
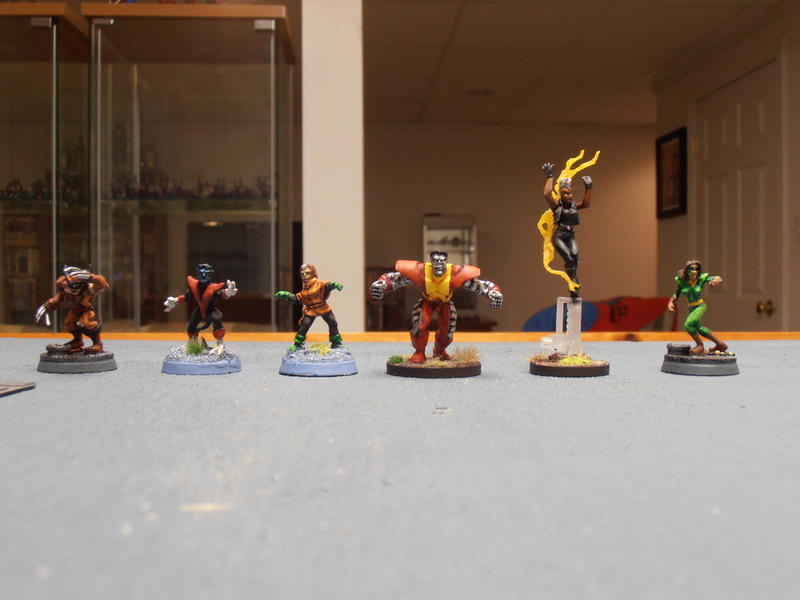
The Scenario: As stated in the adventure summary last time, most of the X-Men are in the Danger Room undergoing training. The X-Men’s objective is to rescue one of their comrades, who is imprisoned in a force field on the far side of the room. this is done by destroying or sabotaging the generators powering the force field. The Danger Room’s objective is, of course, to not let that happen. The imprisoned X-Man is not really there, it’s a holographic projection. The real “imprisoned” hero is alone, upstairs. I chose Cyclops as the imprisoned X-Man, but it could be any member of the team (which will certainly alter the difficulty of this scenario and the next one, depending on who is picked).
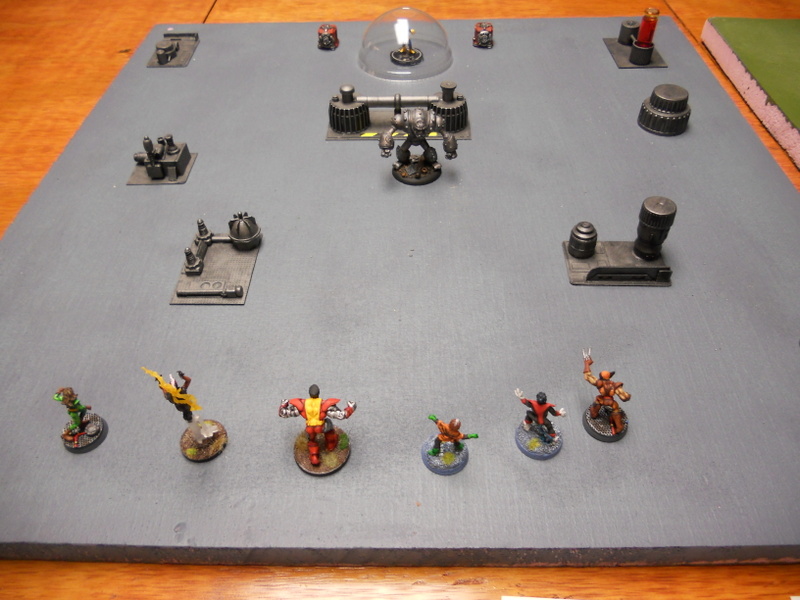

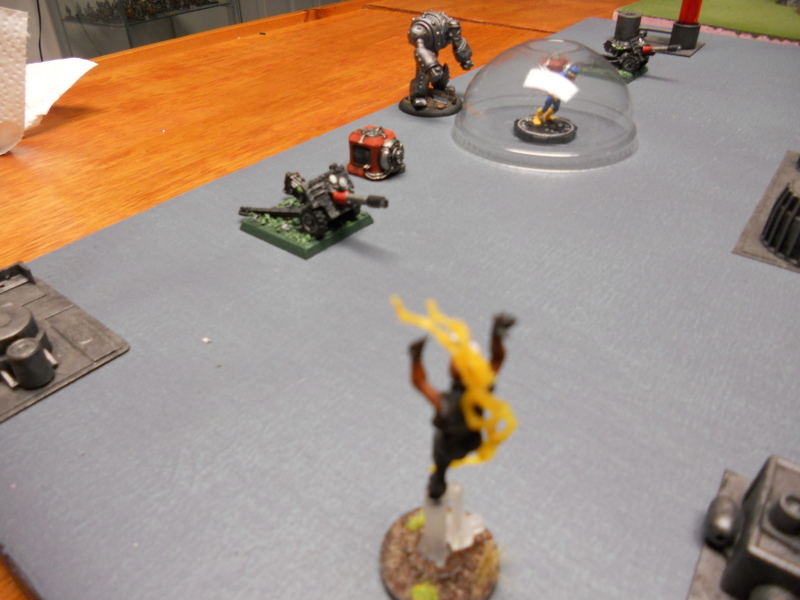
Force field courtesy of Dunkin’ Donuts
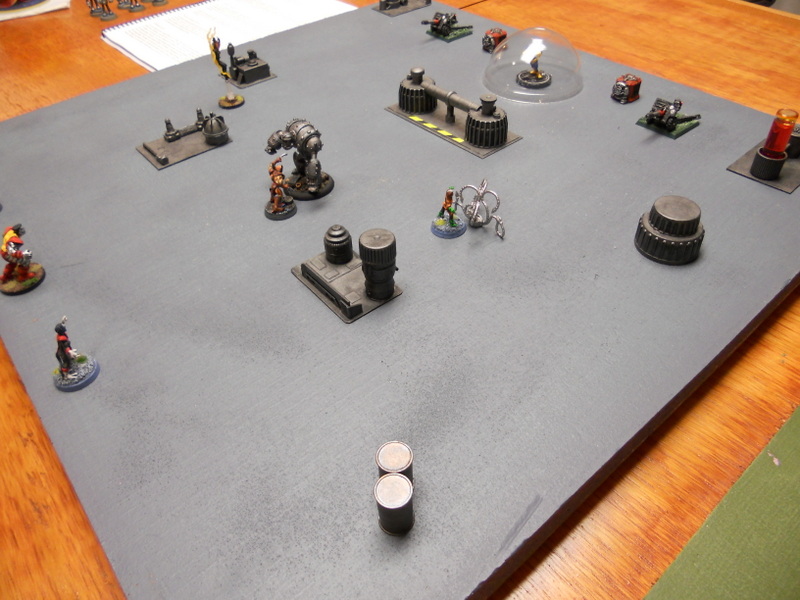
Setup: I decided to use a 2′ x 2′ surface with a few scattered terrain pieces. With this many miniatures on the board, the heroes will get “stuck in” pretty quick, making for a more fast-paced scenario. Of course, you’re free to make it a bigger board, but that just means you’ll need more terrain. The rescuing heroes deploy on one side of the room. On the far side of the room is the imprisoned hero under a force field. Two generators power the force field, positioned one on each side as shown. The Danger Room deploys one obvious defense in the middle of the board at the start of play (here represented by the huge robot in the center).
Special Rules: The Danger Room is the pinnacle of Shi’ar combat technology, and as such is extremely adaptable to whatever the X-Men attempt. To represent this (and to give the X-Men a good run for their money), the Danger Room operates under a special set of rules, listed below.
Initiative: The Danger Room rolls 5D for initiative at the start of the round.
Movement: The Danger Room is smaller than it looks, and compensates for it. All movement and ranged power effects are halved for this scenario. A Power Blast with 30″ range only has a 15″ range. A character with a move of 6″ only moves 3″, while charging they would move 4.5″. Flight of 20″ is reduced to 10″. When Nightcrawler teleports, he ends up halfway between where he started and where he wanted to arrive. This slows things down and allows the Danger Room to bring more of its defenses into play at a faster rate than it would otherwise be able to.
Defenses: The Danger Room activates as many times as the number of X-Men (+1 if it gains initiative). During each activation, it can spawn a new defense as a free action, or simply attack with an established defense as a combat action. Ranged weapons can attack on the turn they spawn with no penalty. Other defenses may attack on the turn they spawn, but may not charge on that turn (see below). The Danger Room may only spawn one defense each turn up to a maximum of 2″ away from an X-Man, and each active defense may only attack once per round. The number in parentheses indicates the maximum number of each defense that may be on the board at once.The following is a list of defenses and any special rules associated with them:
Blaster Cannons (2): 6D Power Blast. Range 15″. Needs 7 goals to destroy, or may be sabotaged.
Tentacle Traps (2): Entangle 5D, Range 5″
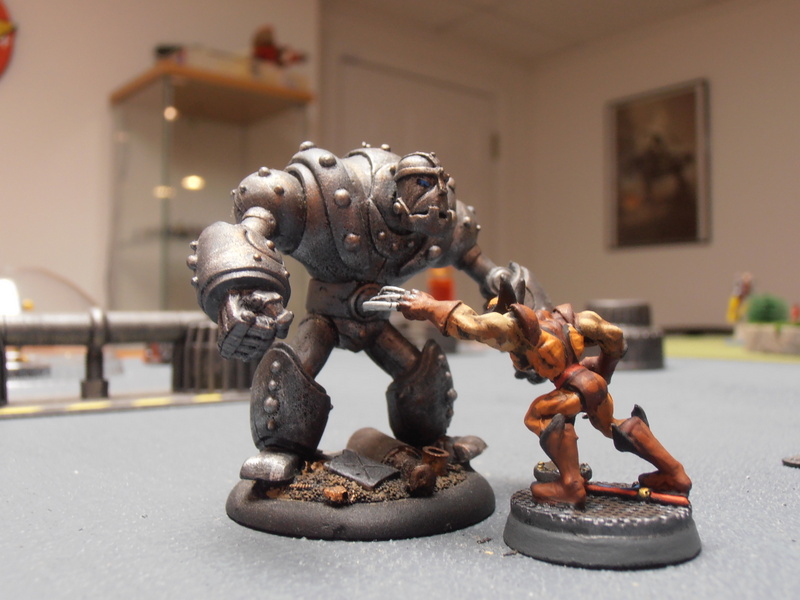
Big Combat Robot (1): (Brick/Brawler) Major: Super Strength, Scrapper, Minor: Armor, Construct, Resistance, Tough
Elite Robot Henchmen (6): Minor: Melee Weapon, Resistance, Veterans
Nullifier Cannon (1): Mimic 5D, but if successful steals a power for one full turn. Needs 7 goals to destroy, or may be sabotaged.
Sabotaging Defenses/Generators: Any X-Man that can get in base contact with a defense or generator that can be sabotaged may make a sabotage attempt (TN 4) as a combat action in lieu of an attack. Success disables the generator or defense.
Spotting the Generators: The X-Men can’t attack or attempt to sabotage the generators until they realize that they’re powering the force field. Once per turn as a free action an X-Man may make a Perception check (TN 2 as it’s not that hard to spot running generators). If successful the X-Men learn that destroying the generators is the key and all can attack them normally.
ROUND 1
The initiative roll goes to the Danger Room.
The first thing the Danger Room does is activate the Big Combat Robot (BCR) in the center of the table, who lumbers forward 3″. That’s about all he can do this round. Storm activates, taking to the air and flying 10″. She fails her Perception roll, however, and doesn’t spot the generators, so she attacks the force field surrounding Cyclops instead. This of course does nothing. In response, the Danger Room spawns a blaster cannon near the closest generator and fires at Storm, narrowly missing her.
Wolverine activates next, and is able to close the distance with the BCR. All he manages to do is chip the paint, however; doing only 1 box of damage to the robot. The Danger Room spawns another blaster cannon near the other generator. This one also fires at Storm (since she’s the only one really out there). This time she’s not so lucky and takes 1 box of damage.
Rogue activates, taking a moment to absorb Colossus’s Armor power. She fails her Perception check and doesn’t realize the generators should be top priority, and since Wolverine seems to have the BCR under control for now, she flies off towards that blaster cannon, hoping to remove it as a threat.
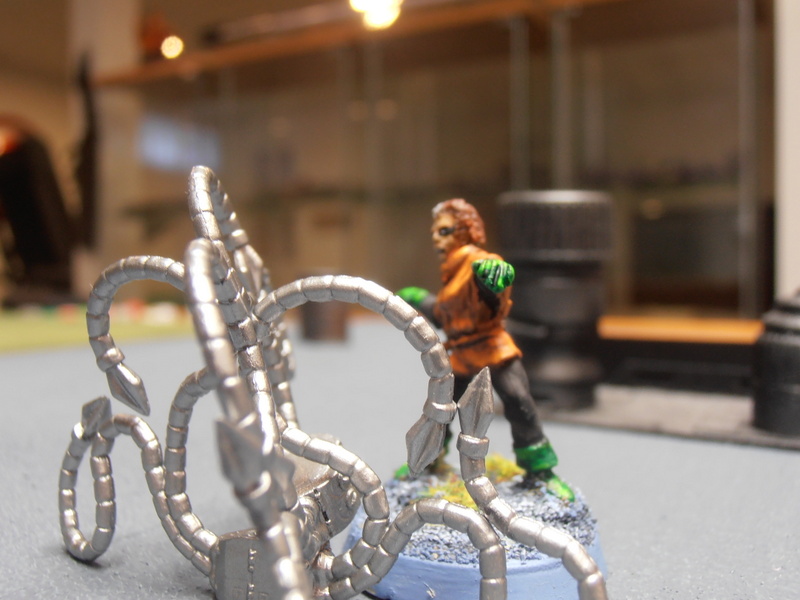
Unfortunately, she only gets about 10″ before her movement ends. The Danger Room spawns some Entangling tentacles, scoring a net 5 goals over Rogue. She’s grappled pretty good, and will need to roll 6 net goals to disengage herself from the tentacles on a future round!

Nightcrawler activates next, teleporting 30″ towards the force field, but of course, since ranges are halved, he only winds up 15″ away, leaving him in the unenviable position of being directly in front of one of the blaster cannons. The Danger Room spawns the Nullifier Cannon, which targets Rogue. It successfully nullifies her Super Strength, which is going to make it that much harder for her to escape those tentacles in a later round.
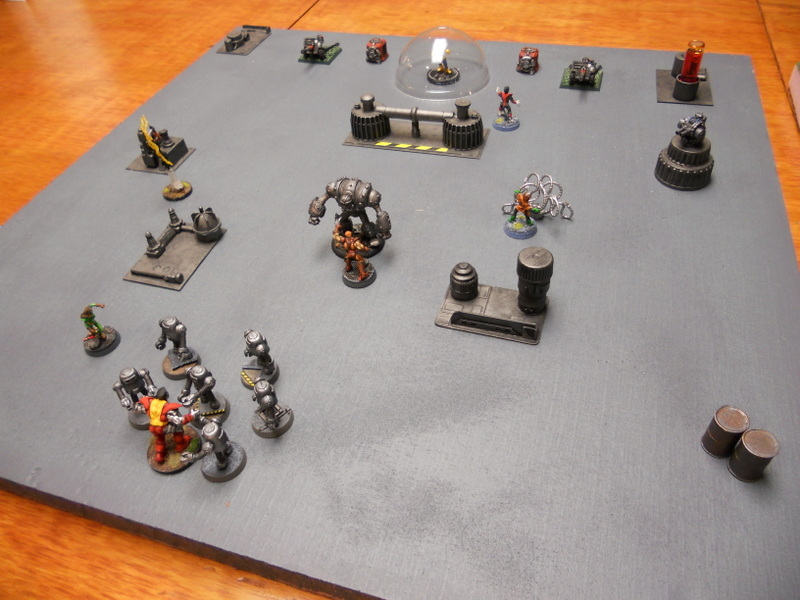
Kitty Pryde has nothing to do, but she moves towards the BCR, hoping to hose his electronics. A move of 3″ doesn’t get her too far, though. In response, the Danger Room spawns a group of 6 elite robotic henchmen, all directly around Colossus. They immediately attack, although without a charge bonus. Despite this, they manage to inflict 2 boxes of damage to Colossus! Colossus responds, but does no damage to the henchmen group.
ROUND 2

The initiative goes to the X-Men.
Colossus is annoyed. So he uses the special Brick maneuver called Shockwave. He attacks the ground, toppling the entire henchmen group. They’re not damaged, only knocked down…but they will have to spend valuable actions getting to their feet on their activation.
The Danger Room activates the Nullifier Cannon again, targeting Nightcrawler in the hopes of removing his Teleport power. It misses, which isn’t that surprising considering Nightcrawler is pretty tough to hit.
For his part, Nightcrawler fails his Perception check and still doesn’t know to attack the generators. Instead he teleports behind the Nullifier Cannon and attempts to sabotage it. He only gets 3 goals and fails. The Danger Room activates the blaster cannon closest to Storm and fires at her, but misses. Storm, sick of getting shot at, activates her Force Field and returns fire, frying the blaster cannon with a bolt of lightning. Unfortunately for her, she doesn’t do any damage to it, but at least she’s better protected against further fire. The BCR attacks Wolverine, but fails to hit him. Kitty Pryde easily determines the generators are the real targets (she’s a Savant after all), and after alerting the team, she charges into combat with the downed robot henchmen. She gains a total bonus of +3D to her attack (+1 for charging, +1 for a downed foe, +1 for attacking robots as per her special power). She scores a total of 7 net goals and wipes the entire henchmen group out! The Danger Room activates the other blaster cannon and fires at the entangled Rogue (not very sporting, right?), but Rogue shrugs off any damage thanks to the Armor she absorbed from Colossus. Rogue attempts to break out of the entanglement, but she fails; not surprising since she lost her Super Strength last round. Finally, Wolverine attacks the BCR, but doesn’t do any damage.
ROUND 3

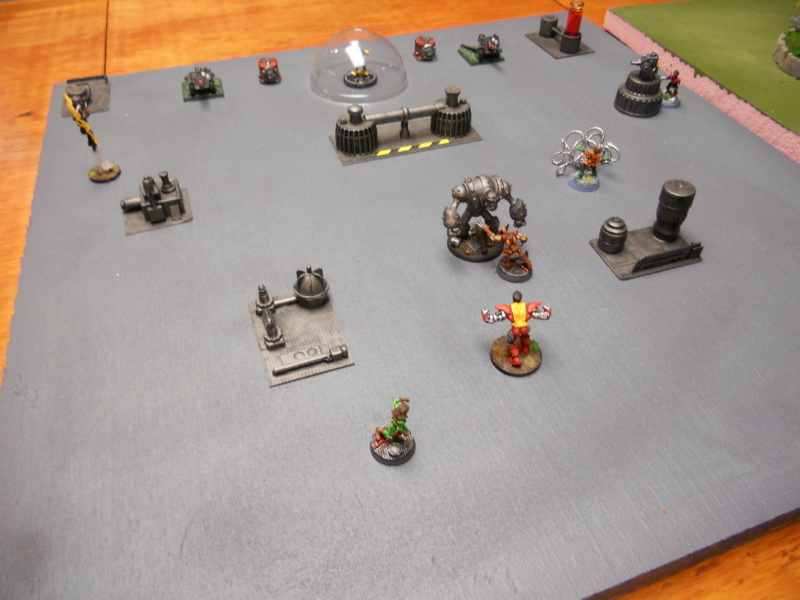
The X-Men retain initiative. Without the robotic henchmen to worry about, Colossus charges the BCR, still locked in combat with Wolverine. He gains a bonus for charging plus another bonus for teaming up on the BCR with Wolverine, so he elects to use the Brick special maneuver called “Haymaker”. He rolls 8 total dice and scores a net 5 goals, which does 5 boxes of damage to the BCR! To add insult to injury, he makes use of the “Way Outta Here” ability, which triples the knockback of any attack! After ranges are halved, the BCR is knocked back 30″, which is clear across the board. He passes his knockdown check, however, and will be able to move normally on his activation.
The Danger Room activates the Nullifier Cannon, firing at Storm. Thanks to her Force Field, she isn’t hit. Kitty Pryde activates, but only moves forward a measly 3″. She has nothing else she can really do. The Danger Room activates the blaster cannon closest to Storm and fires at her again, hitting her for 3 boxes of damage! Ouch!
Storm decides to try and end the fight as quickly as possible, blasting the generator next to her with a bolt of lightning. It pays off and she scores a total of 7 goals, enough to reduce it to a steaming pile of slag. The Danger Room activates the other blaster cannon, firing at the still entangled Rogue for one damage. She’s wishing she wasn’t entangled anymore, so she tries once again to break free. Even with her Super Strength back, she fails to do so.
Everything happens pretty quickly from this point. The Danger Room attempts to entangle Wolverine, but he slashes through the tentacles quite easily. Wolverine moves as quickly as possible towards the other generator, but he only gets about 6″ closer. The BCR moves to defend the generator, placing itself between the generator and Wolverine. Nightcrawler teleports behind the generator and attempts to sabotage it, but fails.
ROUND 4
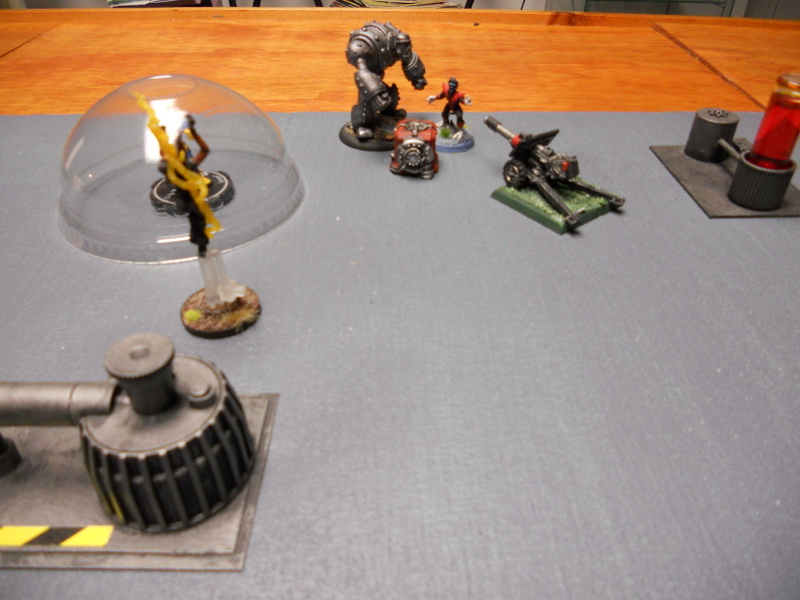
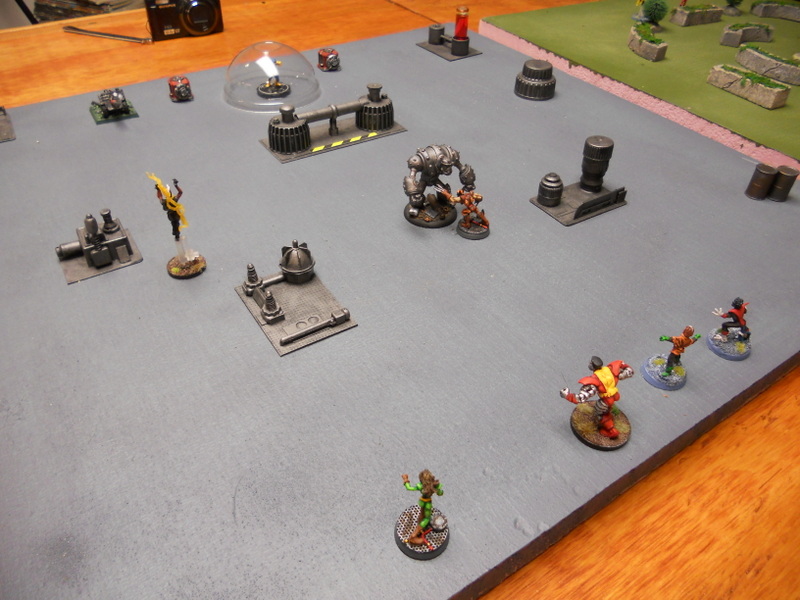
Blaster Cannons on loan from the Mordian Iron Guard
The Danger Room gets initiative, and activates the blaster cannon closest to Nightcrawler. It swivels and shoots at him, but misses. Nightcrawler tries to sabotage the generator, but again fails to gain the required number of goals. The Danger Room activates the BCR, which tries to squash Nightcrawler on the charge. But Nightcrawler proves too elusive for the robot and avoids damage.
Finally, Storm activates, flying closer to the generator and blasting it to oblivion with a lightning bolt. The scenario is ended. Victory to the X-Men!
AFTERWORD
Danger Room scenarios are a lot of fun, because you’re pretty much wide open in what you can bring to the table. I chose to decorate my board with random machinery as terrain, but there’s no reason the battle couldn’t have taken place in a jungle or on among ruins or on an alien planet. It’s the Danger Room, so it can simulate anything! This is also true of the defenses it spawns; you’re pretty much limited only by your imagination! So instead of having a Big Combat Robot, how about using some of those Tyranid beasties you haven’t played with in forever? Instead of robots, how about some skeletons? It gives you a great excuse to use some of your other miniatures that you haven’t used or that mostly collect dust. I was thrilled to finally use my Kroonbots for something, since I never got around to playing them in .45 Adventure…
If I was playing this game with friends instead of solo, I would recommend the use of a referee to control the Danger Room. Just my two cents.
So, what’s Cyclops been doing upstairs this whole time? Find out next scenario! (Hint: he wasn’t making lunch.)