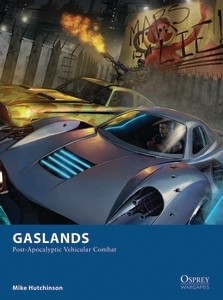
I discovered Gaslands by reading Miniature Wargames magazine a couple of months back. It’s a game of post-apocalyptic vehicular combat put out by Osprey. It’s designed to be played with standard Matchbox/Hot Wheels cars that you convert into Mad Max-esque death machines, and it looks like a lot of fun.
While my experience with Osprey Games has been hit-or-miss so far, I figured why not give it a shot? After all, the entry cost to a game like this is minimal; you only need the rules and a bunch of toy cars to play. The rules are reasonably priced at under $20, and toy cars are easy enough to come by. They’re pretty cheap even brand new, and better still; there are tons of thrift shops, flea markets and secondhand stores where you can pick up used and banged up toy cars for even less! (If you have kids, you can probably find a bunch laying around your house on inconvenient places, like stairs.) You’re going to convert them anyway, and cosmetic damage is the look you’re going for!
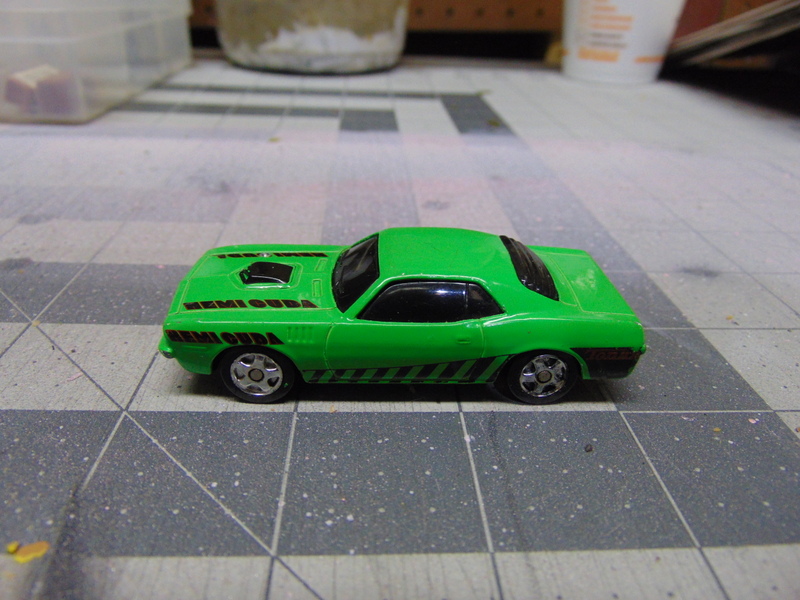
I went by a thrift shop and bought a bag of 6 cars for $3.00. It contained this car, a “Plymouth Hemi Cuda” by Maisto. I actually know a guy who owns a 1969 Plymouth Barracuda. He drove it all through high school and still has it to this day, some 30 years later. It gets about 3 miles to the gallon, but it’s absolutely the coolest car I’ve ever been in, and it hauls balls, to put it mildly.
I decided this is going to be my first Gaslands conversion.
Images abound on the Interweb of Gaslands vehicles; simply Google “Gaslands” and you’ll see for yourself. There are also many Youtube videos to view on the subject. One particular creator, JH Miniatures, does a terrific series entitled Wastelands Workshop. It’s a bit technical, but you don’t need to get as fancy as he does. I highly recommend his videos.
If you’re like me, i.e. an obsessive hoarder of bits from previous kits, then rejoice, for Gaslands is the game for you. I played a lot of Warhammer 40K back in the day, using Space Marines (of course) and Imperial Guard. In other words, I have a lot of old vehicle bits that have been sitting in boxes for a very long time. But you don’t need to have a ton of fancy bits like me, or be as technically savvy as JH Miniatures to get to work on Gaslands conversions. DM Jim over at Game Terrain Engineering does a bunch of Gaslands videos, and this one in particular shows how to use common junk items as weapons and armor. Good stuff!

But back to me…I decided not to go too crazy with my first car. I’ve opted to use some bolters from some old Rhino kits and smoke launchers from a Leman Russ tank as conversion bits. The bolters are machine guns, and the smoke launchers could represent turbo boosters, caltrop or glue droppers, oil dispensers, or…well, smoke launchers, which is what I’m going to use them for. Coughin’ Joe, get it?

For armor, I used some old material I had laying around: these textured craft foam sheets. Each package cost me a dollar, and you get six different texture patterns. Four of these have patterns that are useless (like the one pictured), but there are two that could work.
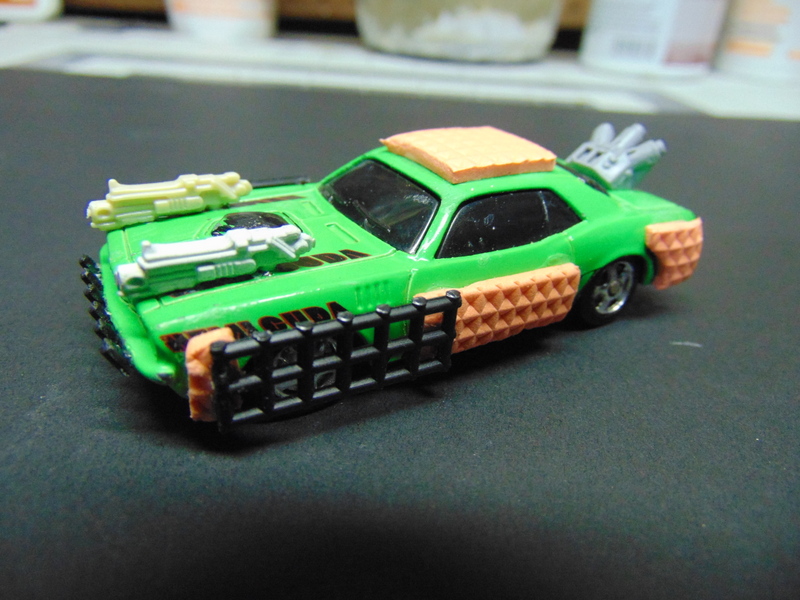
The orange stuff is the craft foam. It’s easy as pie to cut and glue, and the grid pattern makes it look industrial enough to serve as armor. I also clipped some plastic mesh from a needlepoint sheet (I think that cost a dollar, too), and glued it around the front wheel wells to offer the tires some protection.
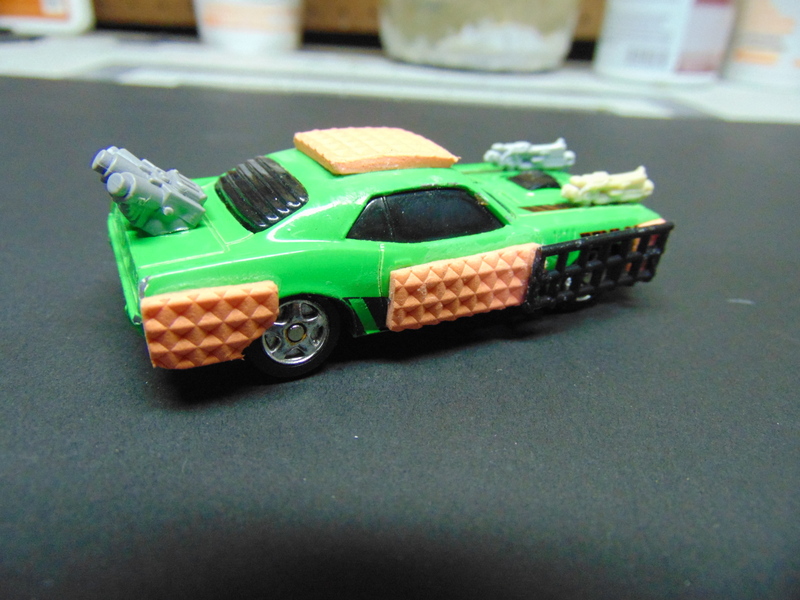
The smoke launchers glued easily to the back of the car. The bolters have little mounting pegs on them, so I decided to drill tiny holes to accommodate the pegs. This was surprisingly difficult, even with my Dremel on max rpm. Turns out I needed a cobalt drill bit to get through the car. One quick trip to Home Depot sorted that out, and voila! Front mounted machine guns!
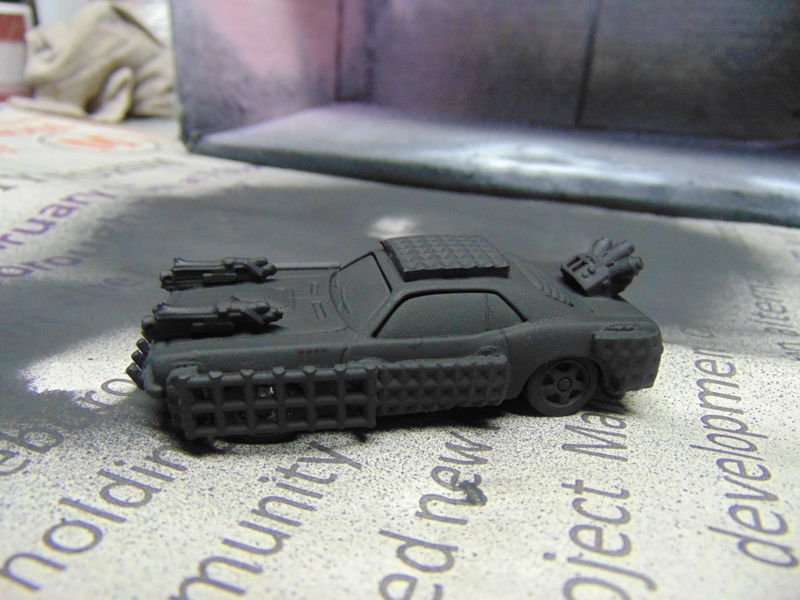
Once assembled (it took less than 20 minutes, not counting my trip to Home Depot), I primed it black.

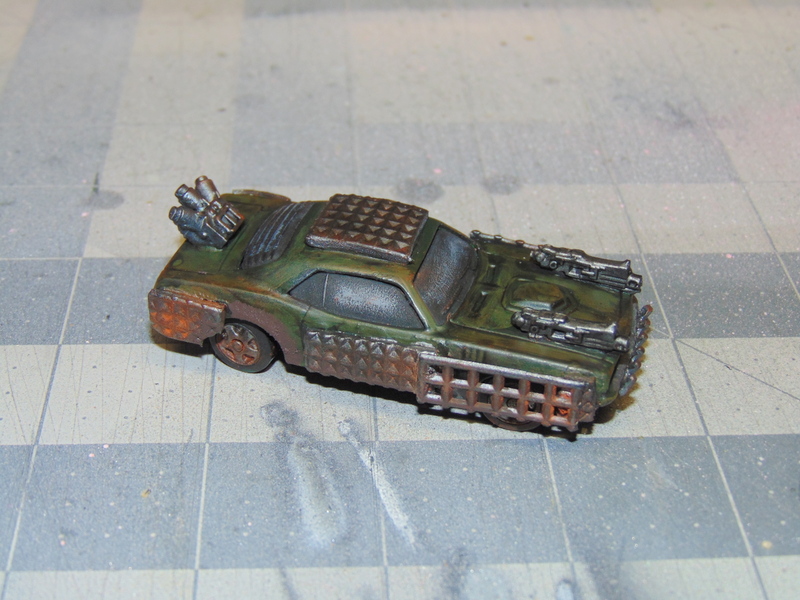
I used a mixture of Vallejo, Cote D’Arms and GW paints. I based the car in Military Green (V) and highlighted it with Cayman Green (V) before giving it a thorough wash in Nuln Oil (GW). I painted the armor plating Gunmetal Grey (V) and the guns and wheel rims with Gun Metal (CD) and washed all the metallics with Armour Wash (CD). Then I liberally applied some MIG rust pigments to the armor sections and the rims. I used some Stirland Mud (GW) on the wheel wells and the front and rear bumpers. A light drybrush of Dawnstone (GW) on the windows, and that was that.And here he is, in all his grimy glory…Coughin’ Joe!
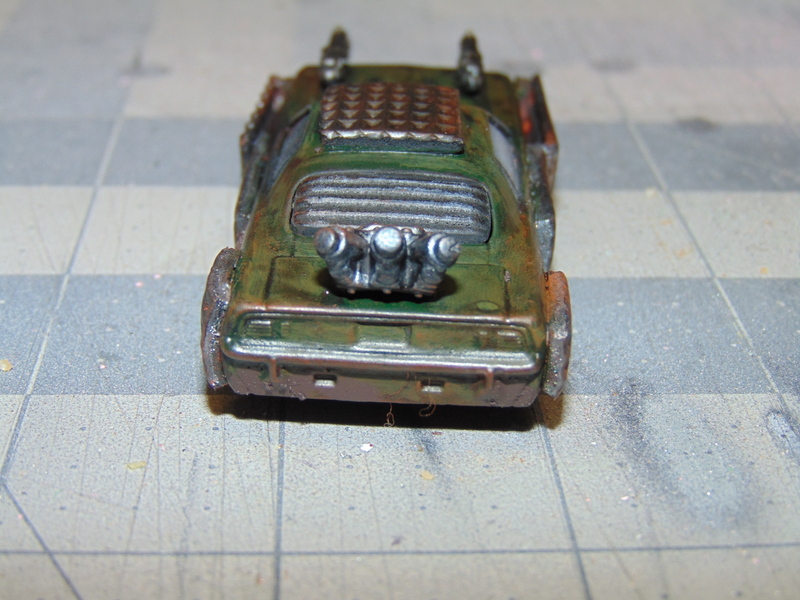
Rear view. Most people never see this on account of the thick black smoke pouring out of those launchers…
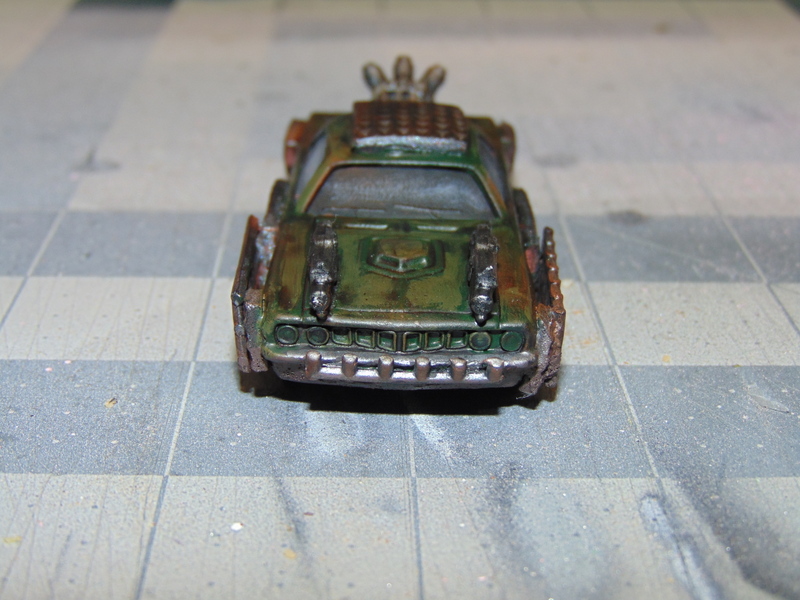
If you see this in your rear-view mirror, you’re about to get shot. A lot.
I read somewhere that it’s easy to get addicted to converting cars for Gaslands, and I am already hooked. I have a bunch of toy cars and bits scattered around my hobby space as we speak. More Gaslands conversions soon!