I have lots of HeroClix miniatures, but I never really got into the game. I hate the dials. While they’ve gotten better with each new release, some of the early miniatures were almost impossible to turn on the dial, resulting in more than one broken miniature from normal play. I lost count of how many Scarlet Witches I snapped off the dial, usually at the ankle.
Another thing that has improved with each new release is the overall quality of the paint jobs. Some of the early sets were atrocious. Even though they’ve improved, I touch up or completely repaint most of my HeroClix miniatures that I play with.
A little while ago I purchased SuperSystem 3 at the recommendation of pretty much everyone who plays superhero miniatures games. I decided it was time to try out my new gaming table, so I threw some scenery down, came up with a quick scenario and grabbed some Clix. First: our cast of characters:

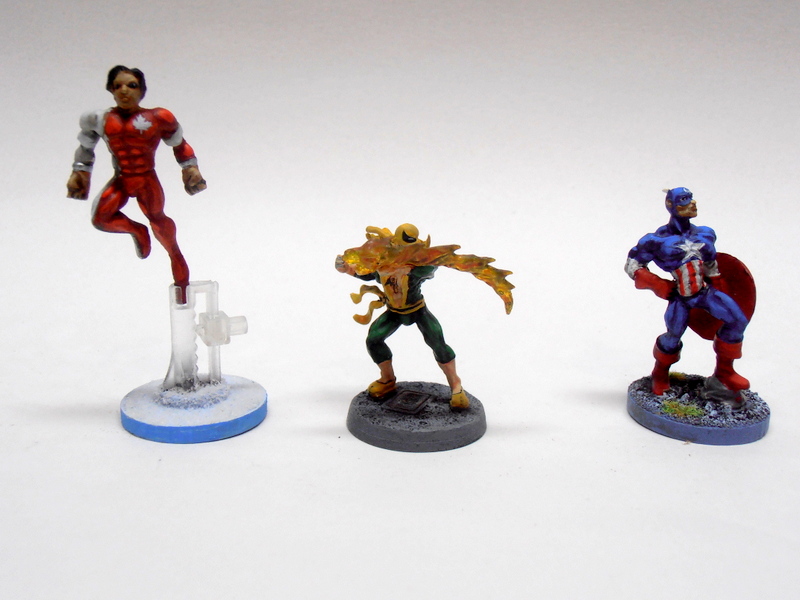
Heroes for Hire
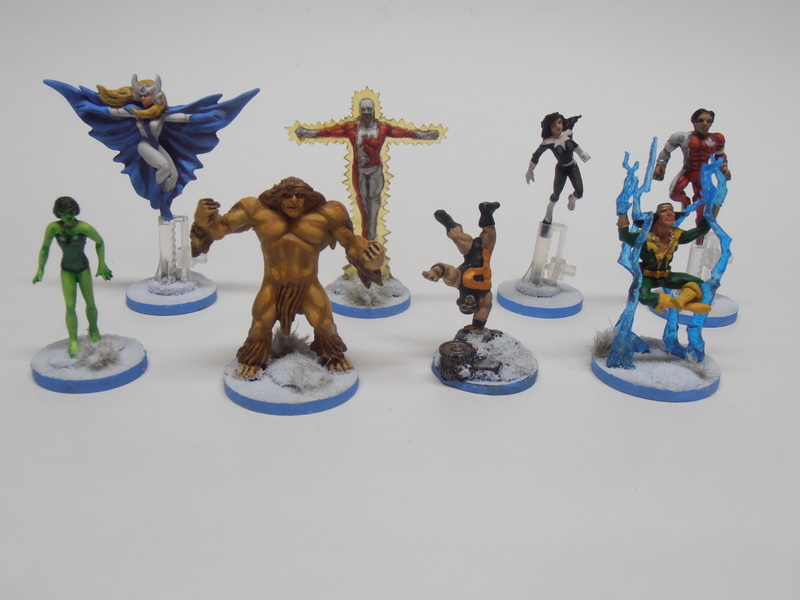
I’m a huge fan of Power Man and Iron Fist, so I decided they would be my heroes. I own a full run of the comic from the 70’s-80’s. Power Man is my favorite. These are both repaints. Especially Iron Fist, since the figure I had was the “Experienced” one with the red costume, and that’s just wrong. I popped them off the dials and rebased them on urban bases.

Daughters of the Dragon
Hanging with our heroes are the gals from Nightwing Restorations, Misty Knight and Colleen Wing. Misty is Reaper’s Ebony Foxx, Mod Heroine (50179), and Colleen is RAFM’s Asp, Assassin. Asp doesn’t really look like Colleen Wing, but she’s the only modern girl with a katana I could find. (For some reason, the angle of this picture makes it look like someone beat the shit out of Misty Knight. She looks better than the picture would indicate.)

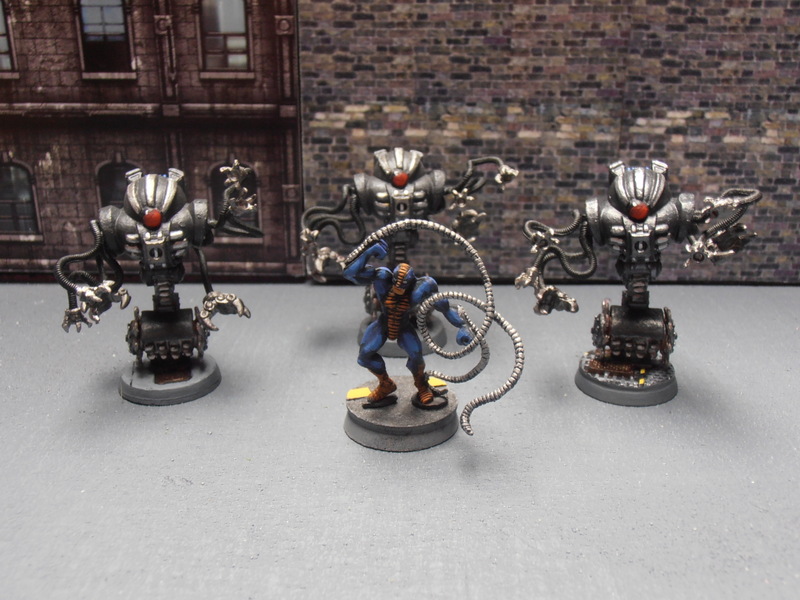
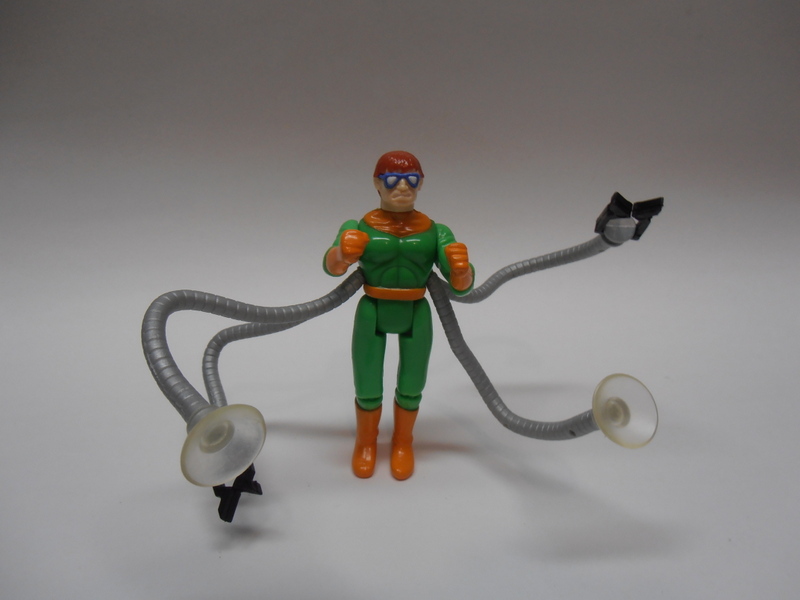
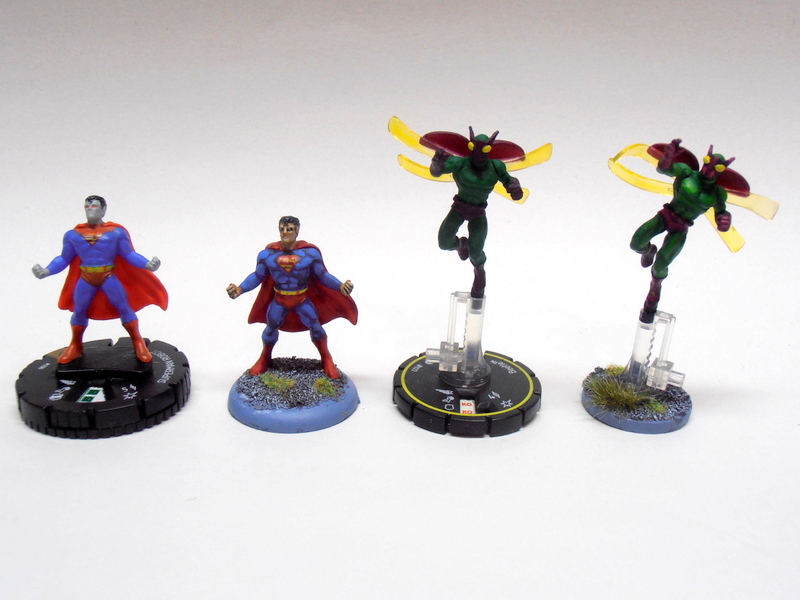
The Bad Guys: Constrictor, Scorpion and Shocker
I picked some bad guys of a similar power level. All of them have ranged attacks, too, which could be a challenge for the heroes, most of whom like to fight hand-to-hand.

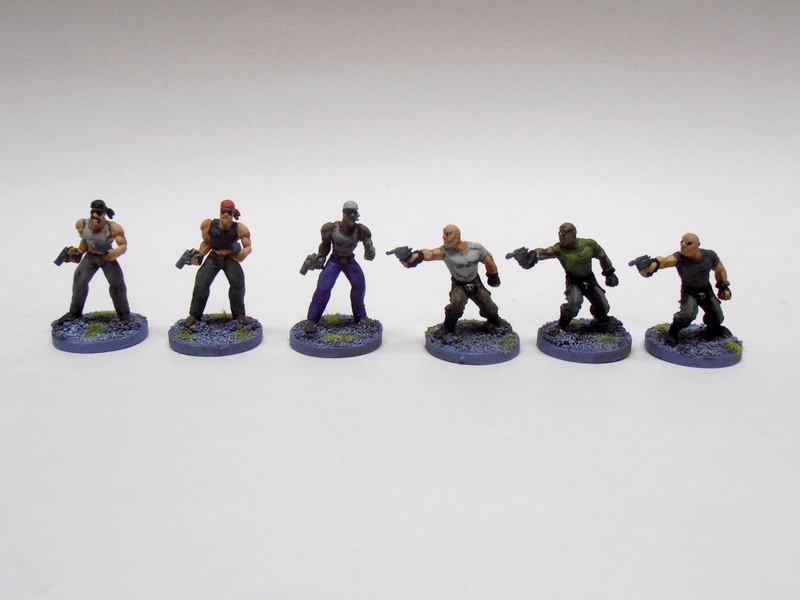
Scorpion's Goons
Of course the bad guys need some henchmen, so I added some repainted and rebased Henchmen and Criminals, too.
The Scenario
Scorpion was never much of a deep thinker, but he knew one thing: guns meant money. If he could load up on guns (and bring his friends), he could make a killing. Guns were always in demand. Whatever he didn’t sell he could outfit his gang with. Maybe knock over an armored car or something down the road. Shocker and Constrictor, both recently out of jail, were looking for a piece of the action. Scorpion figured his gang should be able to deal with any cops that show up. And if any super heroes try to butt in, the three of them should be able to handle it.
Power Man, Iron Fist, Misty Knight and Colleen Wing are enjoying a night on the town (in costume, of course) at the Gaslight Lounge. Just as they’re leaving, they hear a loud explosion followed by an alarm.
“That’s the next block,” says Misty. “The gun shop!”
Colleen draws her katana. Luke Cage cracks his knuckles and stretches his neck. “Looks like we get to bust some heads, eh, Fist?”
But Iron Fist is already in motion, moving swiftly across the street towards the sound of the alarm. Misty draws her trusty .357 Magnum just in time to see several rough-looking men begin to load a truck with crates. They notice the heroes and draw their own guns.
It’s on!
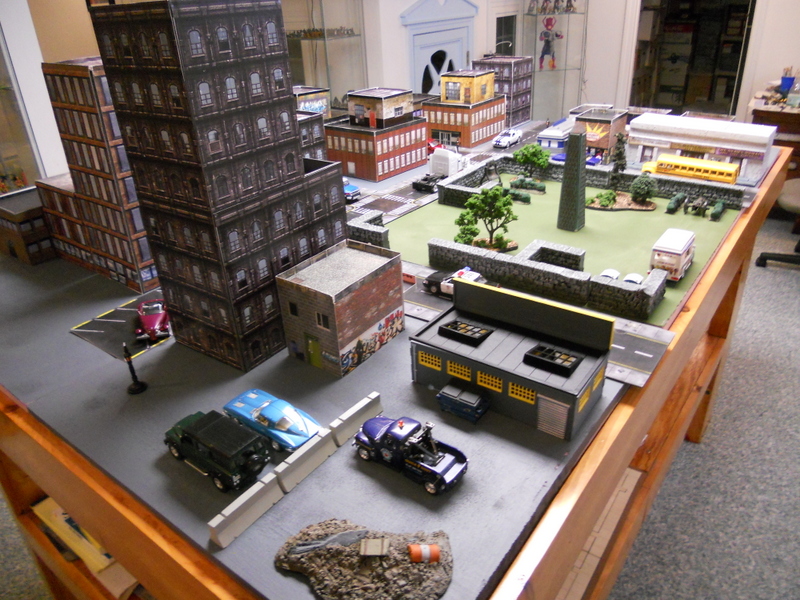
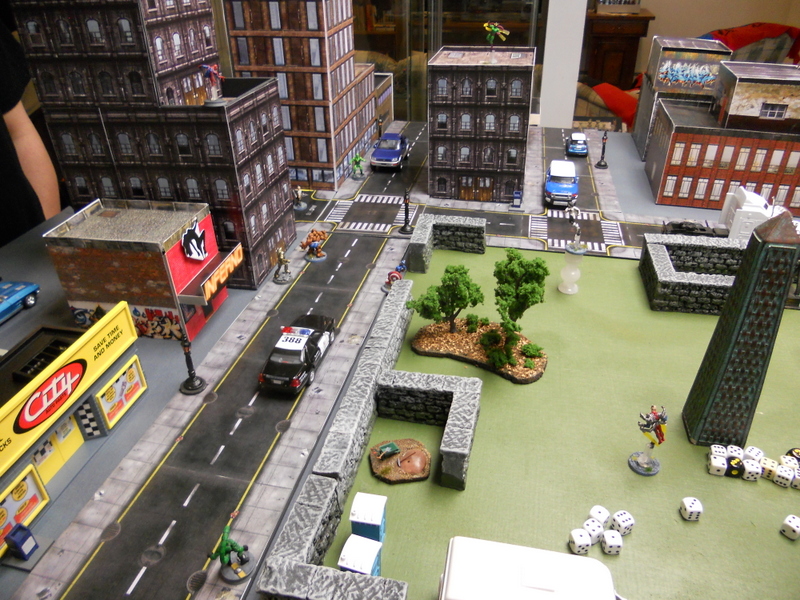
Setup

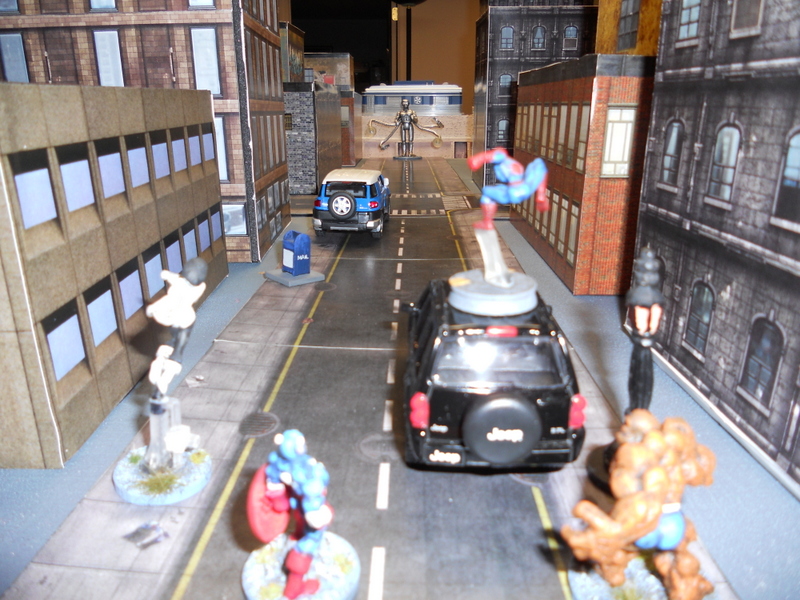
Initial Setup
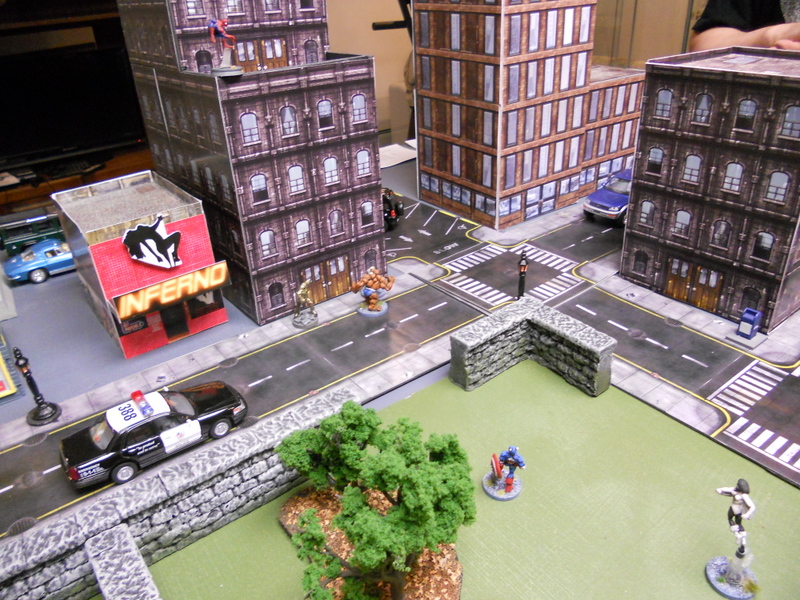
I placed the thugs near the entrance of the gun shop, along with two vehicles. Their job was to load these trucks up and make off with the guns. The Shocker just blew the front door off the shop and is supervising the loading of the pickup, along with the Constrictor, who is supervising the loading of the Hummer. The Scorpion is atop an apartment building, overlooking the battle. The heroes are just coming out of the Gaslight across the street.
Round 1
I designated Iron Fist the leader for the heroes, and Scorpion the leader for the villains. The villains won the initiative for the first round.
Shocker jumps off the back of the truck and moves to the main street where he can get a clear shot at anyone coming around the corner of the Taco Temple. Meanwhile, Misty moves to cover behind a fence and shoots at the henchmen across the street. Despite having some cover from the dumpster and Hummer, Misty manages to drop 3 of the henchmen with some well-placed shots from her .357. Rubber bullets, of course.
The remaining three henchmen return fire, but miss Misty Knight. Iron Fist uses all his Action Points to move across the street towards the Taco Temple, trying to close the gap with the villains as fast as possible. The Constrictor makes his way around the other side of the Taco Temple towards Misty, intent on stopping her from dropping any more of the gang. Power Man moves his full AP, 7″, across the street, and walks right into Scorpion’s plasma blast. Scorpion scores 3 goals, enough to hit Cage smack in the chest. But damaging him is another matter. Aside from shredding his shirt, the blast does nothing to Cage but make him mad. Finally, Colleen darts across the street, using her full AP to get as close to Constrictor as possible.

End of Round 1
Round 2
This time around, the heroes get the initiative.
Misty fires at the Constrictor, wisely perceiving him to be the biggest immediate threat, but he bullets ricochet harmlessly off his armored costume. Since he’s not afraid of Misty’s rubber bullets, Constrictor wastes no time attacking Colleen. He scores enough net goals to entangle her in his electrified coils. Colleen is trapped and takes 4 vitality as the coils begin to constrict!
Colleen tries to break free and barely succeeds. She uses the rest of her AP to close the distance with Constrictor, but she can’t attack. The henchmen open fire on her scoring an impressive four goals, but Colleen scores five, so all of them miss.
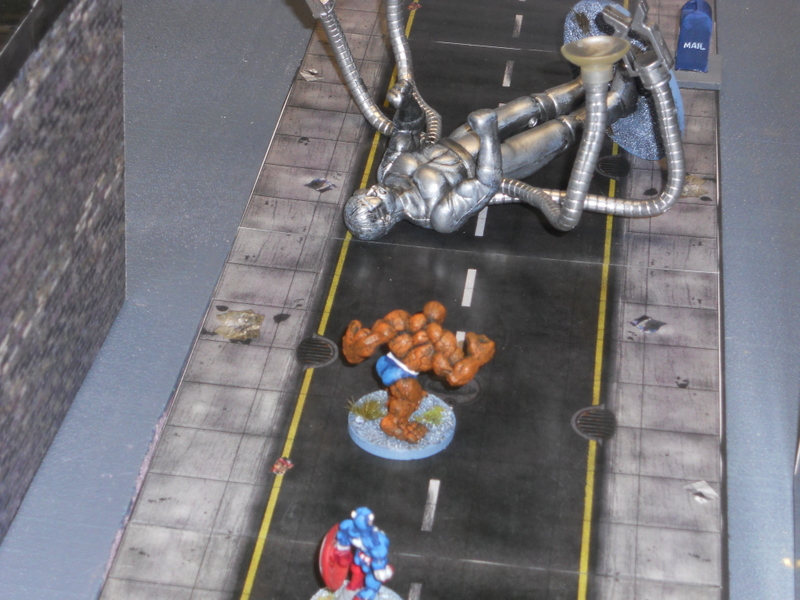
Iron Fist runs at the Shocker, leaping into the air and delivering a vicious aerial back kick! He scores a net total of 8 goals to hit, which translates (after bonuses) into 13 goals worth of damage! Shocker’s padded costume allows him to resist 7 goals, but he still takes 6 vitality, which drops him to 1! Shocker is knocked back 4″ and is knocked prone. He’ll feel that one tomorrow.

Ka-POW!
Shaking his head to clear it, Shocker rises to his feet and levels a blast at Iron Fist. He manages to hit Iron Fist, scoring 3 vitality worth of damage. Iron Fist is knocked back 2″, but his Instant Stand power allows him to easily keep his footing and avoid being knocked prone.
Power Man rips a lamp post out of the ground and advances across the street.
Scorpion sees Iron Fist flatten Shocker. He climbs down the building and aims his tail at Iron Fist. He uses the rest of his AP and fires, but Iron Fist easily dodges.
Round 3
The villains get initiative.

Have a lamp post!
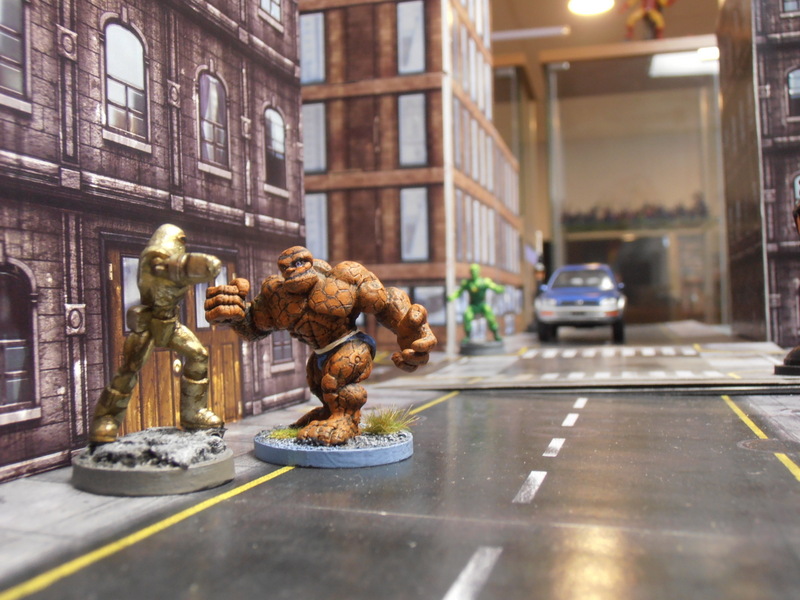
It doesn’t take a genius to figure out what Luke Cage wants to do with that lamp post. Thankfully, Scorpion is no genius. He fires his plasma blaster directly at the advancing Power Man, once again hitting him squarely. He achieves an impressive 6 goals, but Power Man shrugs the blast off yet again, taking no damage. In response, Power Man hurls the lamp post at Scorpion. Scorpion is a pretty agile guy, so he manages to dodge out of the way completely. Cage spends his remaining AP to move 3″ closer to Scorpion.
Shocker backs off 3″ (getting some distance away from Iron Fist seems like a smart thing to do) and fires his vibro-gauntlets at Iron Fist again, but can’t seem to get a bead on him. Iron fist charges Shocker and in a flurry of blows drops the super-villain once and for all. Shocker fails his Resolve roll to stay on his feet and is KO’ed!
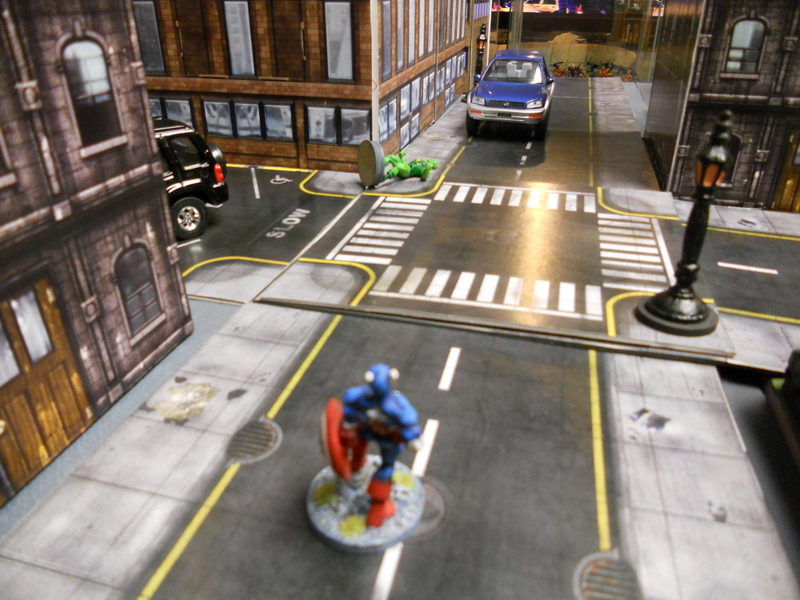
Constrictor decides putting some space between him and the katana-wielding Colleen Wing might be a good idea too, so he attempts to break away from combat in order to try to entangle her again. Unfortunately, since he doesn’t possess Combat Reflexes, Colleen Wing gets a free attack on him as he turns tail and runs. Turns out turning your back on a katana is a bad idea. Colleen slashes through his armored costume, doing a net 3 goals of damage. Constrictor curses and bleeds. Then he uses his remaining AP to move away 3″ and attack Colleen. His steel coils lash out and batter her for 5 goals, dropping Colleen to the ground like a wet bag of dirt. Colleen is KO’ed!
Misty Knight uses all her AP to get as far away from Constrictor as possible, and also get out of the line of fire of the Henchmen.
The Henchmen open fire anyway but miss Misty.
Round 4
Iron Fist rolls an impressive 7 goals to Scorpion’s 2, so the heroes get initiative.
Power Man charges the Scorpion, but fails to inflict any damage. Scorpion lashes out with his tail, intent on smacking Power Man’s head from his shoulders, but Cage dodges.
Constrictor moves closer to Misty by 3″ and tries to entangle, but Misty is too quick and gets out of the way. In response, she fires at Constrictor and hits, but once again fails to do any damage.
The Henchmen move towards and fire upon Iron Fist. They manage to hit him, but he resists all damage from the shot. He moves into base contact with the henchmen group. His Foresight power nullifies any extra combat dice the henchmen would have received for outnumbering him 3 to 1. Iron Fist attacks, and in a disappointing roll only manages to net one goal. Still, that’s enough to drop one henchman.

End of Round 4
Round 5
The heroes manage to hold onto initiative 5 goals to 4.
Luke Cage decides to try to end this quickly, so he winds up and throws a haymaker right at Scorpion’s jaw. Scorpion sees it coming a mile away and Power Man whiffs badly.
Constrictor attacks Misty, entangling her in his coils. He does a net 4 goals of damage, dropping Misty to a mere 3 vitality. Misty tries to break free, but not even her bionic arm can loosen the Constrictor’s coils!
The remaining two Henchmen attack Iron Fist in hand-to-hand, with predictable results. Iron Fist easily avoids their blows and neutralizes both of them with a battery of punches and kicks!

There's a reason he's called "The Living Weapon", you know...
Finally, Scorpion attacks Power Man, but fails to do any damage.
Round 6
The heroes score initiative yet again.
Misty tries to escape the coils of the Constrictor once more, but can’t. She doesn’t have enough AP for a second try. Constrictor starts pumping electricity through his coils. Misty grits her teeth from the pain but manages to resist any damage.
Iron Fist hears his lady-love screaming in agony, and uses all his AP to rush to her aid. He gets close to Misty, but that’s all he can do this round.
Scorpion finally manages to land a blow on Power Man for a net 2 goals of damage. Luke Cage loses 2 vitality, but easily resists the knockback. Power Man throws another haymaker and misses again.

End of Round 6
Round 7
The villains manage to seize the initiative this round.
Constrictor wastes no time in finishing Misty off. His electric coils shock her for a whopping 7 goals. Misty fails to resist any damage and fails her Resolve roll. Since she only had 3 vitality left, she is KO’ed!
Iron Fist charges Constrictor. He reaches down deep…summons his chi…channeling the power of his chi into his fist…until that fist becomes…LIKE UNTO A THING OF IRON! Thus strikes the mystic warrior of K’un L’un!
Iron Fist scores 8 goals on his attack. Constrictor only manages one. After all bonuses, Iron Fist nets 6 goals, which is enough to KO Constrictor. Constrictor fails his Resolve roll and is KO’ed!
Scorpion attacks Power Man again and misses, but is smart enough to know when he’s beaten. He uses his remaining AP to leave combat and flee up the side of the building. Power Man gets a free attack on him as he breaks away, but Scorpion proves too fast and scampers 5″ up the side of the building.
In response, Power Man walks over to another lamp post and rips it out of the ground.
Round 8
Both Iron Fist and Scorpion roll 5 goals for initiative. However, since the heroes’ AP total is highest, they get initiative.
Power Man moves 3″ closer to the building and hurls the lamp post at Scorpion. He hits, scoring a net 5 goals of damage, dropping Scorpion’s vitality to 3. I decide that getting smeared by a lamp post while clinging to a building might make it difficult to keep your grip, so I have Scorpion make a Difficult (3) Agility check to keep his grip or he’ll fall right into Power Man’s lap. Scorpion gets the required 3 goals and manages to hold on.

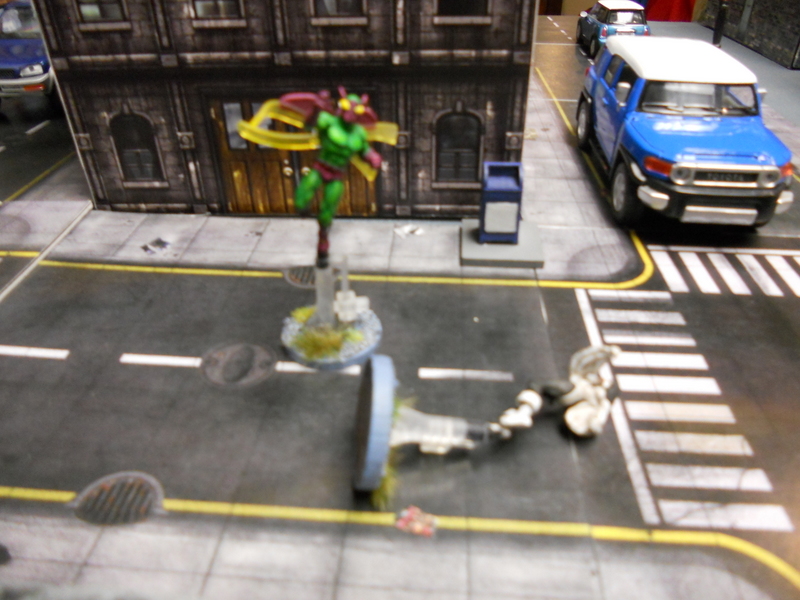
"You haven't seen the last of me!"
Scorpion chooses to flee and fight another day. He takes to the rooftops, vowing revenge! Game over!

End of Turn 8, and End of Game!
And that’s how my first foray into SuperSystem 3 worked out. I’m excited to play more games with different heroes. Although it was solo play, this game took me less than two hours, and that’s with me looking things up every other turn. I think once I get a good handle on the rules, games like this will go fast, allowing several scenarios or campaigns to played in one day.