Monthly Archives: July 2013

The Chase: A .45 Adventure AAR

This could easily be the bloodiest game I have ever played in all my years of wargaming. It was like a Sam Peckinpah film on my gaming table.

With all the Super System 3 I’ve been playing lately, my Pulp gaming has been neglected.  So I had a couple of friends over for some .45 Adventure. (I have since bought the 2nd Edition, but we used 1st ed. the other night.) We started off with the scenario included in the rulebook, “Shootout in the Park”.  It’s designed for two players, but I modified it a bit to include three different teams. Basically, with the heroes in pursuit, a mob boss and his goons flee across a park (the battlefield), dropping two halves of an incriminating ledger listing all the bribed city officials the mob boss has under his thumb. Both sides are trying to find the ledgers and leave the park with them.

The two teams are .45 Adventure’s resident vigilante The Gargoyle and his ally, Ace Reporter Bridgit O’Rourke; and Mob Boss “Little” Paulie Wolinsky and his two goons, “Full Count” Nocerino and Tommy “Gun” Miller. I added a third team: corrupt cops! These cops know that if the ledgers get out, their crooked activities will be revealed. So why not just grab the ledgers and eliminate the mob boss while they’re at it?

The scenario ended with “Little” Paulie recovering both halves of the ledger and fleeing the park, leaving all three cops dead, and Bridgit O’Rourke out of action, pummeled mercilessly into unconsciousness by “Full Count” Nocerino.

Which set us up for the second (and bloodiest) scenario of the night…The Chase!

The Scenario

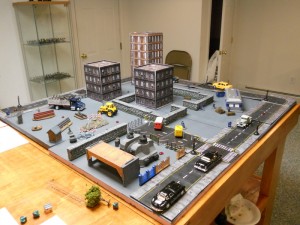
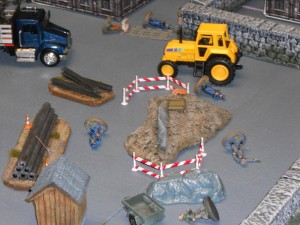
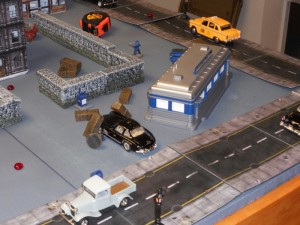
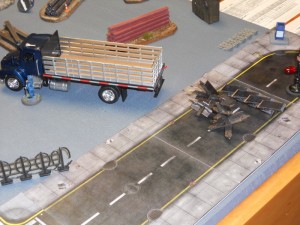
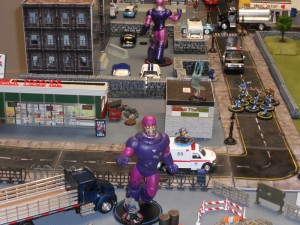
.45 Adventure is designed to be played on a 2’x 2′ surface, which isn’t a whole lot of room where vehicles are concerned. So I set up a 4′ x 4′ board as you see here. “Little” Paulie is in his car, fleeing from the Gargoyle, who is in hot pursuit. He has to make it all the way around the board and exit off the top near the construction yard. But a lot can happen before then. There are encounter markers along the road as well as in the city. To make matters worse, the streets are lit, but the rest of the board is dark, limiting models’ visibility to 12″.

The big dump truck in the construction yard contains a load of junk. Any model can take an action to dump the load if they are in base contact with the truck. This will block the road. It’s not a good idea to do that until the last possible second, however, as you never know who might be in the lead and you don’t want to prevent your own team from making their escape with the ledgers!

The Teams


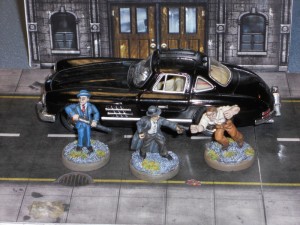
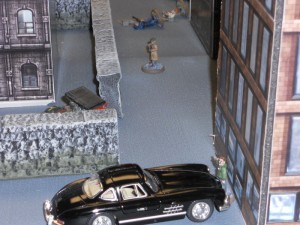
The heroes are The Gargoyle (center), ex-prize fighter Moe Shrevnitz (right), and eccentric, driven District Attorney Roland N Seguin (left), who is determined to rid New Commerce of crime! The Gargoyle is in his car, which is a bit better than your average buggy. The Gargoyle is Rank 3, while the other two are Rank 2. If Bridgit didn’t get creamed in the first scenario, she would have been here too.

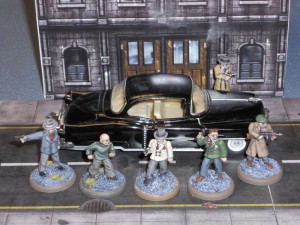
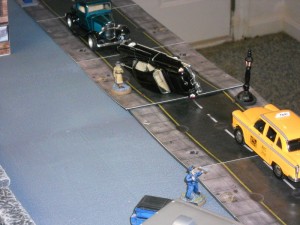
The hoods( from left to right) are Jimmy Gumballs, “Full Count” Nocerino, “Little” Paulie Wolinsky, Rocco Fortunato (nods to Frank Sinatra), Tommy “Gun” Miller, and around the back of the car, Jack Sacco, the driver. Jack and “Little” Paulie are in the mob boss’s roadster, fleeing from the Gargoyle. The rest of the goons are all on guard duty in the construction yard. Paulie is a Grade 3 Mob Boss, Rocco a Grade 2 Enforcer, and the rest are Grade 1.

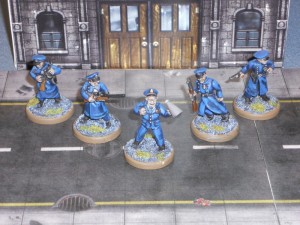
The cops are Sgt. Danny Burke (center), a Grade 3 Police Sergeant, and 4 Grade 1 cops: (L-R) Officer James Haggerty, Officer Enoch Conlon, Officer Rory Landry, and Officer Nick Dearcy. And a fine top o’ the mornin’ to ya!

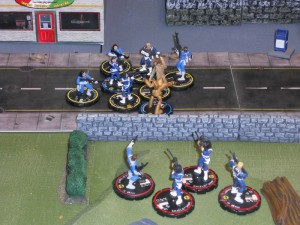
Any surprise the cops or heroes might have enjoyed was pretty much lost on the first turn of the game, when Officer Conlon opened up on DA Seguin with his rifle, scoring a head wound that the DA miraculously survived. From there it went south pretty fast in the construction yard. Within a few turns it looked like this. That’s “Full Count” Nocerino, Moe Shrevnitz, Officer Dearcy, Officer Landry, Officer Conlon and Jimmy Gumballs, all dead. Moe and “Full Count” learned the hard way not to show up with your fists to a gun fight. The star of the show was Officer Landry, who caved in Jimmy Gumballs’s skull with the butt of his shotgun and then, on his next activation, walked up and put a full blast straight into “Full Count’s” chest.

Meanwhile, with Jack Sacco driving, “Little” Paulie was free to fire at the pursuing Gargoyle with abandon. Despite having a faster and more maneuverable car, The Gargoyle was unable to catch “Little” Paulie before he lost control of the roadster after being wounded several times. He swerved off the road, running over and killing Officer Haggerty in the process.

Eventually, The Gargoyle got his car back on the road and once again in pursuit. In the meantime, Sgt. Burke, after spending two turns climbing out of an open manhole he fell into (damn encounter markers!) shot and wounded Jack Sacco, who lost control of the car. It flipped over and landed on Sgt. Burke, who survived long enough to put a few more rounds into “Little” Paulie, wounding him in the arms. Neither Sacco nor “Little” Paulie could use their arms any more, they were so badly shot up. Which of course meant they couldn’t drive. Or shoot. They could just stand there and wait for Sgt. Burke to finish them off.

The Gargoyle had other plans. He swerved around the corner in his sweet ride, pausing long enough to shoot Sgt. Burke between the eyes before running down Rocco Fortunato, killing him. That’s 2 people the Gargoyle had murdered with his car. Over the course of the game, the Gargoyle had been shot so many times that he could barely use his arms and legs. Tommy “Gun” Miller ventilated The Gargoyle and his car a bit more, killing him.

Hedging his bets, DA Seguin managed to get close enough to the truck to dump the junk in the road just in case Tommy “Gun” managed to get to the mob boss’s car and get it running again. Then he hunted Miller down like a dog, killing him. But not before Miller cut him off at the knees with a spray of .45 bullets from his Thompson!

So the end of the game looked like this: All cops: dead. The Gargoyle and Moe: dead. Tommy “Gun” Miller, “Full Count” Nocerino, Rocco Fortunato, and Jimmy Gumballs: dead. DA Seguin: crippled and crawling towards the car wherein Jack Sacco and “Little” Paulie waited, unable to do anything but look sadly at where their arms used to be.

Just another night in New Commerce!


Night of the Sentinels: A Super System 3 Scenario and AAR

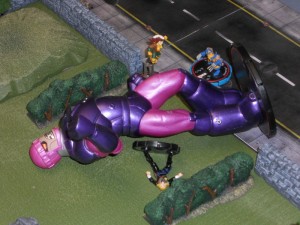
I recently picked up four Heroclix Sentinels from some Craigslist sellers, and decided I needed to use them for Super System 3. I came up with the following scenario, and played through it with some friends the other night.

The Scenario

A young mutant’s powers have just manifested for the first time. Cerebro ranks this unknown as potentially one of the most powerful beings on the planet.  The X-Men are sent to recover him and bring him back to the Xavier Institute for his own safety and security.

Unfortunately, S.H.I.E.L.D. has learned of this mutant and is taking no chances. Acting Director Maria Hill quickly dispatches two of her best recovery teams to the area, hoping to bring the mutant in as quickly as possible. When she learns of the X-Men’s involvement, she authorizes the use of Mark VII Sentinels. It is imperative that the mutant in question be brought under S.H.I.E.L.D.’s control, to be used and/or terminated if necessary, and Maria Hill isn’t one for leaving things to chance.

Meanwhile, the mutant in question, Reggie Bowers, is cold, hungry and scared out of his mind of his new powers.

Forces: One player controls the X-Men: A team of 6-10 would be best (about 750-800 points), depending on the power levels of the heroes chosen. The other player controls two recovery teams of 6 S.H.I.E.L.D. agents each (henchmen), led by one agent in Mandroid armor. One recovery team is made up of veterans, giving them double Vitality. The S.H.I.E.L.D. player will also control the Sentinels, but there are special rules for them.

Setup: The game is played on a 4’x6’ table, divided into sextants of 2’x2’.  Each side deploys their forces on either of the short sides. The X-Men player may deploy all his models at the start of the game. The S.H.I.E.L.D. player may only deploy his Recovery Teams and the Mandroids at the start of the game.

Place at least 4 counters in cover in the two middle sextants of the board. The counters should be numbered in some way to distinguish each from the others. These represent possible hiding places where Reggie has gone to ground.

Special Rules

Reggie: Reggie has the following stats: Strength : 3 Agility: 4 Mind: 2 Resolve: 2 Vitality 5 AP: 6. His powers play no part in the scenario, as he can’t control them yet and is too scared to try.  He begins the game in hiding. The four counters represent possible hiding places. At the start of the game, assign Reggie one of the numbers on the back of the counters. At any point during a model’s turn, if that model is within 6” of a counter, it can try to spot Reggie. Make an opposed Mind vs. Reggie’s Agility contest. If the model wins, flip the counter over and look at the number. If it doesn’t match Reggie’s number, it’s not him. If it does, the model has spotted Reggie. Remove all the counters and place the miniature representing Reggie on that spot.

At the start of every subsequent turn, if Reggie is not in base contact with another model, he will move away from any model towards cover at his full AP (6).  If he is in base contact with a model, he will move with that model up to that model’s AP total or Reggie’s, whichever is less. This represents Reggie being herded along by either side. If the model herding Reggie is KO’ed, Reggie will move randomly again at the start of the next turn until he is in base contact with another model.

Reggie cannot be attacked by either side (they want him alive), and he will not fight. He will move with any model that gets into base contact with him, but can only move as described above. He may be grabbed and moved along faster;, however, he will actively resist any attempts to grab him, and may be hurt unintentionally during a rescue attempt (see below).

Sentinels: At the start of the turn, beginning on Turn 2, the S.H.I.E.L.D. player may deploy a Sentinel in any sextant he wishes. It can activate as normal on the turn it comes into play. Every second turn thereafter (i.e. turn 4, 6, 8, etc), and/or any turn immediately following the destruction of a Sentinel, the S.H.I.E.L.D. player may deploy another Sentinel in the same manner.

The following exceptions apply:  if Reggie has been revealed, the S.H.I.E.L.D. player must deploy his Sentinel in the same sextant that Reggie currently occupies.

Sentinel Grab: If a Sentinel successfully grabs Reggie, he is rendered unconscious immediately and will not resist on subsequent turns. Reggie will regain consciousness if freed (see below).

Rescuing Reggie:
If any model (other than a Sentinel) successfully grabs Reggie, Reggie will resist to the best of his ability each turn until he either gets away or is carried off the board. Note that if Reggie breaks free from a flying model he will suffer falling damage. If a model carrying Reggie is attacked and missed, there is a chance Reggie will be hit (same as firing into close combat). If a model carrying Reggie is hit for at least 2 Vitality, the model drops Reggie and Reggie is free to move on the next turn.

If a Sentinel drops Reggie, he will suffer falling damage (3D) unless a model catches him. A model attempting to catch Reggie must be in base contact with the Sentinel or possess the Bodyguard power, and must pass a Difficult-2 Agility Roll or Reggie hits the ground. If he’s not killed by the fall, Reggie will regain consciousness immediately and can act normally on his next turn, but he will be prone (2AP to stand up).

Winning the Game: A player wins the game either by wiping out the enemy team or by getting Reggie off of their side of the board. If this happens, the game ends immediately, regardless of any remaining models on the board. If Reggie dies during a rescue attempt, the player attempting the rescue loses immediately.

How it all played out:

In my game, the X-Men were controlled by four of my friends in teams of two heroes each, while I controlled S.H.I.E.L.D. and the Sentinels. The X-Men consisted of Storm, Cyclops, Rogue, Wolverine, Colossus, Iceman, Gambit and Longshot.

While the game was too long to detail turn by turn, I’ll share some highlights. I assumed that the hunt for Reggie would take a while, as there are four places he could be. In the meantime, S.H.I.E.L.D. might get a couple of shots off at an X-Man or two, and vice-versa. Turns out Reggie was discovered by Turn 2, thanks to Iceman’s ability to move pretty fast and take Longshot along with him. This duo approached a random marker and was able to make the opposed Mind vs. Agility check to spot Reggie, thanks in part to Longshot’s Fortune power. By Turn 2, Reggie was being herded along towards the X-Men’s side of the board, far, far away from S.H.I.E.L.D.

Thankfully, with Reggie now revealed, I was able to deploy a Sentinel right where he needed to be on Turn 2. This was able to delay the X-Men, hopefully long enough for S.H.I.E.L.D. to catch up. That didn’t happen, but the Sentinel made quick work of Longshot (which was a good strategy for me, as Fortune is a power that can really hose your opponent) and caused Reggie to run away randomly for a turn.

Unfortunately for me, on Turn 3, Wolverine and Rogue took out the sentinel in spectacular fashion. Wolverine is the best he is at what he does, which is shred robots like wet tissue. His Soul Fire ability makes it so that instead of resisting damage with their Physical Resistance (which is formidable), the Sentinels had to resist with their Mind (which is far less impressive). Wolvie took the Sentinel from 11 Vitality down to 1 in one shot, whereupon Rogue finished it off with a Power Dive.

Turn 4 allowed me to deploy another Sentinel, so I wasted no time in doing so. Over the course of the next few turns, I would get all 4 Sentinels on the board, the X-Men would get Reggie to within 1″ of their table edge, only to have a Sentinel rip him from their grasp and high-tail it across the board with the hapless Reggie in his fist. My S.H.I.E.L.D. guys would do absolutely nothing of consequence. They failed at every opportunity to inflict damage, and they were so slow, they barely got anywhere near the action for most of the game.

Except for these guys.

First, I must confess to a certain bias. I hate Gambit. I always have. I find him to be a stupid character with a stupid premise. I hate his costume. I hate his powers. I hate his stupid Cajun accent and his stupid telescoping quarterstaff. In short, I hate Gambit. A lot.

Which is why I found it so vexing that despite shooting at his stupid Cajun ass EVERY TURN with EVERY AVAILABLE MODEL, I was unable to wound him enough to kill him. I even resorted to swarming him en masse, thinking that sheer weight of numbers would overwhelm him. Well, not even 6 highly trained S.H.I.E.L.D agents, one Mandroid, and a fire team of S.H.I.E.L.D. veterans taking intermittent potshots at the melee could drop Gambit. The fact that my friend provided smack-talk in Gambit’s Cajun-accented voice after every failed attempt (Honh Honh Honh, mon ami!) only added to my misery.

The most dramatic moment came at the end of the game, when a Sentinel carrying Reggie made a beeline to the other side of the board, with Iceman and Wolverine in hot pursuit. Iceman tried in vain to entangle the Sentinel in ice so that Wolverine could get close enough to do what he does best, but he was unable to entangle the Sentinel successfully. Also, on the last turn, out of sheer spite, I had my remaining Sentinel charge Gambit hoping to smear him across the pavement.

It didn’t work. Gambit survived.

So although I won the game, I still feel like I lost.

Making Construction Materials

Recently, I made some stacked pipes and I-beams for use in my modern games, such as Super System 3 and No More Room in Hell. I figured I’d share it with you.  It’s not hard to do and I’m pretty happy with the results.

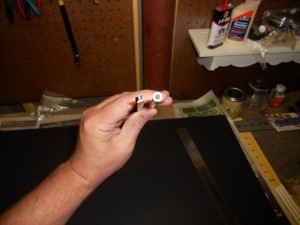
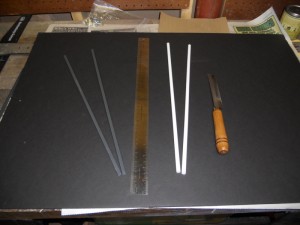
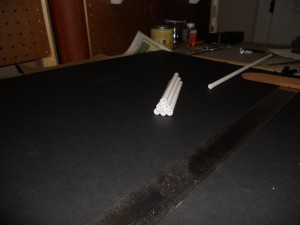
First, you’ll need some plastic rods, like the ones shown here. I picked mine up at a model railroad shop, but they’re available at most hobby stores, too. I chose a size compatible with my chosen gaming scale, 28mm. They cost me a little over a buck apiece.

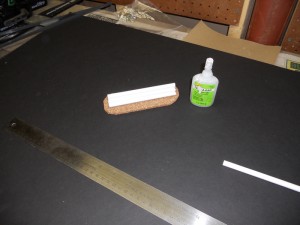
The rods I bought are about 15″ long. You’ll also need a ruler and a small hobby saw, shown above.

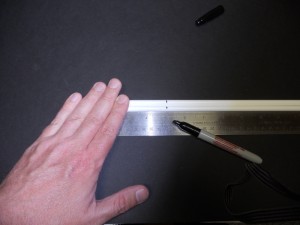
Measure out the length you want for the pipes and I-beams. I chose 5″ pipes and 4″ girders.

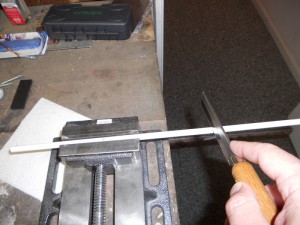
Once you’ve made your mark, cut the pipes to the desired length. Remember that you’ll likely have pipes of slightly different sizes when you’re done, as the saw blade is probably thinner that the mark you made. You may need to trim a bit when you’re done so they all measure up.

Once they’re cut, stack them up however you want and glue them together.

Base them on whatever you want. I chose cork tile, but Masonite would probably be better. I just didn’t feel like messing around with a jigsaw if I didn’t have to.

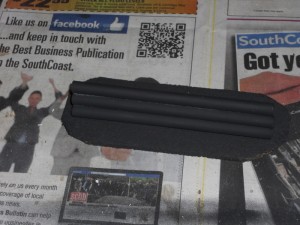
I primed mine black. Remember to get inside the tubes, or it will look weird from the front when you paint it.

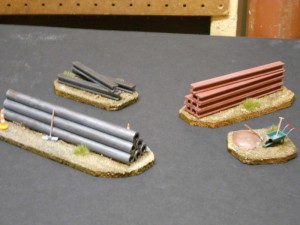
Here are the results after painting and basing. I used some O Scale Railroad scenery  (the tools, cones and wheelbarrow) to spiff up the final presentation.  Since I cut them shorter than the pipes, I was able to make a smaller stack of I-beams with what I had left over. You could make these in a day or so, allowing  for priming and painting.