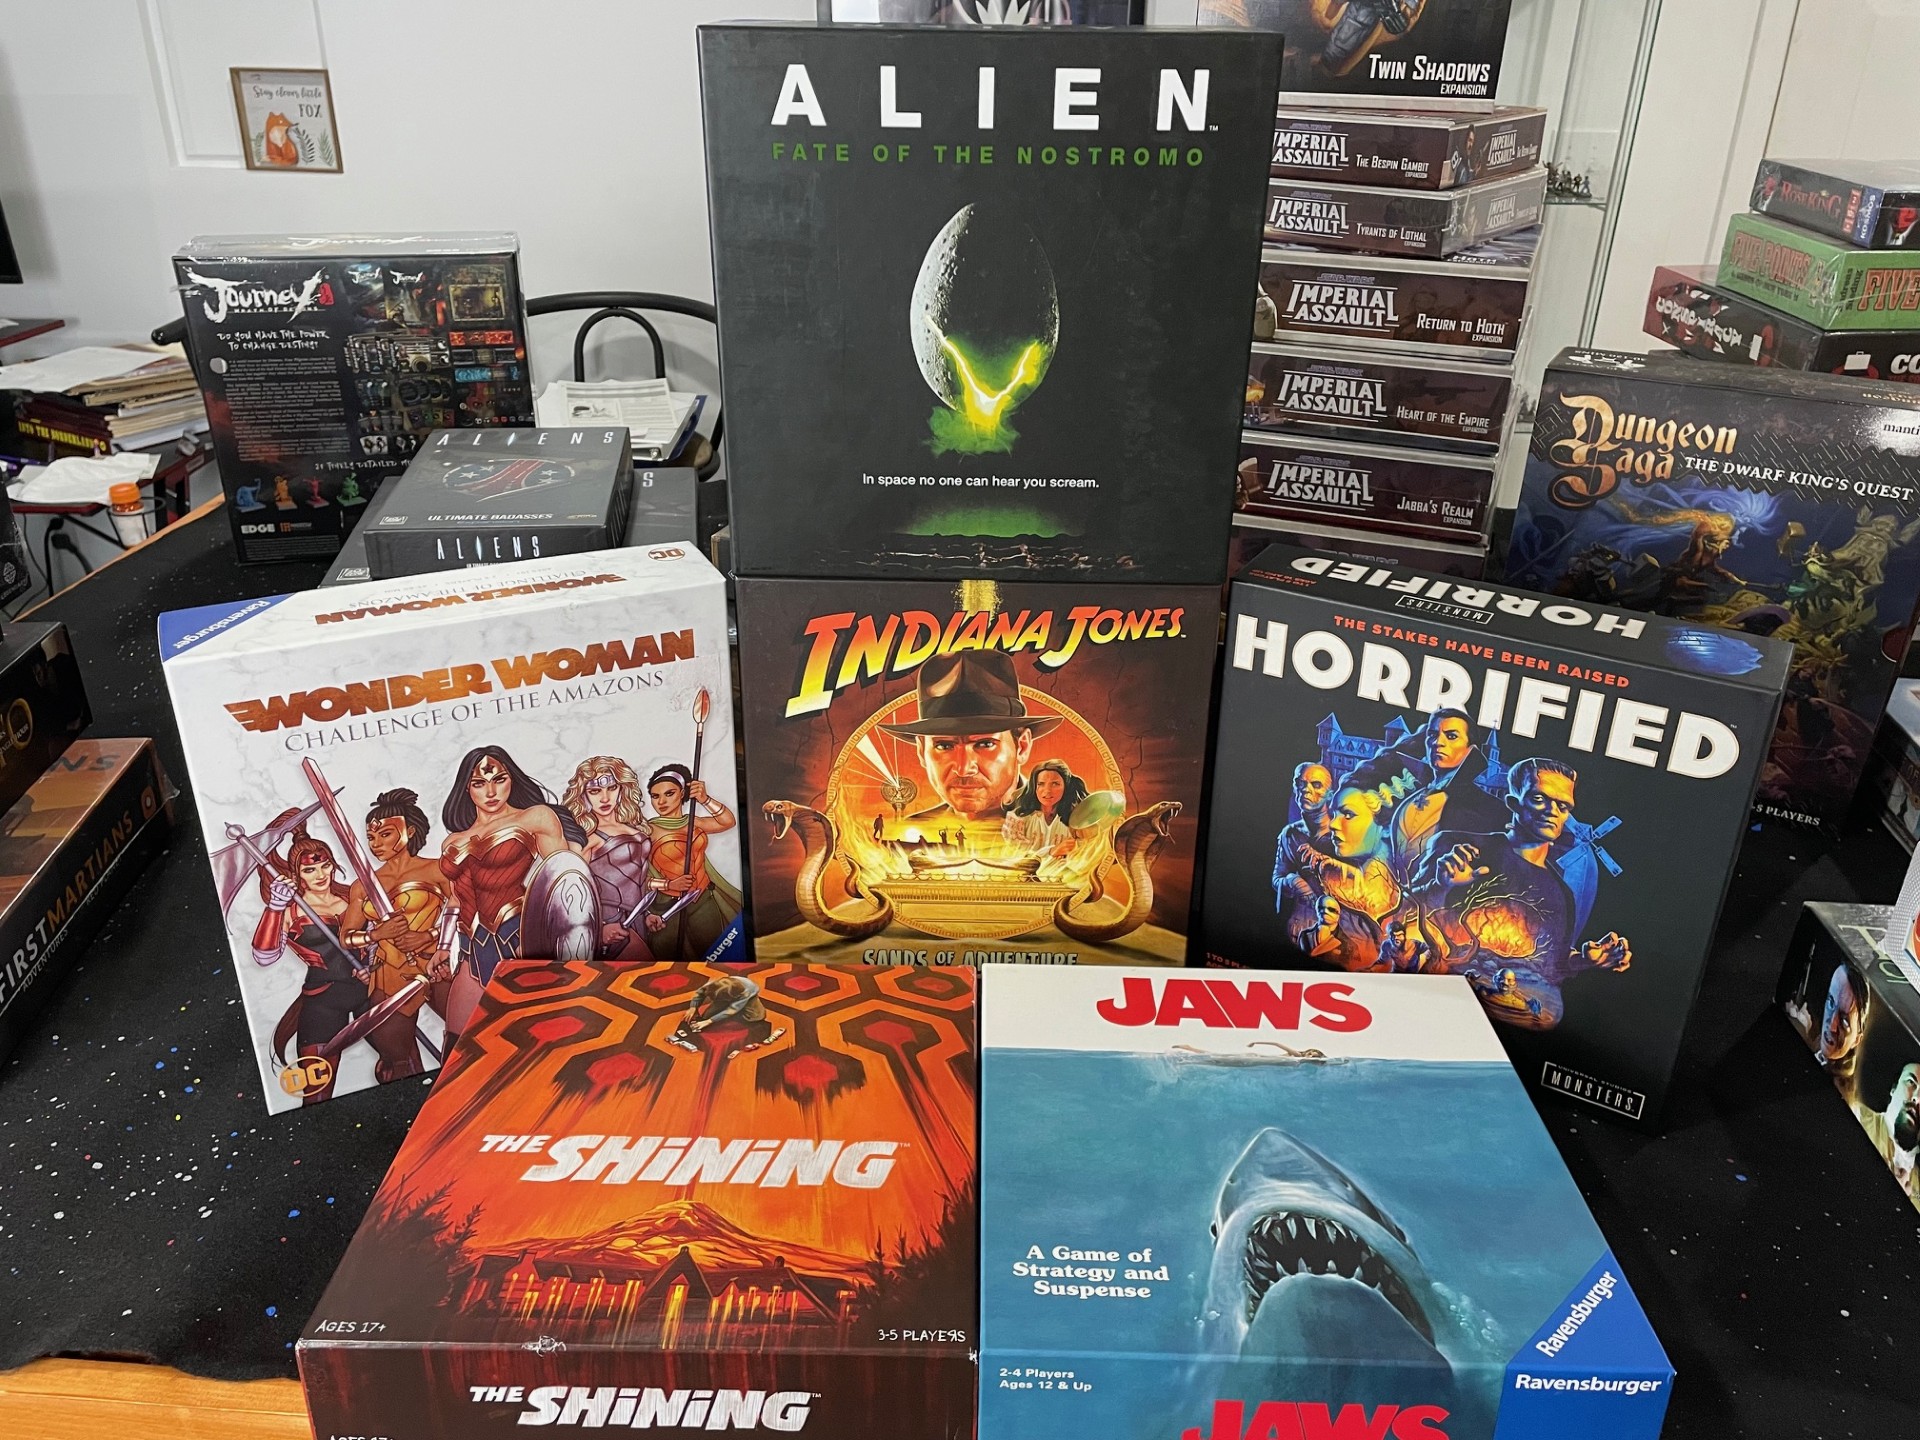
Continuing on with my massive pile of board gaming shame, here are six from Ravensburger: Alien: Fate of the Nostromo, Wonder Woman: Challenge of the Amazons: Indiana Jones: Sands of Adventure, Horrified, The Shining, and Jaws. You can follow the links above to see the painted miniatures for these games. Wonder Woman also comes with four surprisingly good miniatures, one of Diana herself and her four Amazon friends, that I hope to paint soon. I’ve played Alien: FotN before and very much enjoyed it. Ravensburger does some high-quality games that are well-reviewed. Although I hope to play all these games, the one I’m most looking forward to is Jaws. It has a reversible board: one side is Amity Island and the surrounding waters, the other side is Quint’s boat, the Orca. One player plays the shark, while up to three more players take on the role of Brody, Quint and Hooper. The first part of the game the shark tries to attack swimmers while the other players try to tag it with barrels and pinpoint its location. Then, play moves to the Orca, as the players defend the boat from the shark as it begins to dimantle it piece by piece. Sounds fun, right?
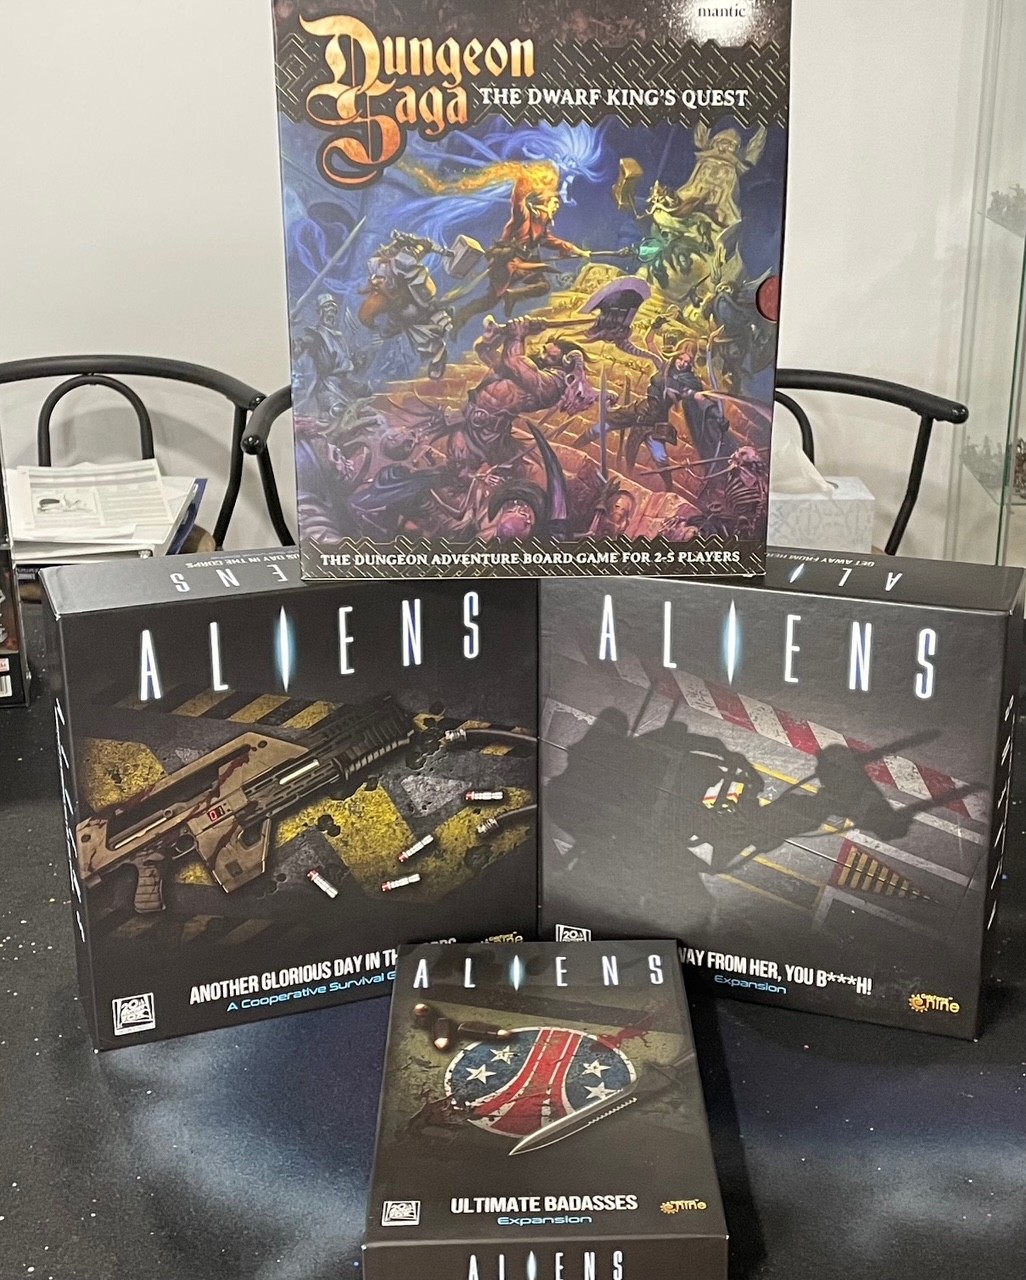
More games I hope to play, since I painted all the miniatures for these games, too: Dungeon Saga: The Dwarf’s King’s Quest, and Aliens: Another Glorious Day in the Corps. Hard to believe Simon, Roger and I painted the Dwarf King’s Quest miniatures as a shared challenge waaaay back in September, 2018. Not so hard to believe that I haven’t ever played it since then. Not once.
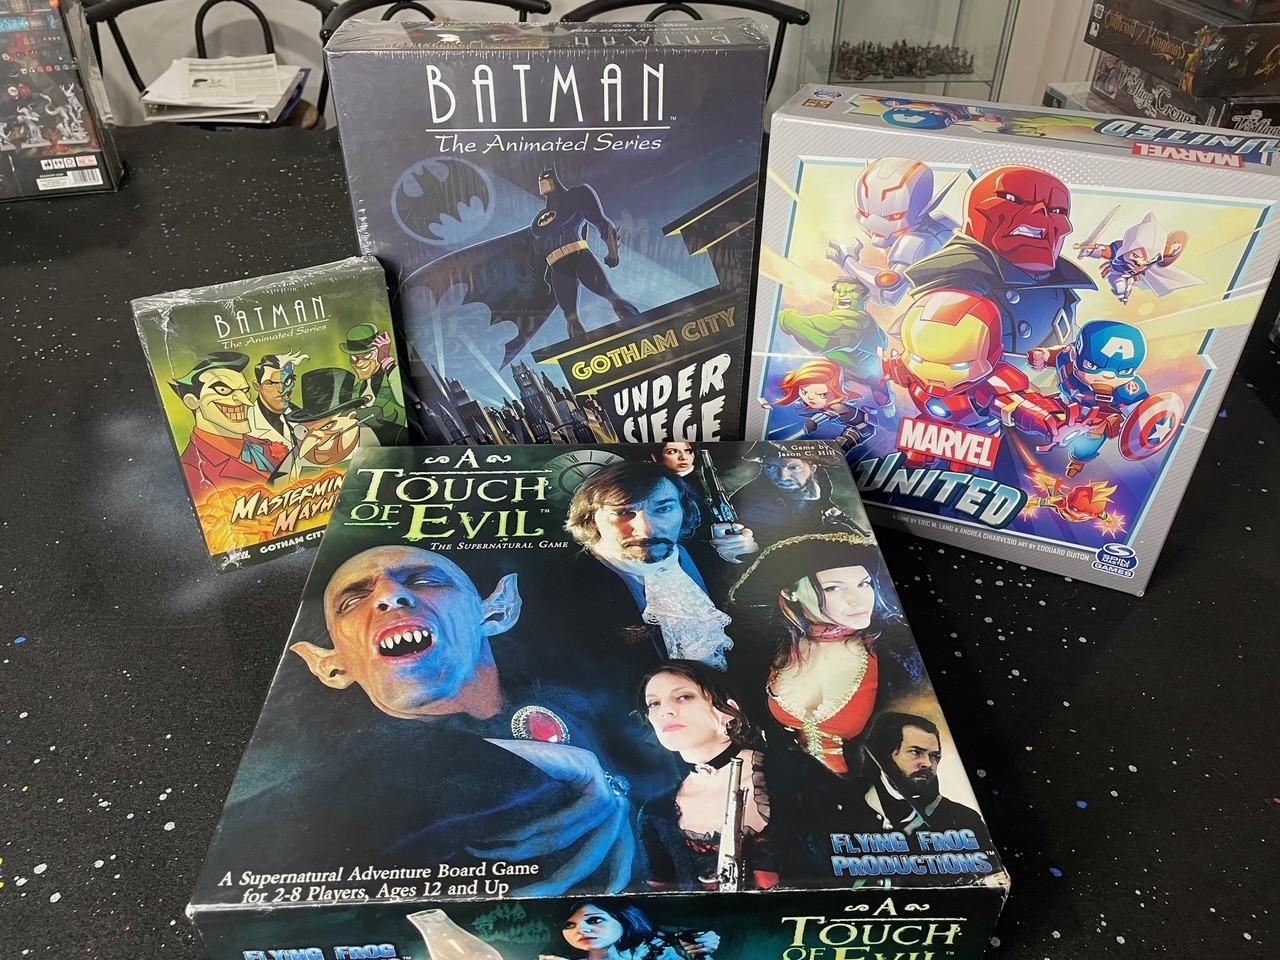
More games I hope to play one day, but as yet remain untouched. Marvel: United, Batman: Gotham City Under Siege, and A Touch of Evil. Since I didn’t really look at these beyond checking out the miniatures, I can’t say how they play. I’ve heard good things about all of them, and the miniatures for them all are really great. I’m not a big fan of chibi-style art, but even I have to admit the Marvel miniatures are cute. The is the base set of Marvel: United, which was available at Wal-Mart. There are many expansions to this game that were all part of the original Kickstarter; to my knowledge that was the only way to get some miniatures and they go for insane amounts on the secondary market as a result. I’m fine with the basic box as I doubt I’ll ever play it. A Touch of Evil got pretty good reviews and has some excellent miniatures despite the goofy box art, and Batman is Batman. What’s not to like?
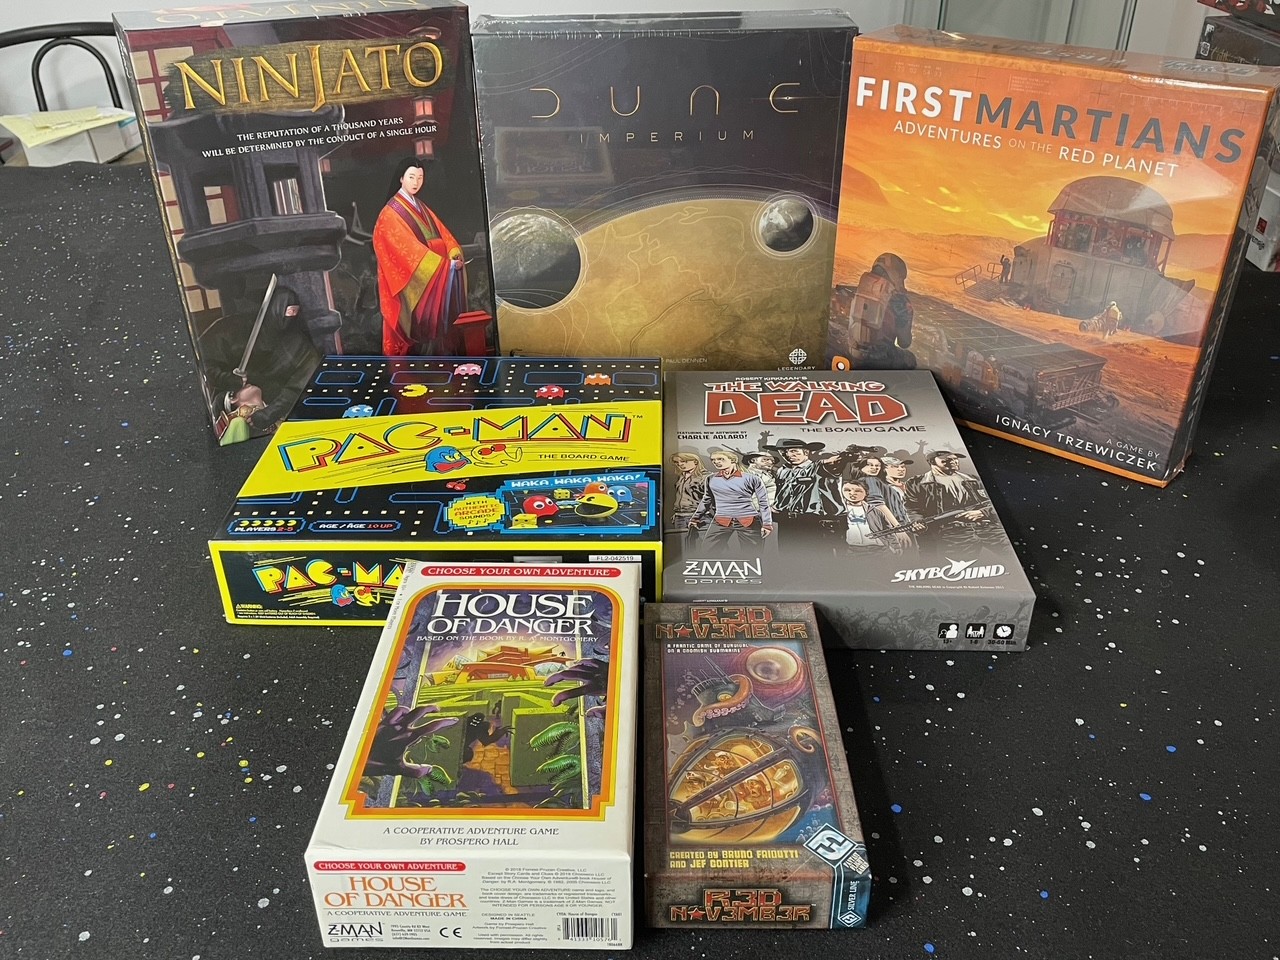
Two I’ve played, five I havent. I have played both the games in the bottom of this picture: House of Danger and Red November. House of Danger is based on the old Choose Your Own Adventure book series. It was fun, but replay value is somewhat limited once you “solve” the story. It’s my understanding new CYOA board games have been released, but this is a purchase I regret. Red November is a small Fantasy Flight game wherein you take on the roles of drunken gnomes aboard a sinking submarine. The pace is hectic as you race to put out fires, pump water, fight off a Kraken and try not to go down with the ship. It’s fun as hell!
I bought Pac-Man because I though it would be an easy game to pass the time during the pandemic. Never played it and got a sideways look for even suggesting it. The Walking Dead was another discounted pandemic purchase. I have no idea why I bought it, because it’s based on the comic, not the TV show, and I’ve never read the comic. I’ve also never played the game.
I picked up NInjato on the discount rack at my FLGS about ten years ago, because you get to play ninjas. I’ve never played it because I can’t understand the rules and haven’t bothered to look up any relevant YouTube videos. Dune: Imperium is a highly rated game that was released around the same time as two other Dune board games, one by Gale Force Nine and one that tied into the recent movies. This game is a deck-building game that combines elements of resource management. You take on the role of one of the Great Houses. Your goal, of course, is to control Arrakis and crush your enemies. Sounds really great, and I’ve never played a deck-building game, so I hope I get to play this one one day. It also has several expansions. Finally, First Martians is a cooperative game of colonization. That’s about all I know about it, other than it has an integrated app, which will most likely disappear after this game is discontinued if it hasn’t already. That makes this a poor choice for purchase and play, but I did it anyway because I didn’t know about the app before I bought the game.
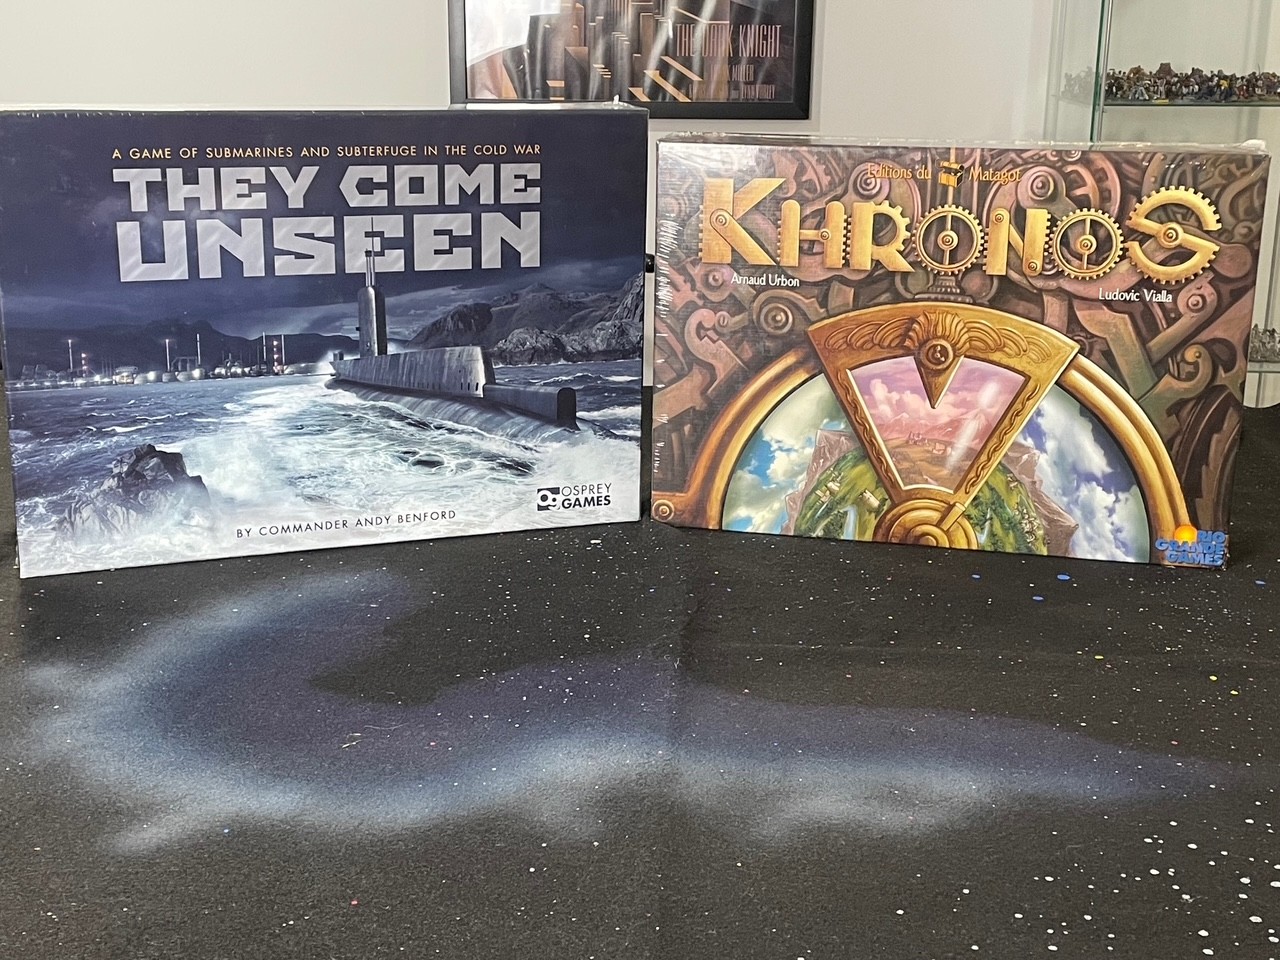
Two I’ve had (but never played) for a long time: They Come Unseen by Osprey and Khronos by Rio Grande Games. They Come Unseen is hide and seek with nuclear submarines, played on two separate boards, one for the surface and one for the depths. I posted about this game on my Instagram account back when I bought it and it caught the attention of the game’s creator, a former Royal Navy sub commander who was quite pleased that I was interested in playing it. Sadly, I still haven’t done so. Khronos seems to be a confusing time-travel game in which things you do in the past affect things that will happen in the future, but the reverse could also be true. Since I picked up this pristine copy at a flea market for 3 dollars, I didn’t really care if I played it or not. I figured I could always sell it for way more than 3 dollars. Maybe I could, but shipping it anywhere would cost a stupid amount of money, so I’m stuck with it.
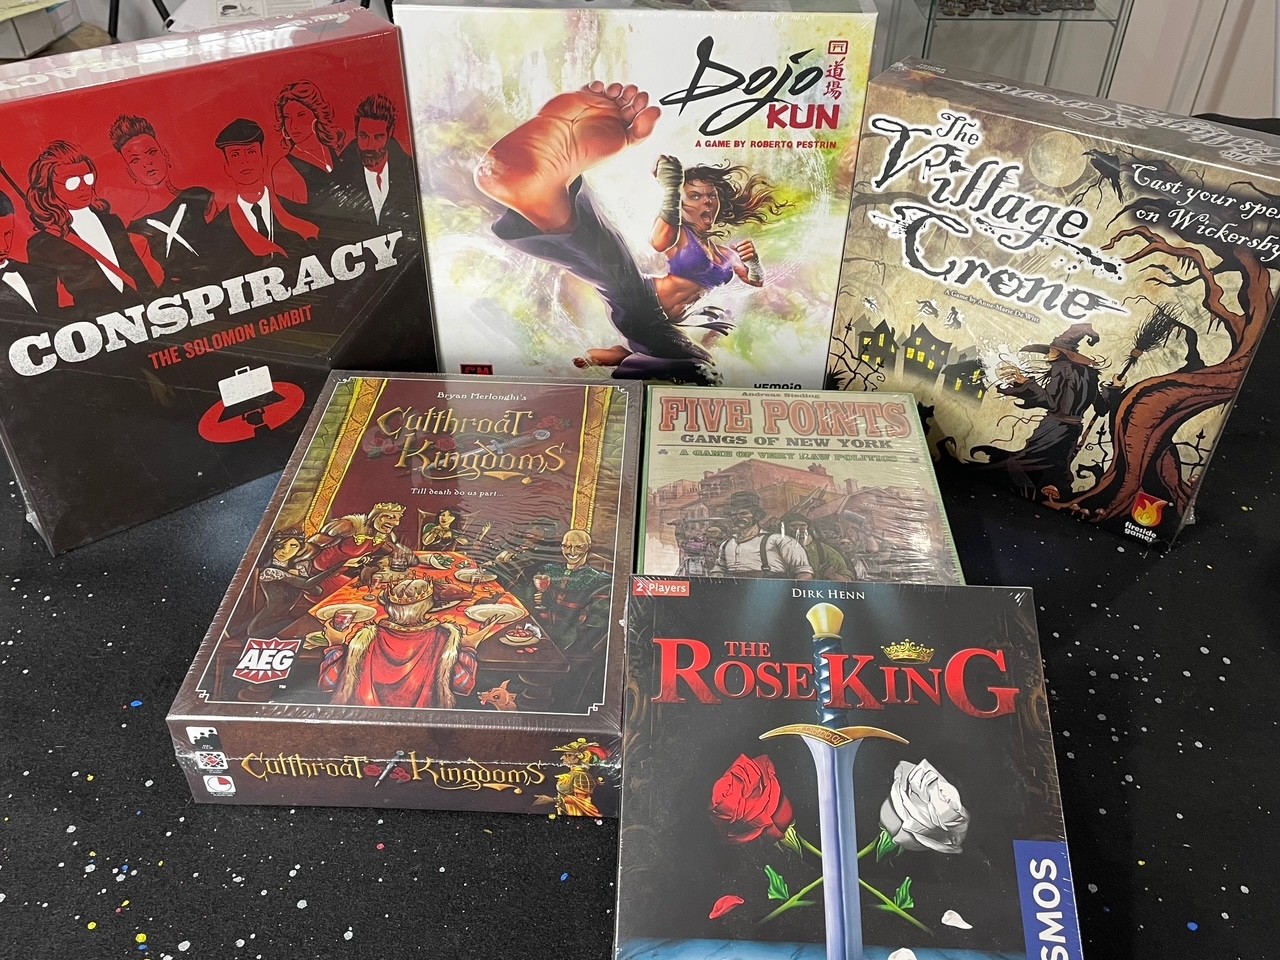
And finally, the games I simply have no excuse for purchasing, as I will never play them: Conspiracy: The Solomon Gambit, Dojo Kun, The Village Crone, Cutthroat Kingdoms, Five Points: Gangs of New York, and The Rose King.
Conspiracy: TSG is an updated version of the classic game, where you take on the role of a spy trying to get a briefcase back to your own country. The other players are trying to do the same thing with the same briefcase, so it’s not a cooperative game. Cutthroat Kingdoms and Five Points are similar in that they are political resource management games as you vie with the other players for control of the Kingdom or Five Points. New York, respectively. The Rose King is a two-player game that is meant to emulate the War of the Roses, with one player taking the role of York and the other Lancaster. You play cards to acquire and control space on the board. Dojo Kun is a game about kung-fu, which is why I bought it at Ollie’s. It’s a CoolMiniorNot game, which means it was probably abandoned shortly after release, hence me finding it at Ollie’s on deep discount. You train your fighters to take part in tournaments for a season, then actually compete in the tournaments. Like I said, poor purchase choices all around, as I’ll probably never play these and would play something higher up in this post instead if I had the opportunity.
Next up: a coda of sorts to Board Game Blues, in which I look at the miniatures from these games.