
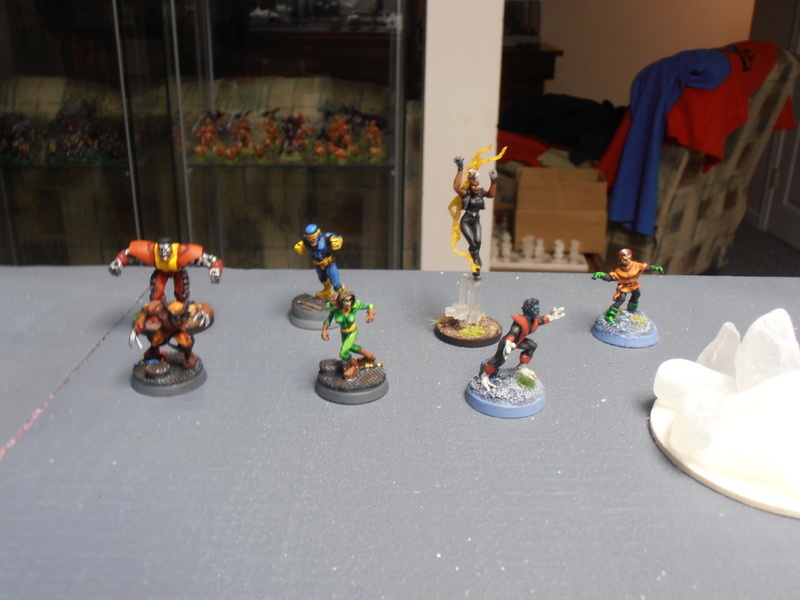
The BREEDER BOMB!!!
The Scenario: Thanks to information provided by the captured duo of the Fixer and Mentallo, the X-Men have tracked Magneto’s first Breeder Bomb to the remote wilds of Alaska. One short Blackbird flight later the team arrives, ready to thwart the Mutant Master of Magnetism in his nefarious plot to accelerate the evolution of humanity, ushering in the age of Homo Superior!
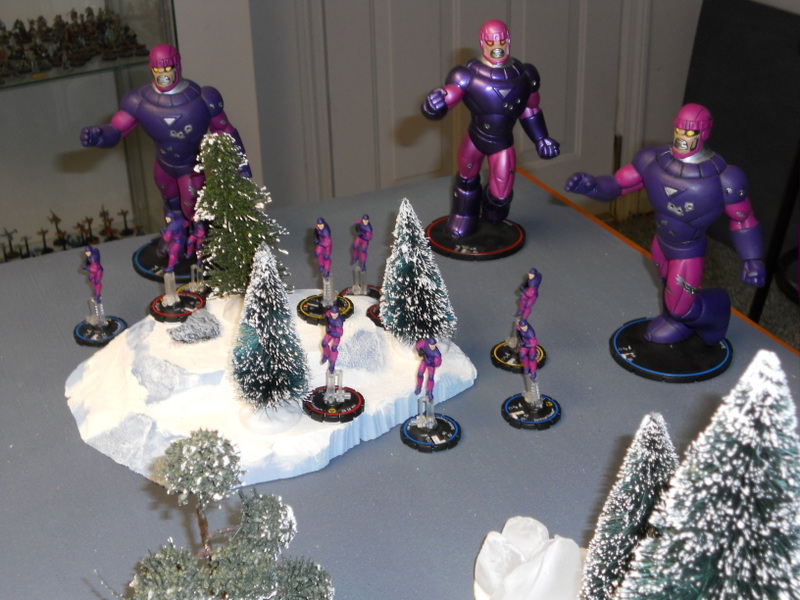
Unbeknownst to the heroes, Magneto has secretly tipped off Project: Wideawake as to the X-Men’s plans. A group of Sentinels consisting of 3 Mark V Sentinels and a group of 10 Sentinel Troopers (henchmen) has been dispatched to the location in an attempt to capture or destroy the X-Men, ensuring that Magneto’s plan proceeds unhindered.
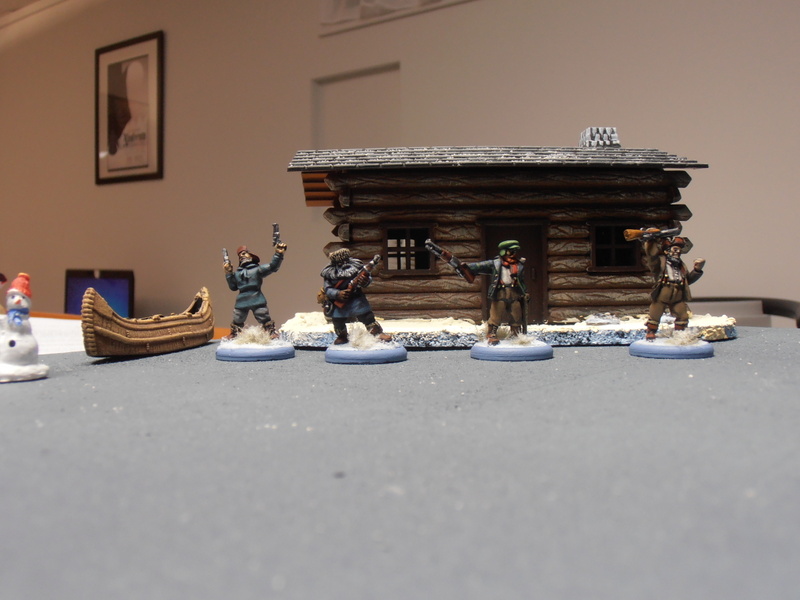
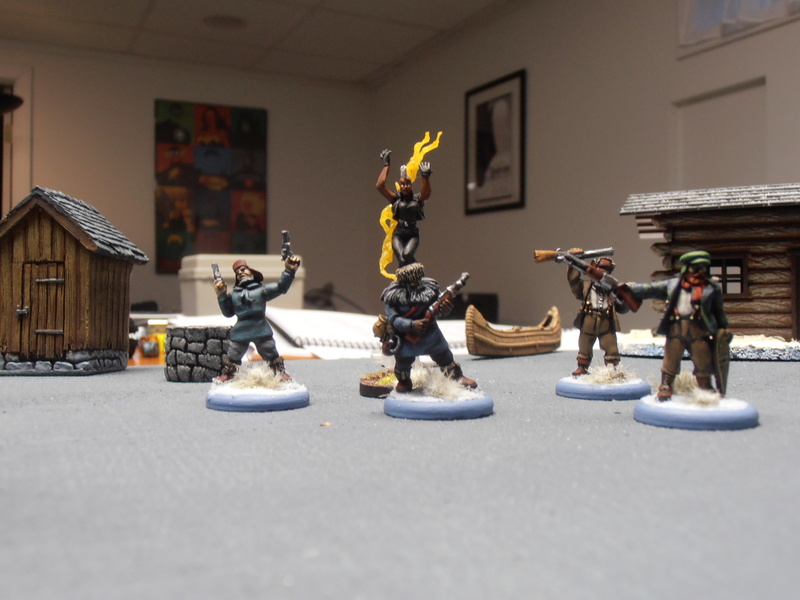
Complicating matters further is the presence of a group of Alaskan trappers, who awoke this morning to find that a huge piece of blinking machinery had mysteriously appeared outside their cabin overnight! The trappers—Filthy Pierre, Stinky Jacques, Dirty Henri and Unwashed Claude—don’t know what the Breeder Bomb is, but they know they want it! After several long months in a remote cabin with no running water, these four manly men have little to show for their trapping efforts. They think they can make money off of selling this thing to the highest bidder, and no muties or robots are gonna stand in their way!
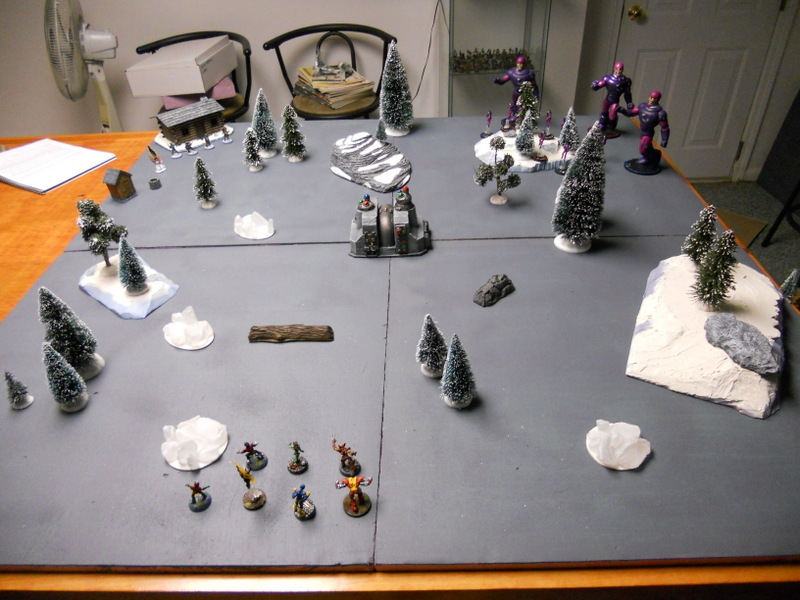
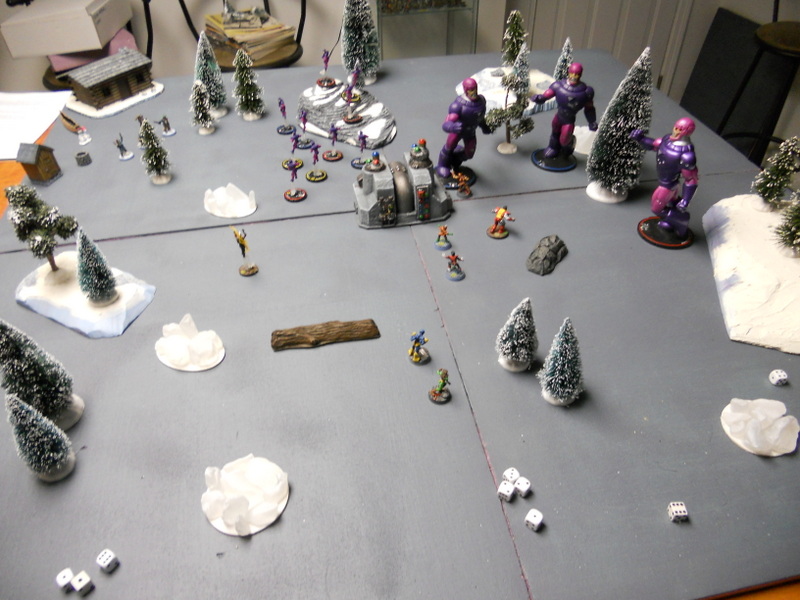
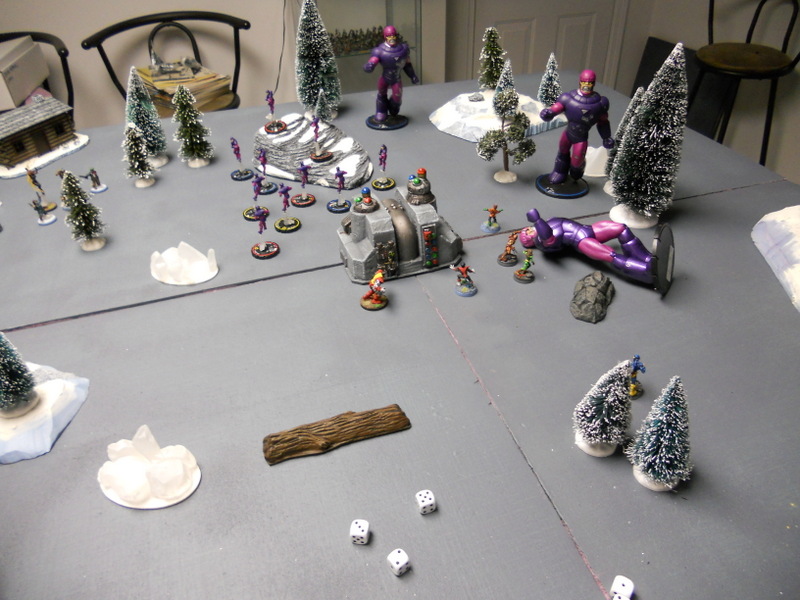
Setup: I used a 4′ x 4′ board for the battle, set up to resemble the Alaskan wilderness. In one corner of the board is the trappers’ cabin. In the center of the board is the Breeder Bomb. The rest of the terrain includes hills, forests and trees, and the odd clump of ice or rock.
The trappers deploy outside their cabin. The Sentinel force deploys on the same side of the table, in the opposite corner of the trappers. The X-Men deploy on the other side of the table along the edge.
Special Rules:
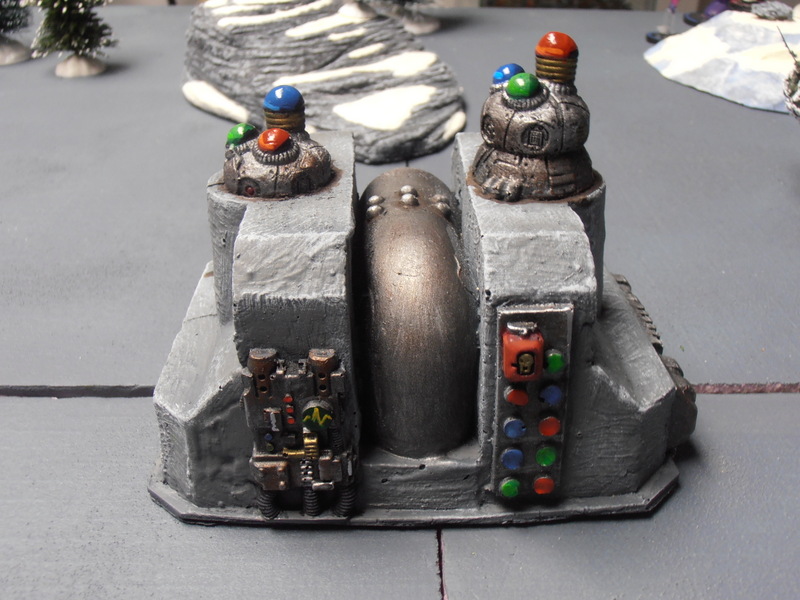
The Breeder Bomb: The X-Men’s objective is to defuse the Breeder Bomb and ensure that no harm comes to the trappers. Attacking the bomb is not an option as it could result in detonation. In order to defuse the bomb, one of the X-Men must get into base contact with the control panel and use a Special Action to make an attempt. This attempt is a Science check, so Kitty Pryde gets a +2D bonus to an attempt. Defusing the bomb requires 4 goals and may not be attempted if there are any Sentinel models within 6″ of the bomb. Failure to defuse the bomb results in a radiation leak!
If the bomb begins leaking radiation, the X-Men and the trappers each take an automatic 2D attack at the start of each round. This may be resisted normally, but Armor has no effect on any damage received. This damage is cumulative (to a maximum of 6D) with each failed attempt to defuse the bomb (i.e. 2 failed attempts = 4D per round, 3 or more = 6D per round).
The Trappers: The four trappers count as a henchmen group, so they only activate once per round. The trappers don’t discriminate between the Sentinels and the X-Men; as far as they’re concerned, everyone is trying to steal their treasure. To represent this, roll a die at the start of each round. On a 1-3, the trappers will attack the closest X-Man; on a 4-6 they attack the closest Sentinel. They always use Coordinated Fire.
The X-Men should do everything in their power to protect the trappers from harm. If the trappers are hurt by either the Sentinels or leaking radiation, the X-Men should lose story points. The X-Men cannot attack the trappers in any way that causes damage no matter how much they want to, but non-damaging attacks (like entangles) are ok.
ROUND 1

The X-Men gain initiative. My first plan was to have Storm scoop up Kitty Pryde and fly her over to the control panel so that she could start disarming the bomb on the X-Men’s next activation, but I decided against it as the Sentinels would easily get a model within 6″ of the bomb before Kitty could act. Instead I decided to have Rogue fly Colossus over there instead. The two of them should be able to hold off the Sentinels for a while…
The Sentinels activate next, and Sentinel #1 flies directly over to the bomb (see? told you it would happen) and lands about 6″ away from Colossus. He opens fire on Colossus, but the power blast glances harmlessly off the mutant’s osmium-steel skin. Finally the trappers act, but they are well out of range of any Sentinels or X-Men, so all they can do is move away from their malodorous cabin towards the bomb, cursing in French and shooting off their guns threateningly.
Colossus activates and wastes no time charging Sentinel #1, clobbering it for 7 net goals of damage. The Sentinel is knocked back but manages to keep its footing. Sentinel #3 activates and flies towards the fray. It attempts to entangle Colossus, but is unable to.
Cyclops fires at Sentinel #1, trying to put the damaged robot out of the fight for good. Unfortunately, he rolls extremely poorly and fails to score even one goal. Oops.
The Sentinel Troopers activate and fly towards the trappers, seeking to cut off their access to the bomb. They open fire on the trappers, and despite rolling 10 dice total, they pull a Cyclops and fail to score even a single goal! I’d say the dice were cursed, but they were two separate dice pools! The trappers sneer in defiance!
Storm doesn’t think the trappers will be as lucky the next time, so she flies over to offer them some protection from further Trooper fire. She power blasts the Troopers with a bolt of lightning…but bad luck strikes yet again, and she fails to inflict any damage on the group!
Sentinel #2 flies over to the Breeder Bomb and, like Sentinel #3, it tries to entangle Colossus, but fails. The big guy just won’t lay down!
Finally, the remaining X-Men act. Nightcrawler teleports Wolverine into the midst of the three Mark V Sentinels. Kitty Pryde moves 6″ closer to the bomb, but can’t do much else. Finally Wolverine acts, charging into combat with Sentinel #2. Unfortunately for him, the Sentinel resists all damage.
Round 1 ends with the X-Men and the trappers unharmed. Sentinel #1 only has 2 boxes of health left, but the other Sentinels and the Troopers are unhurt.
ROUND 2
The X-men keep initiative. Storm knows those trappers are dead meat if they’re left to their own devices, so she flies over to them and calls up her windy force field, extending it to protect the trappers. In Super Mission Force, a force field user can protect a maximum of 3 additional models (besides herself); but I decided Storm would forgo the protection of her own force field so that Unwashed Claude could benefit from it instead. You figure the trappers would be grateful, but instead they open fire on Storm! Luckily they fail to cause any damage.
Sentinel #1 regenerates 2 boxes of health, bringing him back up to 4 Health. He pummels Colossus, but fails to damage him (again, thanks to Armor).
Rogue charges Sentinel #2, which is busy fighting Wolverine. She clobbers it for a net 6 goals of damage! She trying to clear some space around the bomb, so she uses Way Outta Here, a Brick special maneuver that triples knockback distance. Sentinel #2 is knocked back 24″ and is knocked down! It will have to spend some movement getting up on its activation later…
The Sentinel Troopers activate, firing en masse upon the ignorant trappers. Thanks to Storm’s force field, none of them are hit.
Nightcrawler wants to get Kitty over to the bomb now that some space has cleared, so he teleports over to Kitty and teleports her back to the bomb. (Although SMF doesn’t really allow this, it’s certainly thematically appropriate as Nightcrawler does this kind of thing all the time.) I made sure he had enough goals to allow for the required 20″ distance, and Bamf! Kitty is delivered to the bomb!
Sentinel #3 charges Colossus, inflicting 2 damage and knocking Colossus back 6″. He manages to keep his balance and isn’t knocked down. Cyclops moves to get within sight of Sentinel #1, trying again to put it out of the fight. Once again, he fails to score any goals. (Is his visor working?)
Sentinel #2 fires at Rogue, blasting her for five goals of damage! She only has 3 boxes left. Bet she wishes she took a minute to absorb Colossus’s Armor when she was giving him a lift last round…
Wolverine uses a Brawler special maneuver, Acrobatic Attack, to charge Sentinel #3. The two re-rolls he gains from the maneuver help inflict a net 7 boxes of damage on the big robot, dropping it to 2 health!
The remaining X-Men act. Storm fails to power blast the Sentinel Troopers, perhaps because she’s busy protecting the ungrateful trappers who are firing upon her. Finally, Kitty Pryde acts. She can’t attempt to defuse the bomb, because Sentinel #3 is right in her face. So she charges Sentinel #3.
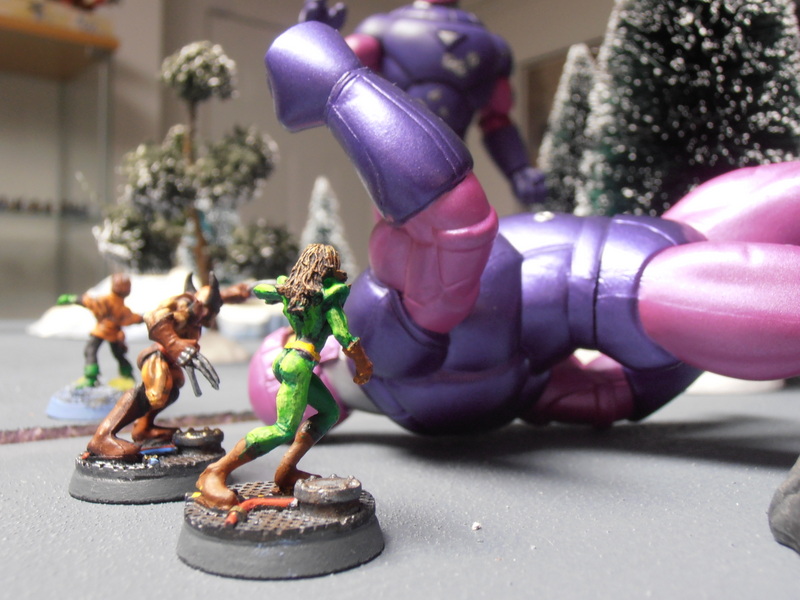
She rolls her normal 4D attack, +1D for charging, +1D for assisting Wolverine, +1D for attacking something electronic (my rule for Kitty) for a total of 7 dice. She scores an impressive 9 goals and utterly destroys Sentinel #3!
ROUND 3
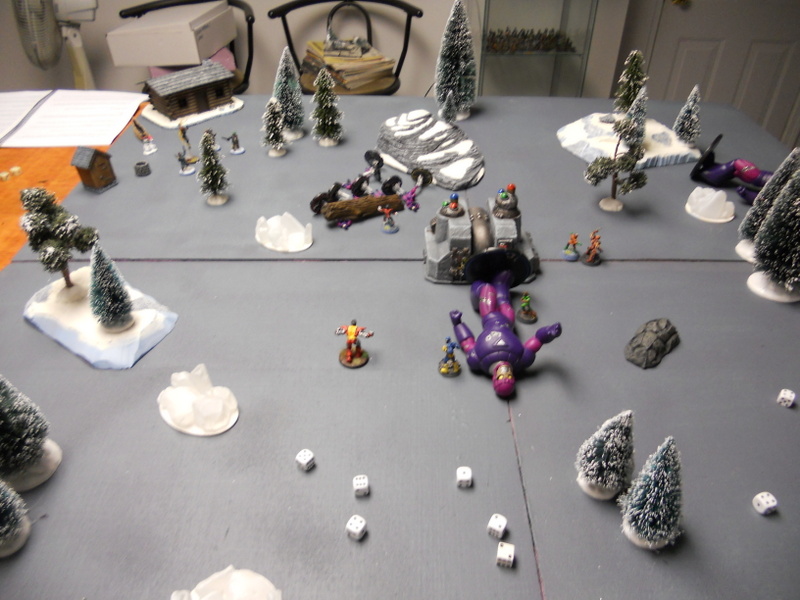
In a stunning turn of events, the trappers gain initiative this round, followed by the Sentinels, then the X-Men.
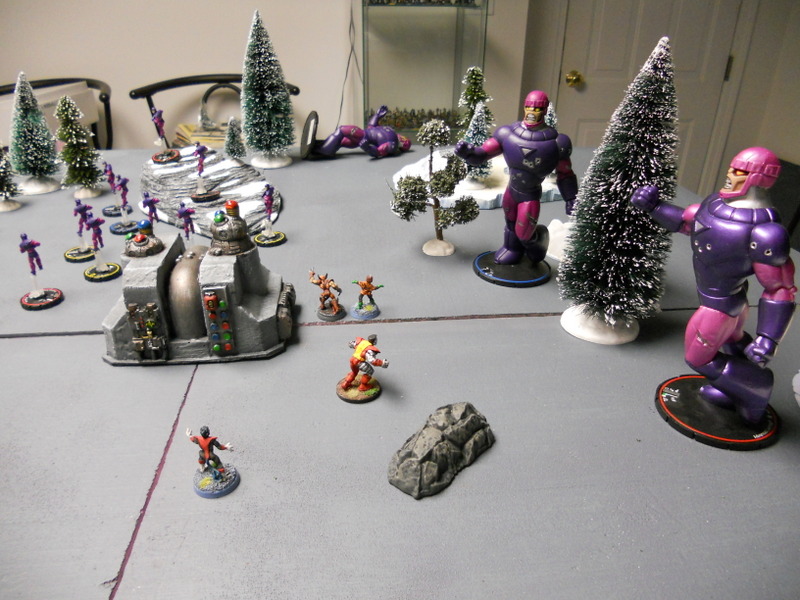
The trappers open fire on the Sentinel Troopers, but fail to damage the group. The Sentinel Troopers act next, spreading out a bit to get some Troopers near the Breeder Bomb so as to foil any defusing attempts. They open fire on Storm (one of their primary objectives), but even without the force field they fail to hit her.
Nightcrawler successfully recharges his Teleport after carrying Kitty, and teleports into melee with the Sentinel Troopers. Although it doesn’t count as a charge, he still manages to take out 3 of the Troopers with his normal attack and the extra attack he gets from his prehensile tail (Multiple Limbs).
Sentinel #1 regenerates 3 boxes, bringing it back up to 7 health. Sentinel #2 regenerates 2 boxes, bringing it back up to 5 health. Sentinel #1 activates, using its Metamorph ability to grow Multiple Limbs. It then charges Rogue, inflicting 6 total boxes of health on her with its two attacks on the charge. Rogue only had 3 boxes of health left, so she has to make a KO check or be knocked out. She manages to make it, but she’s barely standing!
Cyclops fires at the Sentinel Troopers, trying to whittle them down. He fails again to score even one goal, making him the official Worst Leader Ever. Sentinel #2 charges Colossus, but the big mutant squares up and resists all damage. Wolverine recharges his Acrobatic Attack and charges Sentinel #1, inflicting 6 boxes of damage, enough to drop it to 1 health.

Rogue takes advantage of Wolverine’s close proximity to absorb his Regeneration power, which she may need relatively soon. She then attacks Sentinel #1, scoring enough net goals to knock it back 12″ and put it out of commission!
Kitty Pryde activates, charging into combat with Sentinel #2. Once again, she annihilates the big robot with 6 net goals. It fails its KO check and is destroyed!
Finally, Colossus activates. Since he’s no longer in combat with Sentinel #2, he picks up a huge tree and throws it at the Sentinel Trooper group. He scores seven net goals, which means that seven henchmen are removed. Since there are only seven Troopers left, Colossus single-handedly wipes them out by throwing a huge tree at them. Ha!
ROUND 4
On the first activation, Kitty Pryde succeeds in defusing the bomb, so it’s game over. We can assume the X-Men deal with the trappers in some non-lethal way (from downwind, of course). Victory to the X-Men!
AFTERWORD
Another quick game…3 rounds played in under half an hour. Super Mission Force is fast!
I wasn’t expecting so many times when one side completely failed to do any damage to the other…not because the damage was resisted, but because the dice roll was so poor that the attacker didn’t even score any goals at all! I think the dice were feeling mischievous. Clearly, the breakout star of the team was Kitty Pryde this time around. She accounted for two of the Sentinels all by herself. Rogue got into some trouble and almost got KO’ed, but since she managed to remain standing, she doesn’t need to roll on the post-battle damage table for any possible injuries. She’ll be back next scenario fresh as a daisy. The only other X-Man injured was Colossus, and he only took 2 boxes. The less said about Cyclops’s performance, the better.
The other thing that didn’t really work was the “failed defuse = radiation leak” idea. I think it’s a solid premise (it’s adapted from the original RPG adventure), but on a table this size with forces that can easily reach the center of the board, there was never an opportunity to defuse the bomb. There was always a Sentinel model within 6″ of it!
I changed the scenario from its original RPG form in a few minor ways. First, in the original, the setting is “a mining town in Western America”, not Alaska. I changed the setting because I wanted to use my new snow terrain. Also, there was a lone crazed miner who wanted the bomb, not a group of mad trappers. A few Sentinels aren’t really strong opposition for a group of heroes like this, so I added the henchmen group and made the trappers somewhat unpredictable. Having to protect them was just another challenge for the X-Men.
Here are my builds for the Sentinels:
Sentinel MK V: (Metamorph) Major: Metamorph, Minor: Super Strength, Regeneration, Construct, Massive
(Yes, I know that’s a lot of powers, but Metamorph doesn’t allow for any of them in a package.)
Sentinel Troopers: (Henchmen Group) Minor: Flight, Power Blasts
Trappers: (Henchmen Group) Minor: Power Blasts, Resistance
Lastly, if you’re wondering what I used for the actual bomb, it’s a mystery piece of resin terrain I’ve had for about 15 years. The base says “Epicast” on it, but it was clearly molded from a piece of shipping Styrofoam (it has a R and an arrow pointing up on it that I had to fill in before painting). I think it looked sufficiently Jack Kirby-esque so that it could be a bomb or any other kind of infernal machine or doomsday device, so I painted it up just for this campaign! What do you think?
Next time it’s off to Mother Russia where the next Breeder Bomb awaits!