If you’re anything like me, you probably have a not-so-small heap of unfinished terrain projects laying about your workspace. Last month I decided to incorporate building and painting terrain into my normal painting routine (when I have a routine) so the heap will, in theory, reduce over time. So, since I just finished up Imperial Assault, I thought I’d get cracking on some of the modern terrain I ordered for my Supers and Zombie games.
Much of my modern terrain comes from Armorcast. I also recently purchased a couple of things from Laser Cut Card. What follows is a review of both companies and the products I bought.
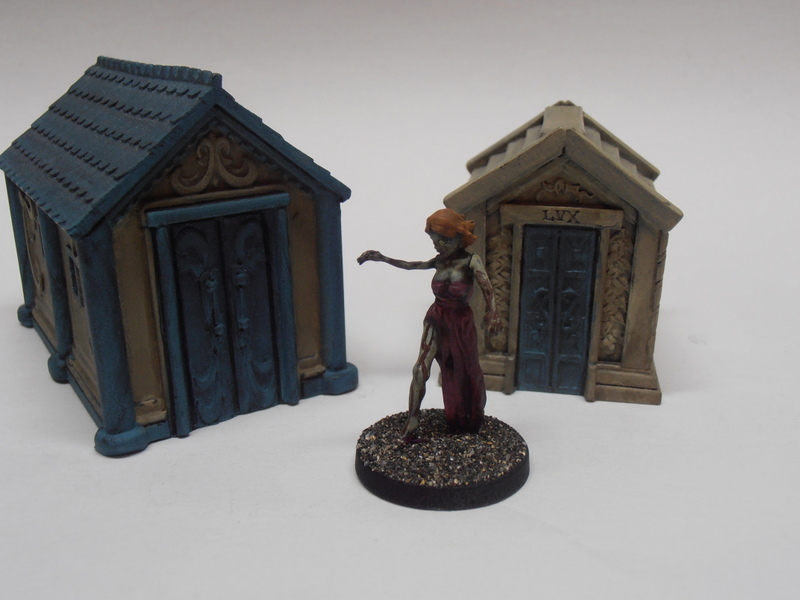

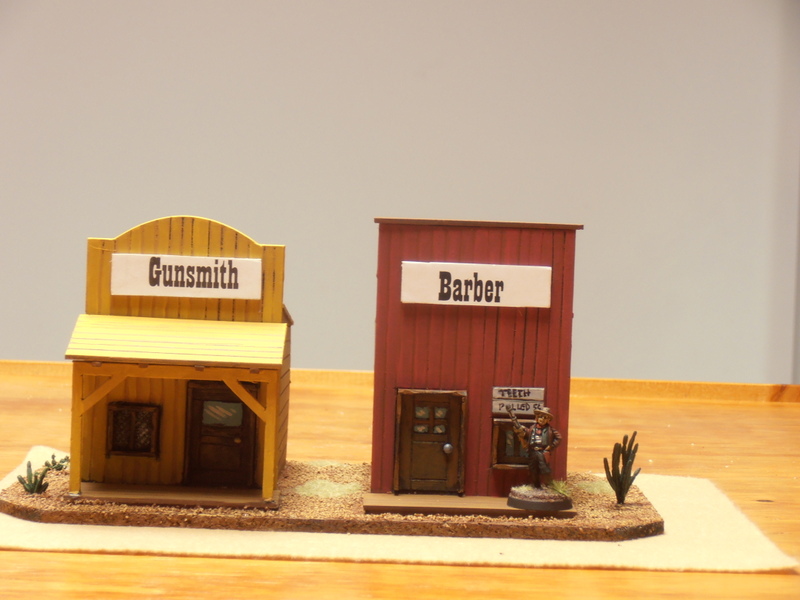
First up is Armorcast. I already own a fair amount of Armorcast products, and there’s a couple of good reasons why. First, they look great when they’re painted up and on the table. I’ve had the mausoleums above for about 6 years and never played a game with them (because I haven’t made a graveyard yet). I posed them with a Wargames Factory zombie vixen to show how cool the terrain looks in context. You might recognize the dumpsters from the many After Action Reports on this blog. I pretty much use them in any city-based game.
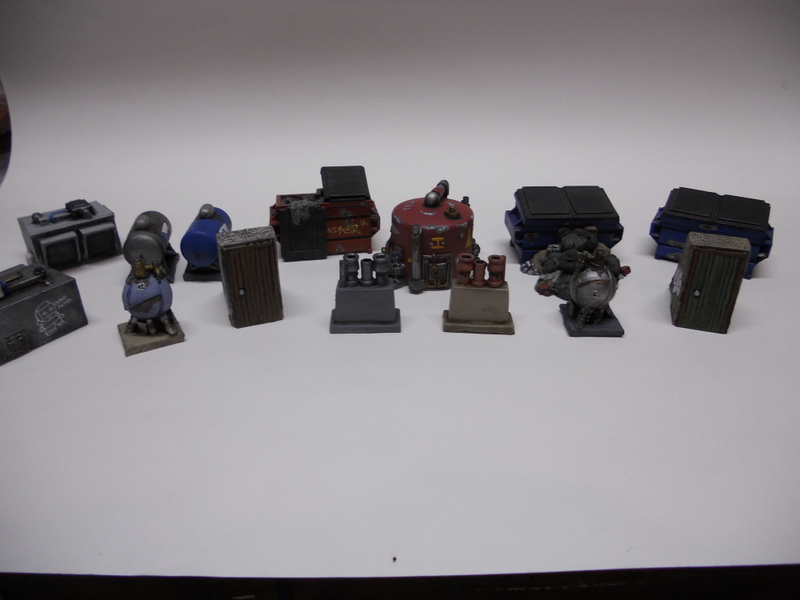
Second, Armorcast resin products are generally pretty durable, especially the chunkier pieces. My recent order consisted of these “roof-toppers” and a billboard 3-pack (which I’ll get to in a minute). These are designed to affix to Armorcast’s line of resin buildings to make the removal of rooftops easier. I don’t use Armorcast buildings, and I like a bit of freedom when it comes to my scenery so I won’t be attaching anything permanently.
All Armorcast stuff is easy to prime and paint. I’ve never had anything rub off once it’s been sealed.

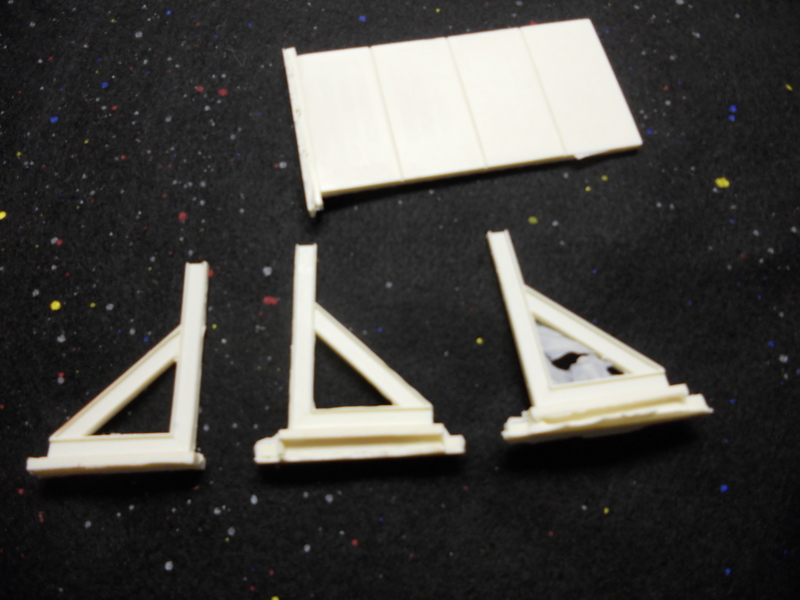
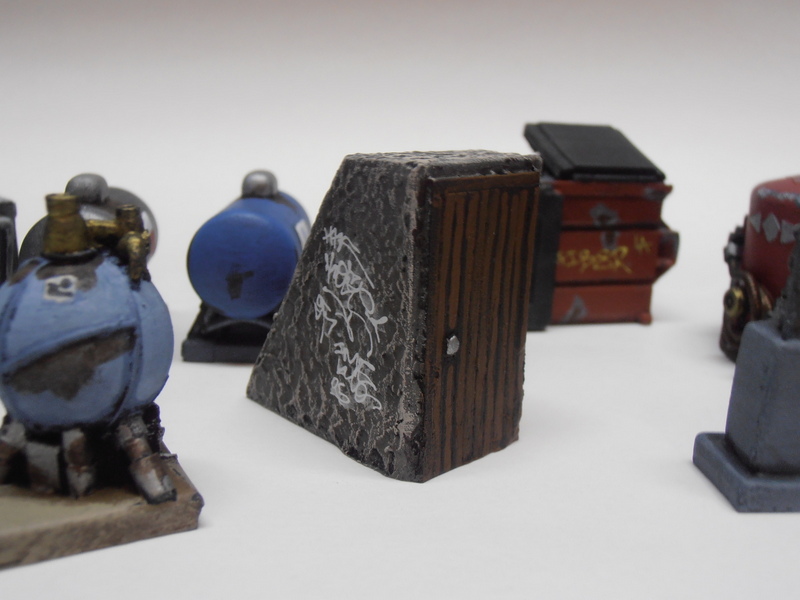
Unfortunately, Armorcast products require a lot of cleanup. This is less true of the big, blocky pieces like those above, but look at these billboards and soda machines.There’s an awful lot of resin flash and bubbles in the casting that will need to be sanded or filled. I was least happy with the billboards, as they required a lot of flash removal. Remember when I said that Armorcast resin is generally durable? It is, but in smaller pieces like this it’s actually brittle. I broke a few of the billboard supports removing flash with some nippy cutters. You can see the broken ones in the top picture (the two middle supports).
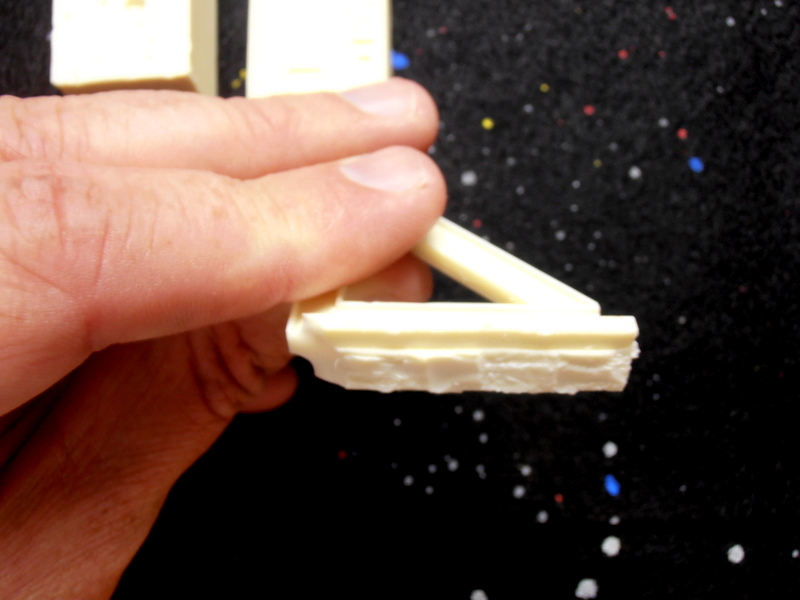
Even then, there was enough flash left that I needed to use a Dremel to get it smoothed down, which is not really something you want to do as resin dust is quite toxic. Also, I assumed that once the billboards were assembled they would stand on their own, but they don’t. Whether this is because I broke the supports or not I don’t know, but I’m pretty sure it’s because the billboard is heavier than the supports, so it falls on its face if not anchored to something. If you plan on gluing it to a building, you’ll have no problem. But if you’re like me, you’ll have to take the extra step of basing it on something so you can use it wherever you want.
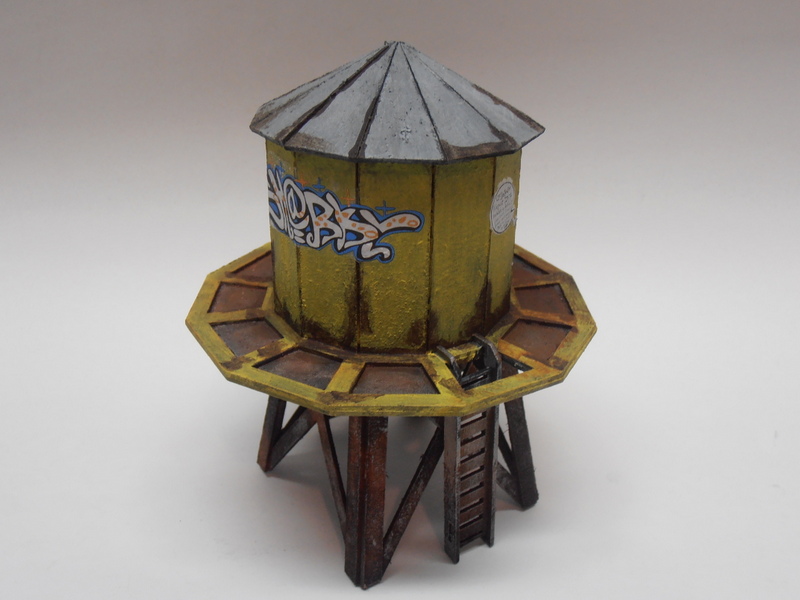

This water tower is from Laser Cut Card, a South African company that seems to have greatly expanded their product line recently. I ordered this about a year ago along with some Ork glyphs and finally got around to assembling and painting it. It’s made of uncoated cardboard, a bit stiffer than your average cereal box. LCC claims that coated cardboard (like Plastcraft stuff) would melt if cut with a laser, so they leave it uncoated. This is not as much of a problem as you’d think, as it’s surprisingly strong and sturdy once assembled.
When I first got this, I bitched and whined that there was no instruction sheet included with it. When I finally got around to assembling it, I had no problems figuring it out just by looking at the picture on the box. Anyone with modeling experience should have no problem, but just for the hell of it I went on LCCs website and found that they have instructions right there, so my grumbling was premature. They don’t include them to save on shipping costs (more on that below). Assembly took about an hour (without the benefit of instructions).
The cardboard takes paint ok, not great. As you can see, not having a coating on it just means the paint soaks into the card a little more than you may like. I spray-primed this tower black before painting it with craft paint and you can judge the results for yourself.
Incidentally, if you’re wondering about the graffiti decals, they’re made by a company called Microscale and carried by Armorcast. The sheet I have says it’s HO scale, but as you can see they seem to fit right in on 28mm scale scenery. I think they really make the water tower look cool and help cover up some of the paint issues.
So those are the products. What about the prices and shipping?
Armorcast isn’t cheap, especially their bigger pieces. However, they have extensive product lines across many genres. If you’re looking for something in particular, chances are they have it, whether you’re playing fantasy, sci-fi or modern games. Most of it looks terrific and is generally durable enough to stand up to the rigors of gaming, although as stated above, you may need to do some work on it first.
Armorcast asks that customers allow one month for shipping, and that’s exactly how long I waited for my most recent order. Not lightning fast, but everything is cast to order, so I have no complaints. Over the years I’ve had a couple of interactions with Armorcast. One order shipped missing an item, and when I called them they took care of it right away. I also talked to their rep at Gen Con in 2012 and he couldn’t have been a nicer guy. So customer service is good, too.
Laser Cut Card has a greatly expanded product line that includes Sci-Fi and Modern terrain at insanely low prices. (That cardboard water tower retails for $6.50; Armorcast has a resin one for $12.00). Of course, you will need to spend some time assembling it first. It’s surprisingly strong and I’m optimistic that my next attempt at painting it will enjoy better success.
LCC’s shipping times and costs are unbelievable. This water tower and a package of ork glyphs shipped in a standard mailing envelope for ONE DOLLAR, and it made the trip from South Africa to Southeastern Massachusetts in a week!!! I haven’t had any need to contact LCC for customer service, but they seem like nice enough guys and, like Armorcast, I’m sure I’ll be ordering from them again.