Tag Archives: Pulp Figures

Death Soldiers of the Jade Hood: Part 2

When we last left our intrepid adventurers Bridget Rourke and Mo Shrevnitz, they had managed to obtain evidence that the Jade Hood was behind the strange disappearances of ordinary citizens in New Commerce. Bridget was able to snap a photo of some of the Jade Hood’s goons loading some suspicious chemicals onto trucks in the Warehouse District.  A shipping label from the Phillips Chemical Consortium was prominently displayed in the photo.

Bridgit went to alert the police and get the necessary warrants for a raid on the chemical plant, while Mo met up with New Commerce’s vigilante crimefighter, The Gargoyle, for a raid of their own. Meanwhile, the nefarious Jade Hood, aware that his schemes are threatened, sends a crew of goons to the chemical plant with orders to blow it sky-high…

 Scenario 2: Raid on the Phillips Chemical Consortium

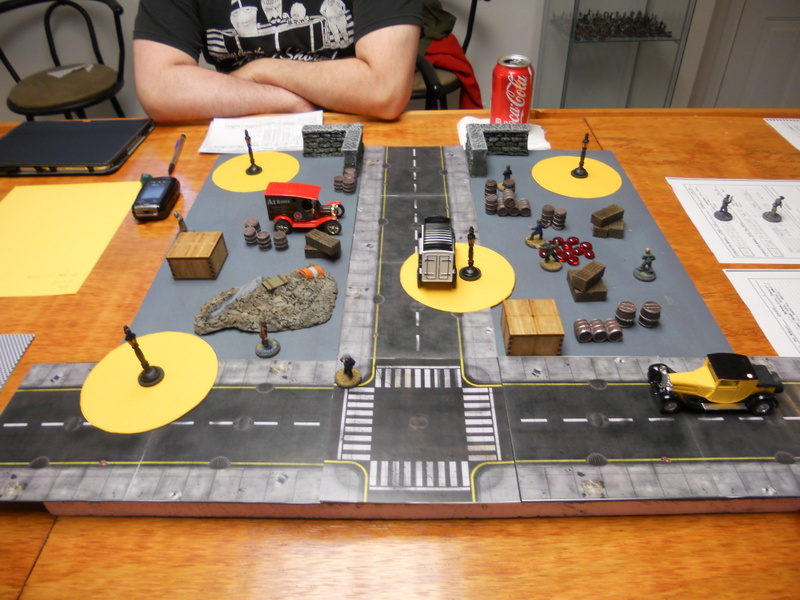
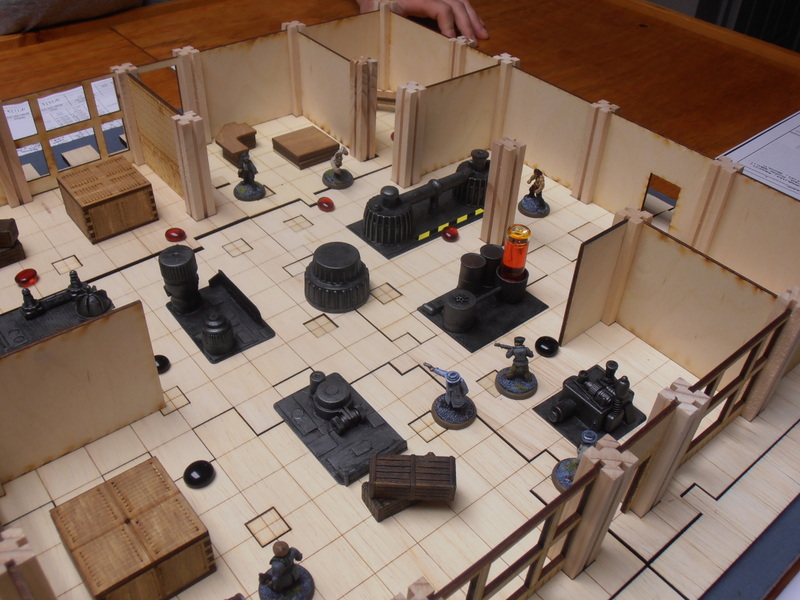
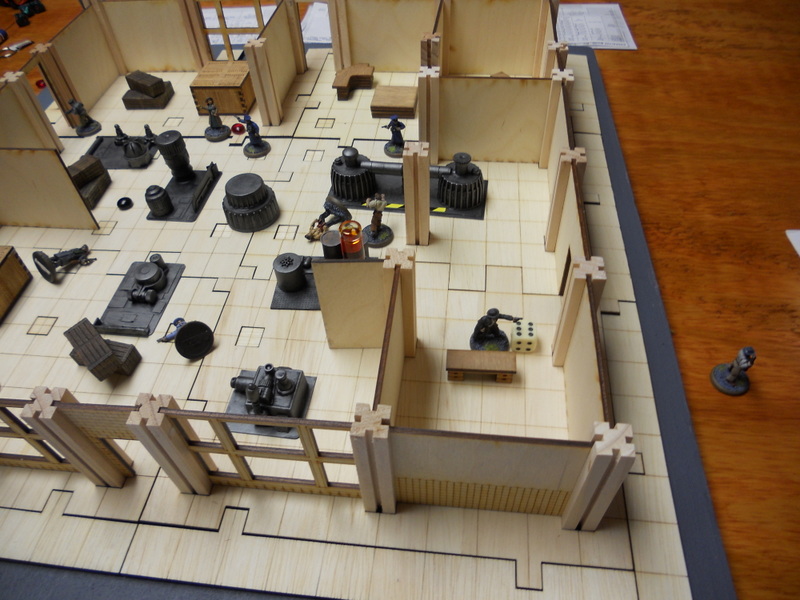
Actually, this is technically Scenario 3, as Scenario 2 is a scenario to be run in the event the heroes are captured. The scene is an industrial complex, with lots of machinery and crates to hide behind. This gave me a good chance to break out my Aftermath Modular Terrain. I’m glad I bought in on this Kickstarter, as it’s really some great stuff. I bought in for $100, and the stuff shown below isn’t even half of what I got. The machinery was made by a fellow TMPer, Russell95403, and it works well for this scenario.

Basically, the good guys, Mo and The Gargoyle, need to find two key pieces of evidence and get out of the warehouse before the bad guys blow it up. The bad guys need to plant two time bombs and detonate them. The heroes get extra Victory Points if they can disarm the bombs or prevent the bad guys from planting them at all.

DSCN0519

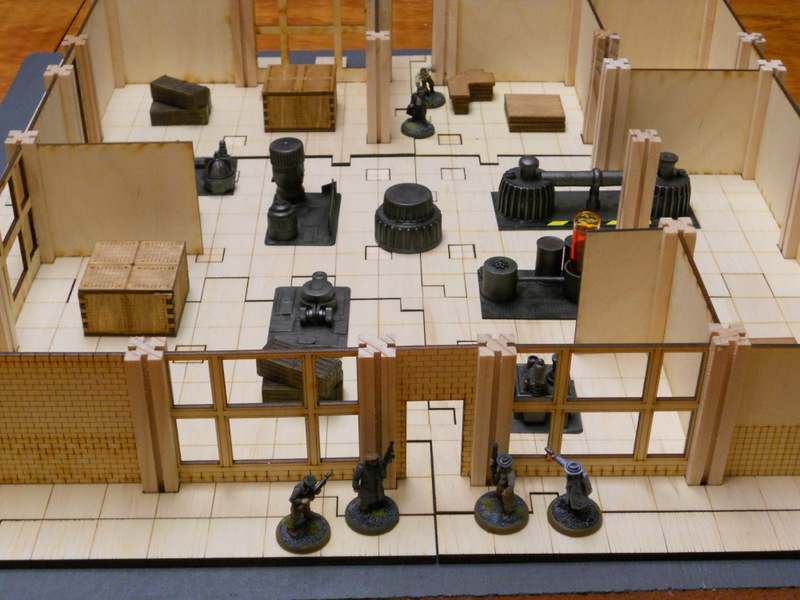
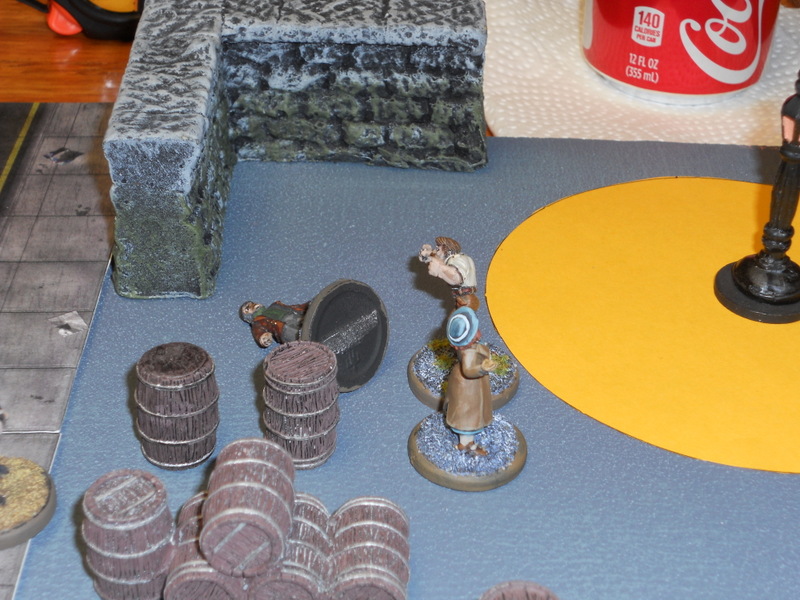
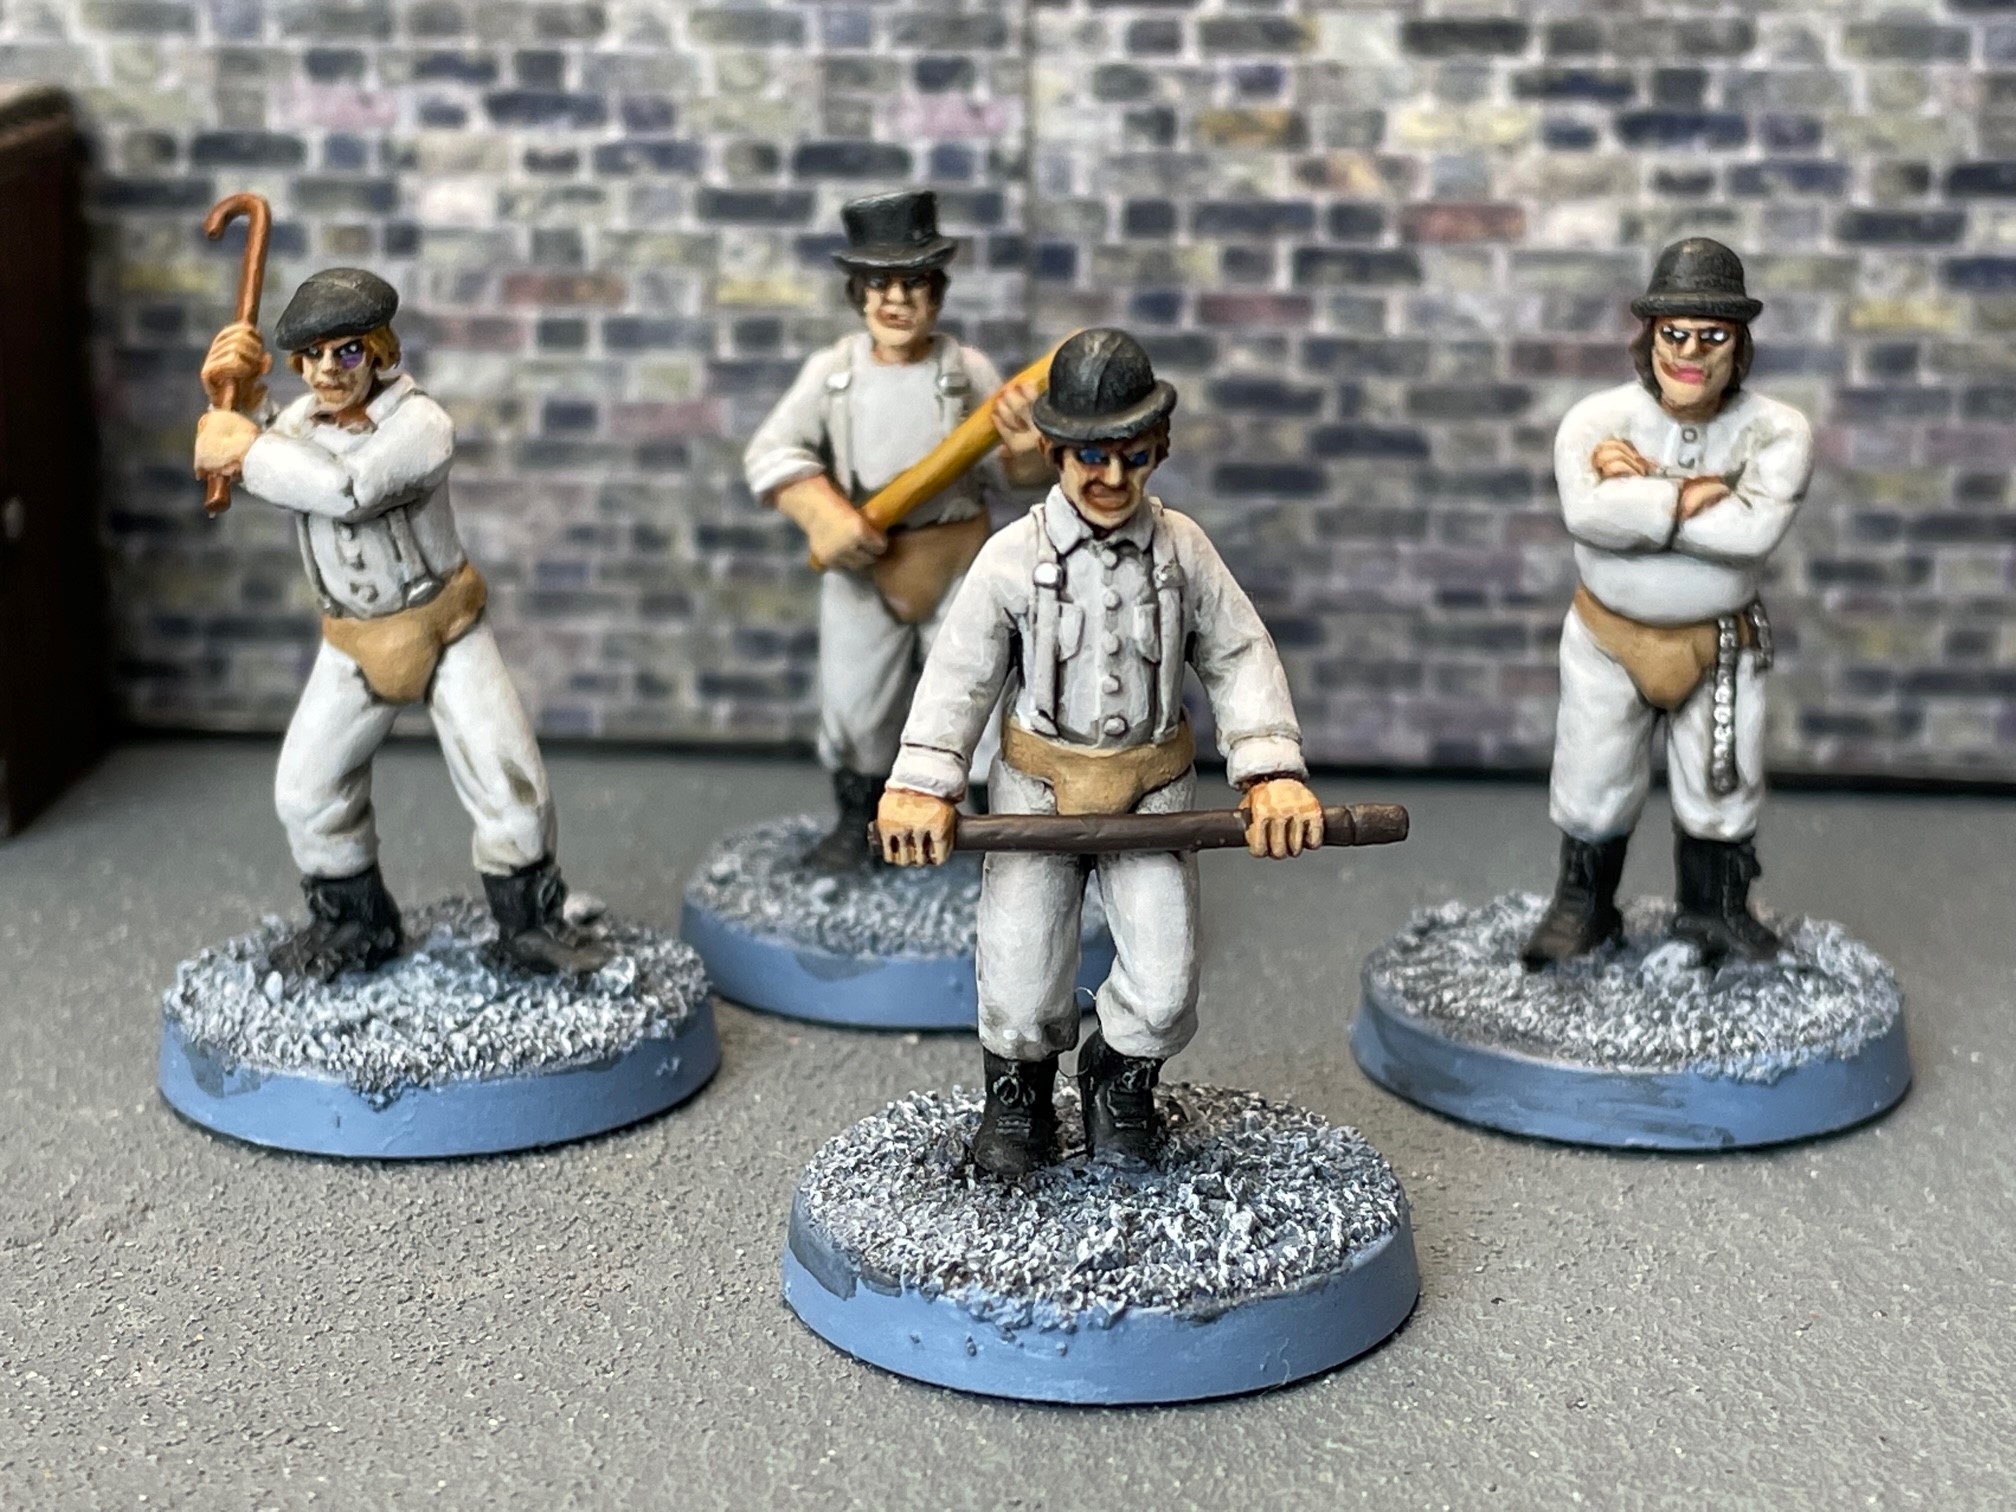
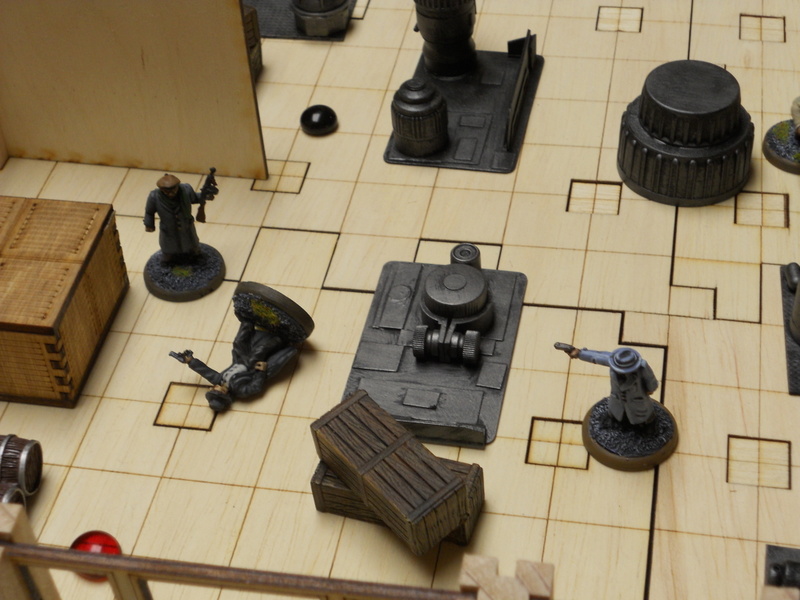
This was the initial setup.  Once again, my buddy Matt took the part of the heroes. Opposing them, played by me, were two Grade 2 Enforcers, Chopper Murphy and Frankie the Fish; and two Grade 1 Gat Men, Limey Joe and Pete the Dentist (you don’t want to know how he got that nickname).

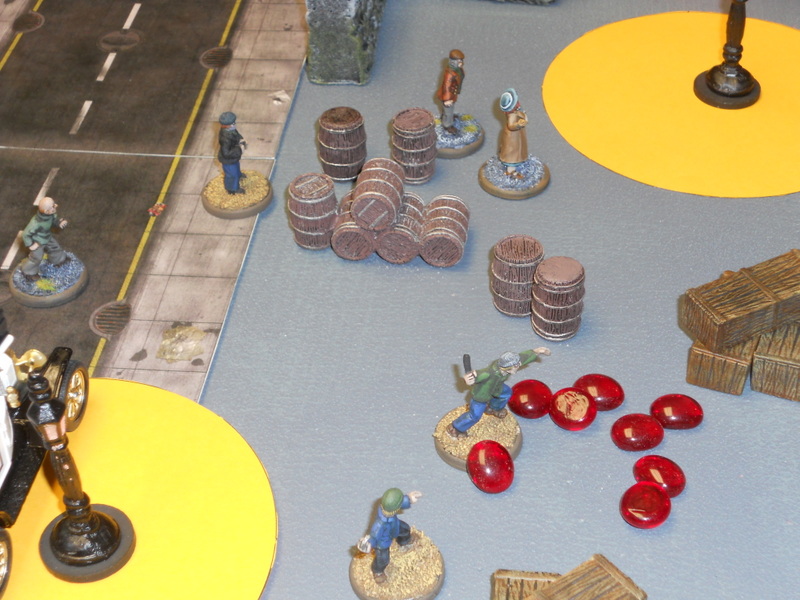
The scenario relies heavily on encounter markers. There are 12 in all, 6 for the heroes and 6 for the villains. Heroes can’t activate villain encounters and vice-versa. The interesting part is the type of encounter (hero or villain) is only revealed when the encounter marker falls within line-of-sight of one of the models on the board. The model still has to come in contact with it to activate it. Among other things, the pieces of evidence and the bomb locations are encounters which must be resolved, which means that each side is trying to get to their encounter markers as quickly as possible, while dodging the bullets and fists of the opposing team!

OLYMPUS DIGITAL CAMERA

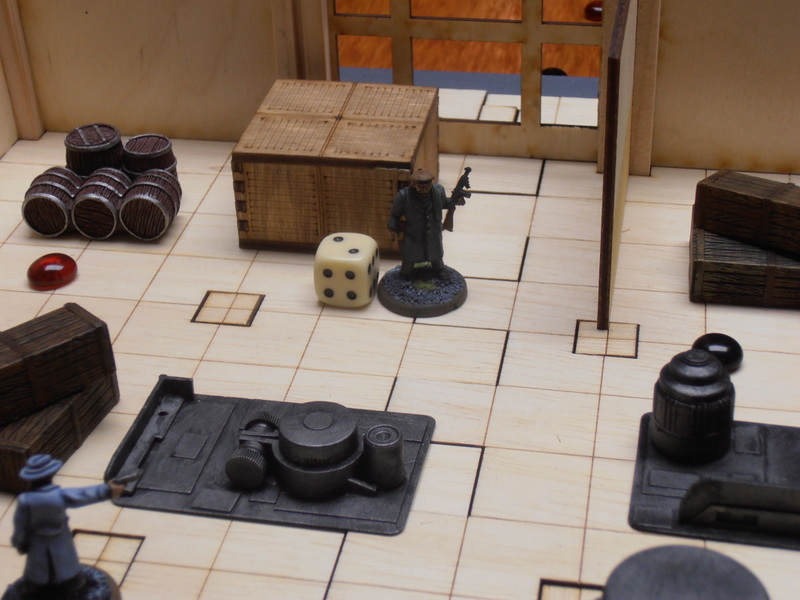
On the first turn, both sides rushed in, trying to get to their encounter markers as quickly as possible. The villains activated one of theirs: a Tong Assassin! Not content to trust the safety of his schemes to his henchmen, the Jade Hood hired a Tong Assassin to ensure that the heroes don’t leave the warehouse alive. The assassin enters play through on of the side entrances.

OLYMPUS DIGITAL CAMERA

Soon after, Chopper Murphy finds one of the ideal locations to plant a time bomb. He sets it for two turns and prepares to move out of the blast radius.

DSCN0502

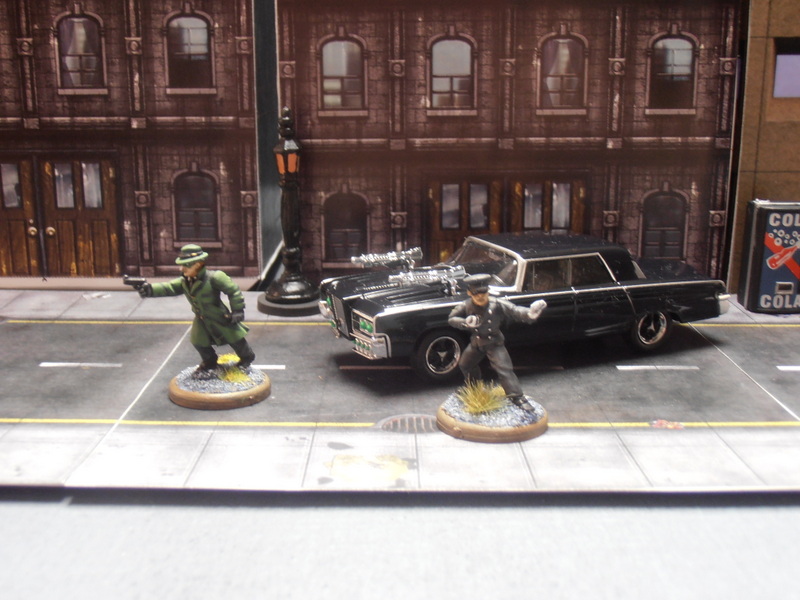
The Gargoyle knows he only has moments to act. He charges forward, guns blazing, and manages to wound Chopper Murphy. The crazed machine-gun maniac fires back, but the hasty expenditure of a Hero Point saves the Gargoyle from being riddled with bullets! Meanwhile, Mo runs at the other goons, but is intercepted by the Tong Assassin!

DSCN0503

The Gargoyle rushes to the ticking bomb, and, heedless of his own safety, attempts to disarm it! He succeeds! Chopper Murphy, slack-jawed at the Gargoyle’s boldness, opens fire again; this time wounding the Gargoyle. But the crimefighter isn’t down yet!

DSCN0504

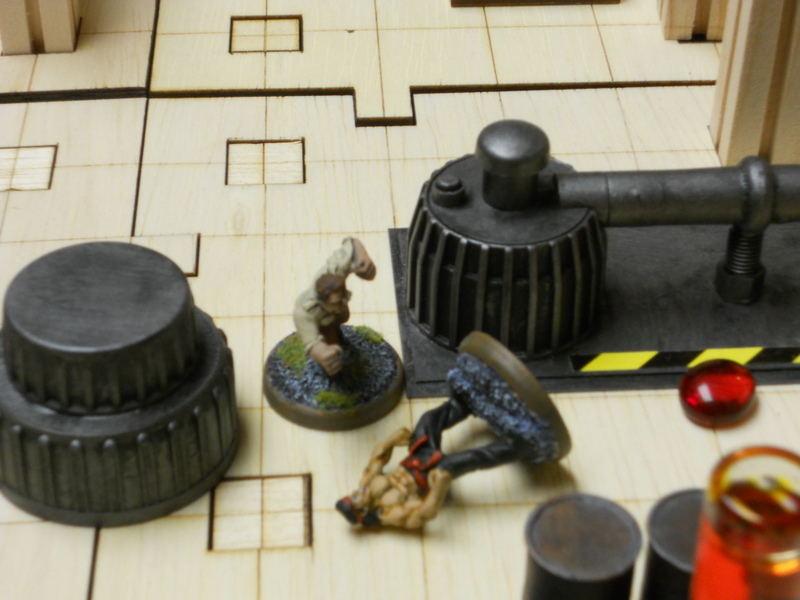
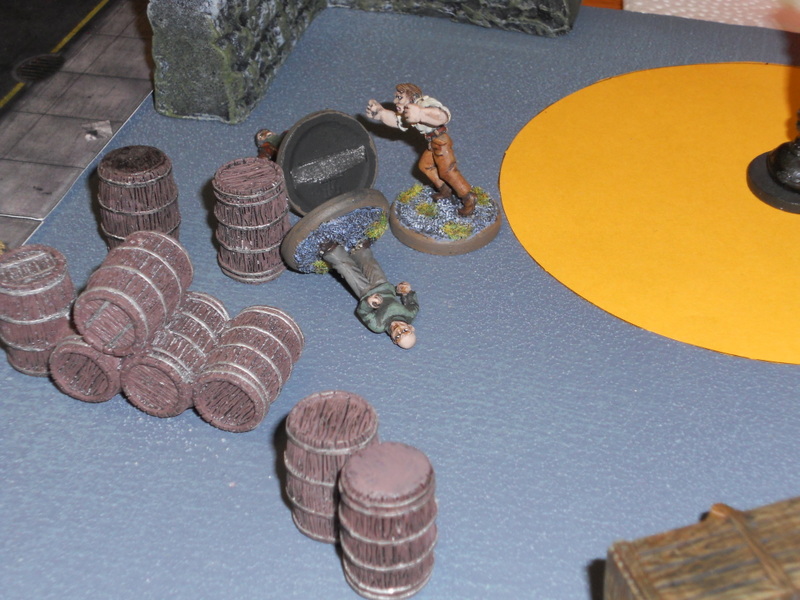
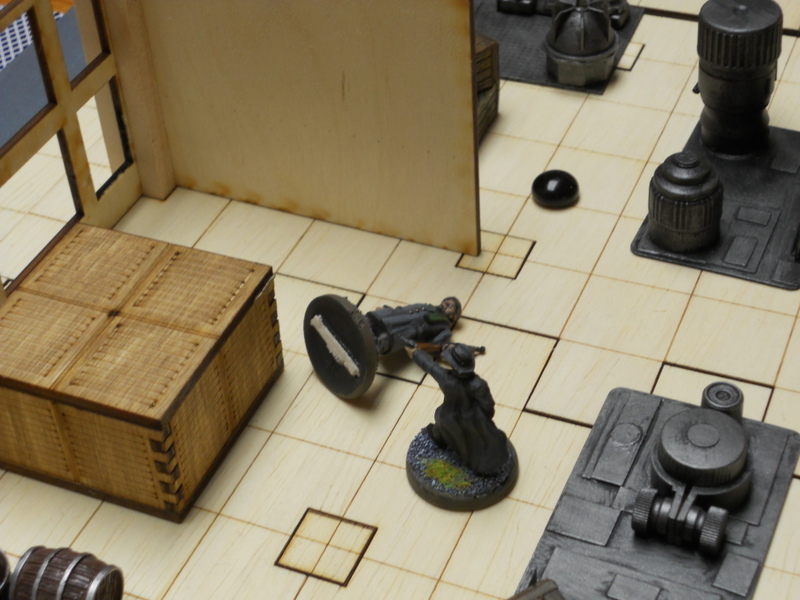
With a flurry of hands the Tong Assassin leaps at Mo, delivering the 1000 needle strike! Mo barely feels it, and delivers two punishing body blows to the assassin. The Tong assassin drops like a wet bag of dirt and doesn’t move!

DSCN0505

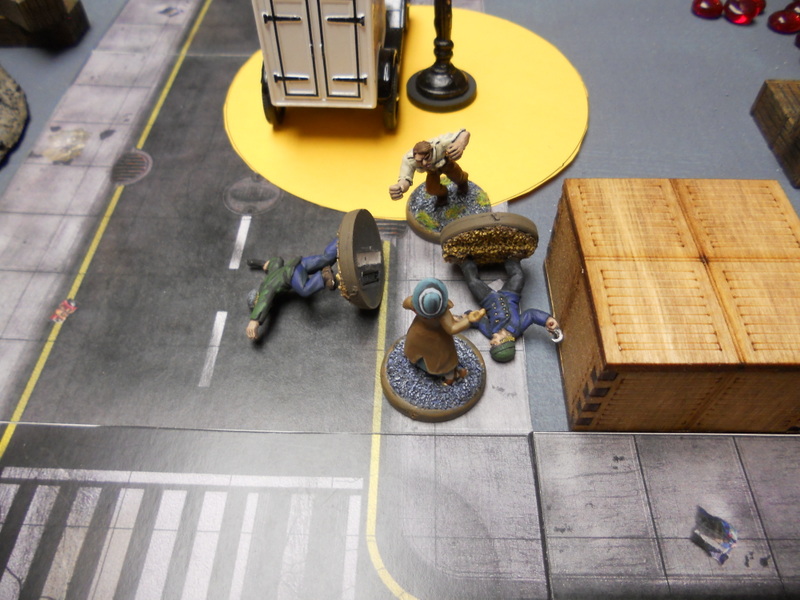
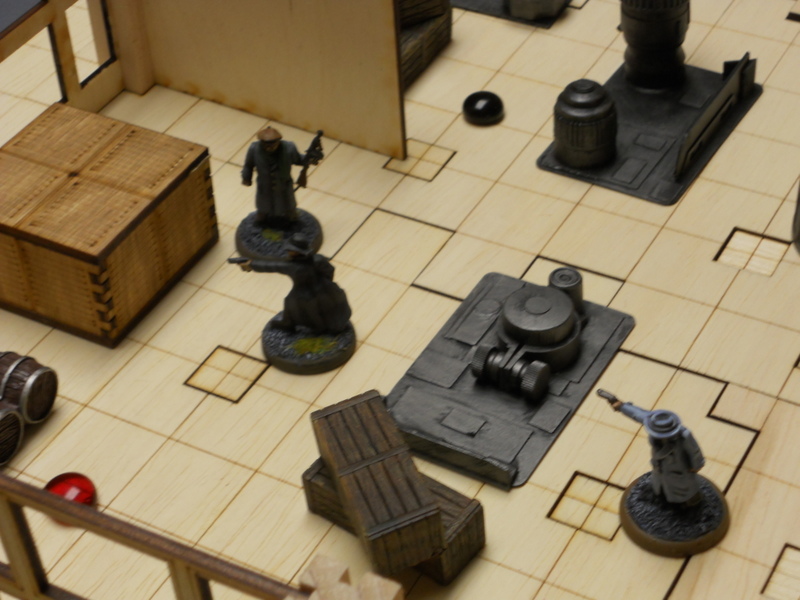
Pete the Dentist sneaks around a piece of machinery and plugs the Gargoyle in the back! The Gargoyle, still reeling from Chopper Murphy’s machine gun rain, goes down!

DSCN0506

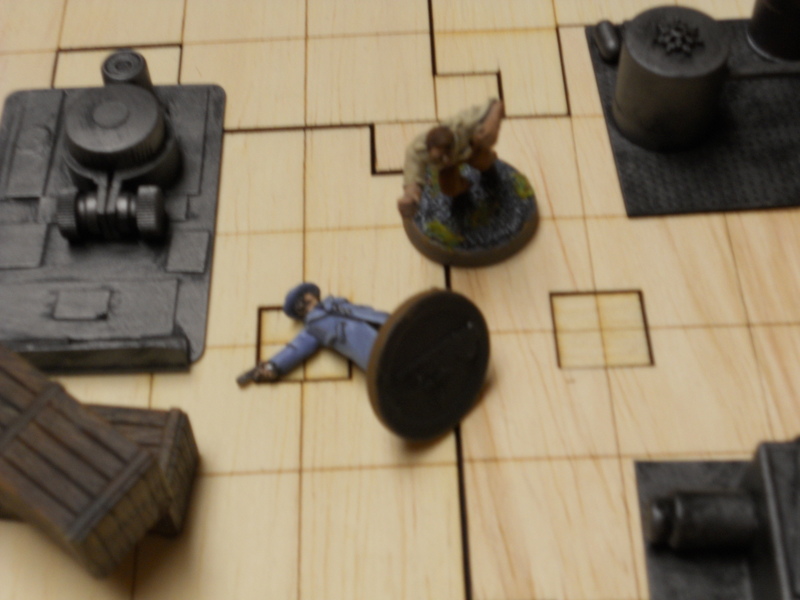
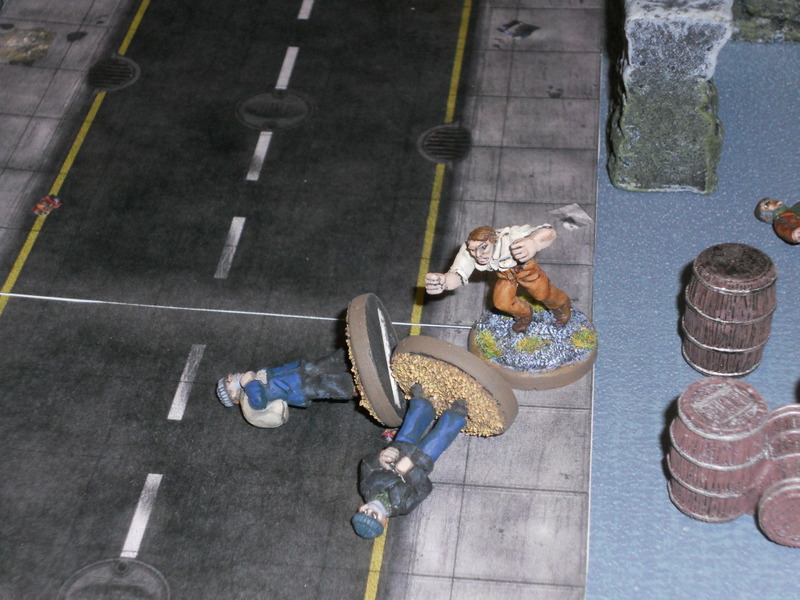
Mo takes this opportunity to charge Pete the Dentist, with predictable results. He levels Pete without breaking a sweat. I’m beginning to think no one has a chance against Mo, at lest not in hand-to-hand!

DSCN0507

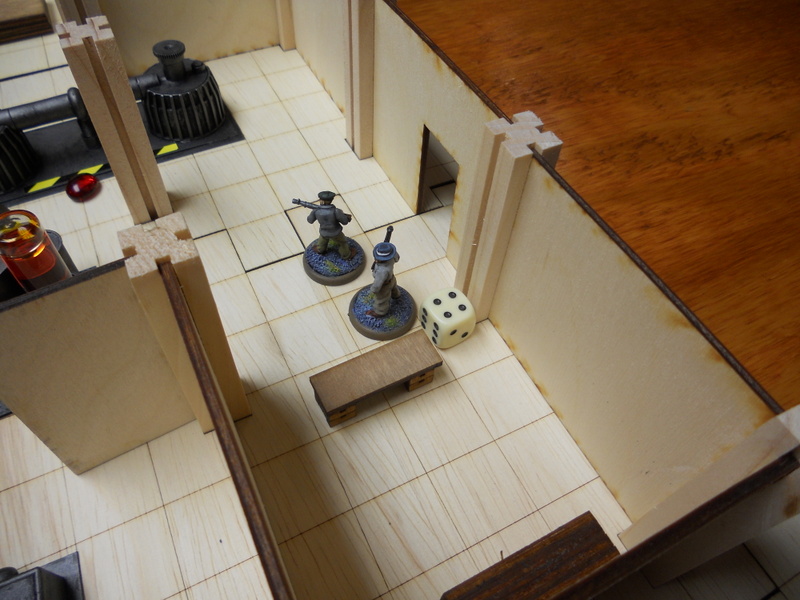
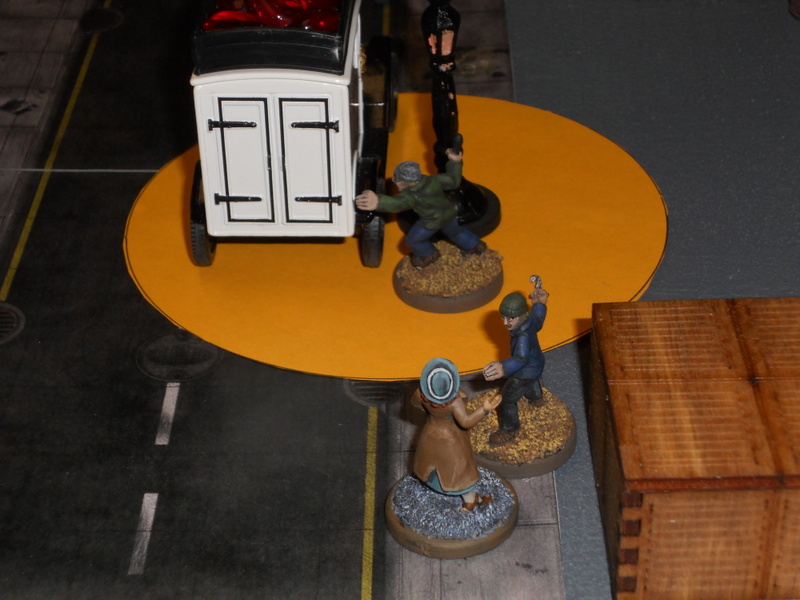
The other two thugs, Frankie the Fish and Limey Joe, activate another encounter marker and find the other prime location to plant a bomb. Frankie sets the timer for three turns.

DSCN0508

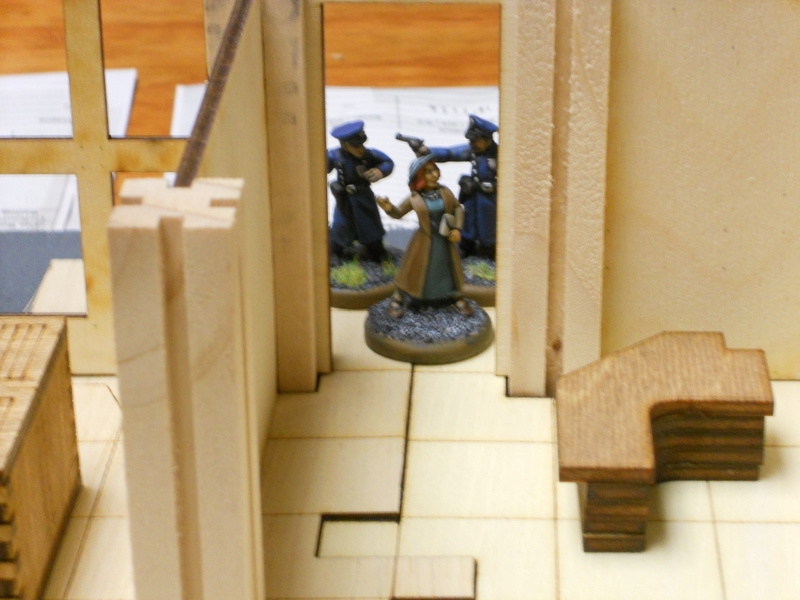
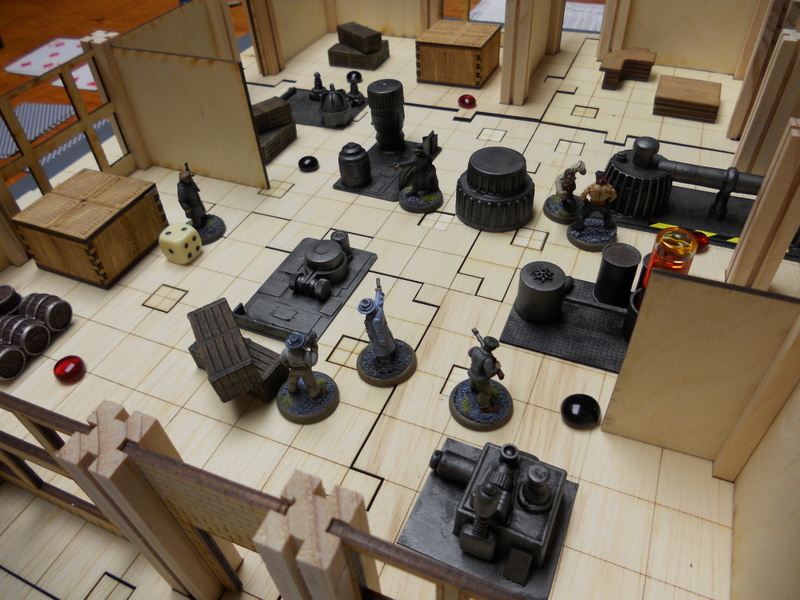
Moe triggers an encounter, still hoping to find a piece of evidence. Instead, Bridget Rourke arrives with two Rookie cops! It’s not looking good for the bad guys!

DSCN0511

It looks even worse on the next turn, when The Gargoyle makes his Will roll and revives. Taking aim from the ground, The Gargoyle puts a slug between Chopper Murphy’s eyes! Then he gets shakily to his feet, scanning the warehouse…

DSCN0512

Limey Joe runs across the warehouse floor, taking a shot at Bridget Rourke on the way out. He misses. Frankie the Fish decides he’d better get out of the warehouse before it blows up, and runs off the board. But The Gargoyle spends another Hero point and sprints across the room towards the time bomb. He defuses it with seconds to spare!

Well, this turned out to be a pretty decisive victory for the good guys. The villains could only win if the bombs went off, and neither one did. The bad guys failed to kill or capture any of the heroes, even with the help of the Tong assassin. The heroes got extra Victory Points for defusing the bombs, but they could only win by finding the evidence, which they didn’t do. But since Frankie and Limey Joe fled the warehouse, the heroes had all the time in the world to search it. We decided the heroes found the evidence they needed after all.

And the Jade Hood? Well, let’s just say he wasn’t pleased. Frankie and Limey Joe won’t be returning for any further scenarios in the campaign…


“Let’s Roll, Kato.”

OLYMPUS DIGITAL CAMERA

I was so excited when I saw Pulp Figures recent “Masked Avengers” set, that I had to rush out and buy them. Actually, I didn’t rush anywhere. I clicked and ordered them. The set comes with two more figures, but I was most interested in the “Masked Crime Fighter” shown above, along with his “Aide”. I picked up that 1/50 scale “Rolling Arsenal” in anticipation of their arrival. It’s a tad small, but not enough to matter to me, seeing how they all look SO DAMN COOL together!!! I can’t wait to use them all in a .45 Adventure game soon!

“And now, to protect the rights and lives of decent citizens, rides The Green Hornet!”

Death Soldiers of the Jade Hood: Part 1

Since I bought .45 Adventure 2nd Edition, I’ve been itching to run some Pulp games with the new rules. In accordance with my new play style, I thought a miniatures campaign over the course of several weeks would be a good way to introduce all my friends to .45 Adventure while not necessarily needing to have them all present at once. It’s easy to jump into an episodic pulp game at any point, as each scenario doesn’t require much of a backstory.

DSCN0467

With that in mind I decided to run Death Soldiers of the Jade Hood, the published campaign for .45 Adventure 1st Edition. It will take a bit of fiddling to get it to run smoothly in the new edition, but I don’t think it’s beyond my abilities. I will give a brief synopsis of each scenario (including special rules), the full After Action Report, and any major differences between 1st and 2nd Edition that I encounter along the way.

The basic plot of the campaign is as follows: The nefarious Jade Hood, criminal mastermind of the city of New Commerce, has hatched a diabolical scheme to turn ordinary, unsuspecting citizens into bloodthirsty maniacs. He hopes to use his mind-controlled army to take over the city once and for all. Standing in his way is Ace Reporter Bridget Rourke, her faithful friend and ex-prizefighter Mo Shrevnitz, and the enigmatic vigilante of New Commerce…the Gargoyle!

DSCN0451

Scenario 1: The Waterfront Mystery

The board is set up as shown above. It’s a warehouse district at night, which limits visibility to 12″. Four streetlamps shed light in a 3″ radius. In the middle of the board is a white truck. The bad guys are loading the truck with crates (represented by the tokens) of chemicals that the Jade Hood needs to make his Death Soldier formula. Bridget Rourke has to get behind the truck and snap a photo of the crates being loaded, then get off the board with her evidence. The bad guys need to stop her or at least prevent her from snapping a picture and get away with the crates. My buddy Matt decided to play the heroes, leaving me with the bad guys. He started with Bridget Rourke (placing her on the left table edge, above). Mo started off the board until his encounter card was drawn. I started with 2 Grade 1 Brunos (Flanagan and Baldy), and 4 Grade 1/2 Mooks. I put two of the Mooks on guard duty and armed them with pistols. The other two Mooks were armed with a knife and club, respectively, and they were loading the truck.

DSCN0452

A couple of turns into the game, the Mooks have successfully loaded the truck with a few crates. Bridget has managed to avoid being spotted thus far, but she can’t get anywhere near the truck without being seen. A deck of cards is used to simulate random events, such as Mo arriving, random guard movement, and an opportunity to snap a picture.  I was a little unclear as to whether or not we should shuffle drawn cards back into the deck, but I decided to reshuffle as there were ten cards and only two chances to take a picture. (What if we drew the picture cards early? Does that mean there’s no chance for the heroes to win?)

DSCN0453

A few turns later, Bridget is spotted. She sprints across the street, trying to avoid the bad guys. Flanagan, Baldy and one of the Mook guards are in hot pursuit. The Mook fires his pistol at her, but it jams. Flanagan gets close but can’t tackle her this turn. The other Mooks continue to load the truck.

DSCN0454

Mo arrives!

Suddenly, Mo arrives just in the nick of time! He sees his friend Bridget is in trouble and rushes in, meaty fists swinging!

DSCN0456

This…HURTS.

On his activation next turn, Mo charges into combat. Now, here’s how 2nd Edition really differs from 1st: combat runs much more smoothly. Most models roll one die and add their Shiv score, keeping the result. Mo, however, is an ex-prize fighter, and he knows how to land a few punches. He has One-Two Punch and two levels of Brawler, which means he rolls four dice and keeps two. Plus, he charged into combat, so he gets to roll an additional die, bring his total to five dice, keeping 2 results. Yeah, Mo is pretty tough.

Among other results, Mo rolls two 10’s. This makes it impossible for Flanagan not to get hit and increases the strength of Mo’s fists from 7 (which is already stronger than most folks) to 9 (which is as powerful as a demolition charge) for two hits to Flanagan’s torso. Since 9 is three times stronger than Flanagan’s defense rating of 3, Moe does three wounds to Flanagan’s torso. Twice.

Being Grade 1, Flanagan only has one wound. So, Flanagan pretty much craps out his bones and keels over.

DSCN0457

Ka-POW!

The next turn, Bridget runs away, still trying to get to the back of the truck. At this point, I pretty much gave up with the random event draw, as most of the results weren’t making sense. (The guards had been roused already and were pursuing Bridget, so it wouldn’t make too much sense that they would suddenly get the urge for a smoke and randomly move off.) On his activation, Baldy charged Mo and tried to rough him up, but Mo wasn’t having any of it. Predictably, he floored Baldy with little effort.

DSCN0458

WHAMMO!

A couple of turns later, the pistol-armed Mooks ganged up and fired on Mo, but failed to hit him. Mo closed the gap, and using his Sweep ability, knocked both of them into next week with one punch!

DSCN0459

Meanwhile, Bridget moved closer to the truck’s rear end. Since we were no longer using the random deck, I ruled that if she could get into contact with the back of the truck, she could attempt to take a picture. The Mooks loading the truck finally decided to drop their crates and get involved. They moved towards Bridget with murderous intent, seeking to silence the nosy broad once and for all!

Bridget popped the flash on her camera, taking a picture of the incriminating chemicals and blinding the Mooks in the process. Despite having their Shiv score reduced to 1, the knife-wielding Mook managed to land a vicious hit on the Ace Reporter, and would have gutted her like a mackerel! But Bridget Rourke didn’t live so long covering crime in New Commerce without being Lucky. Matt spent two Hero points and Bridget managed to miraculously avoid the blow altogether.  Now, however, she was locked in hand-to-hand combat with two armed Mooks, and while Mo was on his way, he wasn’t there yet…

Next round, Mo ran to help his friend Bridget. Bridget couldn’t leave combat without taking some free hits from her assailants, so she craftily raised her camera again and ignited the flash, once again blinding the Mooks…and Mo.

DSCN0462

Don’t Look Now…

Later, Bridget’s blurry picture was developed. It showed the last few seconds of consciousness for the two Mooks, and incidentally fulfilled a bonus victory condition: she got a picture of combat taking place!

DSCN0463

When their eyes cleared, Mo was locked in combat with the two Mooks. Another Sweep, and another two unconscious Mooks. Bridget and Mo were able to exit the board with proof of the Jade Hood’s chemical designs and the fight. A clear victory for the heroes! That’s a wrap, boys!

Rules Synopsis and Differences:

There were a couple of rules differences I noticed between 1st and 2nd Edition. In 1st, Night limits visibility to 6″, whereas in 2nd, it’s 12″. This vastly increased the Spot distance for the guards. In the published scenario, spotting was handled with another deck, giving a 50% chance to not spot, a 25% chance to attempt to spot with a penalty, and a 25% chance to attempt to spot with no penalty. It doesn’t detail the penalty or what happens when the enemy is spotted, so I just threw out this whole mechanic and ruled that once a model was spotted, every model on the board was aware of it.

Also, once a model is spotted, it can’t ever hide again unless it has a special ability allowing it to do so. Bridget didn’t have any such ability, so once she was seen she was effectively screwed until Mo arrived.

Speaking of Mo, he clearly outclassed everyone on the table in combat. In the last edition’s combat system, Mo was nowhere near as tough. The new system really makes a difference.

Lastly, there are no Grade 1/2 models in 2nd Edition. Basically, they made Grade 1 models much weaker and did away with Grade 1/2 models altogether. If I was playing 1st edition 45 Adventure, this would have been a bit more of a challenge for Mo and Bridget, as the bad guys would have been able to stand up to Mo a bit longer.  I played the next scenario the same way (coming soon) and it was even more one-sided. From now on, when converting from 1st to 2nd edition when I see Grade 1/2 models, I’ll make them Grade 1; and when I see Grade 1 models, I will make them Grade 2. That way it won’t be as much of a cakewalk for the heroes.

Stay tuned for the next thrilling episode, coming soon!


The Chase: A .45 Adventure AAR

This could easily be the bloodiest game I have ever played in all my years of wargaming. It was like a Sam Peckinpah film on my gaming table.

With all the Super System 3 I’ve been playing lately, my Pulp gaming has been neglected.  So I had a couple of friends over for some .45 Adventure. (I have since bought the 2nd Edition, but we used 1st ed. the other night.) We started off with the scenario included in the rulebook, “Shootout in the Park”.  It’s designed for two players, but I modified it a bit to include three different teams. Basically, with the heroes in pursuit, a mob boss and his goons flee across a park (the battlefield), dropping two halves of an incriminating ledger listing all the bribed city officials the mob boss has under his thumb. Both sides are trying to find the ledgers and leave the park with them.

The two teams are .45 Adventure’s resident vigilante The Gargoyle and his ally, Ace Reporter Bridgit O’Rourke; and Mob Boss “Little” Paulie Wolinsky and his two goons, “Full Count” Nocerino and Tommy “Gun” Miller. I added a third team: corrupt cops! These cops know that if the ledgers get out, their crooked activities will be revealed. So why not just grab the ledgers and eliminate the mob boss while they’re at it?

The scenario ended with “Little” Paulie recovering both halves of the ledger and fleeing the park, leaving all three cops dead, and Bridgit O’Rourke out of action, pummeled mercilessly into unconsciousness by “Full Count” Nocerino.

Which set us up for the second (and bloodiest) scenario of the night…The Chase!

The Scenario

.45 Adventure is designed to be played on a 2’x 2′ surface, which isn’t a whole lot of room where vehicles are concerned. So I set up a 4′ x 4′ board as you see here. “Little” Paulie is in his car, fleeing from the Gargoyle, who is in hot pursuit. He has to make it all the way around the board and exit off the top near the construction yard. But a lot can happen before then. There are encounter markers along the road as well as in the city. To make matters worse, the streets are lit, but the rest of the board is dark, limiting models’ visibility to 12″.

The big dump truck in the construction yard contains a load of junk. Any model can take an action to dump the load if they are in base contact with the truck. This will block the road. It’s not a good idea to do that until the last possible second, however, as you never know who might be in the lead and you don’t want to prevent your own team from making their escape with the ledgers!

The Teams


The heroes are The Gargoyle (center), ex-prize fighter Moe Shrevnitz (right), and eccentric, driven District Attorney Roland N Seguin (left), who is determined to rid New Commerce of crime! The Gargoyle is in his car, which is a bit better than your average buggy. The Gargoyle is Rank 3, while the other two are Rank 2. If Bridgit didn’t get creamed in the first scenario, she would have been here too.

The hoods( from left to right) are Jimmy Gumballs, “Full Count” Nocerino, “Little” Paulie Wolinsky, Rocco Fortunato (nods to Frank Sinatra), Tommy “Gun” Miller, and around the back of the car, Jack Sacco, the driver. Jack and “Little” Paulie are in the mob boss’s roadster, fleeing from the Gargoyle. The rest of the goons are all on guard duty in the construction yard. Paulie is a Grade 3 Mob Boss, Rocco a Grade 2 Enforcer, and the rest are Grade 1.

The cops are Sgt. Danny Burke (center), a Grade 3 Police Sergeant, and 4 Grade 1 cops: (L-R) Officer James Haggerty, Officer Enoch Conlon, Officer Rory Landry, and Officer Nick Dearcy. And a fine top o’ the mornin’ to ya!

Any surprise the cops or heroes might have enjoyed was pretty much lost on the first turn of the game, when Officer Conlon opened up on DA Seguin with his rifle, scoring a head wound that the DA miraculously survived. From there it went south pretty fast in the construction yard. Within a few turns it looked like this. That’s “Full Count” Nocerino, Moe Shrevnitz, Officer Dearcy, Officer Landry, Officer Conlon and Jimmy Gumballs, all dead. Moe and “Full Count” learned the hard way not to show up with your fists to a gun fight. The star of the show was Officer Landry, who caved in Jimmy Gumballs’s skull with the butt of his shotgun and then, on his next activation, walked up and put a full blast straight into “Full Count’s” chest.

Meanwhile, with Jack Sacco driving, “Little” Paulie was free to fire at the pursuing Gargoyle with abandon. Despite having a faster and more maneuverable car, The Gargoyle was unable to catch “Little” Paulie before he lost control of the roadster after being wounded several times. He swerved off the road, running over and killing Officer Haggerty in the process.

Eventually, The Gargoyle got his car back on the road and once again in pursuit. In the meantime, Sgt. Burke, after spending two turns climbing out of an open manhole he fell into (damn encounter markers!) shot and wounded Jack Sacco, who lost control of the car. It flipped over and landed on Sgt. Burke, who survived long enough to put a few more rounds into “Little” Paulie, wounding him in the arms. Neither Sacco nor “Little” Paulie could use their arms any more, they were so badly shot up. Which of course meant they couldn’t drive. Or shoot. They could just stand there and wait for Sgt. Burke to finish them off.

The Gargoyle had other plans. He swerved around the corner in his sweet ride, pausing long enough to shoot Sgt. Burke between the eyes before running down Rocco Fortunato, killing him. That’s 2 people the Gargoyle had murdered with his car. Over the course of the game, the Gargoyle had been shot so many times that he could barely use his arms and legs. Tommy “Gun” Miller ventilated The Gargoyle and his car a bit more, killing him.

Hedging his bets, DA Seguin managed to get close enough to the truck to dump the junk in the road just in case Tommy “Gun” managed to get to the mob boss’s car and get it running again. Then he hunted Miller down like a dog, killing him. But not before Miller cut him off at the knees with a spray of .45 bullets from his Thompson!

So the end of the game looked like this: All cops: dead. The Gargoyle and Moe: dead. Tommy “Gun” Miller, “Full Count” Nocerino, Rocco Fortunato, and Jimmy Gumballs: dead. DA Seguin: crippled and crawling towards the car wherein Jack Sacco and “Little” Paulie waited, unable to do anything but look sadly at where their arms used to be.

Just another night in New Commerce!


Gangsters and Thugz

Adversaries for my army of Pulp Cops, these gat-men are also from Bob Murch’s Pulp Figures line. Below is Bugs Malarchy’s Mob (PGJ-02), one well-heeled group of hoods. With three Thompsons (who really believes there’s a violin in that case?), these guys mean business!

My personal favorite miniature is “Chopper” McCoy all the way on the right. He looks like a psycho and reminds me of Eddie Dane in Miller’s Crossing.

Up next is another crew of gangsters from Pulp Figures, These Guns for Hire (PGJ-04) I posed them with a car that purists will know isn’t from the 20’s, but it looks good enough.

Fast forwarding seven decades or so, I picked these guys up from Ed the Two Hour Wargames Guy a few months back. They’re from Bobby Jackson’s controversial Thugz line. I love them, but I’m a little bummed I’m missing two of the coolest sculpts. Nonetheless, here are my modern gangstas, probably for use as a gang  in a zombie game.

My favorite is the guy all the way to the left. I’m pretty happy with the way he came out. They’re all packing heat (even the girl on the right, it’s behind her back), except for the big woman. But take a look at her. Do you really think she needs any help?

Here they are posed with some cops from the (I believe) now-defunct Mississinewa Miniatures line.

Uh-Oh, Five-O!!

Pulp Cops

I got the pulp bug again, although to be sure I never really lost it. I painted these cops a while back for use with Rattrap’s .45 Adventure, which is my pulp rule set of choice. In truth, it’s the only rule set I’ve ever used to play pulp. I like it, though, so I haven’t needed to try anything else yet.


All these cops are from Bob Murch’s Pulp Figures line. Some of them are customizable, like the cop on the right in the picture above. You can give him either a billy club or a pistol. I opted for the club.

When the cops need a little something extra, they break out the big guns, like this machine gun here. The shotgun cop on the right is another customizable piece.

The sergeant with the megaphone is one of my favorite models. These cops were easy to paint all at once, considering they’re all wearing the same colors. Now I have more than enough police to take on my gangsters (coming soon).