Monthly Archives: June 2014

Death Soldiers of the Jade Hood: Part 1

Since I bought .45 Adventure 2nd Edition, I’ve been itching to run some Pulp games with the new rules. In accordance with my new play style, I thought a miniatures campaign over the course of several weeks would be a good way to introduce all my friends to .45 Adventure while not necessarily needing to have them all present at once. It’s easy to jump into an episodic pulp game at any point, as each scenario doesn’t require much of a backstory.

DSCN0467

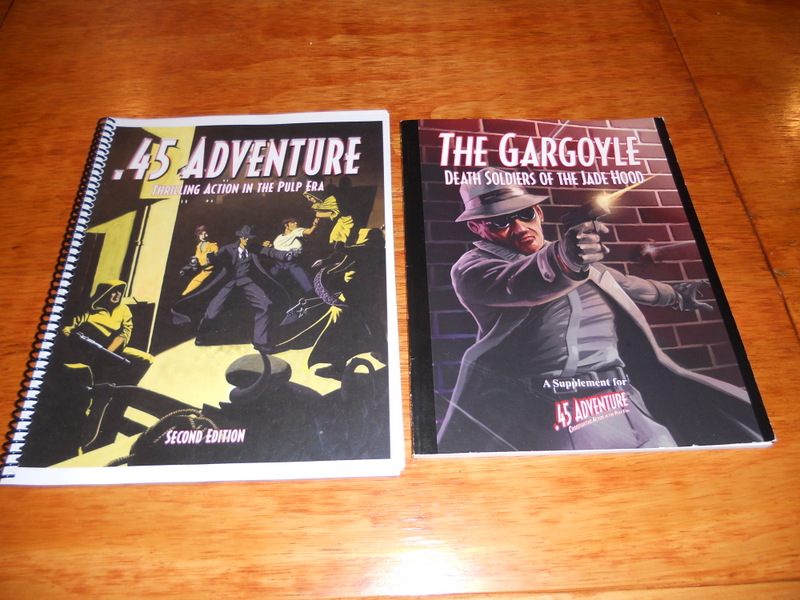
With that in mind I decided to run Death Soldiers of the Jade Hood, the published campaign for .45 Adventure 1st Edition. It will take a bit of fiddling to get it to run smoothly in the new edition, but I don’t think it’s beyond my abilities. I will give a brief synopsis of each scenario (including special rules), the full After Action Report, and any major differences between 1st and 2nd Edition that I encounter along the way.

The basic plot of the campaign is as follows: The nefarious Jade Hood, criminal mastermind of the city of New Commerce, has hatched a diabolical scheme to turn ordinary, unsuspecting citizens into bloodthirsty maniacs. He hopes to use his mind-controlled army to take over the city once and for all. Standing in his way is Ace Reporter Bridget Rourke, her faithful friend and ex-prizefighter Mo Shrevnitz, and the enigmatic vigilante of New Commerce…the Gargoyle!

DSCN0451

Scenario 1: The Waterfront Mystery

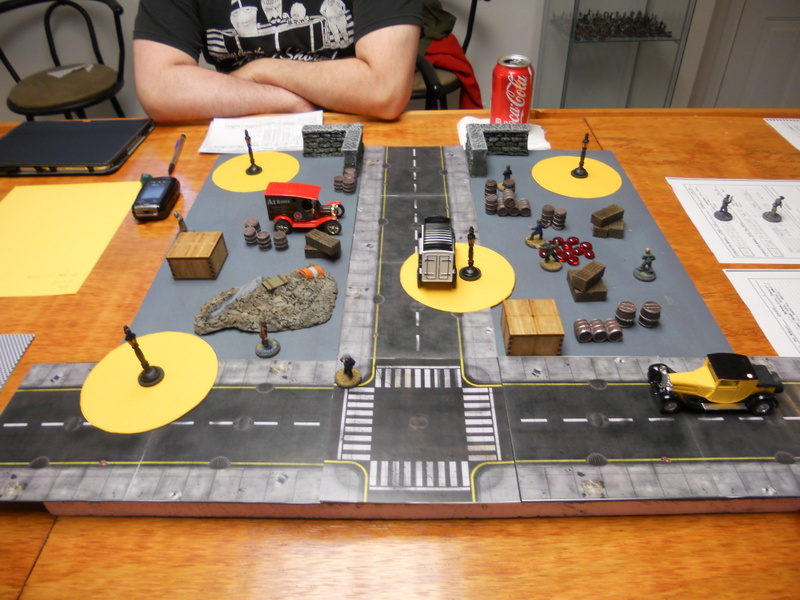
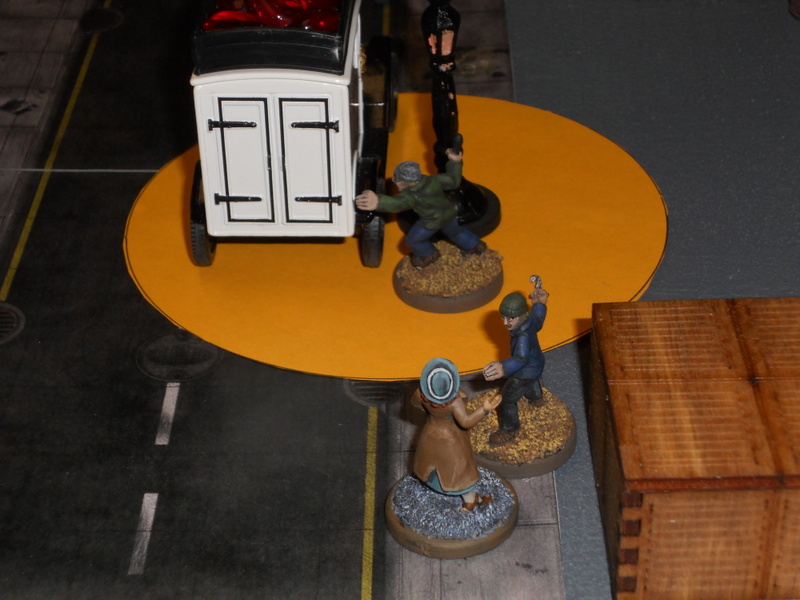
The board is set up as shown above. It’s a warehouse district at night, which limits visibility to 12″. Four streetlamps shed light in a 3″ radius. In the middle of the board is a white truck. The bad guys are loading the truck with crates (represented by the tokens) of chemicals that the Jade Hood needs to make his Death Soldier formula. Bridget Rourke has to get behind the truck and snap a photo of the crates being loaded, then get off the board with her evidence. The bad guys need to stop her or at least prevent her from snapping a picture and get away with the crates. My buddy Matt decided to play the heroes, leaving me with the bad guys. He started with Bridget Rourke (placing her on the left table edge, above). Mo started off the board until his encounter card was drawn. I started with 2 Grade 1 Brunos (Flanagan and Baldy), and 4 Grade 1/2 Mooks. I put two of the Mooks on guard duty and armed them with pistols. The other two Mooks were armed with a knife and club, respectively, and they were loading the truck.

DSCN0452

A couple of turns into the game, the Mooks have successfully loaded the truck with a few crates. Bridget has managed to avoid being spotted thus far, but she can’t get anywhere near the truck without being seen. A deck of cards is used to simulate random events, such as Mo arriving, random guard movement, and an opportunity to snap a picture.  I was a little unclear as to whether or not we should shuffle drawn cards back into the deck, but I decided to reshuffle as there were ten cards and only two chances to take a picture. (What if we drew the picture cards early? Does that mean there’s no chance for the heroes to win?)

DSCN0453

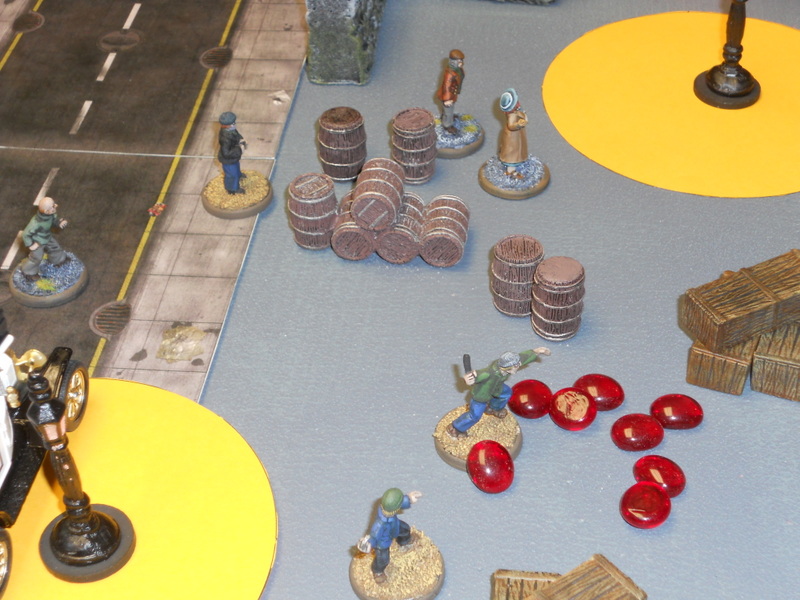
A few turns later, Bridget is spotted. She sprints across the street, trying to avoid the bad guys. Flanagan, Baldy and one of the Mook guards are in hot pursuit. The Mook fires his pistol at her, but it jams. Flanagan gets close but can’t tackle her this turn. The other Mooks continue to load the truck.
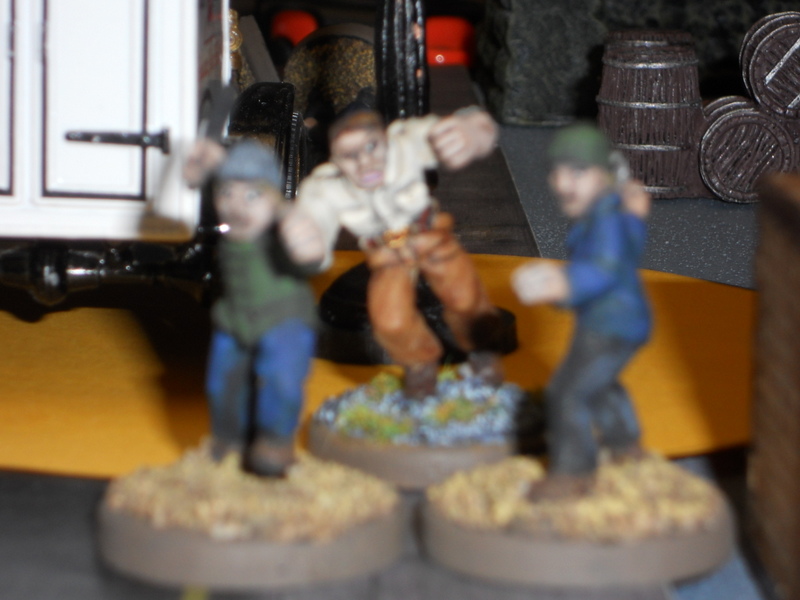
DSCN0454

Mo arrives!

Suddenly, Mo arrives just in the nick of time! He sees his friend Bridget is in trouble and rushes in, meaty fists swinging!
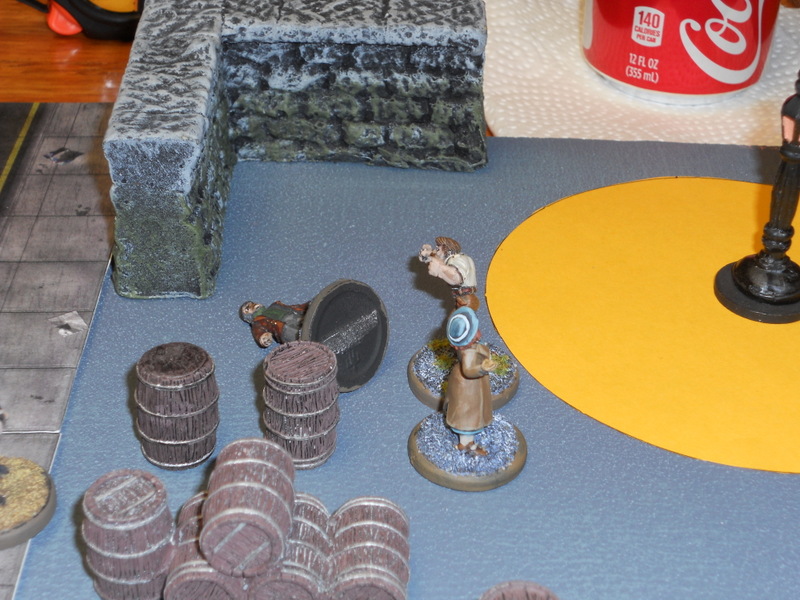
DSCN0456

This…HURTS.

On his activation next turn, Mo charges into combat. Now, here’s how 2nd Edition really differs from 1st: combat runs much more smoothly. Most models roll one die and add their Shiv score, keeping the result. Mo, however, is an ex-prize fighter, and he knows how to land a few punches. He has One-Two Punch and two levels of Brawler, which means he rolls four dice and keeps two. Plus, he charged into combat, so he gets to roll an additional die, bring his total to five dice, keeping 2 results. Yeah, Mo is pretty tough.

Among other results, Mo rolls two 10’s. This makes it impossible for Flanagan not to get hit and increases the strength of Mo’s fists from 7 (which is already stronger than most folks) to 9 (which is as powerful as a demolition charge) for two hits to Flanagan’s torso. Since 9 is three times stronger than Flanagan’s defense rating of 3, Moe does three wounds to Flanagan’s torso. Twice.

Being Grade 1, Flanagan only has one wound. So, Flanagan pretty much craps out his bones and keels over.
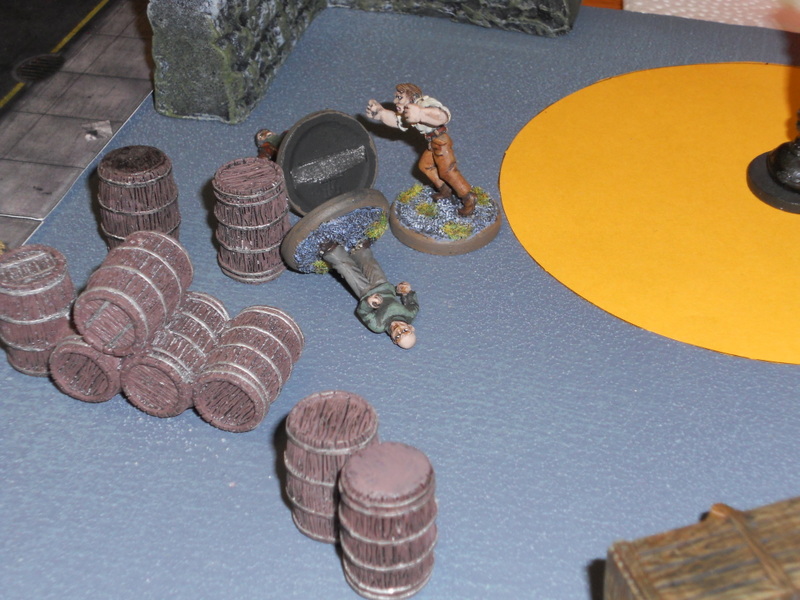
DSCN0457

Ka-POW!

The next turn, Bridget runs away, still trying to get to the back of the truck. At this point, I pretty much gave up with the random event draw, as most of the results weren’t making sense. (The guards had been roused already and were pursuing Bridget, so it wouldn’t make too much sense that they would suddenly get the urge for a smoke and randomly move off.) On his activation, Baldy charged Mo and tried to rough him up, but Mo wasn’t having any of it. Predictably, he floored Baldy with little effort.
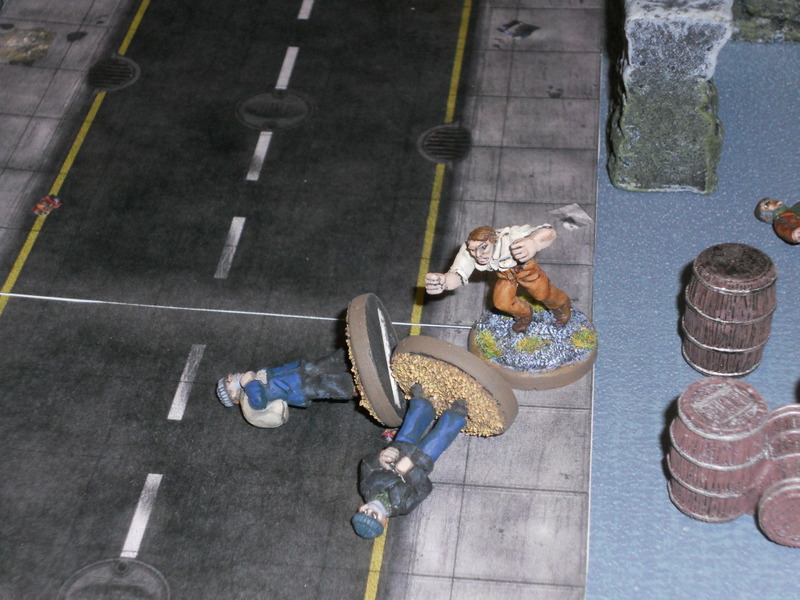
DSCN0458

WHAMMO!

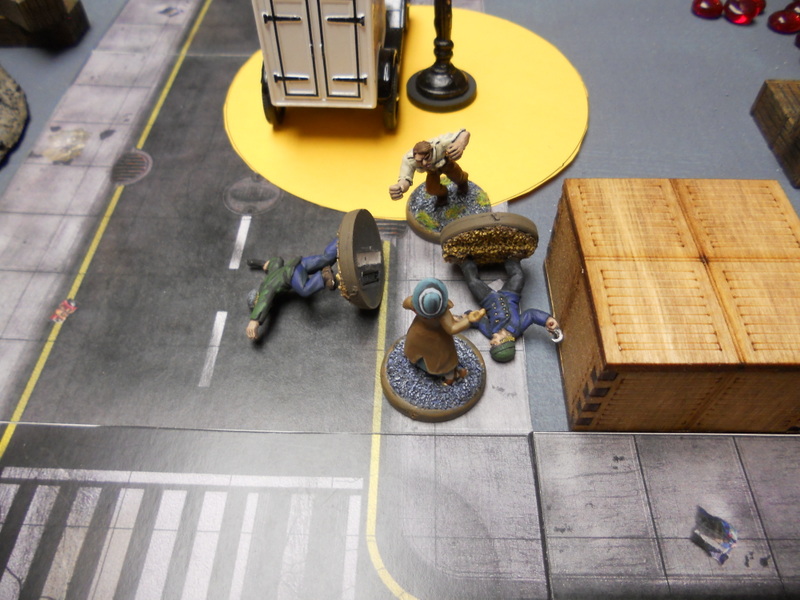
A couple of turns later, the pistol-armed Mooks ganged up and fired on Mo, but failed to hit him. Mo closed the gap, and using his Sweep ability, knocked both of them into next week with one punch!

DSCN0459

Meanwhile, Bridget moved closer to the truck’s rear end. Since we were no longer using the random deck, I ruled that if she could get into contact with the back of the truck, she could attempt to take a picture. The Mooks loading the truck finally decided to drop their crates and get involved. They moved towards Bridget with murderous intent, seeking to silence the nosy broad once and for all!

Bridget popped the flash on her camera, taking a picture of the incriminating chemicals and blinding the Mooks in the process. Despite having their Shiv score reduced to 1, the knife-wielding Mook managed to land a vicious hit on the Ace Reporter, and would have gutted her like a mackerel! But Bridget Rourke didn’t live so long covering crime in New Commerce without being Lucky. Matt spent two Hero points and Bridget managed to miraculously avoid the blow altogether.  Now, however, she was locked in hand-to-hand combat with two armed Mooks, and while Mo was on his way, he wasn’t there yet…

Next round, Mo ran to help his friend Bridget. Bridget couldn’t leave combat without taking some free hits from her assailants, so she craftily raised her camera again and ignited the flash, once again blinding the Mooks…and Mo.

DSCN0462

Don’t Look Now…

Later, Bridget’s blurry picture was developed. It showed the last few seconds of consciousness for the two Mooks, and incidentally fulfilled a bonus victory condition: she got a picture of combat taking place!

DSCN0463

When their eyes cleared, Mo was locked in combat with the two Mooks. Another Sweep, and another two unconscious Mooks. Bridget and Mo were able to exit the board with proof of the Jade Hood’s chemical designs and the fight. A clear victory for the heroes! That’s a wrap, boys!

Rules Synopsis and Differences:

There were a couple of rules differences I noticed between 1st and 2nd Edition. In 1st, Night limits visibility to 6″, whereas in 2nd, it’s 12″. This vastly increased the Spot distance for the guards. In the published scenario, spotting was handled with another deck, giving a 50% chance to not spot, a 25% chance to attempt to spot with a penalty, and a 25% chance to attempt to spot with no penalty. It doesn’t detail the penalty or what happens when the enemy is spotted, so I just threw out this whole mechanic and ruled that once a model was spotted, every model on the board was aware of it.

Also, once a model is spotted, it can’t ever hide again unless it has a special ability allowing it to do so. Bridget didn’t have any such ability, so once she was seen she was effectively screwed until Mo arrived.

Speaking of Mo, he clearly outclassed everyone on the table in combat. In the last edition’s combat system, Mo was nowhere near as tough. The new system really makes a difference.

Lastly, there are no Grade 1/2 models in 2nd Edition. Basically, they made Grade 1 models much weaker and did away with Grade 1/2 models altogether. If I was playing 1st edition 45 Adventure, this would have been a bit more of a challenge for Mo and Bridget, as the bad guys would have been able to stand up to Mo a bit longer.  I played the next scenario the same way (coming soon) and it was even more one-sided. From now on, when converting from 1st to 2nd edition when I see Grade 1/2 models, I’ll make them Grade 1; and when I see Grade 1 models, I will make them Grade 2. That way it won’t be as much of a cakewalk for the heroes.

Stay tuned for the next thrilling episode, coming soon!


Bringin’ the Thunder

Two posts in one day! I did a little more work on my Dwarf Army recently and I thought I’d share the latest additions to my bearded host with you. I decided to paint up the artillery and some handgunners, so here they are.

DSCN0426

First up, the artillery: two Dwarf cannons with crew. The one on the left is the old-school metal cannon, the one on the right is the plastic (much smaller) cannon from Battle for Skull Pass.

DSCN0427

Next is a unit of Dwarf Thunderers from Battle for Skull Pass, along with an OOP Dwarf Lord holding a pistol. Ten Thunderers do not a unit make, IMHO, but there are enough for a skirmish or two.

DSCN0428

This is my organ gun (painted previously). Together with the cannons, it should make life difficult for anyone in front of them.

DSCN0425

Here are most of the shooty units in my Dwarf Army…coming along slowly but surely. Apologies for the blurriness. Up next: Miners!!!!


Making Mescalero: Part 1

I had the week off last week, so I decided to devote some time to terrain-making. I was inspired by the awesome series of Youtube videos by The Terrain Tutor, which I had been watching at my desk the week prior. Hey, I can productively waste time at work like nobody else. In particular, I was inspired by this video, which is a comprehensive guide to using foamboard. A lot of the tips I already knew, but there were a lot of things I didn’t know and I’m glad I watched it.

I recently decided I wanted to get into Old West skirmish gaming, and to that end I have purchased a bunch of cowboys from Blue Moon Manufacturing. Not sure what rules I’m going to use yet, but I’m leaning towards Blackwater Gulch, as it’s a free download and seems pretty easy to play. Another possibility is .45 Adventure, just because I love it so much. In their Thrilling Tales Quarterly magazine, volume 2, there was an article by a guy named “Grimm” on how to make quick adobe buildings. So, between Grimm and the Terrain Tutor, I figured I was well-prepared to start on a Mexican village, which I have decided to call Mescalero. (And yes, I know it’s an area in New Mexico and the name of an Apache tribe. So what?)

I figured I would share with you the process I used. Please note that between the two sources I mentioned above, there’s very little I did that was original or new. I’m not claiming to be an innovator when it comes to building terrain. But  thought the time/process and end results might be of interest to all four of you who read this blog.

DSCN0414

Here’s what I started with: in addition to black foamboard, I used a couple of steel rulers with cork backing, a few different types of razor knives, some Elmer’s glue and a heat gun.  I traced some basic building templates on 5″x7″ index cards and cut them out.

DSCN0415

I used the templates to trace patterns on the foamboard, then cut them out using the knives and rulers. The Terrain Tutor has some great tips on how to cut foamboard cleanly and evenly, especially in hard to reach places like doors and windows. I wasn’t too worried about getting precise cuts since I was making adobe walls.

DSCN0416

Once this was done, I used a heat gun to heat up the corners so I could easily remove the paper backing of the foamboard, creating areas where the walls have cracked. Prior to this, I did not own a heat gun. I picked this one up at Home Depot for 20 bucks.

DSCN0417

Once the paper is peeled back, it’s easy to sculpt a brick pattern onto the foam itself. I used this old butter knife.

DSCN0419

Quick tip: Heat guns are not hair dryers. They get hot quickly and will melt the foam if you keep them on too long. Too long is more than a couple of seconds. Then you get something like this, above. Notice the bottom left corner, it melted away from the paper. Oh, they can also burn you, too, if you’re not careful, so watch where you put the tip when you’re finished.

DSCN0418

Once everything is cut out and sculpted, I assembled the buildings using the Elmer’s glue. I secured them for a good bond using pins inserted into the joins, as well as this painter’s tape. Painter’s tape is great because the adhesive is pretty weak. It will hold the joins together, but it’s easy to peel off once you’re done.

Quick tip: although painter’s tape has a weak adhesive, that adhesive will get a lot stronger if you let it sit for a while, as anyone who has ever used it to paint a room will know. In other words, It’s fine to let it sit overnight, but you should remove it the next day. Letting it sit for a few days or a week will make it very difficult to remove in one piece and may damage your foamboard. (Of course, if you’re making adobe buildings like me, that might not be a big deal. See below.)

DSCN0420

I deviated from Grimm on the next step. He recommends cutting your base out and wrapping it in textured wallpaper to create a floor. Then he mounts the building to the base. I didn’t have any textured wallpaper, but I did have some extra Mayhem tiles from World Works Games that I hadn’t used. Considering it was going to be the floor of a building, I thought I would just use those. You can see I made several buildings before proceeding to this step.

DSCN0421

I traced the inside of the buildings onto the WWG tiles to get a template for the floors, then cut them out and glued them on with paper glue (somewhat stronger than Elmer’s) for a tight bond. You can see the results above. I also traced the inside of the building onto foamboard so I could make a ceiling.

Quick tip: Make sure you trace the inside of the building on the correct side. For example, if you’re making a ceiling, trace the inside top of the building, not the bottom. Don’t assume the floor is exactly the same dimensions as your ceiling. I know it should be, but it’s not, as unless you have a perfectly vertically-level join (which you won’t).

DSCN0422

When that’s done, it’s time to give the adobe building it’s distinctive look. Here, too I deviated from Grimm’s instructions slightly. I used this awl I had laying around (I have no idea where I got it) to poke some holes in the walls a few centimeters below the top, then inserted some balsa wood as ceiling supports. I used my hobby saw to cut the balsa wood to about a 1″ length. If you don’t have balsa wood and don’t want to spend the whole 60 cents it costs to pick up a rod of this size, then you can cut the heads off some wooden matchsticks and use those. In fact, that was Grimm’s method, but I found the matchsticks I had on hand were too thin.

DSCN0423

After that, attach your buildings to whatever you’re going to use as a base. I used cork tiles, as it’s easy to cut and shape. This next part gets messy, so be sure to wear latex or vinyl gloves. Using your fingers, spread a coating of wood filler or spackle over the building. Don’t worry about how messy it is, as adobe structures look rough. Make sure you avoid the areas you cut out and sculpted as you want those to show through later. I had both spackle and wood filler on hand, and I used both just to see the difference. Although the end results were much the same, I found that wood filler was easier to spread and work with, so I pretty much abandoned the spackle after the first building. But YMMV.

I decided not to use wood filler on the interior of the buildings, at least not these small ones. Instead I covered a few centimeters of the top interior, as this is the part that would be visible once the ceiling is in place. Remember when I said it wouldn’t be a big deal if you damaged the foamboard by waiting too long to remove the tape? It’s not, considering you’re covering the walls with wood filler and that will cover the tape, too. You can also leave the pins in, if you want.

DSCN0430

Let it dry overnight. Then you’re ready to paint it. I used craft paint, and started by painting the walls a light brown color.

DSCN0434

Once the brown dried, I drybrushed it with successively lighter shades of tan, ivory and eventually, very little white. I painted the “exposed” brick areas a dark brown color and added a wash of black to make the bricks stand out. Oh, and I also added a stovepipe to the roof with a bit of old metal tubing I had laying around forever, and inserted balsa wood doors. I scored the doors with a hobby knife to make individual planks, and painted them brown. You can see them in later pictures.

DSCN0432

Once the walls were painted, I used a mixture of sand, ballast and wood flue to flock the bases. Then I painted the base brown, and built up the highlights with a lighter brown and ivory paint.

Quick tip: Don’t throw away your foamboard scraps. The piece above was made with some irregular leftovers. Put together, they make a good ruined adobe wall. I’ll be making more of these later.

DSCN0433

I figured with the bases done, I could get creative by adding some things to them.  I decided on some cacti. I bought this box of Pegasus Hobbies cacti for this purpose.

DSCN0438

There’s enough bits in this box for over 60 little cacti (which is more than I’ll ever use). Painted up, they really look nice and add a bit of Old West flavor to the scenery. The box retails for $8.50, so not a bad deal.

DSCN0445

I decided to make a well as a cool little flavor piece, or maybe even a game objective. I bought a couple of sheets of modelling plastic in a Spanish tile pattern at a hobby shop for about $6, and cut a bit to cover the well. Then I painted it with terracotta craft paint.

DSCN0470

Here’s a picture of the finished well. The well itself is from the now defunct JR miniatures (which sucks…they made some great stuff!). The bucket was an accessory from an army toy.

DSCN0471

Here’s the first batch of buildings in Mescalero. It didn’t take me very long to do…a few days between the cutting, gluing, filler application and painting. A fair amount of time was spent waiting for things to dry. As you can see, I added the balsa wood doors and painted them brown. Overall I’m pleased with the results.

What’s next? Well, I’m working on a few other buildings…a stables and a small church, complete with a bell tower and graveyard. I’d like the church to be the focal point of Mescalero. I’d also like to make some two story structures and maybe a couple more small buildings. I’m also toying with the idea of an outdoor mercado, and of course, more ruins. I’ll keep you all updated with more Mescalero as it takes shape.