
PROLOGUE
Later, at the Baxter Building, the Avengers confer with the Fantastic Four in front of the time machine built by the Latverian tyrant, Victor Von Doom!
“Time is pretty resilient, Avengers,” says Mr. Fantastic. “It has a way of sorting things out on its own. I wouldn’t worry too much about it.”
“Really?” asks Wasp. “I’d always assumed if you go back in time and change something, it screws up the present and eventually, the future.”
“A solid theory,” says Mr. Fantastic. “But only one of many, I’m afraid. There are, at present, four leading theories in the area of temporal manipulation…take, for example, the theory of—”
“They don’t have all day, Reed,” says Invisible Woman. “Kang is still out there, somewhere in time, plotting his next scheme.”
“I don’t mean to contradict you, Sue, but this time machine means the Avengers technically DO have all day,” says Mr. Fantastic. “As many days as they need, in fact.” Invisible Woman gives her husband an icy stare. Mr. Fantastic sighs. “But, I suppose you’re right. We should get things rolling, dear.”
“You believe you can send us directly to Kang?” asks Captain America.
“Yes, of course,” says Mr. Fantastic. “Just hop onto the time machine’s transport platform.”
“But what if you’re wrong? asks Vision.
“Look, buddy,” says Mr. Fantastic, “do I come to your lab and tell you how to do your job?”
“My…job?” Vision seems taken aback. “Uh…no. No, you don’t. But I was merely—”
Whatever else he was going to say is cut short by Thing’s guffaw.“Reed’s just busting your chops, pal.”
Mr. Fantastic smiles. “Don’t worry, Vision. If I’m wrong, as you fear, I will know almost immediately and we will come to get you, wherever or whenever you may be. However, I think it far more likely that Kang is expecting you. He must know by now that his ambush failed, and he’s clever enough to know you’ll be coming for him as a result.”
“Great,” says Captain Marvel. “So much for the element of surprise.” She joins Captain America, Wasp and Vision on the platform, while Starfox hobbles to his feet, moving slowly.
“I wish we could go with you,” says the Human Torch, “but Reed says no, we shouldn’t mess with the time streams any more than necessary. It’s too bad.”
“Mmm. That is too bad,” says Captain Marvel, smiling flirtatiously.
“Let’s just go get this over with,” says Starfox, walking stiffly onto the platform. “I owe Kang some payback.”
“Just remember what I said, Starfox,” says the Human Torch. “When you get back to your own time, you want to apply some Icy-Hot directly to the…um..area.”
“Icy-Hot?” asks Starfox. “Isn’t that some kind of ointment?” The machine begins to hum.
“Yup,” says Thing, hiding a smile. “Best thing for ya. And don’t skimp on it. Just layer it on, good and plenty. You’ll thank us for it later.” The Human Torch coughs into his fist rather than laughing out loud.
A bright flash of light, and the Avengers are hurtled forward in time. They materialize in the other-where laboratory of Kang, the Conqueror!
Scenario
Kang is cornered in his lair, but he has had time to prepare for the Avengers’ arrival. His goal is to either defeat the Avengers once and for all or else escape to plague them another day. To this end, he has enlisted the aid of the mindless Dragon Man construct and an old Avengers foe, the Grey Gargoyle, as well as a group of elite henchmen bodyguards and sentry robots.
The heroes must defeat Kang; the other villains are just there to make it more difficult. The Avengers lose if they are defeated (Kang escapes).

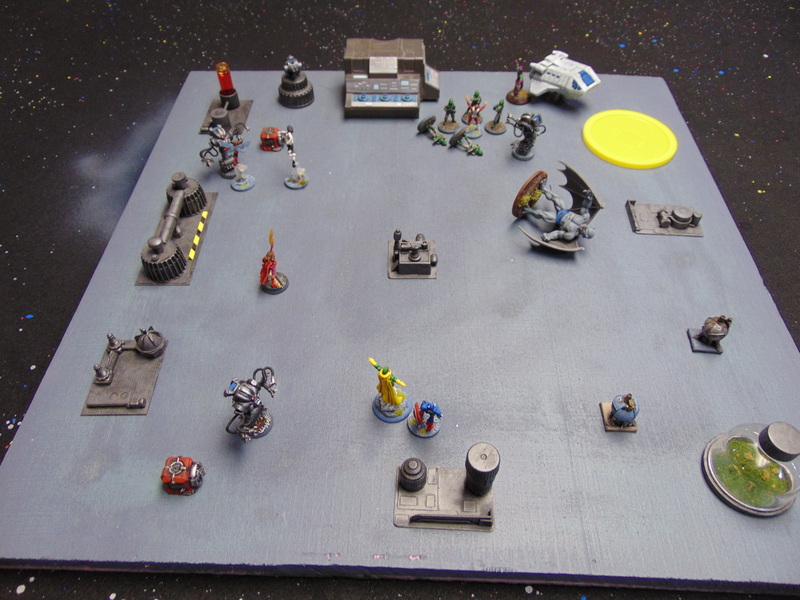
Setup
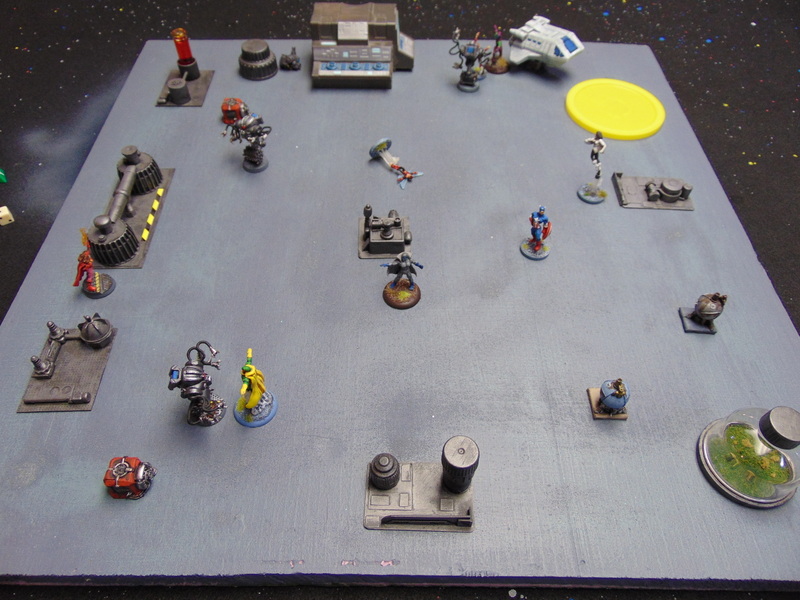
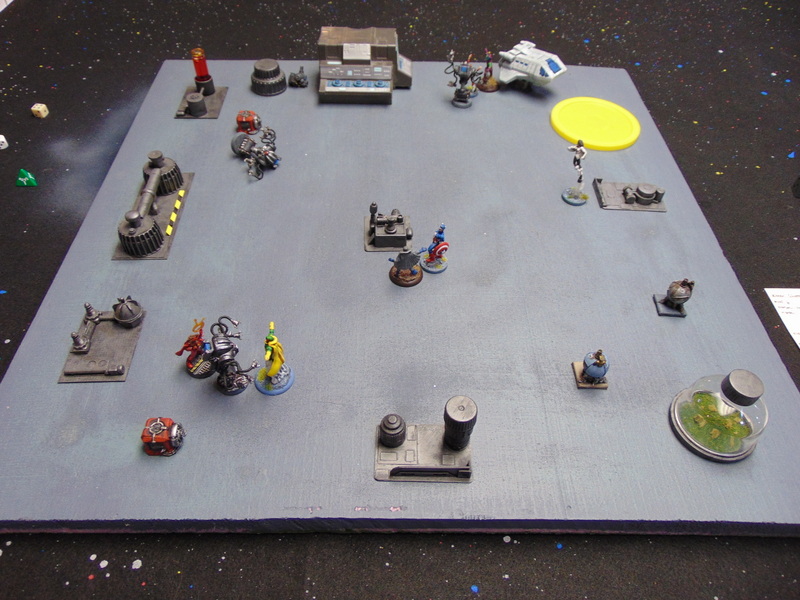
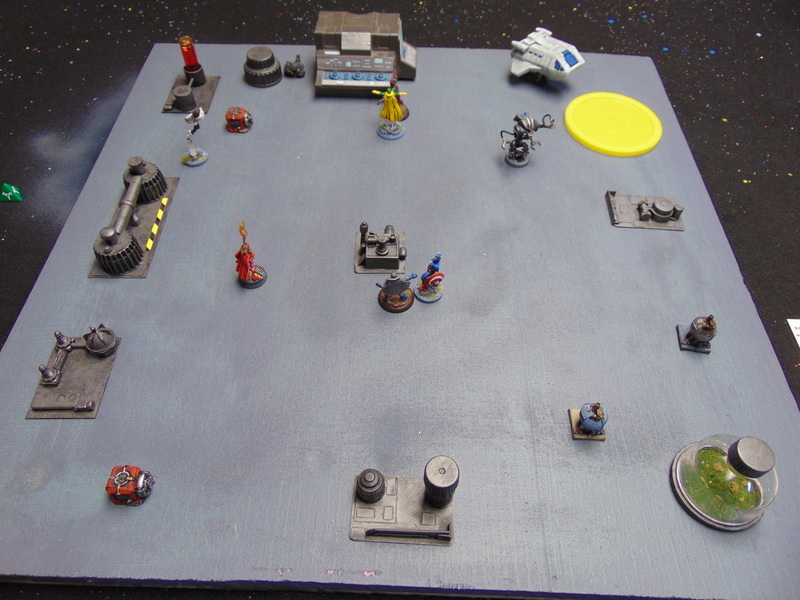
I used a 2′ x 2′ board representing Kang’s laboratory. High-tech, futuristic equipment, including Kang’s time ship, is scattered around the lab. There are 3 docking stations that hold Kang’s sentry robots, and a large teleportation pad set in front of Kang’s Time Ship.
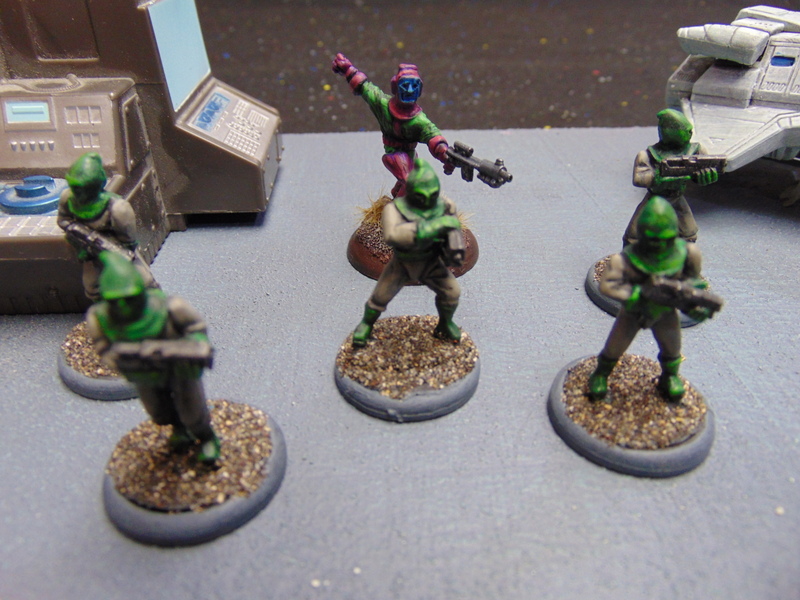
Kang deploys on one end of the board, close to a large computer. He is surrounded closely by a group of elite henchmen. The combat robots deploy in their respective docking stations. The heroes deploy on the opposite side from Kang. Dragon Man and Grey Gargoyle do not deploy at the start of the game (see below).
Special Rules
Pontification: Kang loves to talk. If he gives up all his actions and spends an entire round doing nothing else but telling the heroes how inferior they are, he gains the Fortune power in addition to all his regular powers for the remainder of the scenario.
Calling in Reinforcements: If in base contact with his Time Ship, Kang can use a Special Action to bring in either Dragon Man or Grey Gargoyle on the teleportation pad. He can only bring one villain in per round. These villains will fight for Kang, and will activate later in the same round.
Blaster Turret: Kang has upgraded his lab’s defenses with another blaster turret, much like the one used by the Super-Skrull last scenario (Range 15″, 5D blast, TN5, Body 4). Unlike the Super-Skrull, however, Kang has had time to calibrate the gun so that it fires only at the Avengers. At the start of the round, it fires at the closest Avenger that attacked Kang in the previous round. (It will fire into melee if Kang is fighting an Avenger in melee combat.) If no Avenger attacked Kang in the previous round, the blaster turret will fire at the closest Avenger to Kang. This blaster turret is not equipped with a force field.
Grey Gargoyle’s Petrification Power: Grey Gargoyle has a variation of the standard Entangle power. Like a standard Entangle, it’s a 5D attack, but Grey Gargoyle must be in melee to use it (i.e. it has no range). The upside of this (for Grey Gargoyle) is it’s tougher to break out once you’re turned to stone(TN5). Also, anyone turned to stone resists Body-damaging attacks with their base 4D pool, no matter what their usual defense is.
NOTE: There are a lot of miniatures on the board. Rather than relate the action step-by-step, I’ll give a general overview of what happened each round. These actions are not necessarily sequential.
ROUND 1
The blaster turret fires at Wasp, who happens to be the closest Avenger to Kang. It clips her for 1 damage before the game even really gets started. Ow!
Kang wins initiative for the first round. He makes a Chance roll for his Gadgets power, which gives him re-rolls equal to his successes. He gains 2. The he uses his Enhance power as a free action, and gains another 2 re-rolls which he gives to himself. (The rules don’t specifically say you can’t target yourself with Enhance, but if Scott Pyle is reading this, maybe he could give some clarification in the comments below… Kang is an expert on tactics, so I figured why the hell not?) Kang is going to do both of these things at the start of every round, so I’ll just keep a running tally of Kang’s re-rolls at the beginning of every round.
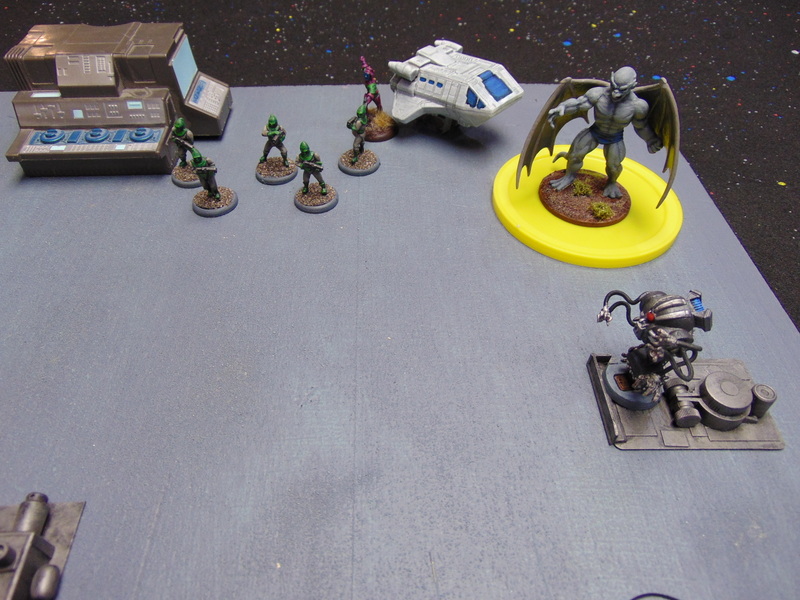
Enter the Dragon (Man)!
Kang immediately moves to his Time Ship and uses a special action to bring in Dragon Man on the teleport pad. (Yes, that’s a teleport pad, not a coffee can lid!)
Wasp activates her Shrinking power and flies out towards the turret. She blasts it, but does no damage.
Combat robot #1, the one closest to the Avengers, fires at Captain Marvel and hits her for 3 damage. Then it moves quickly into base contact, trying to lock her up in melee for next round. Captain Marvel activates her Density Decrease power and flies away. Since she’s intangible, all the robot can do is ineffectively grab at her ghostly form as she flies out of melee. She flies over to help out the Wasp and blasts the turret for 2 damage, taking half its Body. Not enough to destroy it, though.
Dragon Man charges at Captain America and winds up with a haymaker. He rolls terribly, but not badly enough that Cap can reflect damage back. Cap attacks Dragon Man, scoring 3 Body worth of damage, dropping the big guy from 10 Body to 7.
Combat robot #3, the one closest to the turret, fires at Wasp but misses. Much like robot #1, it follows this attack up with a Move action which brings it into base contact with Wasp, locking her in melee for next round.

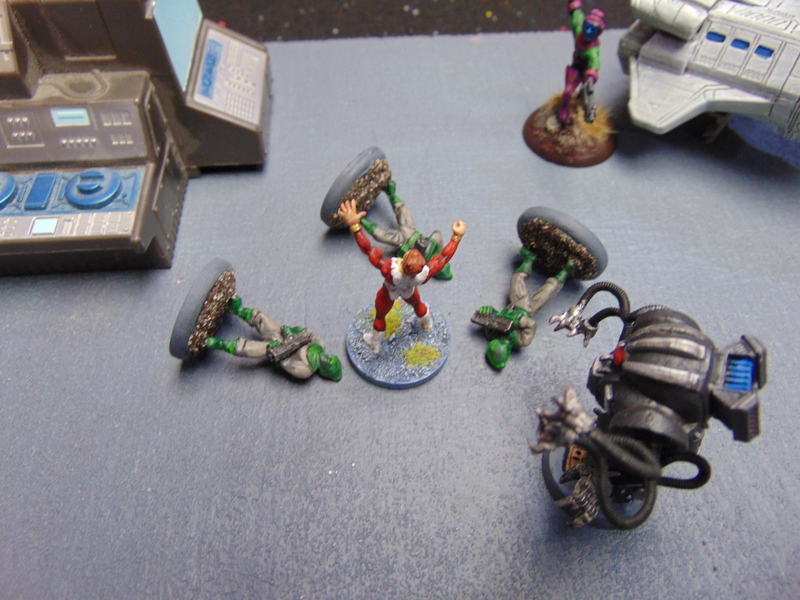
Starfox charges the henchmen group screening Kang, knocking 2 of them out of the fight. The henchmen try to fight back but deal no damage to Starfox. Combat robot #2 fires at Starfox, dealing 3 Body worth of damage! Starfox drops from 7 Body to 4. Again, like the other robots (it’s almost as if they were all programmed by the same person), robot #2 closes the distance with Starfox. It doesn’t quite make it into base contact, but since it has Reach of 2″, it just needs to get close.
Scarlet Witch uses Jinx on Dragon Man, successful despite his construct nature making it more difficult for her. She then runs away from both Dragon Man and robot #3, gaining some distance.
Finally, Vision activates his Density Increase power and charges Dragon Man, shouldering the big construct aside with a Haymaker that deals a net 5 Body worth of damage! He knocks Dragon Man back 8″ and onto his backside!
End of Round 1
ROUND 2
The turret fires at Starfox, as he’s the closest Avenger to Kang. He gets clipped for 1 more damage.
Kang burns through 2 re-rolls in his pool in order to keep Initiative. He gains 1 re-roll from Enhance and banks it for himself, bringing his total re-roll pool to 3. He uses a Special Action to bring in Grey Gargoyle via the Time Ship’s teleportation pad.
Vision charges Combat robot #1. He recharges his Haymaker, but does no damage to the robot. Combat robot #1 attacks back, rolling all 6’s! He scores the maximum number of possible goals, and Vision is walloped for 5 Body damage, dropping him from 9 to 4! Good thing Vision is Density Increased or he would have gone flying!
Combat robot #2 attacks Starfox, but misses.
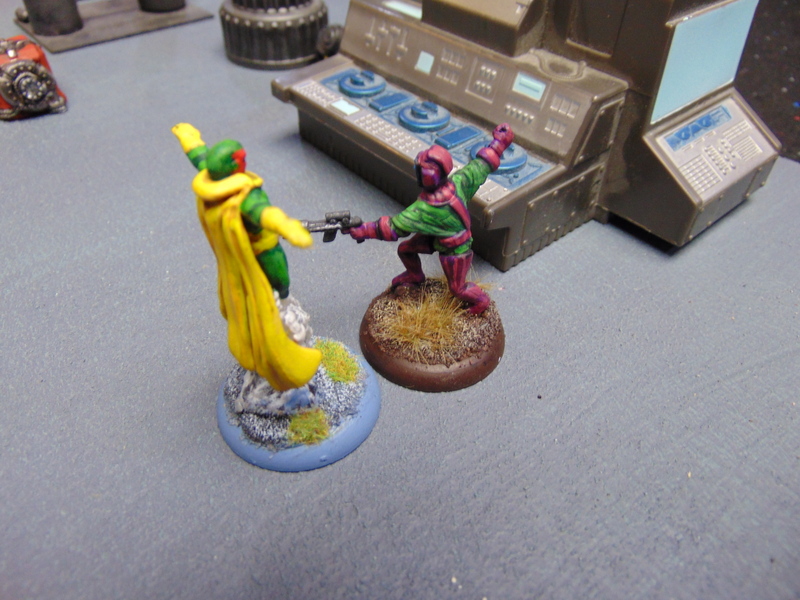
“Hear me, Kang,” cries Starfox. “Your doom is at hand! I will exact revenge for my ruined testes!” Grey Gargoyle bursts out laughing as the Avengers collectively roll their eyes. Kang smiles. “Then take your vengeance if you can, you arrogant popinjay.”
Starfox attacks the henchmen group and wipes them out, then he moves into base contact with Kang. Unfortunately, by leaving combat with robot #2, he leaves himself wide open to a free attack. The robot cracks him for 1 Body worth of damage, but he manages to get into melee with Kang.
Scarlet Witch blasts robot #2, inflicting 2 damage. Captain Marvel destroys the turret with a well-placed power blast.
Combat robot #3 attacks Wasp, but Wasp manages to deftly slip through it’s grasping tentacles. She gambles on her evasiveness again and leaves combat, trying to get out of melee where she can do the most good with her power blasts. This proves to be a disaster, as the robot’s free attack hits her for 4 Body, taking her all the way down to 1!
Dragon Man charges Captain America, unhindered by Scarlet Witch’s Jinx; however once he gets into combat it’s a different story. He misses badly and Captain America deals 1 damage on his return attack. He knocks Dragon Man back 1″ so he can maneuver around the big guy towards Kang and the Grey Gargoyle. Dragon Man is down to 1 Body!
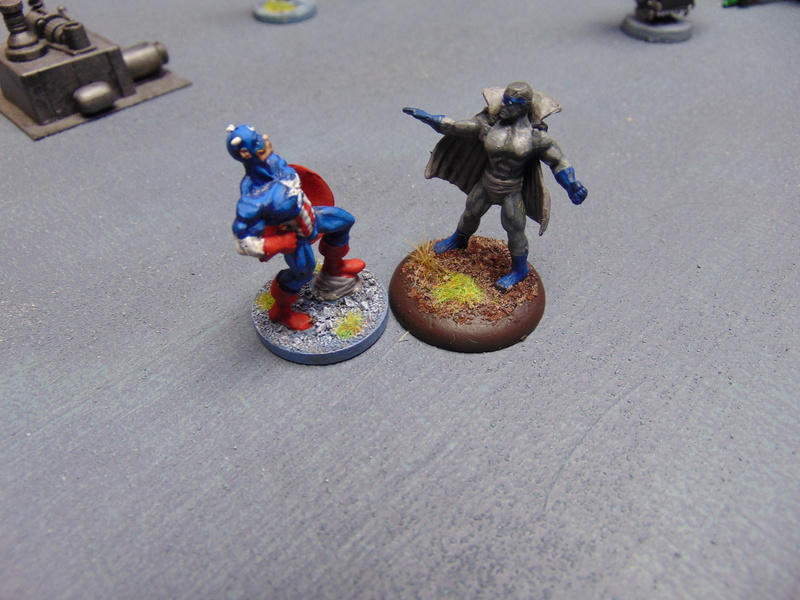
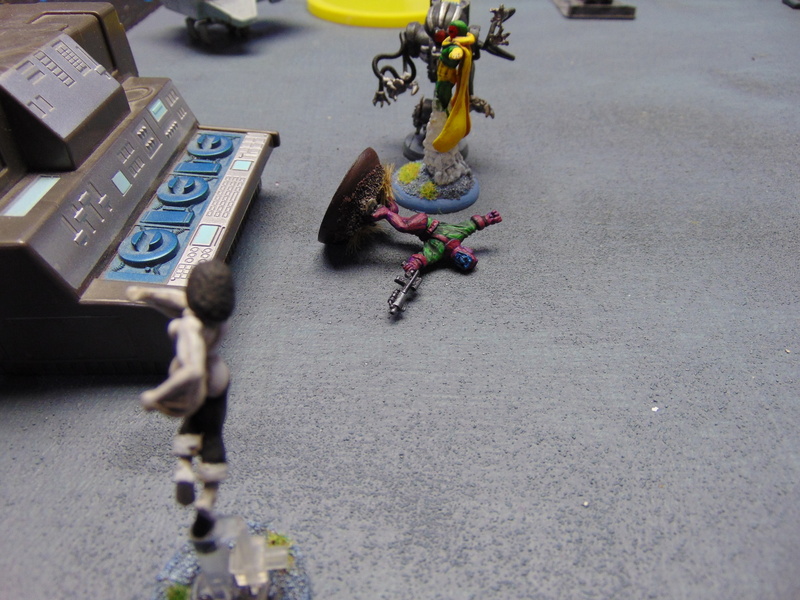
Grey Gargoyle charges Captain America, and manages to turn Captain America to stone!
After leaving combat with robot #3 (and barely escaping with her life), Wasp takes a parting shot at Dragon Man and manages to KO him (it?)!

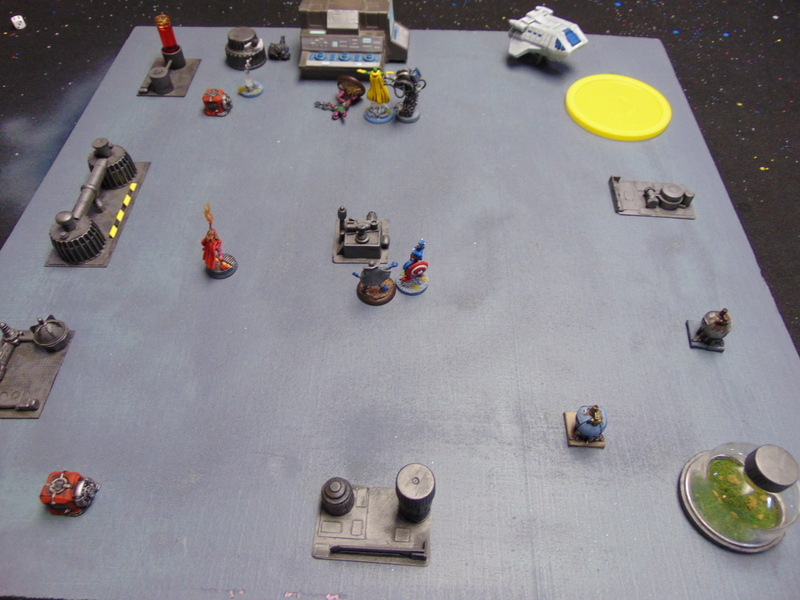
End of Round 2
The first 2 rounds have been real slugfests! Wasp down to 1 Body! Dragon Man and Kang’s henchmen wiped out! Starfox down to 2 Body, Vision down to 4, Captain Marvel at 3!! One combat robot damaged, and Captain America turned to stone by the touch of the Grey Gargoyle!!!
ROUND 3
Without Captain America’s initiative bonus, Kang easily manages to hang onto initiative.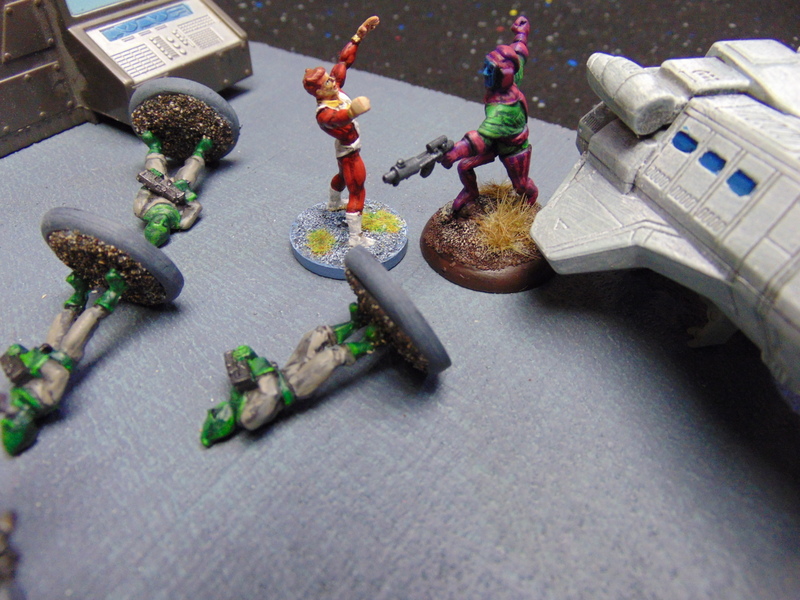
Kang’s re-roll pool is 3, and he gives 1 re-roll to the Grey Gargoyle. Kang attacks Starfox, but does no damage. He attempts a Power Attack at the hated Kang, but a sudden sharp pain in his groin distracts him and he whiffs badly.
Grey Gargoyle decides to stick around and punish the calcified Captain America. He does a Power Attack of his own, dealing 2 damage. Then he walks away towards Vision and Scarlet Witch. Scarlet Witch successfully Jinxes Grey Gargoyle and backs away from him, while Vision pounds combat robot #1 for 2 damage, knocking it back 8″. Combat robot #1 takes advantage of the distance and blasts back at Vision but does no damage. Then, predictably, it moves back into melee with Vision.
Combat robot #2 blasts Wasp and KO’s her, then moves into base contact with Starfox. Combat robot #3 fires at Scarlet Witch and would have fried her pretty good if not for her Fortune power. She escapes damage.
Captain America manages to free himself from Grey Gargoyle’s petrification. He hurls his shield at Grey Gargoyle, but misses. Finally, Captain Marvel blasts Grey Gargoyle, but misses. She puts some space between her and the robots.
ROUND 4
In order to keep initiative, Kang burns all 4 of his re-rolls. His Gadgets power gives him 1 re-roll back. Despite having Starfox in his face, Kang decides to Pontificate.
“You are all fools if you think you can ever truly defeat me,” says Kang. “It was all to easy to manipulate you into pulling loose the errant threads of your own existence! Not one of you is a match for my superior intellect! I have had countless centuries of study. You will fall before me and Earth will look to me as their overlord! It is only a matter of time! Yes, time— of which I AM MASTER!! MU-HUHAHAHAHAHAHAHAHA!”
This fiery little speech gives Kang the Fortune power for the rest of the game.
Starfox desperately tries to shut Kang up, but can’t even get through his force field. Combat robot #2 attacks Starfox but misses.
Captain America tries to inspire his team, but he gains no goals in his Enhance power. Undaunted, he charges Grey Gargoyle with an Acrobatic Attack that deals 2 damage. Grey Gargoyle tries to turn Captain America back to stone, but Scarlet Witch’s jinx ensures he doesn’t even come close. She blasts combat robot #3 for 5 damage, taking it all the way down to 1 Body. Then she moves into base contact with robot #1 to assist Vision. The robot attacks Vision but does no damage, while Vision clobbers it for 3 Body. He elects to do no knockback, instead keeping the robot in melee with him.

Captain Marvel takes a shot at Combat robot #3 and blasts it to slag.
End of Round 4
ROUND 5
Kang wins initiative. He gains 5 re-rolls, bringing him to his maximum of 6. He gives 2 of them to Combat robot #2, bringing its total to 3. Then he attacks Starfox and KO’s him handily, being sure to crouch down and punch the Eternal in the crotch once more for good measure.
Captain Marvel turns invisible and blasts Kang, ripping through his force field. Kang burns a re-roll to resist, taking only 2 damage, dropping him from 6 to 4. Combat robot #2 manages to spot her despite her invisibility and fires, but misses. It rolls towards her on its Move action.
Captain America belts Grey Gargoyle for 2 more damage, keeping him close in melee. Grey Gargoyle tries to petrify Cap again, but fails.
Vision destroys Combat robot #1 in melee. Scarlet Witch tries to jinx Kang, but fails.
ROUND 6
Kang keeps initiative and gains enough re-rolls to max his pool at 6. He fires at Scarlet Witch but misses. She blasts back, and burns through 2 re-rolls resisting damage.
Captain Marvel fires at Combat robot #2 but doesn’t damage it. She also fails to keep her Invisibility active. She moves to set up a crossfire with Scarlet Witch for next turn.
Grey Gargoyle turns Cap to stone, and despite his best efforts, Captain America is stuck that way, failing his breakout attempt.
Vision drops his Density Increase power and recharges his Haymaker. He charges into combat with Kang and decks him hard, but Kang burns through 4 re-rolls and manages to take 2 damage, dropping him to 2 Body. Vision wants to keep Kang close, so he doesn’t do knockback.
End of Round 6
ROUND 7
Even though they’re operating without Captain America’s initiative bonus, the Avengers seize initiative for the first time, and Kang’s re-rolls don’t help him. He gains 3 re-rolls from his Gadgets power.
Vision fails to recharge his Haymaker, but he activates his Density Increase power before attacking Kang. He breaks through Kang’s force field and does 1 damage, dropping Kang to his last Body point! Kang burns all his re-rolls, including his newly acquired Fortune power, and is on the ropes!
Scarlet Witch fires at combat robot #2 but misses. Combat robot #2 fires at Vision and misses, so he moves into melee to assist Kang next round.
Captain America fails to free himself from Grey Gargoyle’s power.
Captain Marvel recharges her Invisibility and activates it. Then she fires at Kang, dropping him to zero Body. Kang fails his KO check and collapses! Victory to the Avengers!
End of Game
EPILOGUE
I suppose I could have continued to play out the scenario until all the bad guys were accounted for, but why? Grey Gargoyle is no genius, but he’s smart enough to know when he’s beaten. I figure he’d probably surrender.
My thoughts on the scenario, in no particular order:
I got to use my old TSR Marvel Super Heroes miniature for Kang! He scales very well with the Heroclix, which is good because I hate the two Heroclix versions of Kang that I own. I was very happy to get to use some classic lead in this game!
It was a tight space for so many miniatures. I probably should have used a 3′ x 3′ area rather than the 2′ x 2′ board. That being said, the action started pretty much immediately.
While I made use of a lot of Archetype combat maneuvers, I completely forgot about Kang’s abilities, as I was focused on remembering his re-roll pool. Kang is wily, but no match for most of the Avengers in a stand-up fight. He always has tricks up his sleeve, and he stacks the deck in his favor. I think using Kang’s re-roll pool to its best ability is what kept him healthy for so long.
Dragon Man was a huge disappointment. I thought he’d be good to tie up the Avengers for a while, but he performed so badly in this scenario he was little more than a distraction.
Not very surprising, the henchmen did nothing, except exactly what they were supposed to: protect Kang. By surrounding him so closely, they made it impossible for Kang to get charged early. Starfox had to waste precious time dealing with them before he could get to Kang. The robots performed very well, and blasting first and moving into combat second proved to be a good strategy to delay the heroes.
Why did I use Grey Gargoyle? Because he was in the original Time Trap module, in his own (very stupid) chapter. I had already repainted the miniature, so I threw him in as support for Kang in the final chapter. He seemed to work out well, as he took Captain America out of the fight for two of the rounds!
The overall campaign was a blast, despite having a rather lame cast of heroes and villains. I had as much fun with Starfox as I could. This was the first campaign I ran with the finalized Super Mission Force rules (The Breeder Bombs used the incomplete playdocs through various versions) and I think it went very smoothly.
Here are my Super Mission Force builds for the bad guys in this scenario:
Kang (Super) Major: Enhance, Minor: Clever, Force Field, Gadgets, Power Blasts
Like I said above, focusing on getting as many re-rolls as possible is my key to playing Kang. I considered giving him Armor and Savant in place of Force Field and Clever, but I like the above version better.
Dragon Man (Super) Major: Super Strength Minor: Construct, Flight, Power Blasts, Tough
Grey Gargoyle (Wild Card) Minor: Armor, Entangle, Super Strength, Resistance
Grey Gargoyle’s version of the Entangle power is described under Special Rules, above.
Combat Robots: Minor: Power Blasts, Melee Specialist (Reach 2″)
Henchmen: Armor, Power Blasts
That’s it for now. I plan on converting more Marvel Super Heroes modules to Super Mission Force, and I’ll likely have another campaign going before too long. It’s too much fun to pass up!
Great stuff Keith, I really enjoyed this played out really well by the looks of it, and gave a good result that wasn’t certain till the very end. Looking for ward to the next one already!
Cheers Roger.
Thanks, Roger. It was a lot of fun to convert the old rpg module to Super Mission Force. Half of the fun is trying to alter the scenarios so they work, and in so doing create something new that (hopefully) is close enough to the source material that the whole point isn’t lost.
Chronologically, the next module is MH-3, Murderworld, featuring the Fantastic Four. Although I’d love to use the FF in one of these campaigns, Murderworld is a huge mess that makes no sense. I think I’m going to skip it in favor of another adventure. I just haven’t decided which one yet.
Enjoying these uses of the old TSR modules. I’ve been thinking about doing Sudden Dawn from an old Dragon magazine. Any chance you might do that one?
Welcome, Robert! I am a huge fan of Sudden Dawn, I think it was probably the best Marvel module ever made for the old TSR game, and it was contained in a Dragon Magazine! I converted the entire Liberty Legion for the Forgotten Heroes challenge last year with Sudden Dawn in mind, but finding suitable villains is difficult…I have the Heroclix Baron Blood and a suitable proxy for Agent Axis, but nothing for Master Man, Warrior Woman, Iron Cross and U-Man. I considered just using some Weird War II German stuff instead, but I never got around to it. If you have any suggestions for me, let me know. If you decide to have a go a it yourself, please send me a link!
You can check out my Liberty Legion here. That’s the intro post, scroll forward and you’ll find my repaints, conversions, and Super Mission Force builds!
A fitting conclusion to an excellent set of encounters. As with the previous episodes, the result wasn’t certain until the last moment and played out as though torn from the comics themselves. Very enjoyable to read and appears to have been fun to play to.
You’ve set the bar pretty high for this type of AAR – If my planned games come half as close toy yours, I’ll be happy. Just need a bit of time to play.
Glad to see you’re back, Jez. Sorry about the lack of play time. That can be a real downer.
As far as the campaign went, it was quite fun. It took me back in a lot of ways; to the comics of my youth, to the old Marvel RPG…I really enjoy adapting the old RPG modules to the new game.
There was a brief moment when I thought “what if Starfox actually beats up Kang?” Turns out he had his shot, but blew it. Still, he did a lot better across the campaign than I would have thought.
I still hate him, though.
Hopefully we won’t have to wait too long to read your AARs. I eagerly await the adventures of Bananaman!