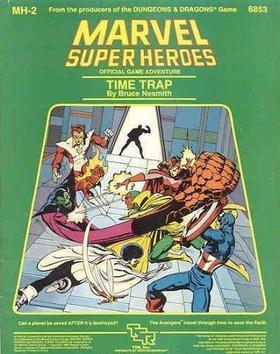
Category Archives: Scenarios

The Storage Yard: A Green Hornet .45 Adventure AAR: Part 1

If you missed it, start at the beginning here!

Scenario: At midnight, three of the most powerful mob lieutenants in the city are meeting with a mysterious figure. Who do these lieutenants work for and what are they discussing? Who is this mystery man? And why wasn’t the Green Hornet invited? The Green Hornet and Kato plan on finding out the answers to these questions; but there’s another problem: Ace Reporter Mike Axford has also learned of the meeting and tipped off the police. It’s only a matter of time before they arrive…can the Green Hornet find his answers before then?

Victory Conditions: The Green Hornet must discover three clues (the identities of the enforcers) and escape the board. The criminals must prevent him from learning everything before the cops arrive and they are forced to make their escape. Victory points are awarded for clues. Each clue discovered by the Green Hornet is worth 1 VP, each clue that goes undiscovered is worth 1 VP for the criminals. In addition, each model that is eliminated is worth one VP equal to his grade (i.e. a Grade 3 model is worth 3 VP, etc.), and each Mob Lieutenant (not including the mystery man) that is able to escape is worth 1VP to the criminals. Whoever has the most VP at the end wins.

Forces: The Hero player controls the Green Hornet (Grade 3 Crimefighter) and Kato (Grade 3 Crimefighter). The Criminal Player starts with 3 Enforcers (Grade 2) and 6 Gat Men (Grade 1).  (Each lieutenant brought a driver and a goon.) The lieutenants and the drivers are armed with pistols; the goons are armed with submachine guns. The Police (3 Grade 1 Officers) and Mike Axford (Grade 1 Reporter) are controlled by either player, subject to the conditions below.

Setup: Play is on a 24”x24” surface, representing the yard of MacLane’s Storage Yard. There are shipping containers stacked around the yard, forming a central clearing of sorts. Crates, barrels and oil drums are liberally scattered about the yard, providing cover and spots to hide. There are three cars each facing an unobstructed path through the containers in roughly a Y-shaped pattern. In the center of these cars, the three Mob Lieutenants are deployed, along with the Mystery Man.  One Gat Man is deployed next to each car; these are the lieutenants’ drivers and they don’t usually take part in any of the action unless the shooting starts. The remaining 3 Gat Men are deployed on Guard Duty. The guards can be placed among or atop the shipping containers. The Green Hornet and Kato start on one board edge, in cover but at least 8” away from any enemy model.

Special Rules

Stealthy: A hero can attempt to take out a guard in melee without alerting any of the others. If a hero attacks a guard in melee and KO’s him, he does so silently. If the guard doesn’t go down, he immediately sounds the alarm. If a hero attacks a guard with line of sight to another guard, any attempts to spot him are made at +1.

Sounding the Alarm: Any guard who spots a hero model or who survives a round of melee can sound the alarm. This instantly alerts all the guards on the table, who can activate and act normally in subsequent turns. The bosses make a break for it as if The Police Arrive (see below).

The Police Arrive: When this happens (or when the alarm is sounded), all the bosses immediately make a break for their cars, and will reach them in one turn. The drivers can shoot at any of the heroes or the police they can see for one turn, then they speed away with their boss on the following turn. Any of the bosses who get off the board escape. As for the mystery man, he cannot be captured. He vanishes without a trace!

The police choose their targets as follows: first, they fire at any model that fired upon them, otherwise they fire at the closest hero or criminal they can see. Whichever model is the target, the opposing player rolls for the cop’s attacks. The Green Hornet and Kato will not enter combat with the police or with Mike Axford (no matter how much they want to), the one exception being the Green Hornet can use his gas gun if needed.

Pesky Mike Axford: Mike Axford is obsessed with unmasking the Green Hornet, and is constantly pointing out his whereabouts to the cops. By spending a Hero point, the player controlling the mob enforcers can force the police to fire upon either of the heroes, even if there is a closer criminal target. The criminal player cannot do this if any criminals fired upon the police earlier this turn, however. Axford cannot be the target of attacks, nor can he attack any other model.

The Characters

The Green Hornet (Grade 3): DR 5 Brains 4 Will 3 Brawn 3 Guts 10 Heater 5 Shiv 5 Dodge 4 Speed 5 Brawler +1d10, Pugilist +1, One-Two Punch, Sharpshooter +1, Quick +1, Nerves of Steel +2, Observant, Quick Recovery, Heroic Action

Kato (Grade 3): DR 5 Brains 2 Will 4 Brawn 5 Guts 8 Heater 2 Shiv 6 Dodge 4 Speed 5 Brawler +1d10, Pugilist +2, Multiple Attacks +1, Shiv Thrower, Driver +1, Battle Cry, Leap, Devotion, Nimble

Mob Lieutenant (Grade 2): DR 4 Brains 2 Will 3 Brawn 3 Guts 7 Heater 3 Shiv 2 Dodge 3 Speed 4 Brawler +2d10, Sharpshooter +1, Rapid Fire, Fearful Presence, Nimble, Quick Recovery

Goons/Drivers (Grade 1): DR 3 Brains 2 Will 3 Brawn 2 Guts 5 Heater 3 Shiv 2 Dodge 2 Speed 5 Brawler +1d10, Sharpshooter +1, Rapid Fire, Quick Load

Police (Grade 1) DR 4 Brains 2 Will 3 Brawn 4 Guts 4 Heater 2 Shiv 3 Dodge 3 Speed 5 Brawler +1d10, Ferocious, Fencing +1d10, Bruiser +1

Mike Axford (Grade 1) DR 3 Brains 3 Will 2 Brawn 2 Guts 7 Heater 2 Shiv 2 Dodge 3 Speed 5 Deception, Genius, Savant, Nerves of Steel +1

This post was a little longer than I expected…Full AAR to follow soon!

A Meeting at Midnight…

Another challenge for the Green Hornet; his aide, Kato; and their rolling arsenal, the Black Beauty!

Britt Reid, publisher of the Daily Sentinel, sat in his home office, uneasily drumming his fingers on the desk. “Very interesting, Kato.”

“What’s that?” Kato asked, setting a glass in front of his boss and friend. With a flourish, he held aside the sleeve of his white valet jacket and began to fill the glass with orange juice, raising the decanter impossibly high before lowering it at just the right moment to avoid an overflow.

Reid smiled at Kato’s theatrics. “Three of the city’s biggest mob lieutenants have a meeting tonight­­, Kato– a secret meeting with a mysterious fourth party…and it seems the Green Hornet wasn’t invited!”

“Maybe our invitation got lost in the mail,” Kato said dryly. “What do you think it’s about?”

“I don’t know, my friend. But one thing I do know: this is one soiree the Green Hornet isn’t about to miss!”

Kato nodded. “I’ll get the car ready.”

It’s long past time I played some Pulp. Although my Star Trek skirmishes last year scratched an itch for adventures in spaaaaaace; I wanted to get back to some good old-fashioned two-fisted Pulp action. And who better for that than the Green Hornet and Kato?

I used .45 Adventure 2nd Edition, my favorite rules for Pulp gaming. You can get the PDF here for a measly 10 bucks, and it’s well worth it. That being said, I made a few changes; the same changes I used when playing the Star Trek games using Fantastic Worlds. I’ll repeat them here: .45 Adventure has a detailed combat system that involves wound location and deteriorating statistics based on damage received. For example, you get shot in the arm, your shooting and brawling abilities go down; you get shot in the legs, your movement speed decreases, etc. The better your character, the higher his stats and the more wound boxes he has; therefore wounds have less of an effect on heroic characters and a greater effect on scrubs.

For my taste, this was a bit more bookkeeping than I wanted to deal with. I decided a model has a number of wounds equal to its rank and damage resistance (DR) commensurate with their abilities, and that wound location doesn’t matter. If a character is wounded, he loses a wound. Rank 3 and Rank 2 characters are KOed when they lose their last wound; Rank 1 scrubs aren’t so lucky: they’re dead (unless they are supposed to be KOed). This makes combat a lot faster and more deadly, but requires a lot less effort to keep track of a character round-to-round. Heroic characters (like the Green Hornet) may have access to abilities that allow them to shrug off and/or heal wounds, or to act regardless of them, but goons go down fast. As it should be!

The tradeoff is that a lot of special abilities in .45 Adventure are based around wound location, such as Supreme Effort, which allows a model to use his starting stats for a wound location for a turn (regardless of how badly damaged that location is); or Dead Shot, which improves your chances of hitting a specific location. Since I scrapped wound location, none of the models could use these; which somewhat limited the selection of skills I had access to. Each location also has its own Damage Resistance value. It’s generally easier to wound someone if you hit them in the head as opposed to hitting their arm, for example. I scrapped that too, and just assigned a blanket DR to an entire model. The more important or tough the model is, the more DR it has. This makes the game move a lot faster at the expense of some of the detail of the system; I like it, but YMMV.

That about covers the rules. But, what about the scenario?

It’s simple: At midnight, three of the most powerful mob lieutenants in the city are meeting with a mysterious figure. Who do these lieutenants work for and what are they discussing? Who is this mystery man? And why wasn’t the Green Hornet invited? The Green Hornet and Kato plan on finding out the answers to these questions; but there’s another problem: Ace Reporter Mike Axford has also learned of the meeting, and tipped off the police. It’s only a matter of time before they arrive…can the Green Hornet find his answers before then?

Find out next time!

Tug of War: A Fantastic Worlds Star Trek AAR

Captain’s Log Supplemental: We have escaped the Klingon prison and regrouped in the jungles of Hubbard’s World. Mr. Scott has beamed down a security team to assist us. We managed to retrieve our tricorders and have set off in pursuit of the source of the strange energy that seems to be the cause of the unchecked, sentient plant life here on the the planet. Being above ground again should feel good, but the oppressive humidity hasn’t gone anywhere and once more, it’s difficult to breathe. None of us, except perhaps Mr. Sulu, will be sad to leave this place.

The air shimmered as three humanoid forms began to take shape. A moment later, Lt. Hikaru Sulu and two Starfleet security officers stood in the clearing. They glanced around for a moment before Sulu approached the Captain.

“Security team reporting, sir,” Sulu said.

Kirk grinned. “Nice to see you, Mr. Sulu.”

“Nice to be seen, Captain.”

“Glad you could join us. Although I was expecting Mr. Chekov.”

“I pulled rank on him, sir,” said Sulu. “Sentient plants. I wasn’t about to miss that. Hope you don’t mind, sir.”

“Not at all. Your knowledge of botany could come in handy. It’s a…rather unique…place.”

McCoy grinned at Sulu. “Glad to have you along. At least now we won’t have to hear about how the Russians invented plants.”

“Now that we are all present,” said Spock, “I recommend we proceed with haste to the site of the tricorder readings. The Klingons are certainly not waiting.”

“Agreed,” said Kirk. “Fan out, everyone, and watch for threats. Spock, take point. We’ll follow you.”

A few minutes later, they followed Spock into another underground cavern. They could hear the echoes of raised voices arguing in Klingon. Kirk motioned for the team to take up positions silently and crept forward, accompanied by Spock and McCoy. In the midst of the cavern was a strange machine pulsing with visible energy. The Klingons kept a healthy distance from it, but it was clear it was the focus of their attention.

“That machine is the source of the energy, Captain,” said Spock. “It is almost certainly extraterrestrial in origin; nothing like it has been observed on this world.”

“Jim, look!” McCoy pointed. Guarded closely by a pair of brutish Klingons was a bedraggled and exhausted-looking Dr. Hubbard. A Klingon with the unmistakable aura of authority barked an order and Hubbard began working feverishly with his tricorder. Whatever he attempted must have failed, as a moment later, the Klingon captain swore loudly. He whirled on Hubbard and the scientist quailed.

“Looks like they’re trying to beam that doohickey out of here,” said McCoy. “Hubbard is probably being forced to help.”

“Agreed, Captain,” said Spock. “However, removing the doohickey would ensure the catastrophic destruction of this planet’s ecosystem. It is therefore imperative that the Klingons not succeed at their endeavor.”

Whatever reply Kirk was about to make was cut off as the ground began to tremble violently. “All right,” Kirk said when it subsided, “it seems time is against us. Rescue the doctor if possible, but make sure the Klingons don’t get what they’re after. Let’s go.”

Scenario: It’s the final showdown with the Klingons over the alien technology responsible for the plant life on Hubbard’s World. The Klingons are trying to beam the machine off-world, but they need Dr. Hubbard’s help to do that. The Enterprise crew is trying to stop them and rescue Dr. Hubbard. Meanwhile, the strange alien machine is protecting itself…it doesn’t want to go anywhere!

Victory Conditions: The Klingons win if they succeed at beaming the machine off-world, or if both Kirk and Spock are KO’ed at the same time. The Enterprise crew wins if they manage to KO both the Klingon Captain and the Klingon Lieutenant before the machine is beamed off-world. Should this occur, the remaining Klingons surrender.

Forces: The Klingons have a Klingon Captain (Grade 3), a Klingon Lieutenant (Grade 2), and four Klingon Warriors (Grade 1). The Captain also has two more Klingon Warriors in reserve, not deployed at the start of the game. Starfleet has Captain Kirk (Grade 3), Mr. Spock (Grade 2), Dr. McCoy (Grade 2), Mr Sulu (Grade 1), and two Security Officers (Grade 1). The two teams deploy on opposite table corners, with the alien machine smack in the middle.

Special Rules:

Countdown: There are no encounter markers in this scenario; rather an event deck randomly determines what occurs at the beginning of each round. Three of the cards in the deck represent a Klingon transporter lock; once the third such card is in play, the machine is beamed off-planet at the start of the next round and the Klingons win. If Dr. Hubbard is rescued before the Klingons achieve the third transporter lock, Starfleet wins.

Dr. Hubbard: Dr. Hubbard is crucial to this scenario. The Klingons are holding Dr. Hubbard hostage and forcing him to work for them, as their transporter technology isn’t as good as Starfleet’s. As long as there is a Klingon model within 2″ of Dr. Hubbard, he is captive. If that ever changes, Dr. Hubbard makes a run for it. He can’t sprint of fight, but he will move towards the nearest Starfleet model at his full move. He is recaptured if a Klingon moves within 2″ again. He is automatically rescued if a Starfleet model moves within 2″ of him and there are no Klingons within 2″.

Dr. Hubbard is scared, but he’s still a Starfleet officer and he doesn’t want the Klingons to succeed. Two of the cards in the deck represent intentional miscalculations designed to give the Enterprise crew more time to stop the Klingons. If one of these cards is drawn, shuffle a transporter lock card back into the event deck.

Dr. Hubbard cannot be the target of an attack, nor is he affected by any events in the Event Deck.

The Alien Machine: The machine cannot be attacked or destroyed. The Klingons want it too badly, and Strafleet would never risk damaging the planet.

Turn 1: The Klingons get the first turn. Before they act, an event is drawn from the deck: Dr. Hubbard manages to get a transporter lock on the alien machine! Not off to a good start for Starfleet! The rest of the turn is taken up by movement. The Klingons move towards the machine, maintaining cover for the most part, while the Enterprise crew splits up, attempting to flank the Klingons. One Klingon soldier tries to shoot Ensign S’lyr, the Vulcan security officer, but he misses.

Turn 2: The Klingons retain initiative. The event deck draw is a cave-in! The Klingon player nominates an enemy model-in this case, he decides to stick with the Vulcan security officer, Ensign S’lyr. She fails her Dodge test and is buried under a ton of cascading rock! Oh, the humanity (Vulcanity?)!

Now, sadly, as I write this, I have discovered that my iPhone’s voice memos, which I use to record these little game sessions for later transcription, just decided to NOT FUCKING WORK. So, apologies to all. I am winging the rest of this, because my FUCKING iPhone FUCKED ME. So, no turn-by-turn anymore. I’ll just give the general results as I recall them. Above: Kirk kills a Klingon soldier. I forget the context.

At some point, the Klingon Captain made use of his “Meet My Minions” ability, which allows him to instantly “summon” two low-grade henchmen to his person. These Klingons were the models not deployed at the start of the game.

Captain Kirk promptly shot one of them after shooting the Klingon above. He spent Hero Points to do it. The Klingon Captain shoots Kirk, and uses his own Hero Points to activate his Deadly Accuracy ability. This increases the strength of his disruptor enough to cause 2 wounds instead of one. Ouch!

Spock shot the Klingon Captain and managed to KO him. I forget how. I think Kirk might have shot him first. But I forget.

Meanwhile, the Klingon Lieutenant snuck around the rock, trying to flank Sulu. Some Klingon shot and killed the Andorian security officer, Ensign Vendax.

Not sure of the Turn here (FUCK YOU, iPhone!), but the Klingon Lieutenant charged Sulu and put him down hard. I made the Klingons beasts in melee, as they should be. Sulu’s no slouch, but he got charged from behind.

It looks bad for Starfleet, but the event deck draw is an energy burst from the machine that knocks down anyone who fails a Dodge test. Everyone above who is on their ass, except for Sulu and the Klingon Captain, who are both Ko’ed, got knocked over by the burst.

This gave Starfleet some breathing room. McCoy shot the Klingon Captain, who had revived but wasn’t able to stand up in time. He KO’ed him again. Kirk shot the Klingon Lieutenant, KO’ing him, too. With their leadership decimated, the remaining Klingons surrendered!

Victory for Starfleet!

R.I.P. to the fallen Starfleet security officers of the Hubbard’s World campaign. L-R: Ensign Gatwick, Ensign Heathrow, Ensign Stansted, Ensign S’lyr, Ensign Vendax.

Cue the bagpipes, Mr. Scott.

Analysis: This short campaign was a lot of fun. I’m happy with the changes I made to the Fantastic Worlds rules, as they only served to speed play by eliminating some of the bookkeeping. If I had opted to track wound locations and effects, the games would have undoubtedly been longer, but I’m not sure anything would have been gained by it.

To be honest, Starfleet was on a losing streak and I didn’t think they would pull it off. I do know there was an event in the deck that could have made things more interesting: the machine would have animated some of the Deathspitter plants, which would have been another obstacle for both players to deal with. The luck of the draw was with the players, however, and that particular card never appeared.

Starfleet tried to get close enough to the Klingon guarding Dr. Hubbard in the hopes of shooting him and freeing the doctor, but he was deployed too far away.

On a personal note, I am really annoyed with Apple, as my voice memos recorded, but can’t be played back. A quick visit to the Apple forums shows that I’m not the only person to experience this, and Apple doesn’t seem to have a solution beyond “upgrade to the latest iPhone.” Bullshit. From now on I’ll use a digital recorder, circa 1999. At least it will do what it’s supposed to.

I want to do another FW Star Trek campaign soon, perhaps using the TNG crew. I have an idea already…

Captured! A Fantastic Worlds Star Trek AAR

Captain’s Log Supplemental: Commander Spock, Dr. McCoy and I have been captured by Klingons and taken to an unknown location. It appears we are in a subterranean cave the Klingons have modified for use as a base of operations. At least we are out of the oppressive heat and humidity of the jungle. They’ve taken our phasers, tricorders and communicators and left us here. Every once in a while, one of them comes by to laugh at us, but for the most part we are left alone. Their arrogance can benefit us. They think we’re helpless. Attempting escape is our first duty. We won’t discover the fate of the science team or the Klingons’ plans by sitting here.

“Klingons sure like their caves dark,” said McCoy. “I can’t see my hand in front of my face.”

“As your hands are presently bound behind your back,” said Spock, “you would be unable to see your hand in any event.”

“The Klingons must want this…strange energy source…very badly,” said Kirk. “Otherwise why risk breaking the Organian Treaty?”

“Klingons aren’t the sharpest tools in the galactic shed, Jim,” McCoy scoffed. “They probably haven’t thought this through very well.”

“Neither are they fools, Doctor,” said Spock. “The energy source seems to have a profound effect on vegetable life, causing exponential growth.”

“That much is obvious, Spock,” McCoy snapped. “You think they’re doing this out of some desire to take up gardening?”

“On the contrary, Doctor, I believe the Klingons are considering harnessing this energy for military purposes. Consider the effect on populated worlds should it be introduced. Plant life would grow unchecked, soon taking over the entire planet.”

“Mother Nature run amok!” Kirk exclaimed. “That has to be it, Spock!”

“It is the most logical of my several working theories, Captain.”

“Well,” said Kirk, “one thing’s for sure. We can’t do much sitting here in this cave. We need to get to the source of that energy and find out what happened to the science team.. We must stop the Klingons!”

“How can we find the source?” McCoy said. “They took our tricorders. They took everything.”

“The tricorders should contain all the data we collected prior to our capture,” Spock said. “If we can recover them, we should be able to find the source.”

“Getting our communicators back would be nice, too,” said Kirk. “We could contact the ship, have Scotty beam down some reinforcements. But first we need to get out of these bonds.”

“How do you suggest we do that, Jim?” asked McCoy. “I’m a doctor, not an escape artist.”

Spock casually dropped his restraints on the floor. “If you will permit me, Doctor, I believe I can soon have you both free.”

McCoy stared at the Vulcan in shock. “Are you telling us you’ve been free this whole time?”

“No, Doctor,” said Spock. “I slipped my bonds 38 seconds ago. I merely thought it prudent to formulate a logical plan of action before we proceed.”

Kirk cut off what was certain to be a loud oath from McCoy. “Gentlemen, I suggest we act quickly, and silently. Our main priority is to locate our gear. We won’t get far without weapons.”

Scenario: The Enterprise crew has been captured by the Klingons and are being held in a cave below ground. They must escape and continue their search for the mysterious energy, and for Dr. Hubbard.

Victory Conditions: In order to win, the Enterprise crew must find their equipment and escape the board via one of two board edges chosen by the Klingon player as escape routes. The Klingons must prevent at least one of the Enterprise crew from escaping in order to win.

Forces: The Enterprise player has Captain Kirk (Grade 3), Mr. Spock (Grade 2) and Dr. McCoy (Grade 2). They begin play in the center of the board. The Klingon player begins with 4 Klingon guards (Grade 1). He also has a Klingon Lieutenant (Grade 2), who is not deployed at the start of the game. The guards are placed at least 10″ away from the Enterprise crew, and at least 6″ away from each other. They begin on guard duty (see below).

Special Rules:

Guard Duty: The rules for guard duty are in effect for this scenario. I won’t reproduce them here: just understand that the Klingons act like guards (which they are) until the alarm is raised. Once the alarm is raised, they act normally, and the Klingon Lieutenant is deployed immediately.

Darkness: The cave is dark and the Klingons didn’t bring much light. This limits visibility to 8″.

Stealth Takedown: If an Enterprise crewman can engage a Klingon guard in melee and defeat him in one round, then he does so silently and does not alert any other guards. He can then take the Klingon’s weapon. If he fails, the alarm is raised automatically. In addition, if melee occurs within spotting distance of a guard, the guard gets +1 to his roll to spot the attacker.

Initial setup.

The Enterprise crew must exit the board by either the right edge or the bottom edge in order to escape.

Turn 1: The Enterprise crew gets initiative. Kirk activates an encounter marker but it turns out to be nothing. McCoy triggers a restless guard, who activates out of sequence but fails to spot the doctor sneaking around in the darkness. Spock activates an encounter marker and startles a cave-dwelling critter, which makes a noise loud enough to alert the guard nearby. Unfortunately for him, the guard fails his brains test and doesn’t bother investigating the sound, so he doesn’t see Mr. Spock at all, despite being only 6″ away from him. The remaining Klingons all move around, but fail to spot any of the Enterprise crew.

Kancho!

Turn 2: Spock activates first and stealthily moves towards the closest Klingon guard. He applies the Vulcan nerve pinch and the Klingon goes down silently. Spock helps himself to the Klingon’s disruptor. (Game mechanics: Spock and the Klingon both have “Dirty Tricks”; Spock wins and gets an extra d10, which represents his nerve pinch. He handily defeats the Klingon in melee.)

I see nothing.

Despite being within spotting distance and despite Spock engaging in melee, one of the Klingons fails to spot Spock and turns away. Nothing to see here. McCoy activates another encounter marker, but it’s nothing. The remaining Klingons move. (It’s around now that we realized we’ve been playing guard duty rules wrong; that until the alarm is raised only ONE guard is supposed to move each turn. The others can change facing, but that’s about it. We decide to play it correctly from this point on.) Kirk activates and moves closer to the action, but doesn’t really do anything substantive.

Some folks wouldn’t think to use a giant penis as a weapon. Kirk isn’t one of those folks.

Turn 3: The Klingons gain initiative. One of them moves towards Kirk, but he fails to see the Captain. Kirk activates an encounter marker: “I got a rock.” He finds a heavy, interestingly-shaped rock that he can use as a weapon (functions as a club).

Kirk wastes no time, immediately taking a Heroic Action and charging the closest Klingon from behind. He brains the Klingon into unconsciousness and takes the Klingon’s disruptor. (He also inexplicably holds onto the rock.) That’s two guards down, and the remaining Klingons are none the wiser. Spock and McCoy both move off towards other encounters. The remaining Klingons change facing.

Turn 4: The Klingons activate and one returns to his original position. Kirk activates an encounter: reinforcements! Two Klingon guards enter via a table edge that is not an escape route. They’re loud and obnoxious, which makes it harder for the Klingons to spot any of the Enterprise crew this turn. The downside is they’re here to stay!

Turns out those GW artillery dice are still useful.

Spock triggers another restless guard, who moves in a random direction. He walks right between Spock and McCoy, but doesn’t see either one of them. (These guards are bad at guarding.) McCoy ignores the guard and activates an encounter marker. It’s the crew’s gear: communicators, phasers and tricorders! Now that the Enterprise crew has secured their gear, they can move off the board! McCoy and Spock are relatively close to the right edge, but Kirk is still pretty far away…The other Klingons change facing, etc. No one spots any of the Enterprise crew.

Turn 5: The Klingons activate and one immediately spots Mr. Spock. He sounds the alarm and fires at Spock, hitting the Vulcan and inflicting 1 wound!

Behold! I walked through this wall!

The Klingon lieutenant is deployed immediately, from a board edge that is not an escape route. Spock returns fire on the Klingon guard, killing him. The lieutenant charges into combat with Spock. Klingons fight better in melee than with guns, but not this time. Spock wins, inflicting one wound on the Klingon lieutenant!

McCoy adds injury to injury, firing into the melee with his newly-recovered phaser. He hits the Klingon lieutenant and puts him down for good!

The closest Klingon to Kirk charges him from behind, but it doesn’t go well for him. Kirk swings his big, manly rock with abandon, clubbing the Klingon to the ground.

Kirk sprints towards the right side of the board, spending two Hero Points to gets some extra movement.

Turn 6: The Enterprise crew makes a run for it. They can all reach the edge of the board, but can’t exit until next turn. The Klingons pursue, but fail to catch them.

Turn 7: The Enterprise crew gets initiative and escapes! Victory for Starfleet!

Once he realized they were not being pursued, Kirk slowed to a halt. “Now we can contact Scotty. We could use some reinforcements. We have to find Dr. Hubbard and stop whatever it is the Klingons are doing here.”

McCoy stared at the rock in Kirk’s hand. “You know, that thing looks like just about the biggest-“

“That’s enough, Bones,” said Kirk.

“I concur, Doctor,” said Spock. “It certainly bears a remarkable resemblance to a-“

“Yes, yes, Spock,” snapped Kirk, impatiently.

“Look, Jim,” said McCoy, “I’m a doctor. I’ve seen a million of ’em in my day. That one’s definitely noteworthy.”

“Whatever! It served its purpose!” yelled Kirk.

“Right,” said McCoy. “Can’t argue with that. But Jim… why are you still holding it?”

Spock raised an eyebrow.

Kirk tossed the rock aside and flipped open his communicator. “Kirk to Enterprise…come in, Scotty.”

Analysis: We played this scenario a couple of times. This was the most fun. (The first time we played, the Enterprise crew found their gear on the first encounter marker and it quickly degenerated into a firefight with no stealth at all. Boring.) It played very quickly, only about 25 minutes or so.

When creating the encounter markers for this scenario, I just had to include the infamous phallic rock from the classic episode “What are Little Girls Made Of?” Watching that scene really makes you wonder if the props department was deliberately fucking with the network, or if maybe Gene Roddenberry was. How could anyone see that and just see a rock? It had to be deliberate.

This was my first time playing a scenario with the guard duty rules in the 2nd edition. I was struck by just how difficult it is for guards to spot the heroes, even when they’re standing right in front of their faces. At least, it turned out that way the second time.

Coming soon, the final chapter, as Kirk and the crew of the Enterprise face off against the Klingon Captain and his men for control of the strange energy of Hubbard’s World! Watch for “Tug of War!”

Hubbard’s World: Outpost Laertes: A Fantastic Worlds Star Trek AAR

Captain’s Log: Stardate 1315.9: We have received word that Federation Outpost Laertes, a science station on the newly-discovered Hubbard’s World in the Klingon neutral zone, has gone silent. We arrived in the system to discover a Klingon battle cruiser in orbit around the planet. Our repeated hails to the outpost remain unanswered. Of course, the Klingons deny any knowledge of the outpost’s fate and would like us to leave. Commander Spock, Dr. McCoy and I, accompanied by Ensigns Gatwick and Heathrow from Starfleet security, are beaming down to the planet’s surface to investigate. Chief Engineer Scott has been given command of Enterprise in my absence.

Outpost Laertes looked abandoned. Vines and creepers already encroached on the small clearing where the science team’s supplies still lay neatly stacked in crates and barrels. The jungle seemed poised to quickly reclaim the ground where the Federation outpost stood. A standard Starfleet communications array, clearly damaged and inoperative, sat atop the basic, prefab building that served as both laboratory and living quarters to the missing scientists.

Spock regarded his tricorder. “Fascinating.”

Kirk and McCoy traded glances, but the Vulcan didn’t elaborate. “Well, don’t keep us in suspense, Spock,” said the Captain. “What is it?”

“Life sign readings are overwhelmingly vegetable in origin. I estimate some 97.56%”

McCoy’s uneasy gaze took in the vast jungle around them. “You don’t say. That’s fascinating, all right.”

“There is no trace of the science team,” continued Spock, coolly ignoring the doctor, “at least not in the immediate area.”

“Jim! Look!”

Kirk whirled and focused his attention where McCoy indicated. Four bipedal, plantlike creatures began to shamble out of the surrounding jungle. They looked like walking flowers, but much more menacing. They began to converge on the clearing.

“It’s like the jungle is coming alive,” said McCoy.

“Incorrect, Doctor,” said Spock. “These beings were certainly alive prior to our arrival, and did not spontaneously animate, as you suggest.”

McCoy flushed angrily. Before he could respond, Kirk stepped forward. “I am Captain James T. Kirk of the United Federation of Planets. We come in peace and mean you no harm.” In response, one of the plant-things ejected a stream of liquid in Kirk’s direction. He quickly stepped aside as it splashed on one of the supply crates nearby. Immediately, it began to smoke and hiss as the outer casing began to dissolve.

“Well, that’s darn rude,” said McCoy.

“Rude perhaps, though likely unintentionally so,” said Spock. “There is no indication that attempts at verbal communication should be effective, or that these beings possess any sense of hearing, at least not in the way we understand.” The plant things crept closer. “Phasers on stun, Captain?”

“When was the last time you stunned a houseplant, Spock?” asked McCoy. The Vulcan raised an eyebrow, but said nothing.

“Let’s not do anything we regret,” said Kirk, adjusting his phaser. “Low heat setting should be enough to show them we can defend ourselves if need be.”

Scenario: The Enterprise crew beams down to the site of the science outpost to find it deserted. They must search for clues to discover what happened to the science team. While they do so, they are attacked by some of the plant creatures of Hubbard’s World. Meanwhile, a Klingon spy is hiding near the camp, hoping to learn everything he can before he makes his escape, both about the Federation technology that now lies abandoned and about the landing party from the Enterprise.

Victory Conditions: The Enterprise crew must find three clues in order to discover what happened to the science team and in order to discover the strange energy readings. For every clue the Enterprise team discovers, the Klingon spy automatically gets one piece of information that is of value to his superiors. Once all clues have been found, the first team to move all the surviving models off the nearest board edge wins the scenario. (Only the Klingon spy needs to leave the board for the Klingon player to end the scenario.)

The Enterprise crew beams down to the science outpost.

Turn 1: The Enterprise crew gains initiative. McCoy activates first, and heads immediately towards the building. He activates the encounter marker there and discovers a clue: the remains of a Federation science officer, Ensign Jorgensen, one of the botanists assigned to the science team. He’s been partially dissolved. McCoy passes his Will check, and as a result he doesn’t have to spend next turn throwing up. One of the plant creepers spits its corrosive liquid at Ensign Gatwick, but misses him by a country mile.

Spock activates and heads into the jungle. He passes his Brawn check and is not entangled by the dense foliage. He activates an encounter marker (no effect). Another plant creeper spits at Spock, but the Vulcan ducks aside. Kirk uses his ability, Voice of Command, to make Ensign Gatwick act next. Gatwick fires at a shambling plant creature, but fails to hit.

A plant creeper creeps closer. Kirk shows Gatwick how it’s done. He steps forward and blasts one of the shambling plant creatures that spit at his first officer, killing it. Ensign Heathrow takes aim at an approaching plant creature, but he misses.

Turn two starts off with one of the plant creepers spitting its caustic juices all over Ensign Gatwick, who lets out a Wilhelm scream and dies horribly. Oh, the humanity!

Kirk uses his Voice of Command ability again, this time to allow Ensign Heathrow to go first. He spends a Hero Point, takes a deep breath, and vaporizes the nearest plant creeper to his position.

The plant creeper nearest to Dr. McCoy attacks, but the doctor has no intention of ending up like poor Jorgensen. The plant misses, McCoy returns fire and kills it. Kirk fires at the plant creeper that killed Ensign Gatwick and kills it, too. Spock heads deeper into the jungle and activates another encounter marker. Another clue! Tricorder readings indicate a strange energy coming from farther off in the jungle. All the vegetation on the planet seems imbued with this strange energy. Did the science team go investigate?

Turn 3: No plant creepers remain, so the Enterprise crew has the run of the board. Ensign Heathrow heads off into the jungle, but fails his Brawn test and gets entangled in the thick vegetation before going too far.

Dr, McCoy stumbles directly into a slumbering plant beast! This one’s huge, and it’s not happy!

The Plant Beast wastes no time. It swats Dr. McCoy hard, knocking him back and inflicting one wound!

McCoy is down, but not out. Spock activates next, moving back into the clearing and firing his phaser. He hits the Plant Beast squarely, inflicting a wound. The Plant Beast barely feels it! Kirk fires at the Plant Beast, wounding it; then immediately spends 2 Hero Points to take a Heroic Action, charging forward and firing again for another wound! Now the Plant Beast takes notice!

Turn 4: The Plant Beast gets initiative and charges Kirk, but Kirk spends another Hero Point and manages to evade the Beast’s grasping tendrils. Spock fires again but misses; McCoy tries to administer aid to himself but is too stunned and fails his roll. Kirk fires at point-blank range and finally kills the huge Plant Beast. Ensign Heathrow manages to extricate himself from the clinging foliage, but blunders into a spore cloud and is knocked unconscious for 2 turns!

Turn 5: Once again, with no opposition, the Enterprise crew has board control. McCoy moves into the jungle to revive Ensign Heathrow. He is successful! Spock and Kirk likewise enter the jungle, heading for encounter markers. Spock finds nothing, but Kirk discovers a final clue: the signs of several humanoids passing into the jungle is a clear indication that the science team went in search of the strange energy readings. The vegetation seems to have grown back abnormally fast. If not for their tricorders, the crew may have missed the science team’s tracks altogether!

At that very moment, the Klingon spy makes his move! Armed with the information on the Enterprise crew and their plans to seek the energy source themselves, he quickly attempts to race back to his superiors!

Turn 6: The Klingon spy gains initiative and flees into the jungle. He passes his Brawn test and is not entangled, but is slowed by the dense foliage. Spock activates and attempts to flank him. He fires at the Klingon, but misses. Kirk once again uses his Voice of Command to order Ensign Heathrow to pursue. The Ensign gives chase and fires, but he misses! Kirk all-out sprints into the clearing, trying to get as close to the Klingon as he can. He spends two Hero Points to take another Heroic Action, and fires, but he misses his mark! (Looks like they all need to go back to Starfleet marksman school!) McCoy chases after Ensign Heathrow, but gets entangled in the brush.

Turn 7: The bad luck continues for Starfleet this turn. In a last-ditch effort, Kirk commands Ensign Heathrow to take the shot! Sadly, the Ensign misses again, which allows the Klingon to slip away into the jungle!

Victory to the Klingons!

Analysis: The rules changes I made worked well and sped things up considerably. Not having to roll for wound location and keep track of deteriorating abilities made each shot count.

My first thought was that the scenario favors the Klingon player, since the Klingons only need to move one model off the board to win. Additionally, until the spy is revealed, Starfleet takes all the lumps from the plant creatures. But, considering the Starfleet player can just shoot the spy and win by default, this balances things out a bit. Turns out in my game Starfleet got the yips when it counted most and missed the Klingon with every shot!

I built the characters using a variety of archetypes from both Fantastic Worlds and .45 Adventure 2nd Edition, which was the core rules engine I used for the game mechanics. The Special Abilities listed are taken with my rules changes in mind, so nothing that would require wound location or stat changes. I also changed “Ray Gun” to “Phaser” and “Blade” to “Melee”, purely for thematic reasons.

Captain Kirk (Grade 3): DR 5 Brains 4 Will 4 Brawn 3 Guts 10 Phaser 4 Melee 6 Dodge 3 Speed 5 Brawler +2d10, Pugilist +1, Leadership, Tactics +1d10, Nerves of Steel +2, Voice of Command, Quick Recovery, Heroic Action

Mr. Spock (Grade 2): DR 5 Brains 6 Will 5 Brawn 5 Guts 7 Phaser 3 Melee 3 Dodge 3 Speed 5 Genius +2, Observant, Immune to Fear, Incredible Will +1, Nerve Pinch (Dirty Tricks), Undying Loyalty, Well-Prepared

Dr. McCoy (Grade 2): DR 4 Brains 5 Will 5 Brawn 3 Guts 8 Phaser 3 Melee 3 Dodge 3 Speed 5 Genius +1, Leadership, Medical Knowledge, Nerves of Steel +2, Observant, Undying Loyalty

Starfleet Security (Grade 1): DR 4 Brains 2 Will 2 Brawn 3 Guts 6 Phaser 3 Melee 2 Dodge 2 Speed 5 Sharpshooter +1d10, Tactics +1d10, Devotion, Nerves of Steel +1

Klingon Spy (Grade 1) DR 4 Brains 2 Will 3 Brawn 4 Guts 4 Phaser 2 Melee 3 Dodge 3 Speed 5 Brawler +1d10, Ferocious, Fencing +1d10, Bruiser +1

Up next: Race to the Source!

Hubbard’s World: A Fantastic Worlds Star Trek Campaign

I decided since I have all these Modiphius Star Trek miniatures, I should play something with them. This left me with the task of finding a set of rules conducive to Star Trek skirmish gaming. Modiphius has their own rules, callled Red Alert, for just this sort of thing; but I find it to be a cumbersome system that requires familiarity with their roleplaying game (which I have, but still…) I looked into a few other options, like using Osprey’s Black Ops (fail) and Pulp Alley (I only perused the starter rules, but it seemed like too much work for Trek). None of them really captured what I was looking for: simple rules that allow for heroic acts and can capture the feel of Star Trek.

Then I remembered Fantastic Worlds, which is the pulp sci-fi version of Rattrap’s .45 Adventure. I haven’t played .45 Adventure in a long time, but I love it lots. After I dug out my copy of Fantastic Worlds I knew I had what I needed. I made some rules changes (primarily to combat) to help speed everything along.

The rules I changed were really quite simple. .45 Adventure has a detailed combat system that involves wound location and deteriorating statistics based on damage received. For example, you get shot in the arm, your shooting and brawling abilities go down; you get shot in the legs, your movement speed decreases, etc. The better your character, the higher his stats and the more wound boxes he has; therefore wounds have less of an effect on heroic characters and a greater effect on scrubs.

For my game, this was a bit more bookkeeping than I wanted to deal with. I decided a model has a number of wounds equal to its rank and damage resistance (DR) commensurate with their abilities, and that wound location doesn’t matter. If a character is wounded, he loses a wound. Rank 3 and Rank 2 characters are KOed when they lose their last wound; Rank 1 scrubs aren’t so lucky: they’re dead (unless they are supposed to be KOed). This makes combat a lot faster and more deadly, but requires a lot less effort to keep track of a character round-to-round. Heroic characters ( like Kirk) may have access to abilities that allow them to shrug off and/or heal wounds, or to act regardless of them, but Joe Redshirt is probably going to die. It’s the Trek way.

The tradeoff is that a lot of special abilities are based around wound location, such as Supreme Effort, which allows a model to use his starting stats for a wound location for a turn (regardless of how badly damaged that location is); or Dead Shot, which improves your chances of hitting a specific location. Since I scrapped wound location, none of the models could use these; which somewhat limited the selection of skills I had access to. Each location also has its own Damage Resistance value. It’s generally easier to wound someone if you hit them in the head as opposed to hitting their arm, for example. I scrapped that too, and just assigned a blanket DR to an entire model. The more important or tough the model is, the more DR it has.

I was ready to boldly go. I just needed a compelling story. So…

Hubbard’s World (or Q’uvakh, as it is known in Klingon) is a lush, jungle-covered M-Class planet in the midst of the Klingon/Federation Neutral Zone. No one can say with certainty who discovered it first (although Dr. William Hubbard took the liberty of naming it after himself); however, both the Federation and The Klingon Empire have staked a claim. Under the provisions of the Organian Treaty, both powers are allowed to develop the planet for non-military use to the best of their ability, while ensuring any native species are not interfered with.

Several months ago, the Federation sent a science team to set up an outpost to observe the new life on Hubbard’s World, but soon lost contact with them. The U.S.S. Enterprise was dispatched to investigate the disappearance of Dr. Hubbard and his team. When they arrived in the sector they discovered a Klingon battle cruiser orbiting the planet. Naturally, suspicion immediately fell upon the Klingons; but they denied any knowledge of the science team’s disappearance.

The Klingons explained that while the Federation claimed to be interested in scientific research, the Klingon Empire had more practical concerns: their intent was to cultivate the world for food production, as (unbeknownst to the Federation) the Empire was in the midst of famine. They loudly insisted that they had no reason to interfere with any scientific expedition and resented the implication they would do so. They warned the Enterprise to quickly conduct their investigation and be on their way, as they considered this larger Federation presence to be an act of aggression.

Of course, the Federation was telling the truth about their motives. The Klingons were lying…

Up next: Hubbard’s World, Part 1: Outpost Laertes!

MH-2 Time Trap Part 1: The Menace of the Mimic!

PROLOGUE

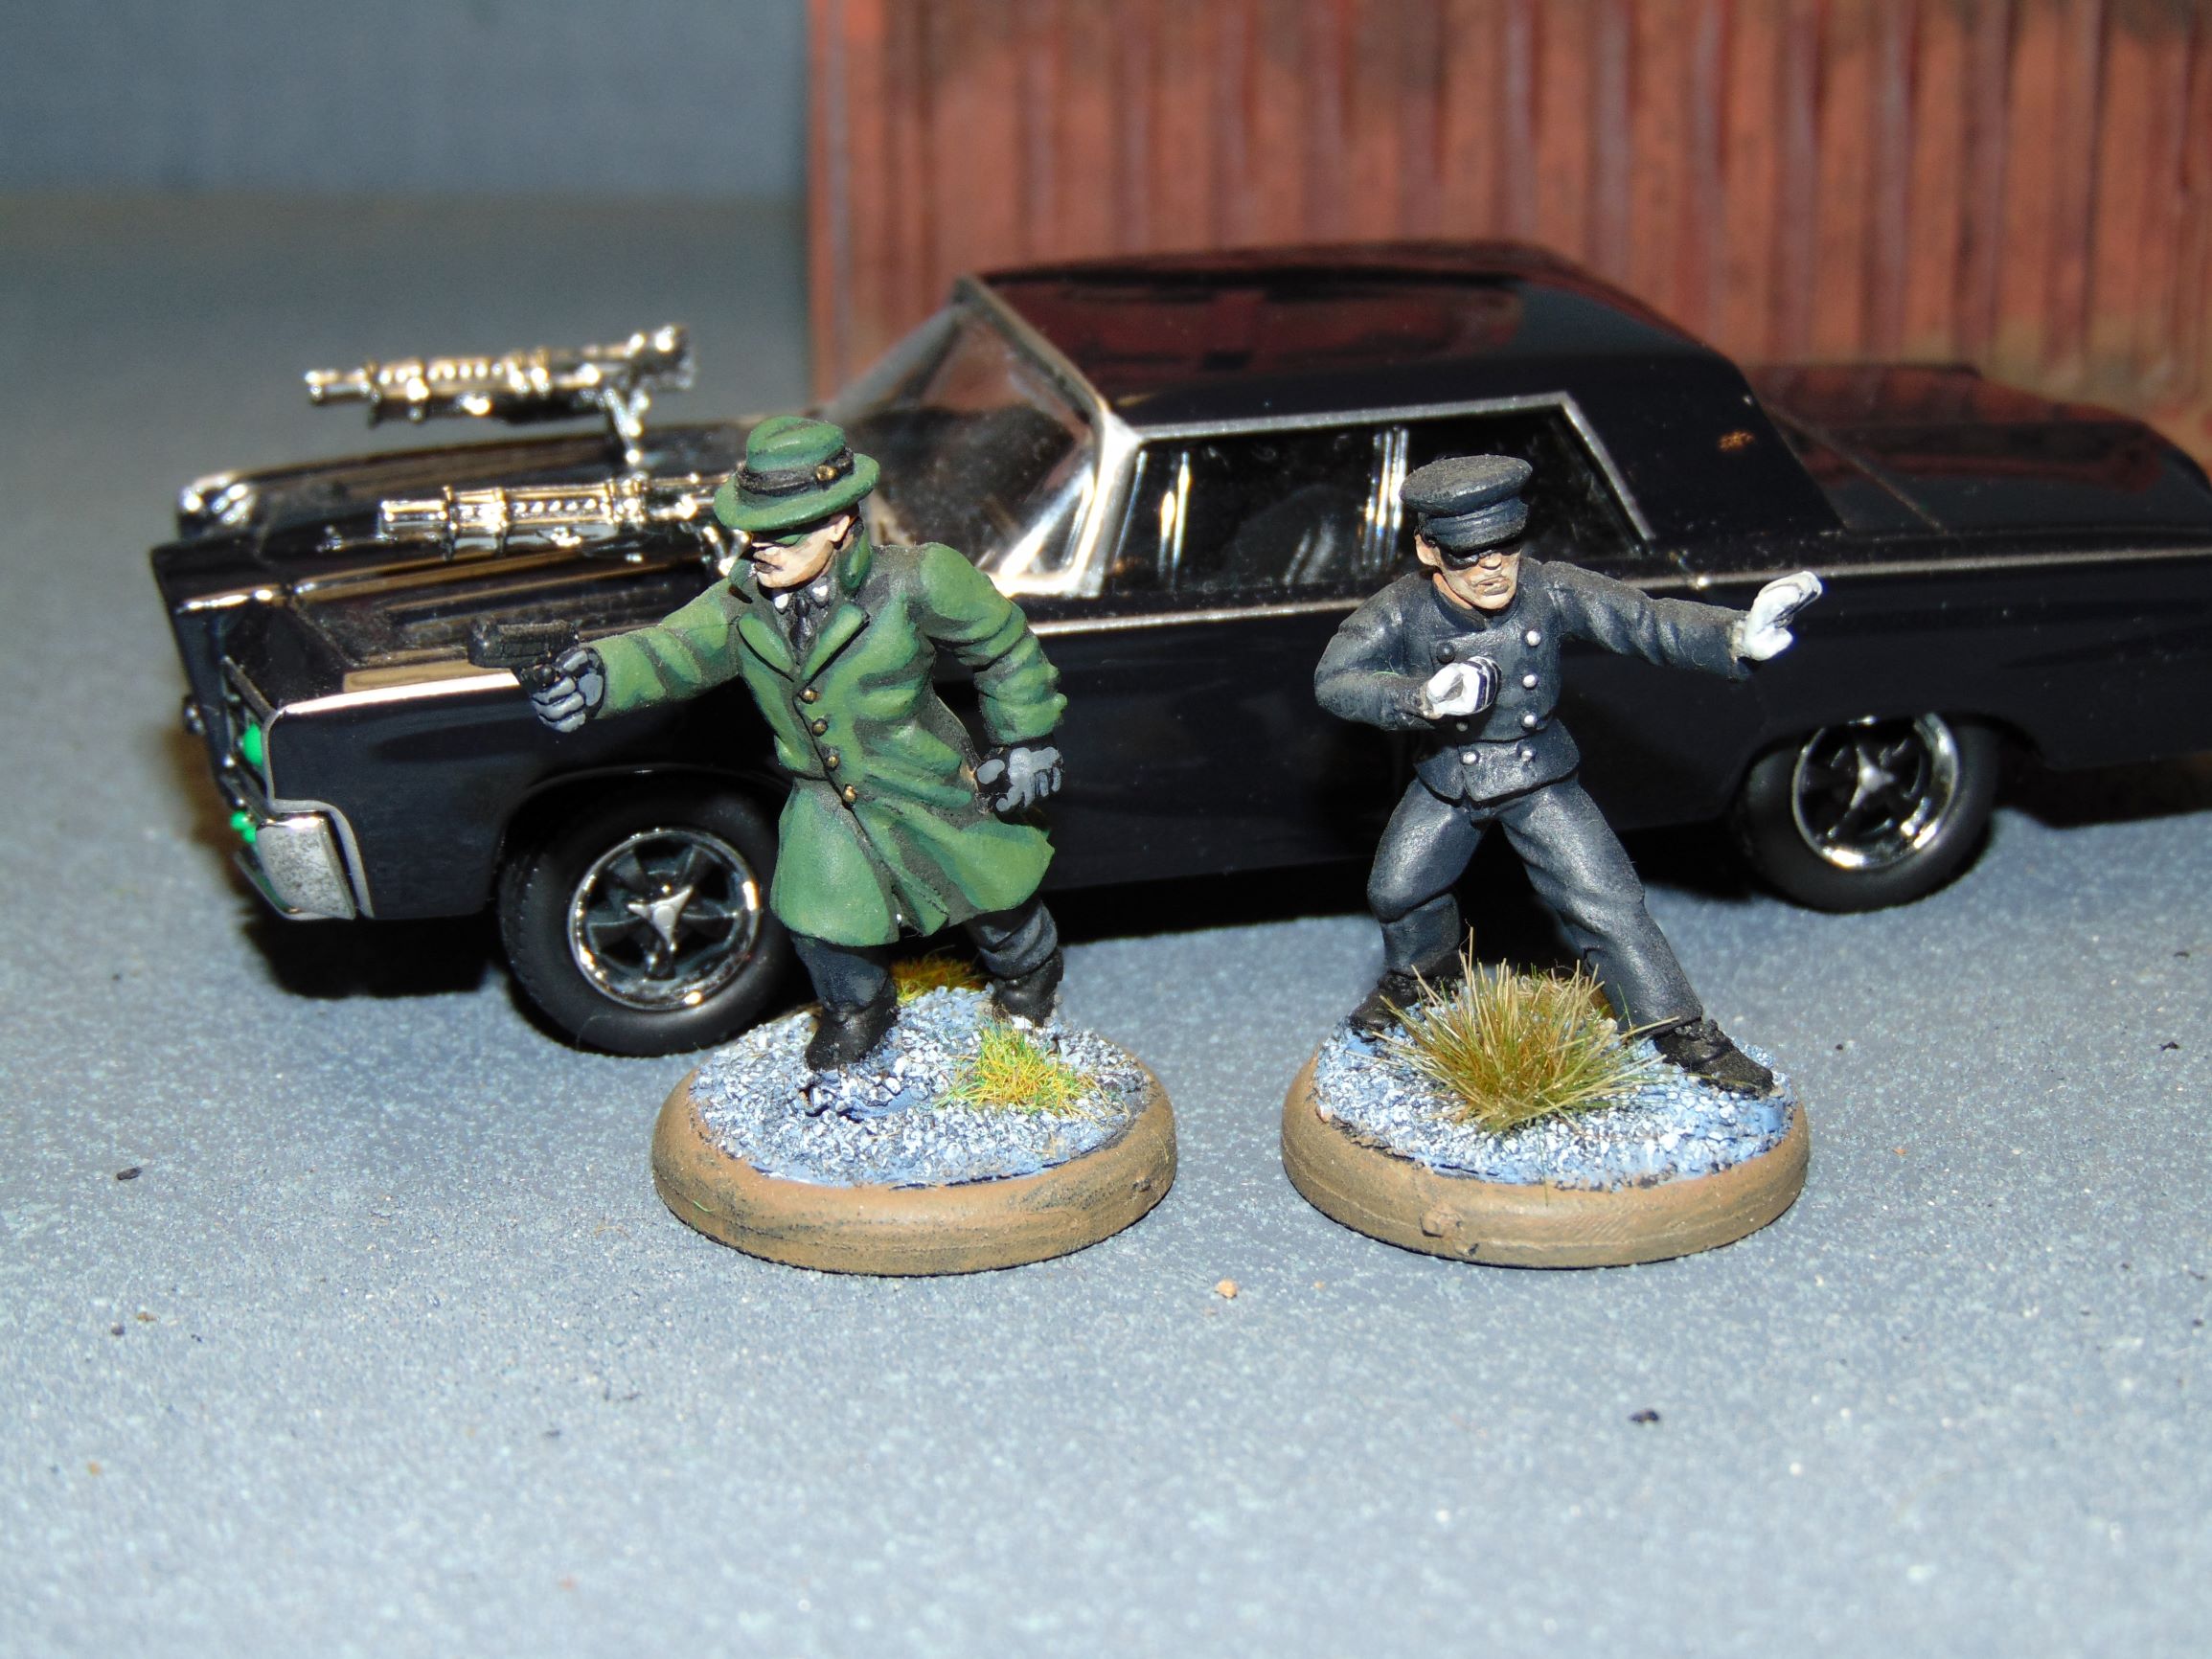
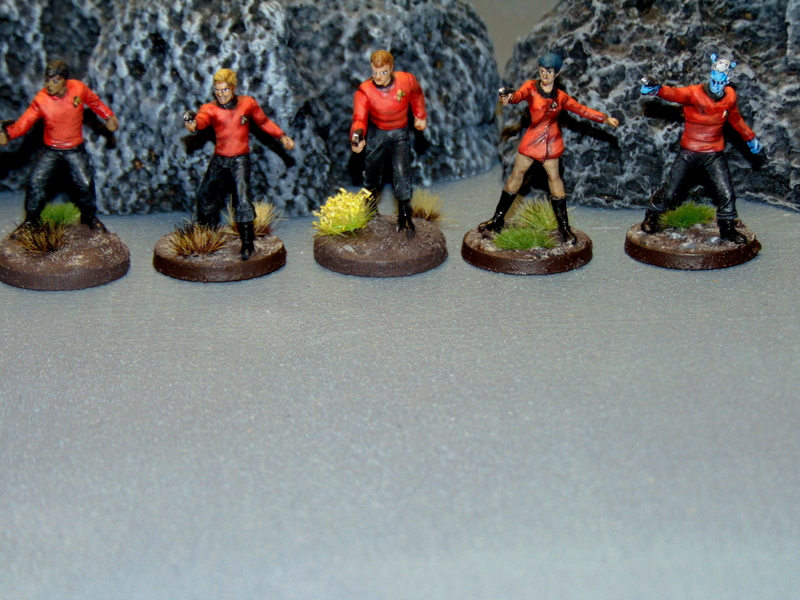
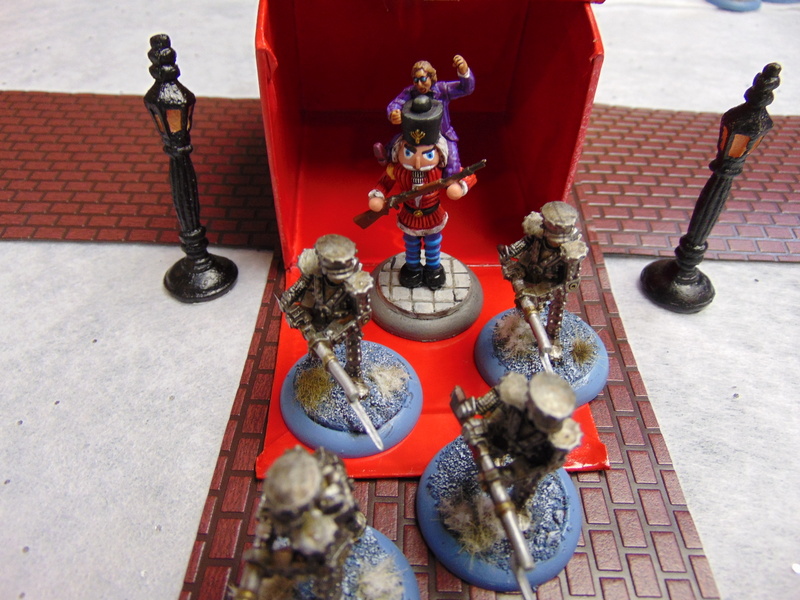
They are Earth’s Mightiest Heroes, the Avengers! Captain America, Captain Marvel, Vision, Scarlet Witch, Starfox and Wasp! Their quiet afternoon at Avengers Mansion is shattered, as suddenly, without warning, a visitor appears in their midst, trailing a mysterious, billowing smoke! They recognize him immediately as Immortus, Lord of Limbo!

“Avengers,” says Immortus. “We have no time to exchange pleasantries. In several days, a solar flare will destroy this galaxy. You must act quickly to prevent this, or Earth is doomed. The only way to do this is to allow me to use my mastery of time to send you back to various points in history, where you must prevent certain events from occurring. The flare develops as a result of these events, so you must alter the course of time and ensure they do not take place.”

“Wait a minute, Immortus,” Captain America says. “How do we know that this is the best course of action? Messing around with the timeline seems drastic. Perhaps we can consult with Dr. Richards and come up with a better plan?” Several of the Avengers nod in agreement.

“I am Master of Time, Captain, and I assure you we have little of it left. You must act now. There are two events that require immediate attention. The first involves a young man named Calvin Rankin. The other event concerns Drax the Destroyer. Both must be stopped!”

“Drax!” exclaims Wasp. “That’s never good news.”

“I assure you that Rankin is every bit as formidable. Nonetheless, we have little time to debate.”

Captain America nods reluctantly. “All right, then. Captain Marvel, Wanda…you’re with me. We’ll deal with Rankin. Starfox, Wasp, Vision…you handle Drax. And be careful.”

“How fortunate you are, Captain, to enjoy the assistance of these two beautiful women,” says Starfox, “but Janet’s beauty is so sublime that I consider myself equally fortunate.”

“Keep your mind on the mission, Starfox,” says Cap. I’d love to punch him in the dick, he thinks to himself.

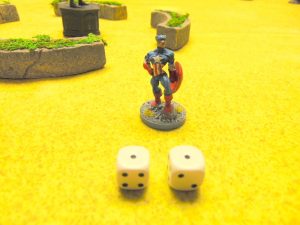
Immortus turns towards Captain America’s group. “Very well, then. You will be sent back to the year 1969. Calvin Rankin is in Central Park. You must find him and convince him to put this on.” Immortus holds up a strange-looking headset.

“Why?” asks the Scarlet Witch.

Immortus sighs in irritation. “Have I not impressed upon you the need for haste? Because Rankin will eventually come in contact with an alien device that will increase his intellect a thousand fold, allowing him to develop dangerous technologies that will directly lead to the formation of the solar flare. This headset will ensure his mind will not be altered in this fashion. It will not otherwise harm him.”

“What if he won’t put it on?” asks Captain Marvel.

“Then you must put it on him,” Immortus says, as though talking to a child. He hands the headset to Captain America. “Now, enough talk. Prepare yourselves!”

The mysterious smoke billows forth from Immortus’s hands, surrounding the small team. They are transported through time!

The Scenario:

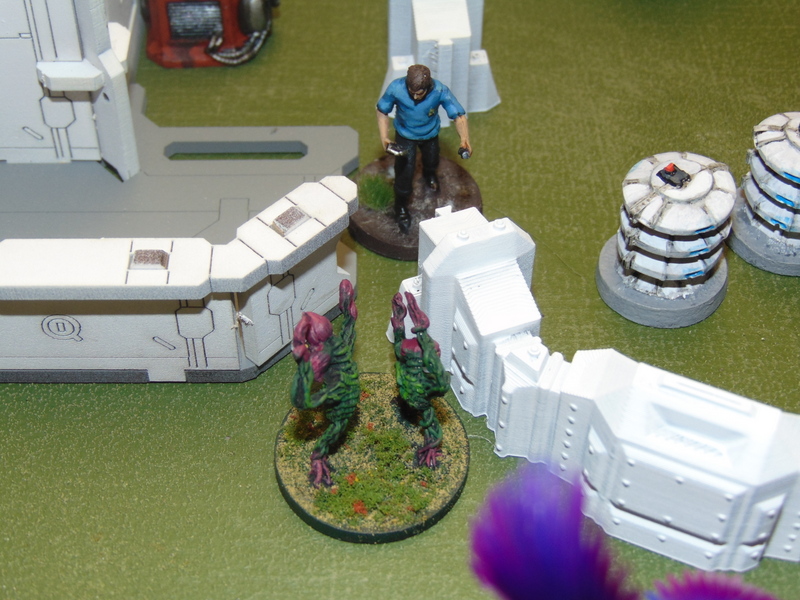
The prologue pretty much sums it up. The Avengers must find Calvin Rankin in the park and make sure he puts on the headset. What Immortus didn’t tell them is that Calvin Rankin is a powerful mutant with the ability to absorb and mimic the powers of anyone he comes across, and that he’s not going down without a fight. To add challenge, there are innocent civilians in harm’s way and the fight quickly draws the attention and intervention of law enforcement.

Setup:

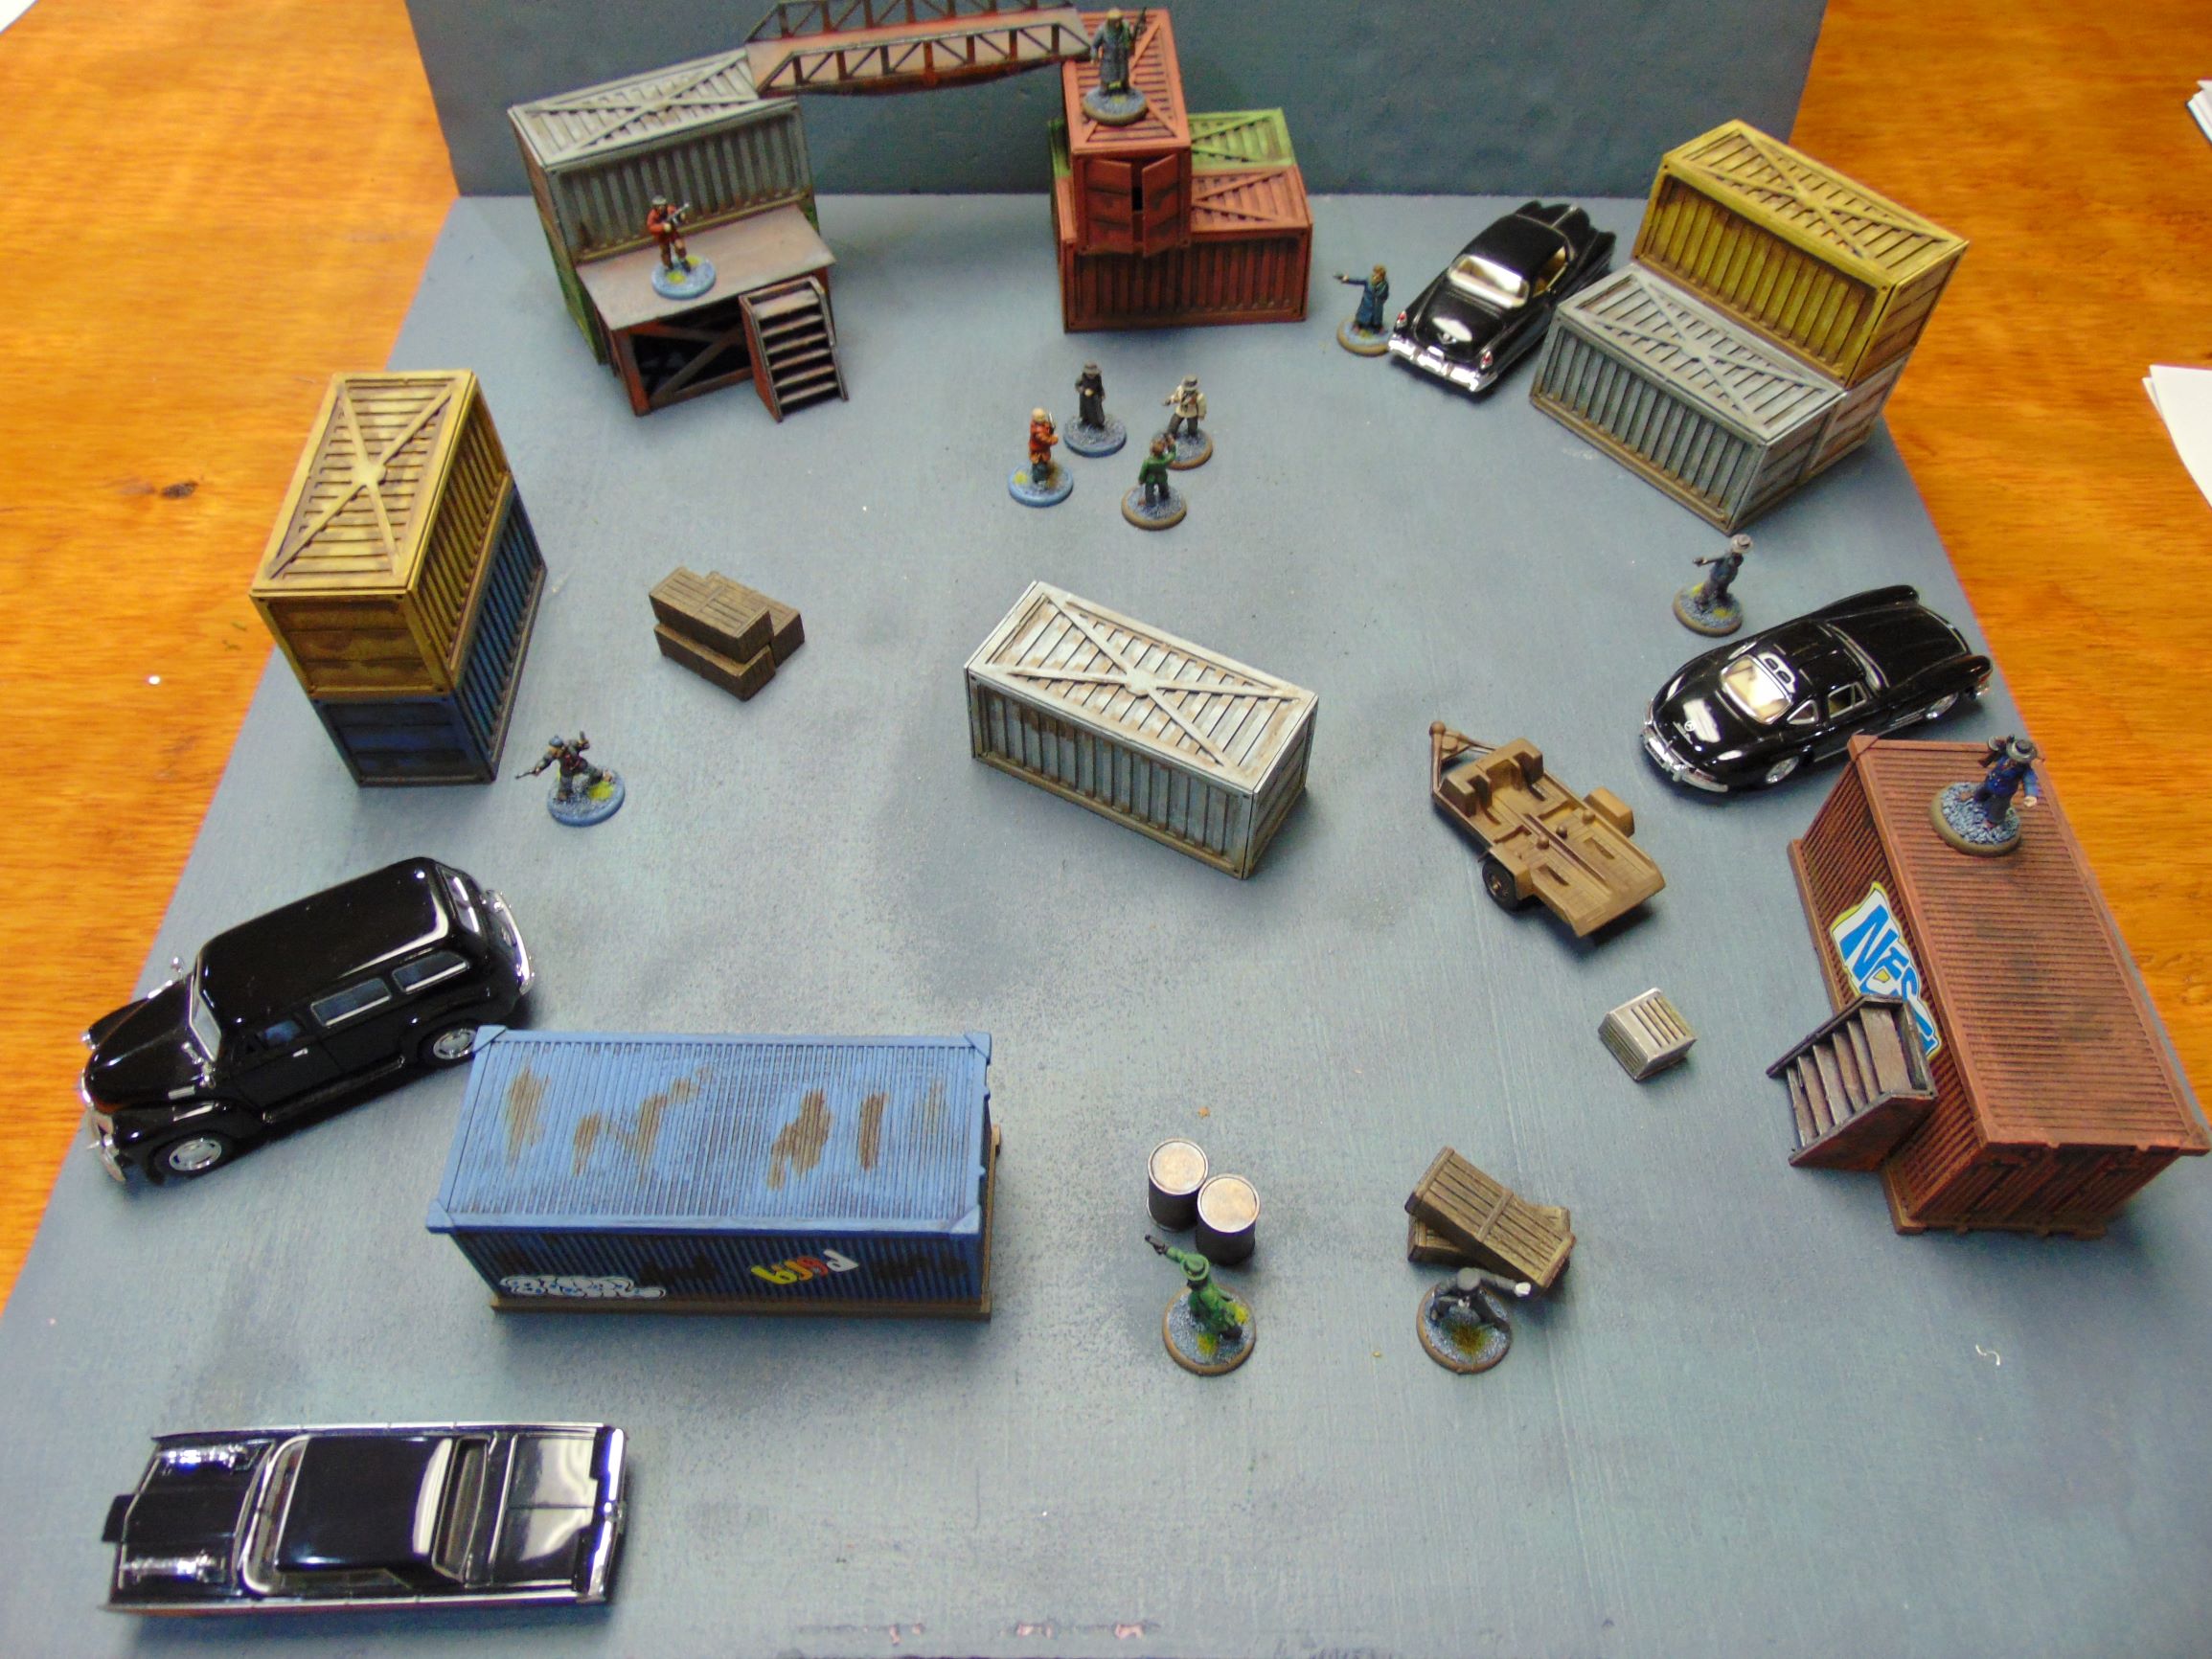
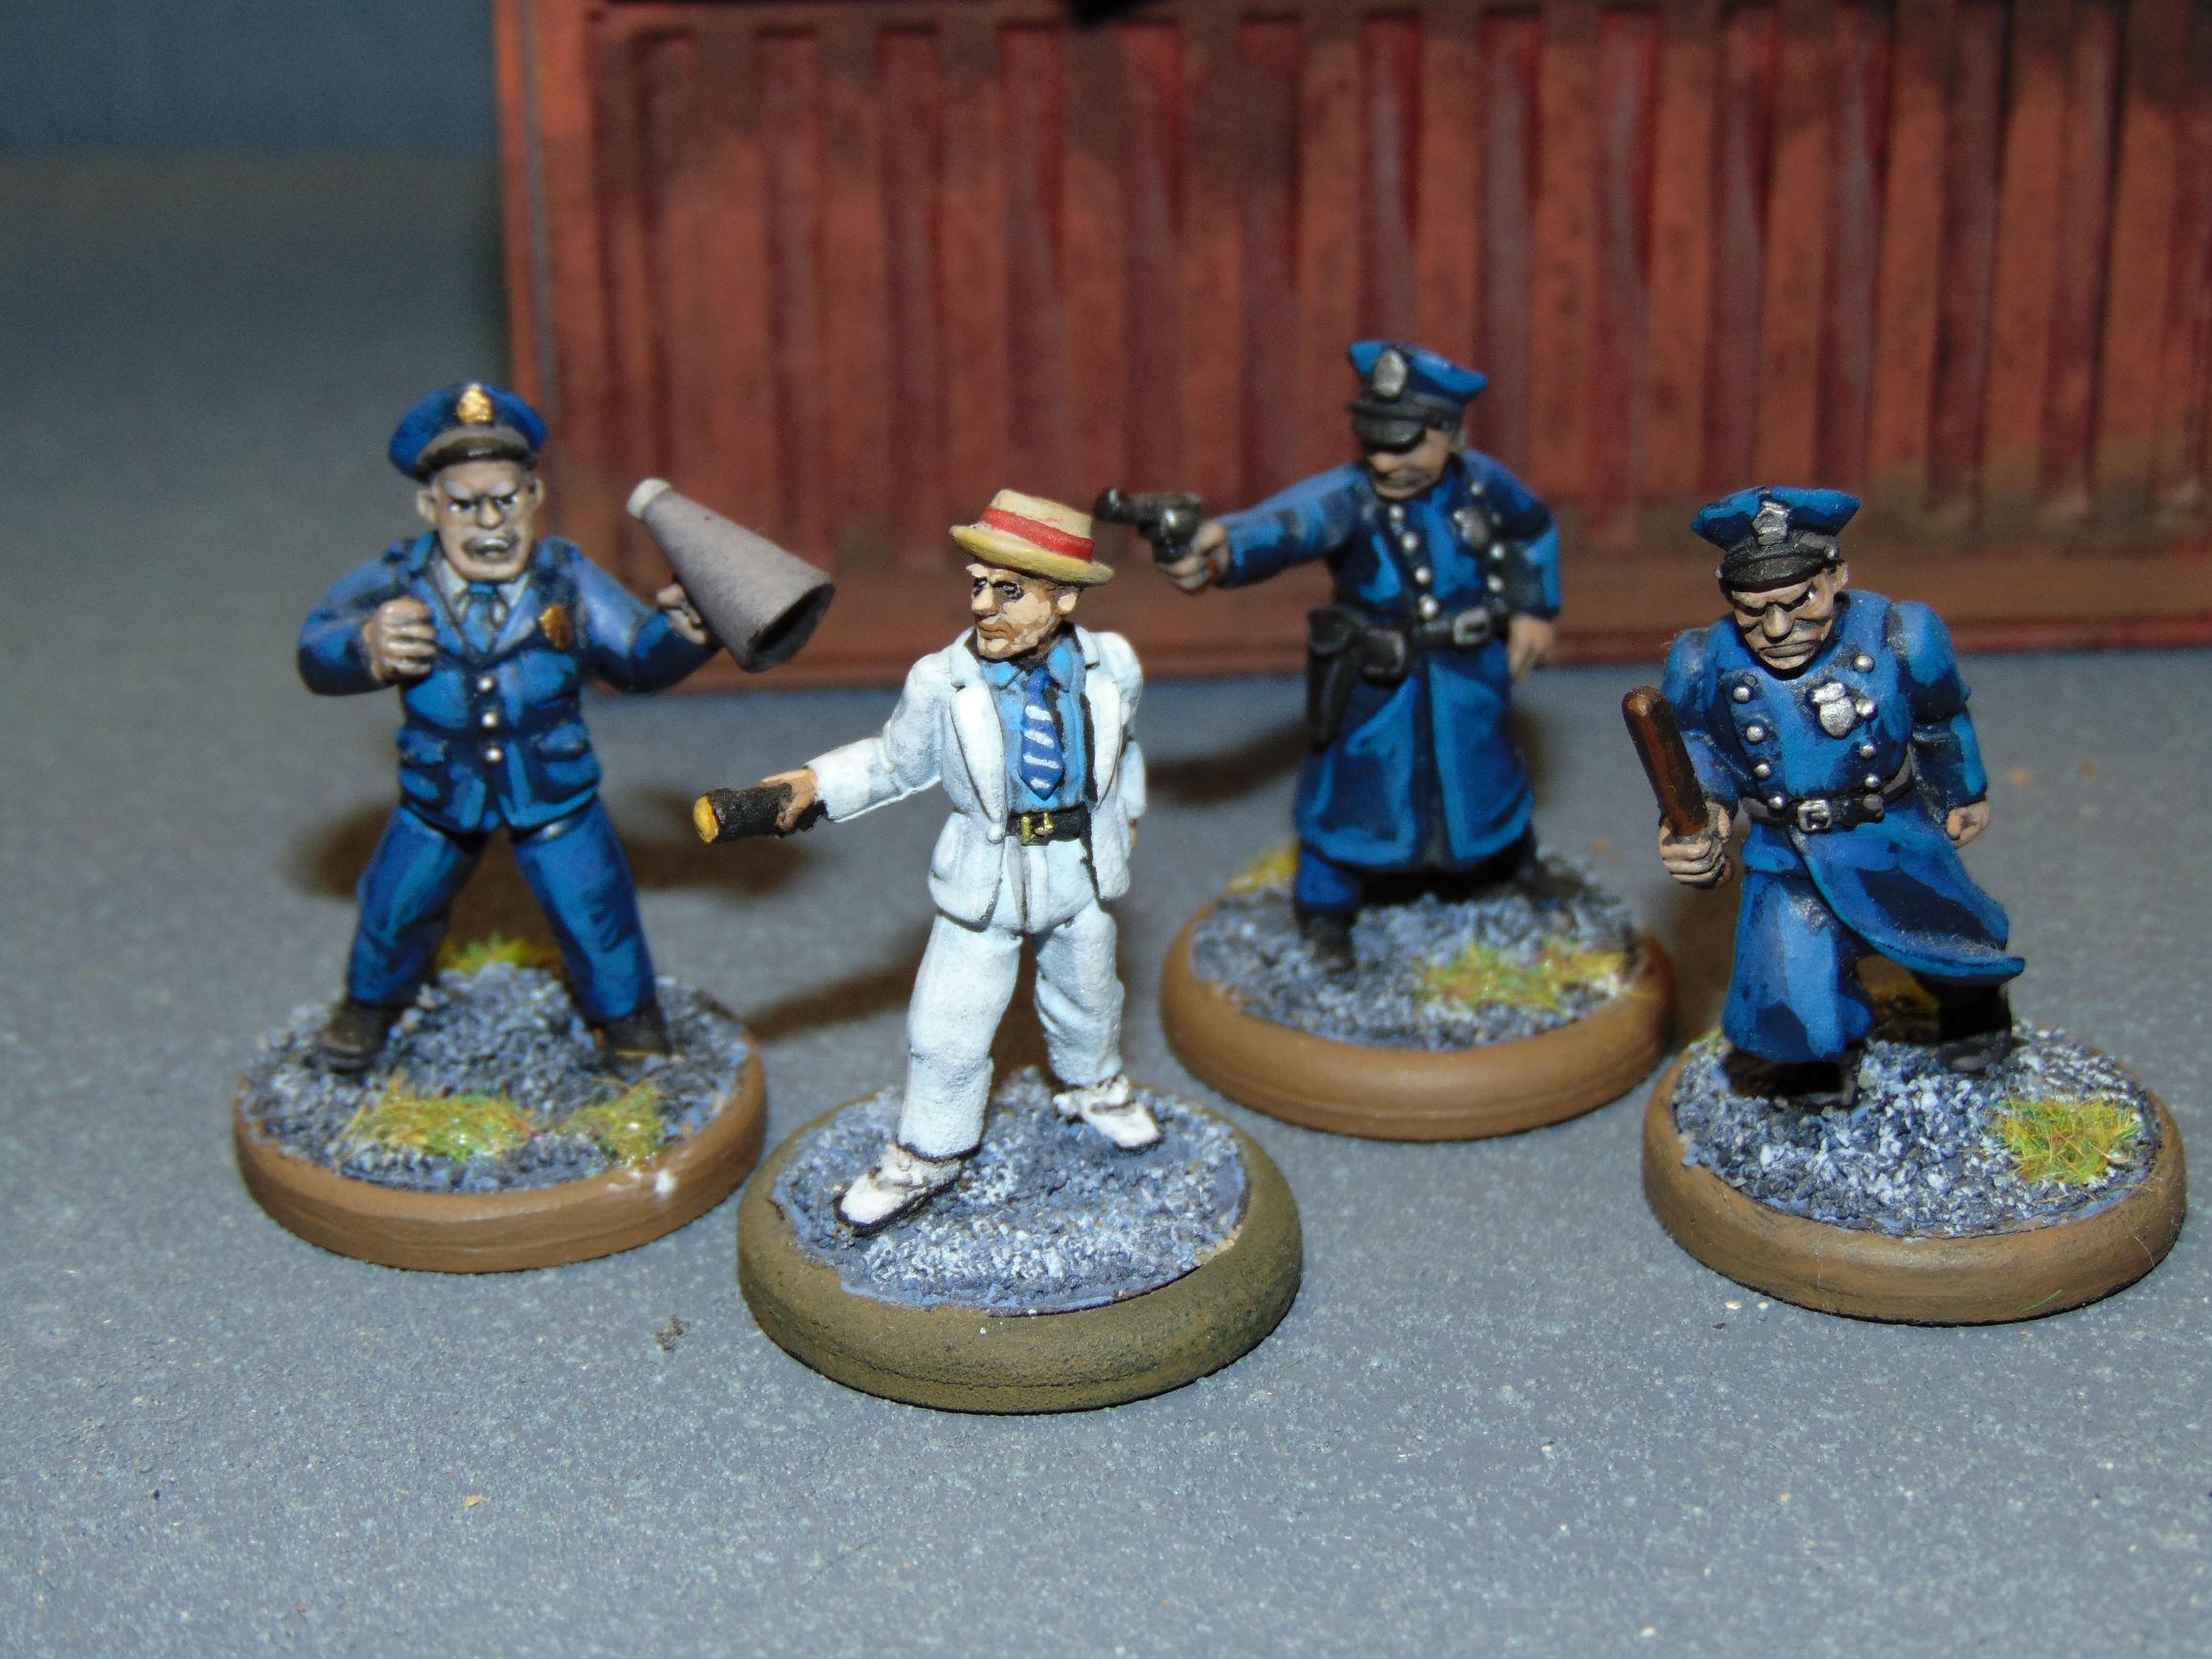
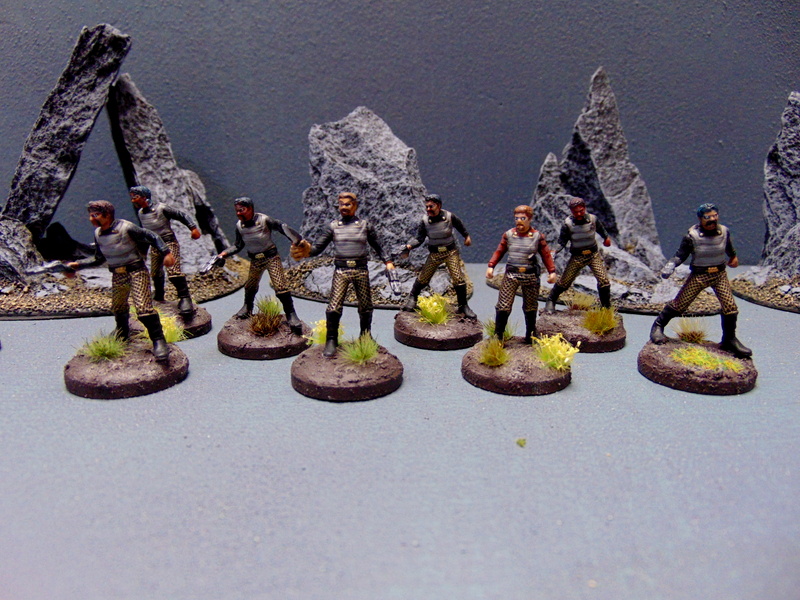
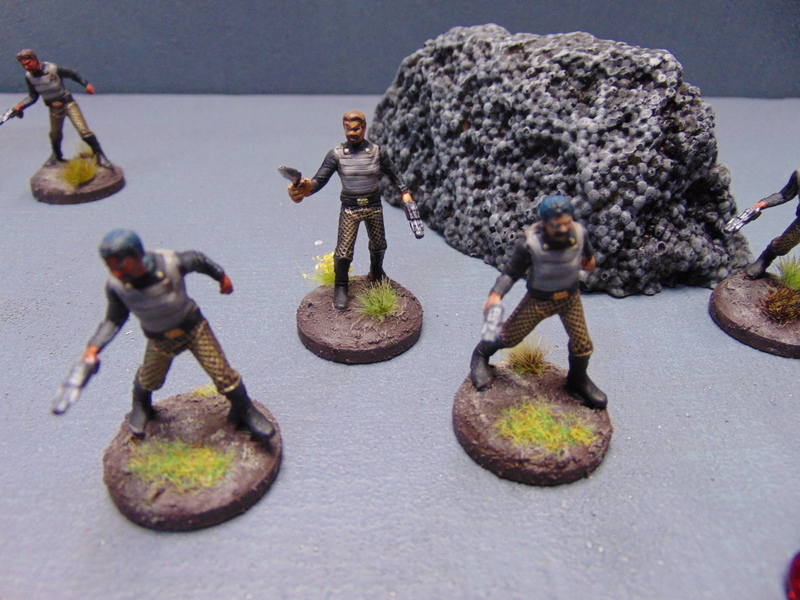
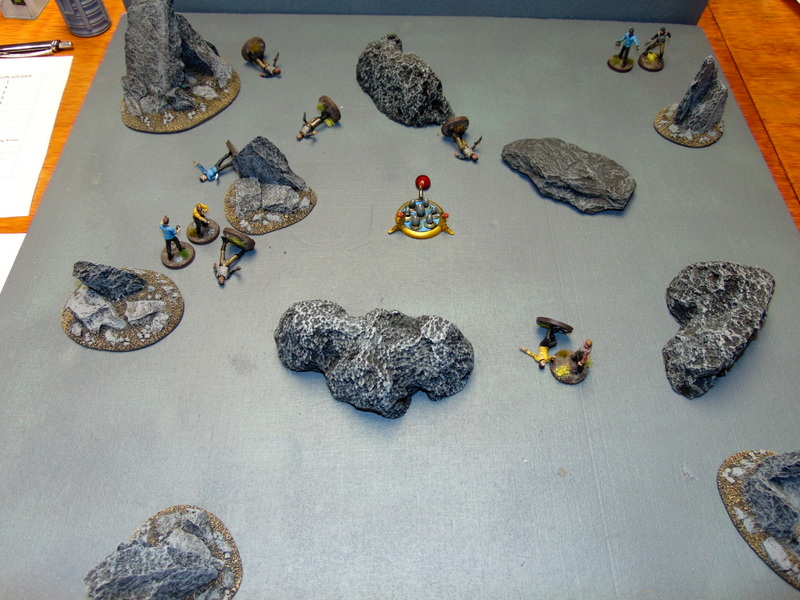
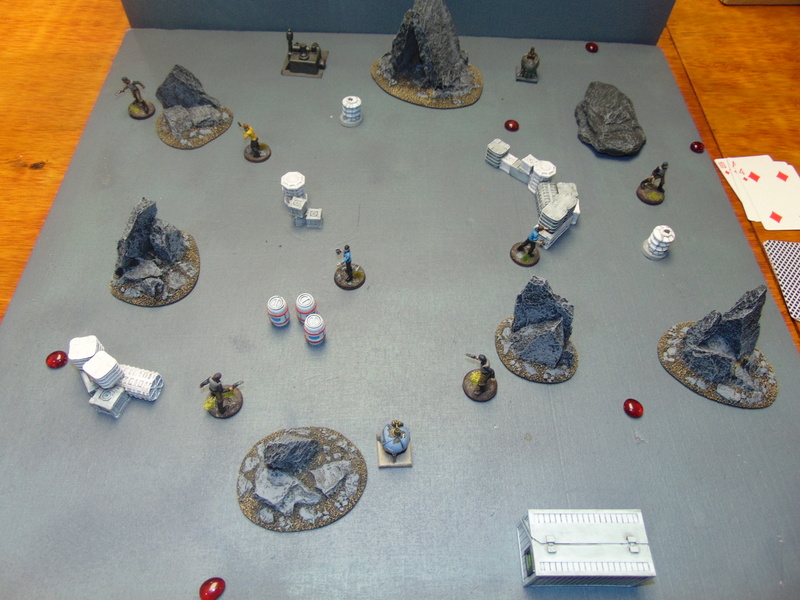
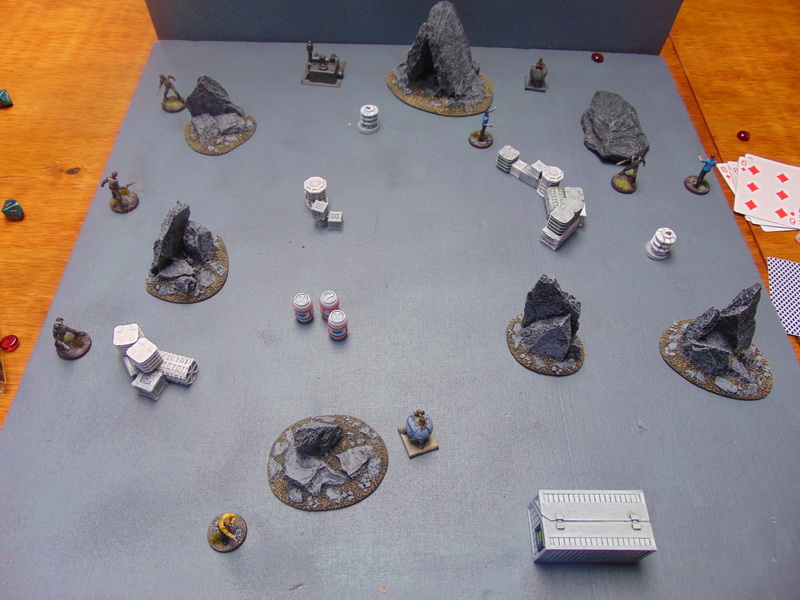
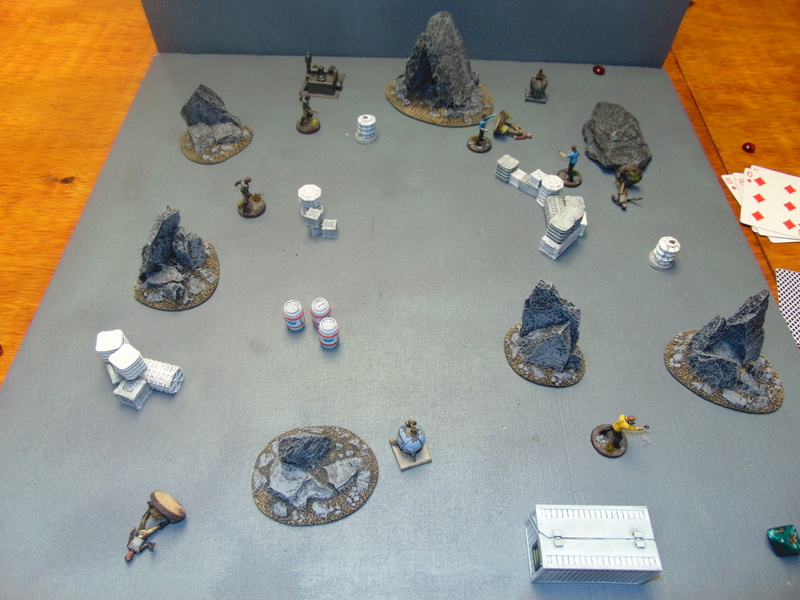
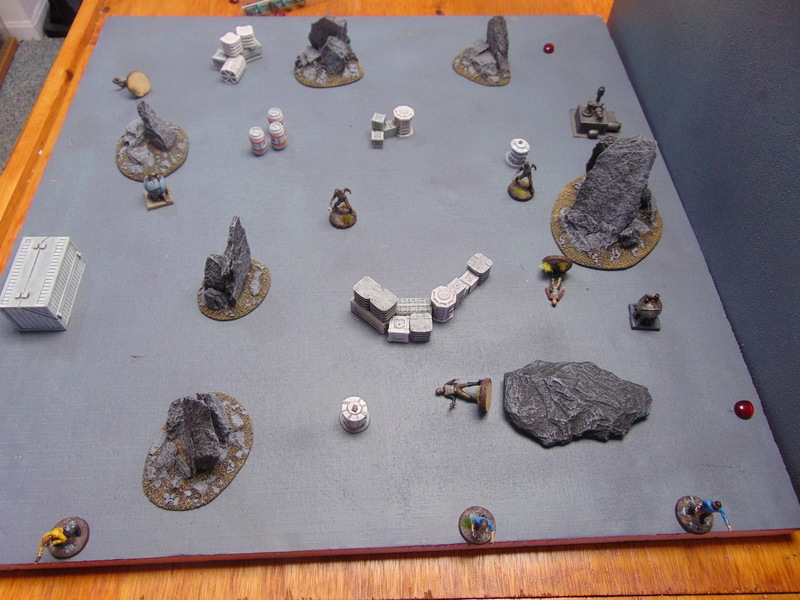
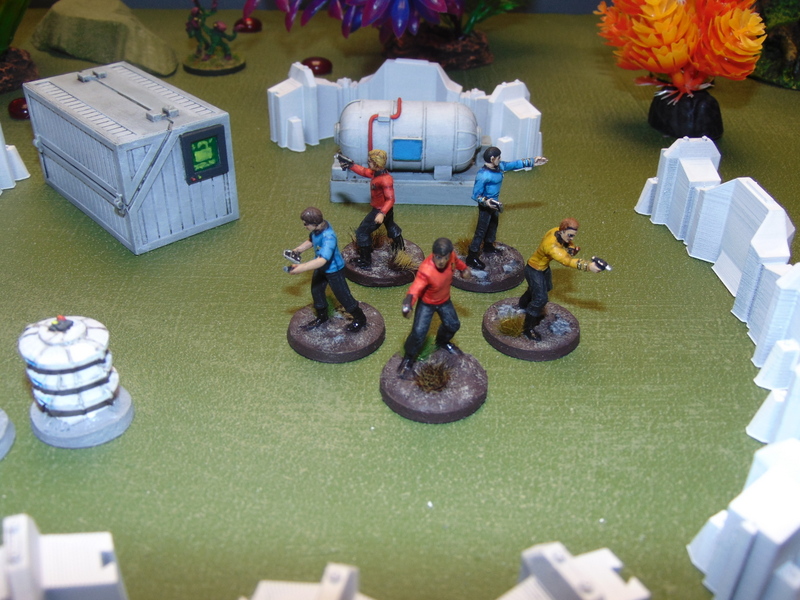
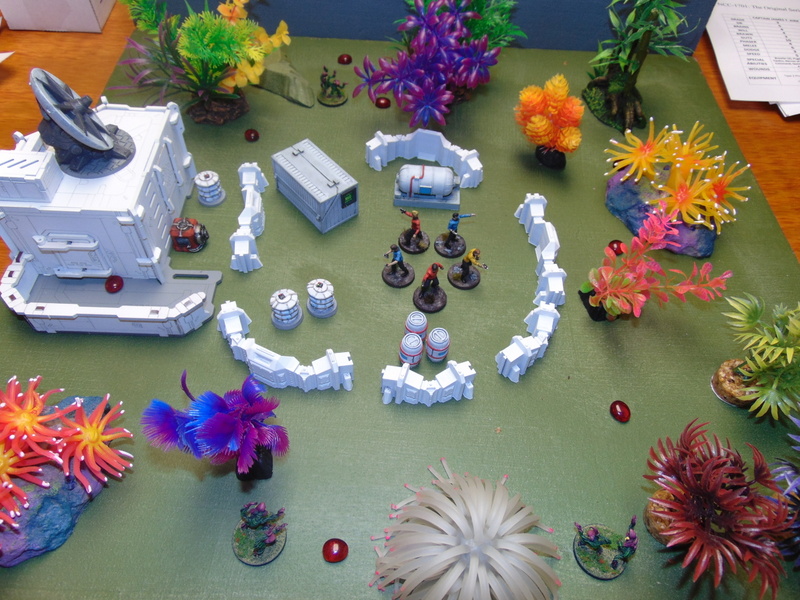
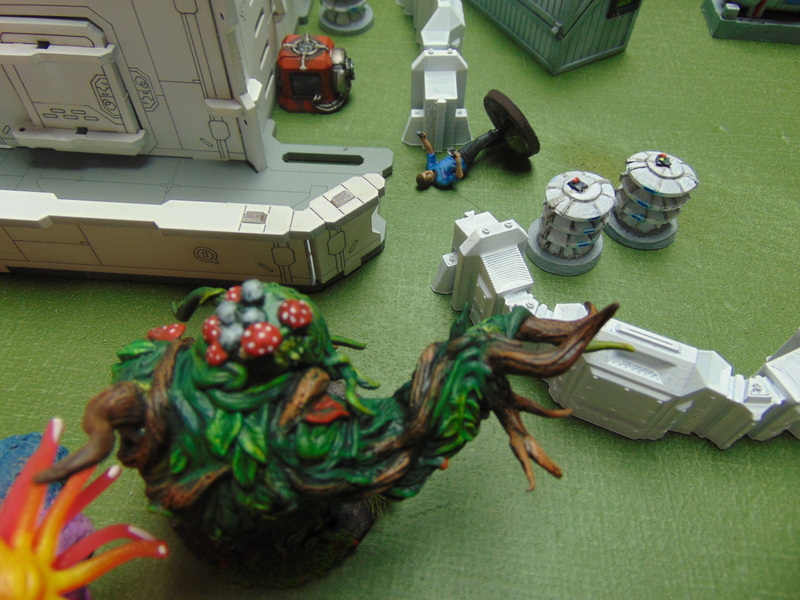
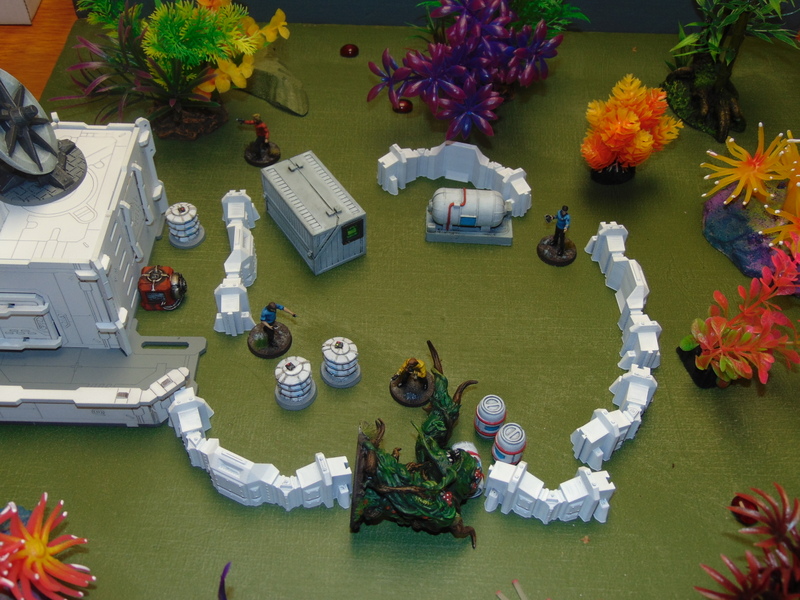
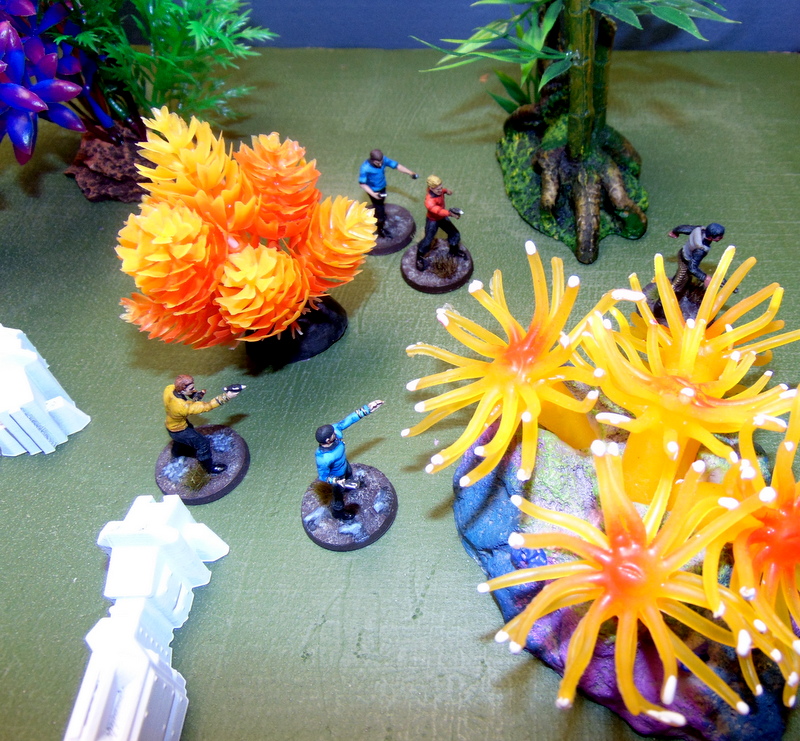
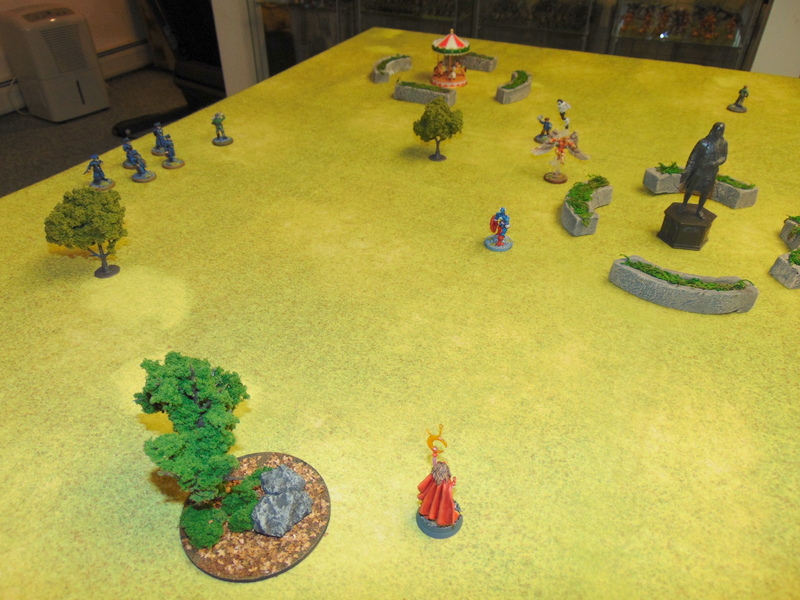
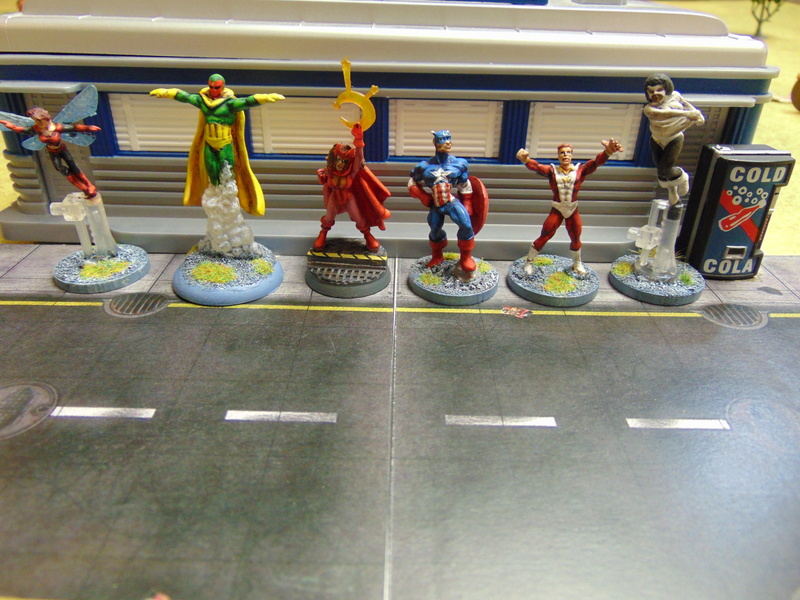
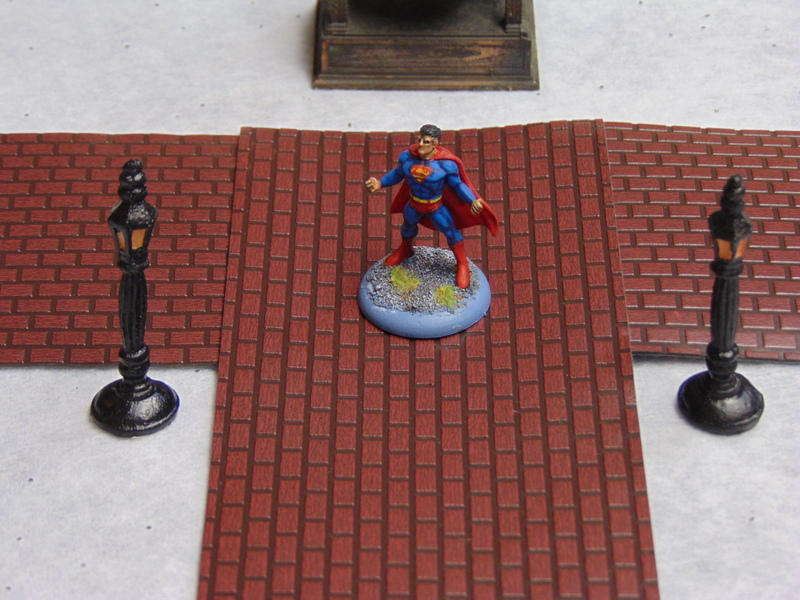
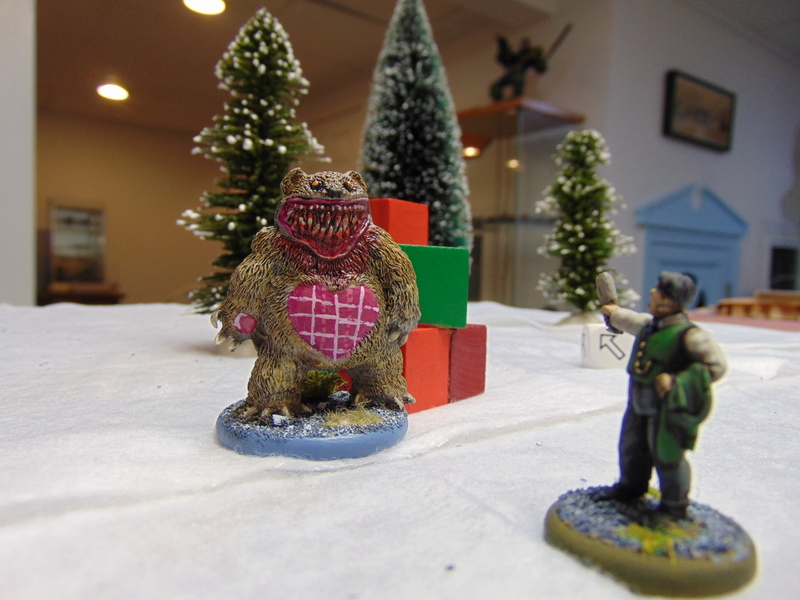
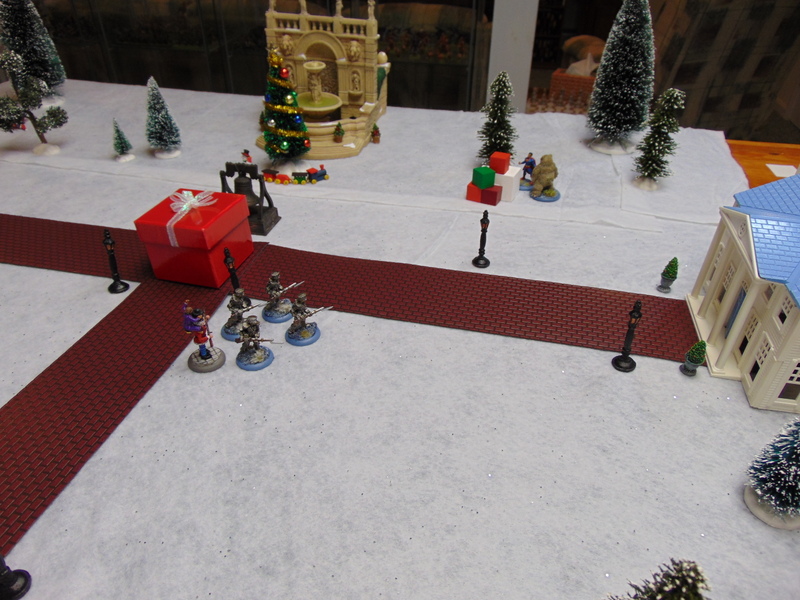
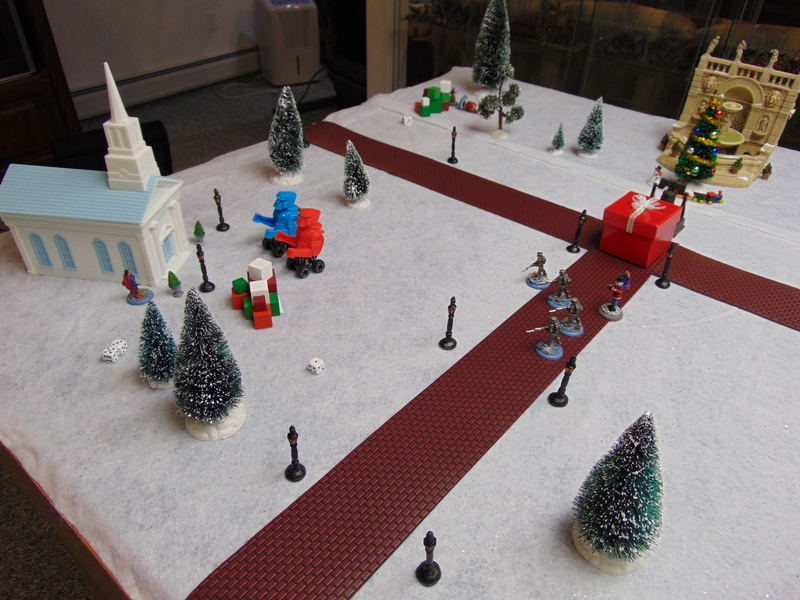
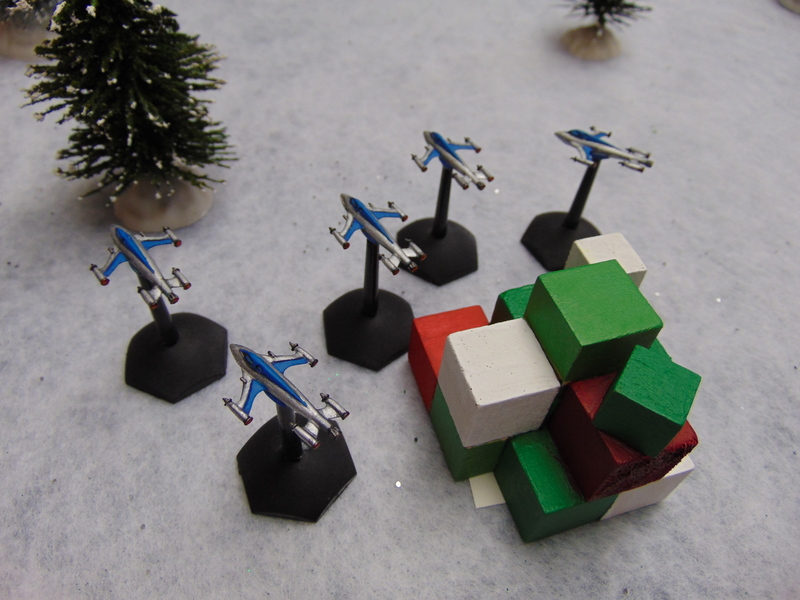
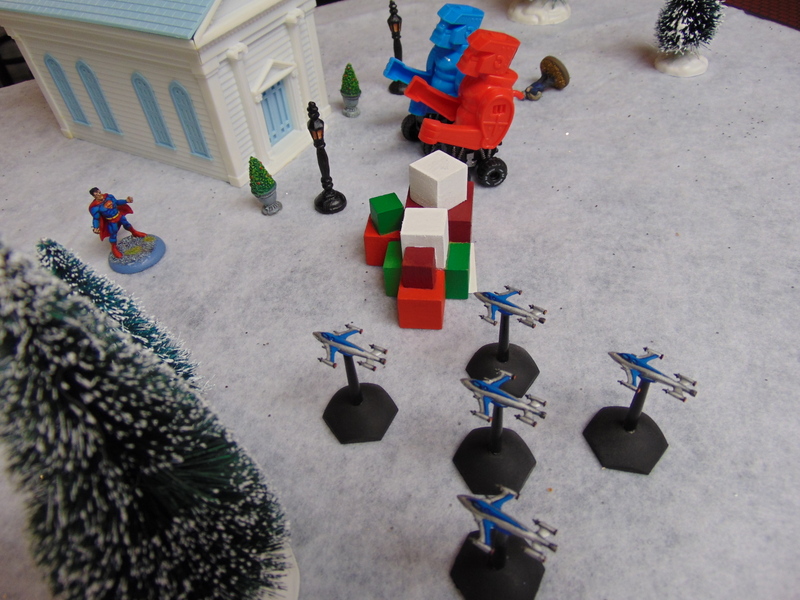
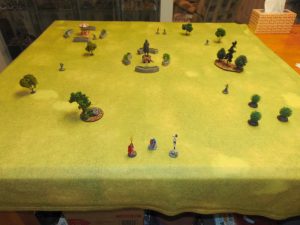
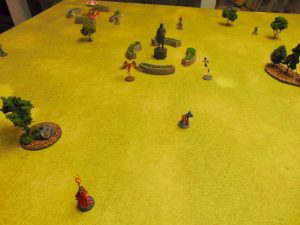
I used a 4′ x 4′ area set up like a park, with trees and natural terrain scattered around. There is a lot of open space. A statue is in the middle of the board. The Avengers deploy on one side of the board. The Mimic is deployed at the statue. There are six civilians deployed randomly around the board. The police do not deploy at the start of the game (see below).

SPECIAL RULES

The Mimic: At the start of the game, The Mimic has a Move, Body and Psyche of 6 and has only one power: Mimic. The Mimic’s power is a stronger version of the Mimic super power in Super Mission Force. Once per round, the Mimic can attempt to copy the powers of EVERY hero within 15″ of him. The mechanism is the same: a 5D Psyche-based opposed roll, every goal allows the Mimic to mimic one minor power of his choice, while major powers require two goals. Obviously, the Mimic can’t copy powers that are not technically powers, such as Captain America’s shield, and cannot copy both the major and minor versions of the same power. (This is stronger then the normal Mimic power, which only targets one individual at a time, and has a range of only 5″.) Once copied, the mimicked powers are usable for the remainder of the scenario.

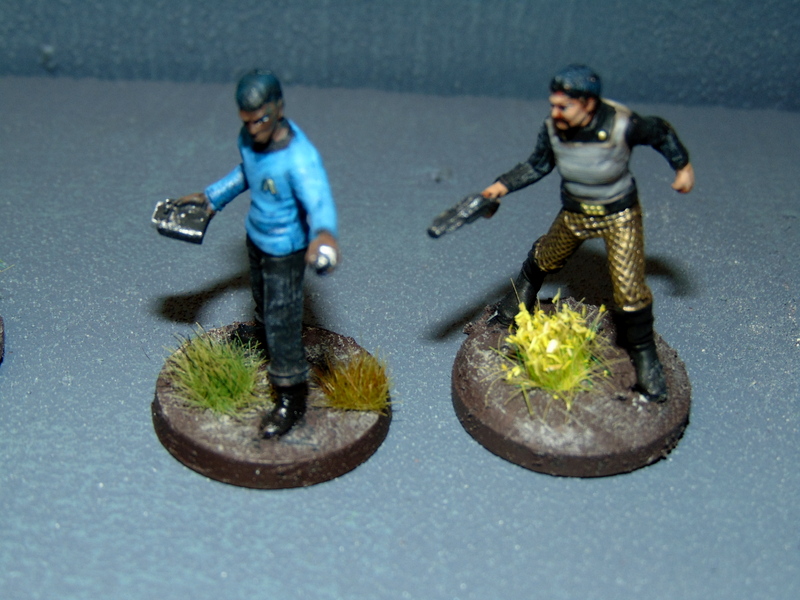
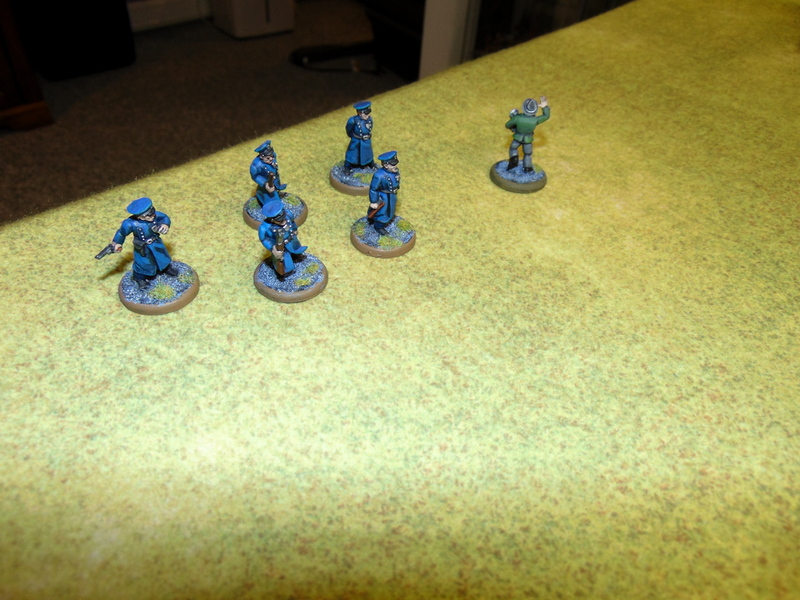
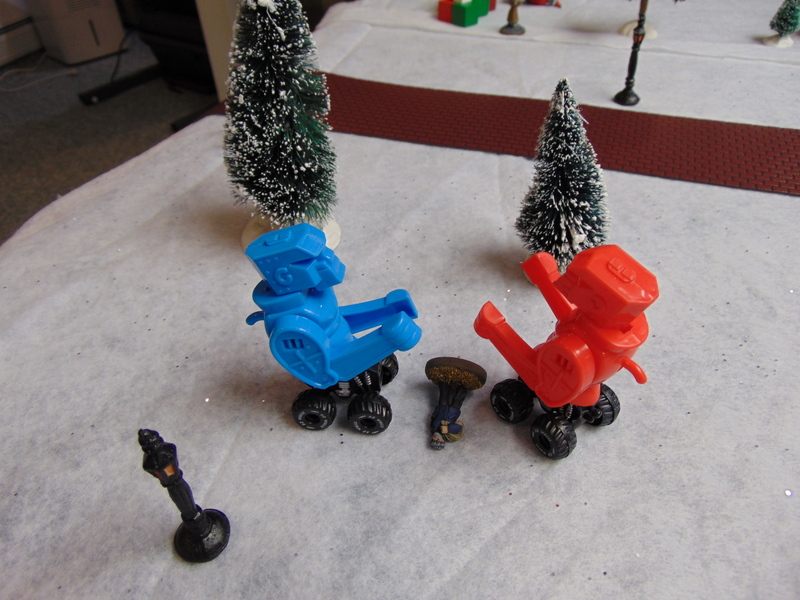
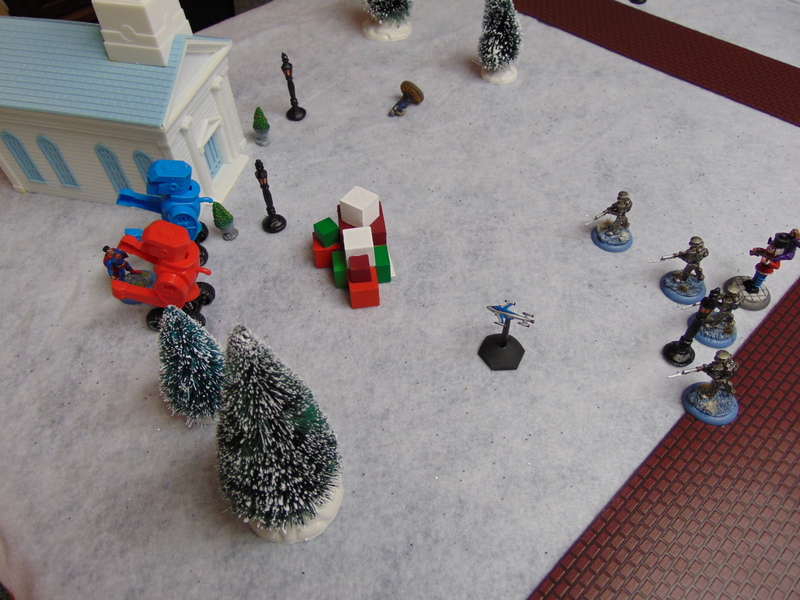
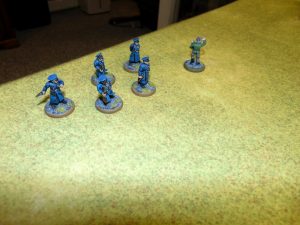
The Cops: It’s 1969, and those damn dirty hippies are protesting everywhere. The NYPD has a strong presence in Central Park, and they are not about to take any shit from a bunch of barefoot longhairs. There are 3 Henchmen groups of police officers that may eventually be drawn to the combat. The first group enters at the end of Round 2; the next at the end of Round 4, and the last at the end of Round 6. The groups enter via the board edge that is closest to the majority of the action.

“We’re here to help!”: Unfortunately for the Avengers, with the exception of Captain America, the cops have no idea who they are. (1969 is well before the formation of the team.) This means they’re just as likely to open fire on the heroes, especially if they feel there is a threat to public safety (and there is). The Avengers CANNOT harm the police officers in any way. They’re the good guys, remember? Instead, they must either work around the cops, or convince them that they’re the good guys. Any hero can spend an entire round trying to convince the cops to join their side. This is tough to do, as the cops are used to seeing outlandishly dressed youths rebelling against authorit-aah pretty regularly. It requires a 3 Goals on a Chance roll to persuade the police to stop shooting at the Avengers.

Cap has it easier. Some of these cops are veterans and fought in the Big One, and all of them know Captain America (who was technically still active at this time, although Steve Rogers is still in a block of ice somewhere…) It only takes Cap 2 goals to convince the cops that the Avengers are not the bad guys. Once the cops recognize this, they assist in any way they can.

Civilians: There are 6 civilians milling around the park at the start of the game. They move randomly at the start of each turn and follow the standard rules for civilians in Super Mission Force. If things go poorly, the Mimic will not hesitate to threaten innocent bystanders.

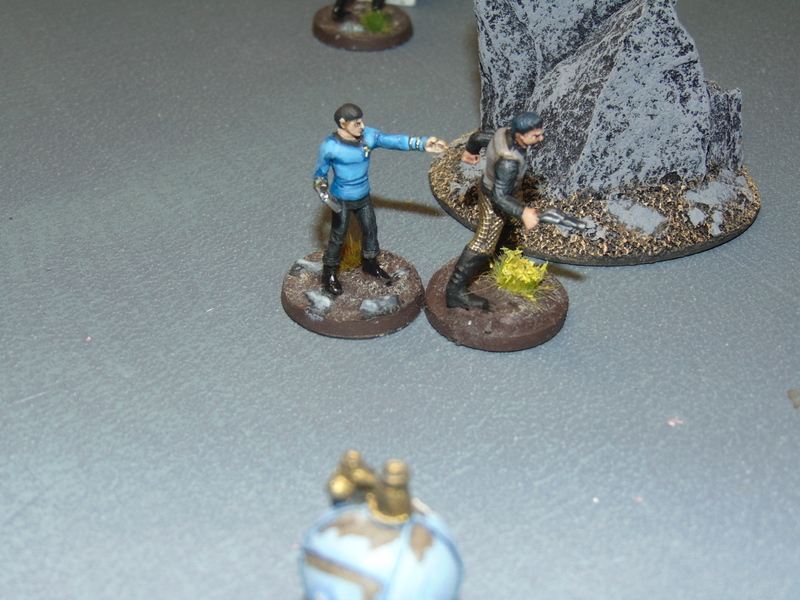
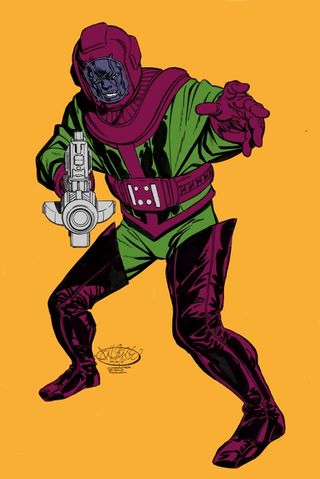
The Headset: The Mimic will not willingly put on the headset provided by Immortus (Kang). In order to slip it on his head while he is still conscious, a hero must win an opposed grapple check in close combat with the Mimic. Of course, it can be easily placed on his head if the Mimic is KO’ed. Captain America has the headset at the start of the game. Big surprise: the headset doesn’t do what Immortus says it does. Rather, it strips the Mimic of his powers entirely, thus ensuring he never joins the X-Men. As a result, more mutants, including some future Avengers, are subverted to future lives of crime rather than heroism. MU-HU-HAHAHAHAHAHAHA!

ROUND 1

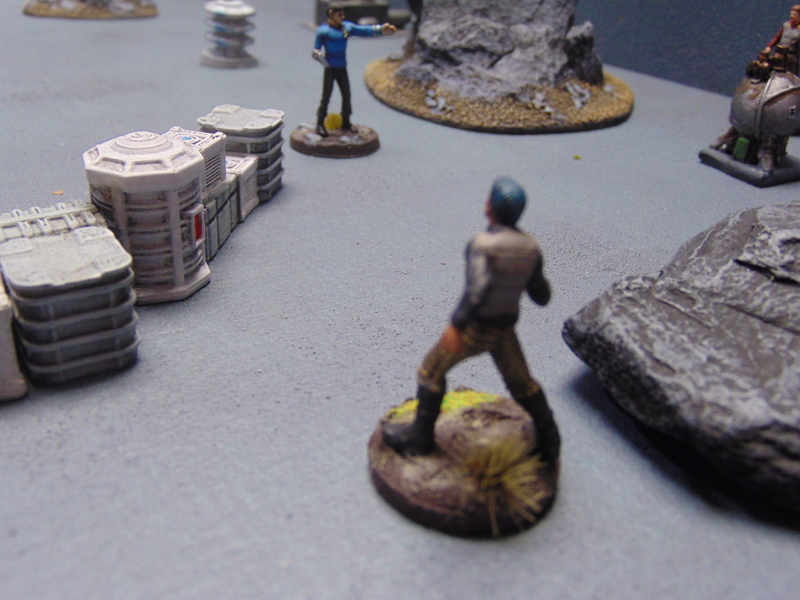
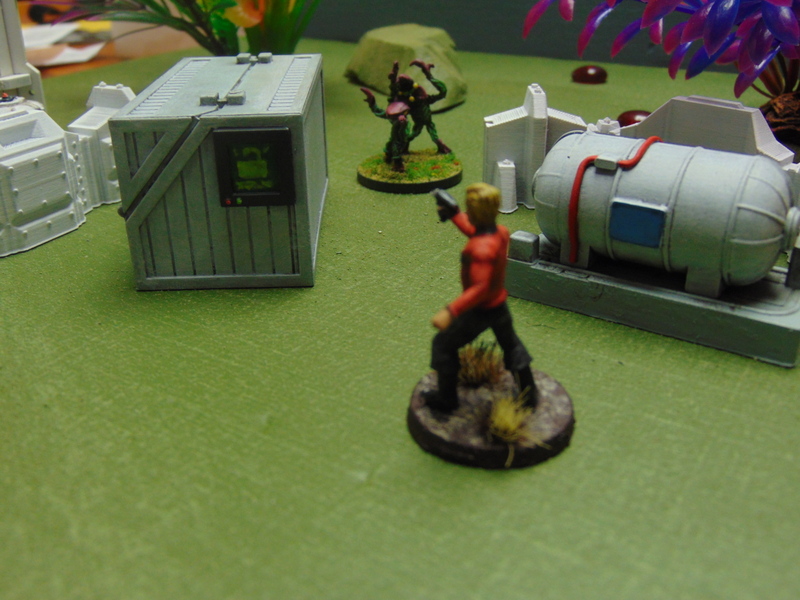
Calvin Rankin sits on a stone bench, eyes glazed, riding a reefer buzz. The new Hendrix is on the transistor radio of the girl across the way: “Let Me Stand Next to Your Fire.” Hendrix reaches the chorus right around the time Calvin hears his name being called by a cat dressed like Captain America.

“Calvin Rankin,” Cap calls. “It’s important that we speak to you, son. Please come here.”

For a minute, Calvin considers it. After all, whoever this cat is, he has a couple of fab foxes with him. The he remembers the reefer. These three are probably from the draft board. Complete squares, man…

The civilians move randomly. The Mimic gains initiative for the round.

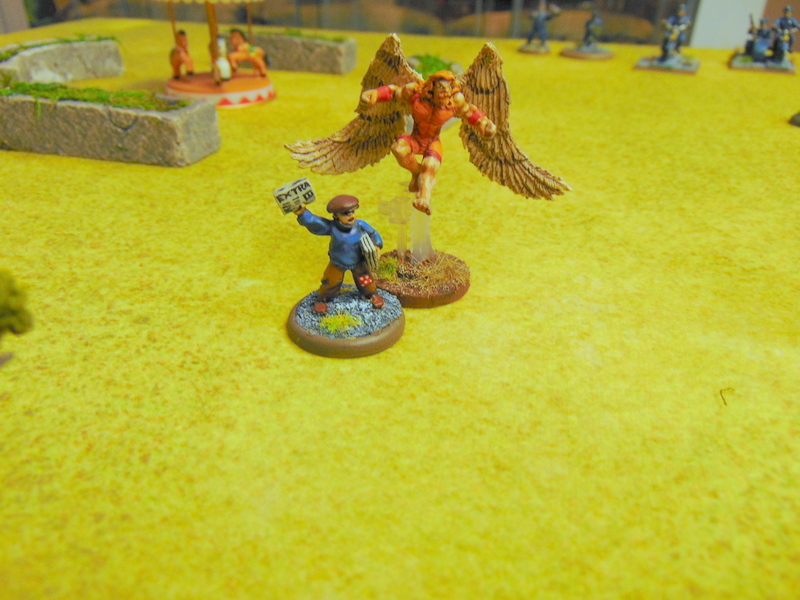
First, he moves just enough to catch all three heroes within 15″. Then he tries to mimic the powers of all 3 heroes. He gets enough goals to absorb Power Blasts (Major), Fortune and Jinx from Scarlet Witch; and Density Decrease, Flight and Invisibility from Captain Marvel. The only “power” he could absorb from Captain America is Super Agility, but he fails to do that. He promptly turns invisible. Then he decides to try out another of his new powers: Jinx. He successfully uses it on Scarlet Witch (who fails to detect him), which will make things tough for her on her next turn.

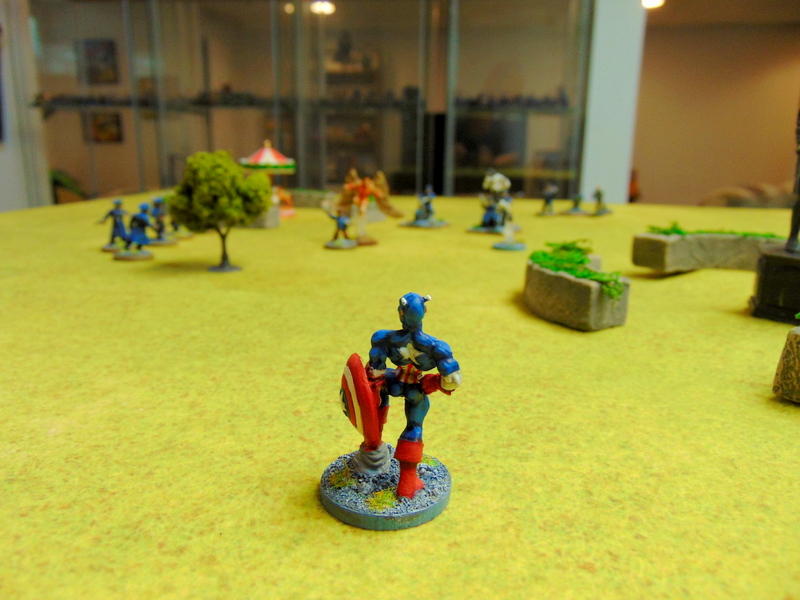
Captain Marvel fails to spot the Mimic, so all she can do is activate her Density Decrease power and fly out to the general vicinity of where she thinks he is. Scarlet Witch, possibly because she was jinxed, spots the Mimic and moves towards him. She trips and face-plants ( a result of the jinx), taking one Body worth of damage. She then successfully jinxes the Mimic right back, giving him a taste of his own bad luck. Captain America fails to spot the Mimic, so he moves to a position between his teammates and uses his Enhance power, granting Scarlet Witch two re-rolls to her dice pool and Captain Marvel one re-roll to hers.

End of Round 1

ROUND 2

The civilians move randomly; about half move away while the other half move towards the action. Gotta love scatter dice and random movement.

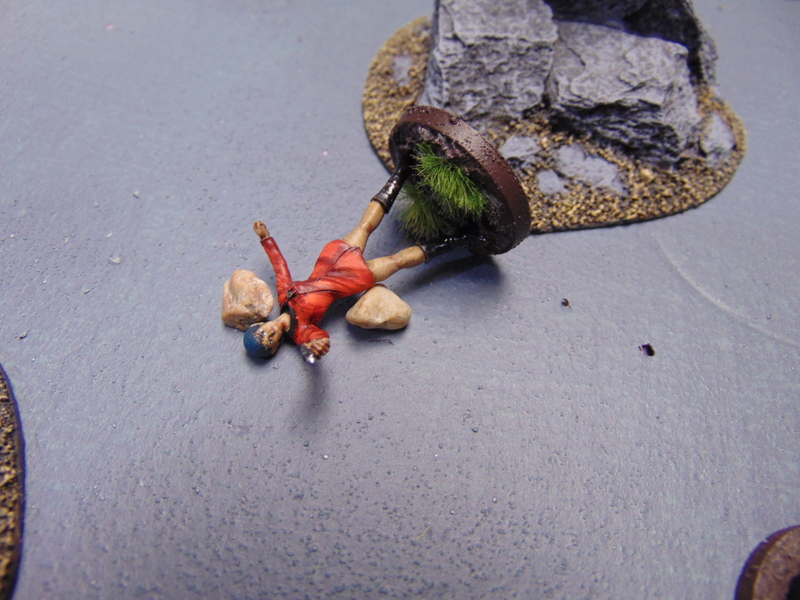
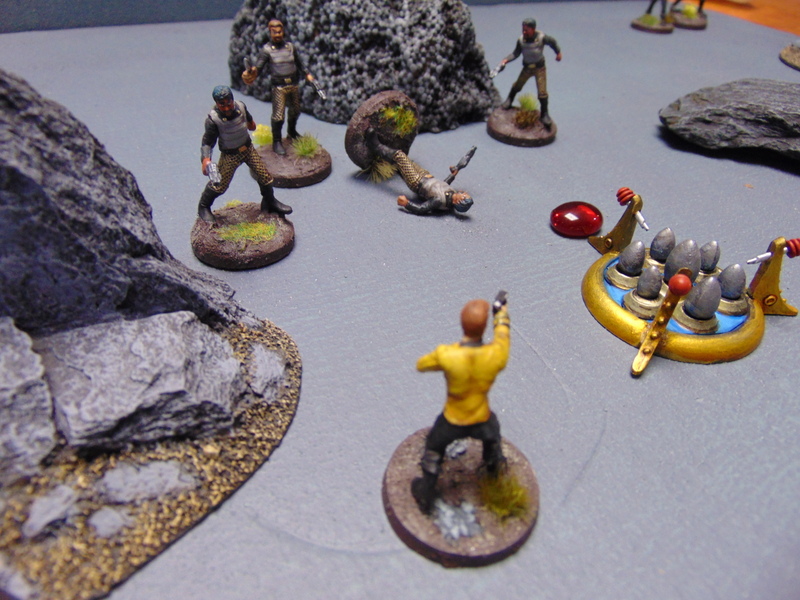
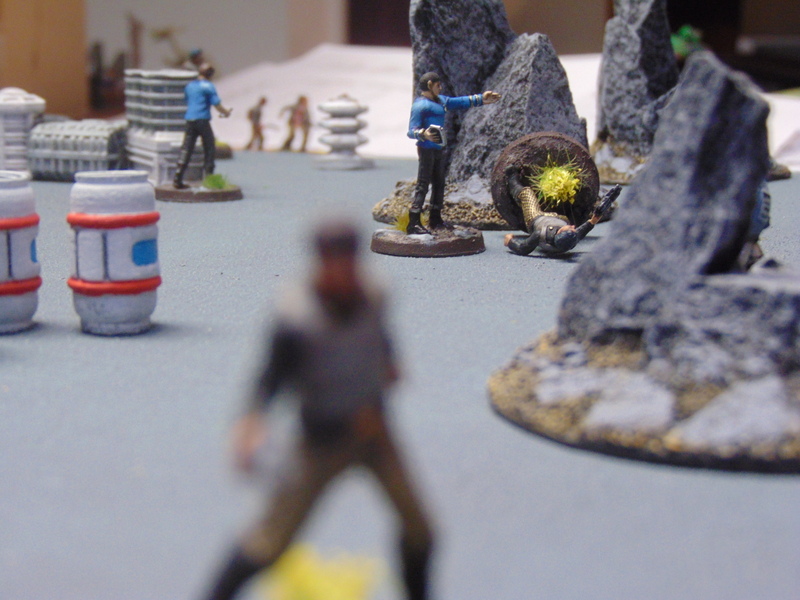
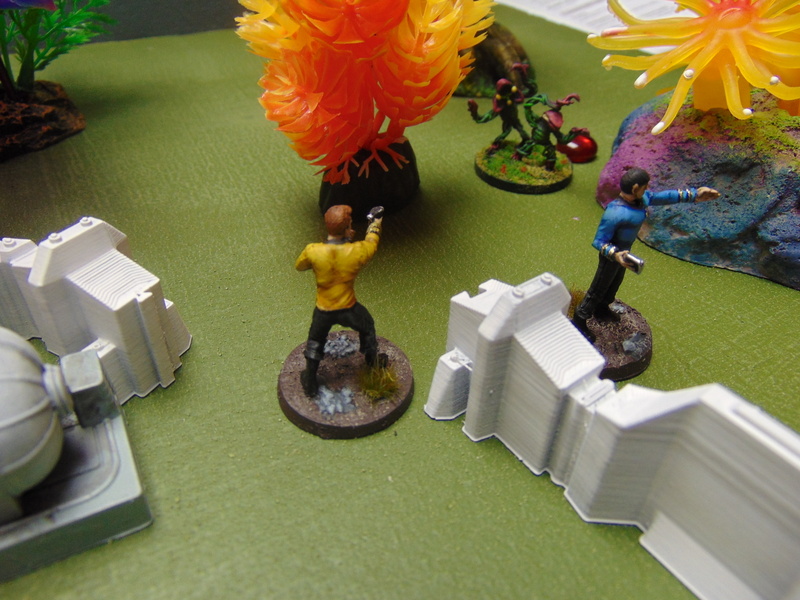
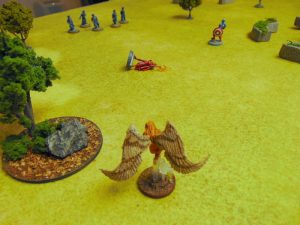
The Mimic keeps initiative. He fails to absorb any powers from Captain Marvel and Captain America. He becomes visible, as invisibility only lasts from turn to turn unless successfully recharged. He tries to recharge it, but fails (due to the higher difficulty as a result of being jinxed). He attempts to activate his Density Decrease power, but fails to do that, too. He Power Blasts Captain America, but Cap easily dodges. Mimic decides he needs to put some space between himself and the heroes and flies away. Unfortunately, because of the jinx on him, he twists his ankle taking off and takes 2 Body worth of damage. Ouch.

Scarlet Witch sees the Mimic getting closer to civilians and decides to blast him. She succeeds, inflicting another 2 Body worth of damage on the Mimic. Captain Marvel maintains her Density Decrease power and flies straight through the statue, coming into base contact with a nearby civilian. This means she is protecting him, and any attacks against the civilian will target Captain Marvel instead. She takes her attack action to blast the Mimic again, but fails to damage him. Finally, Captain America charges forward, trying to get close enough to at least throw his shield. Unfortunately, he’s just out of range.

Here comes The Fuzz!

At the end of the round, the first group of police arrive at the closest table edge, drawn by the sounds of combat! Not a good round for the Mimic, as he’s lost 2/3 of his health!

End of Round 2


ROUND 3

The civilians move randomly, and one of them moves off the board to safety. The initiative goes to the Avengers, followed by the Mimic and finally, the cops.

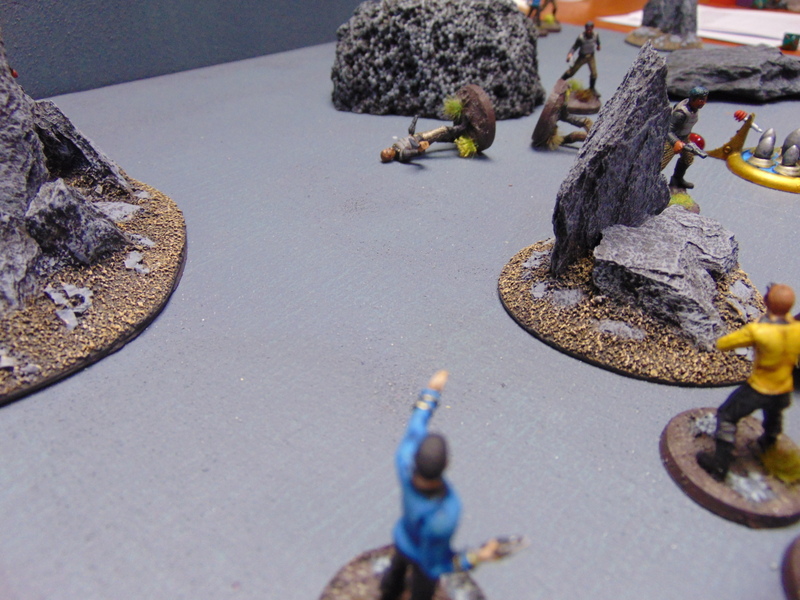
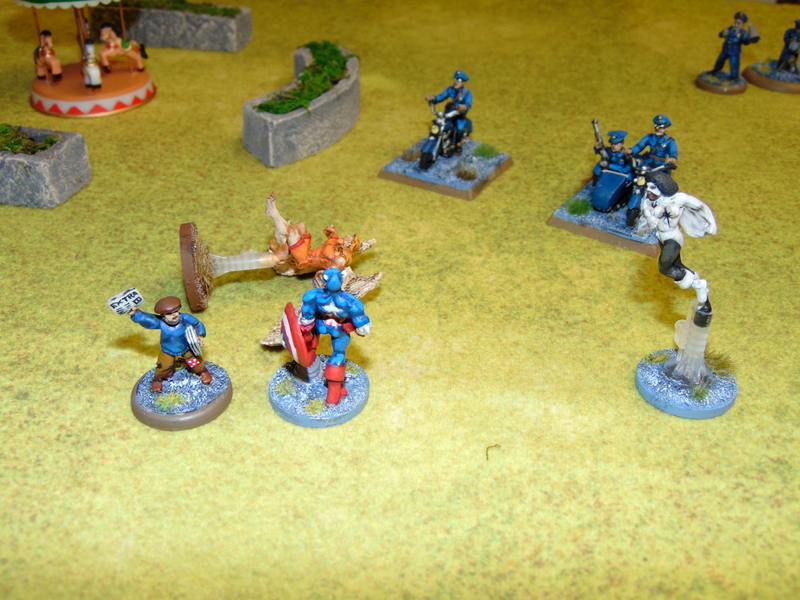
Scarlet Witch wastes no time firing at the Mimic again, but fails to hit. The Mimic absorbs Speed, a major power, from Captain Marvel. He fails again to recharge his Invisibility power, so he instead activates Density Decrease and fires his Power Blasts at Captain America, wounding him for 1 Body worth of damage. He then uses his newfound Speed power to beat a hasty retreat, flying far across the board and into base contact with a civilian! What nefarious plans could he have?

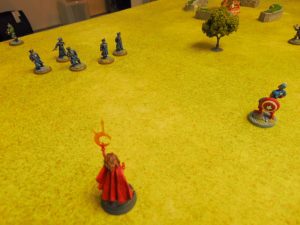
The cops activate, and, seeing how Scarlet Witch is the closest target and is obviously a dirty hippie in a slinky costume, they open fire on her, inflicting 1 Body worth of damage, despite both her Fortune power and the re-rolls Cap gave her through Enhance. Captain America forgoes all his actions to try to convince the police that the Avengers are not the enemy…

“You, sir, are NO Captain America!”

…but totally screws the pooch. The cops ain’t buyin’ it.

Captain Marvel tries to blast Mimic before he can harm the civilian, but misses. She decides to stay and protect the civilian she’s currently with.

ROUND 4

The civilians move randomly. The initiative goes to the Mimic, then the cops, and lastly, the Avengers.

The Mimic fails again to recharge his Invisibilty and fails to maintain his Density Decrease power. Ignoring the civilian, he uses Speed to position himself behind the Scarlet Witch. He fires his Power Blasts at her, but misses.

Ignoring Captain America, the cops open fire on the Scarlet Witch again, but due to her Fortune power, they miss. Captain Marvel chases after the Mimic, blasting him for 1 more damage. The Mimic is reeling, with only 1 Body left!

Captain America once again tries to convince the cops that the Avengers are no threat, but the cops still aren’t buying it. (He’s really rolling like crap.)

At the end of the round, another group of cops enters from the opposite side of the board.

ROUND 5

The civilians move randomly. Another moves off the board. (“Feets, don’t fail me now!”)

The initiative order is The Avengers, the cops, then the Mimic.

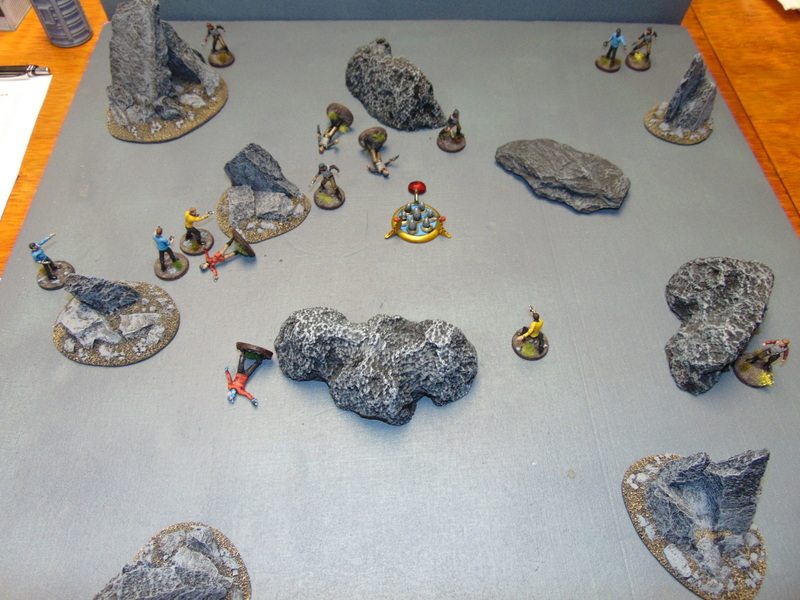
Captain Marvel presses her attack, but fails to hit the Mimic with her blasts. The cops closest to Scarlet Witch fire upon her again. Her Fortune power didn’t recharge, but lucky for her she dives on the ground fast enough to avoid being riddled with bullets. The newly-arrived group of police fire upon the Mimic but miss.

End of Round 5.

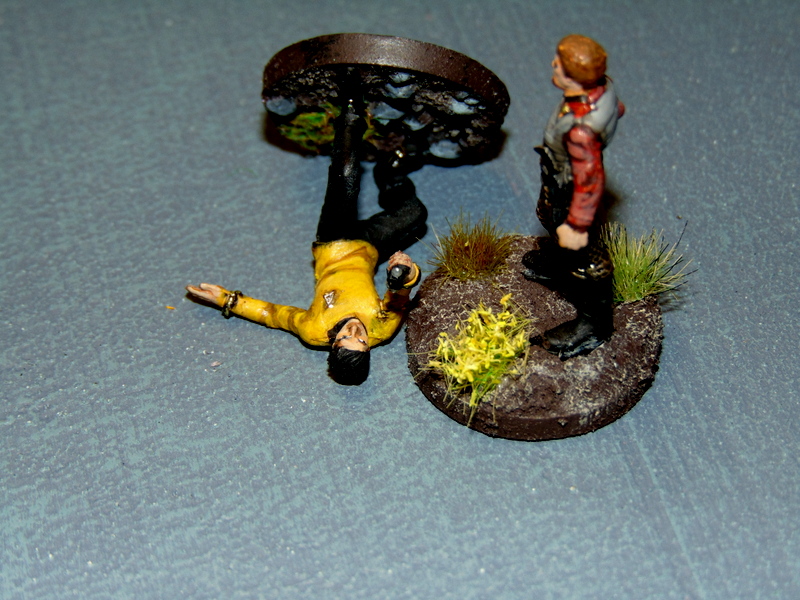
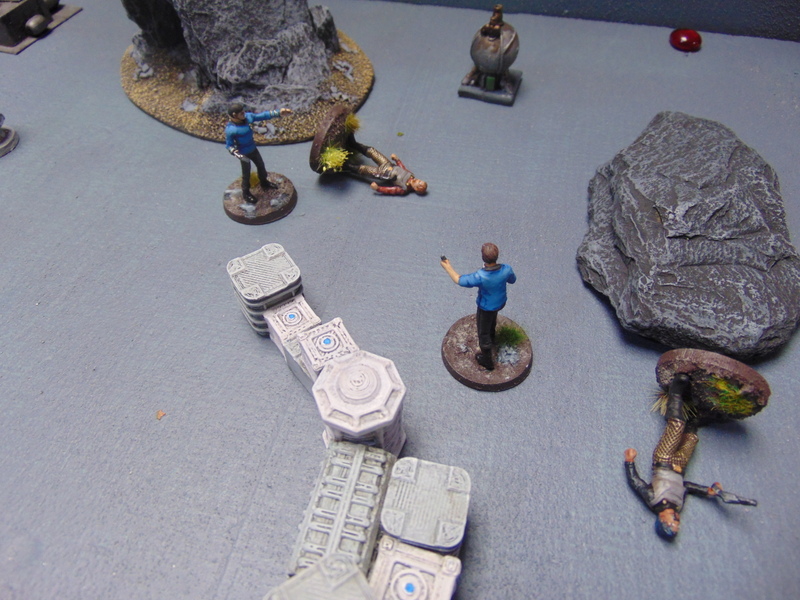
The Mimic finally succeeds in recharging his Invisibility power. He turns invisible and blasts the Scarlet Witch, who fails to spot him. He does enough damage to KO her handily, and she fails her check to stay up. Captain America tries one more time to convince the police to help, and this time he finally succeeds (perhaps watching the Scarlet Witch get blasted into next week drove the point home). From now on, all the cops will target the Mimic, if possible.

ROUND 6

The remaining civilians move randomly as usual. The Avengers will act first, then the Mimic and finally, the police.

Captain America manages to spot the Mimic, despite his invisibility. He charges forward and hurls his shield at the Mimic, but misses.
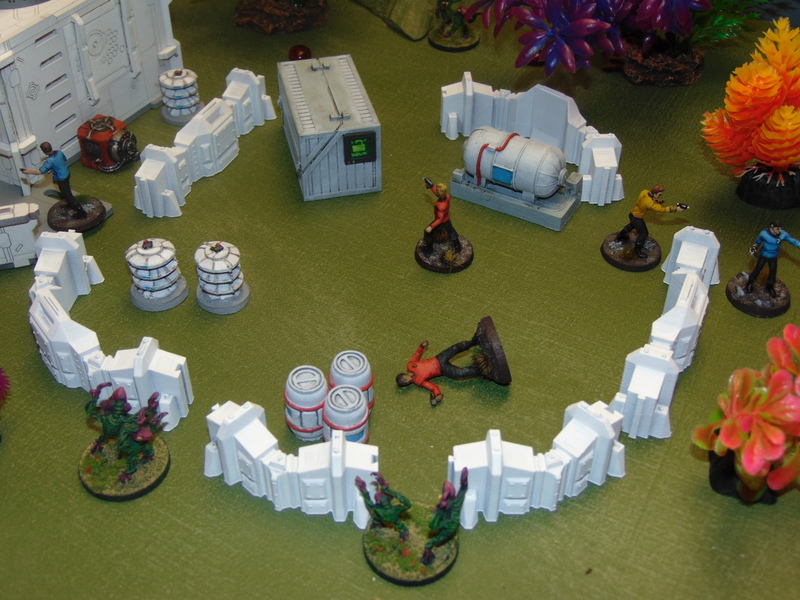
“He’s got a kid!”

The Mimic loses his Invisibility and fails to recharge it. He’s getting desperate now, and decides he will take a hostage. He flies across the board into base contact with a civilian and grabs him, intending to use him as a bargaining chip, or, failing that, as a human shield! All attacks targeting the Mimic may hit the civilian instead!

End of Round 6

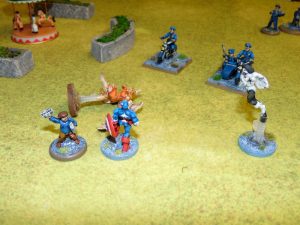
For the rest of the round, the cops closest to the Mimic surround him with guns drawn, but hesitate to open fire because of the hostage. The other cops move closer to the hostage situation, as does Captain Marvel. Finally, at the end of the turn, more cops arrive: two motorcycle cops and a heavy machine gun. They’re done playing!

ROUND 7

Whatever civilians are left move randomly, except for the kid being used as a human shield by the Mimic.

The cops act first, followed by the Avengers and the Mimic.

All the cops move to surround the Mimic. They don’t do anything else.

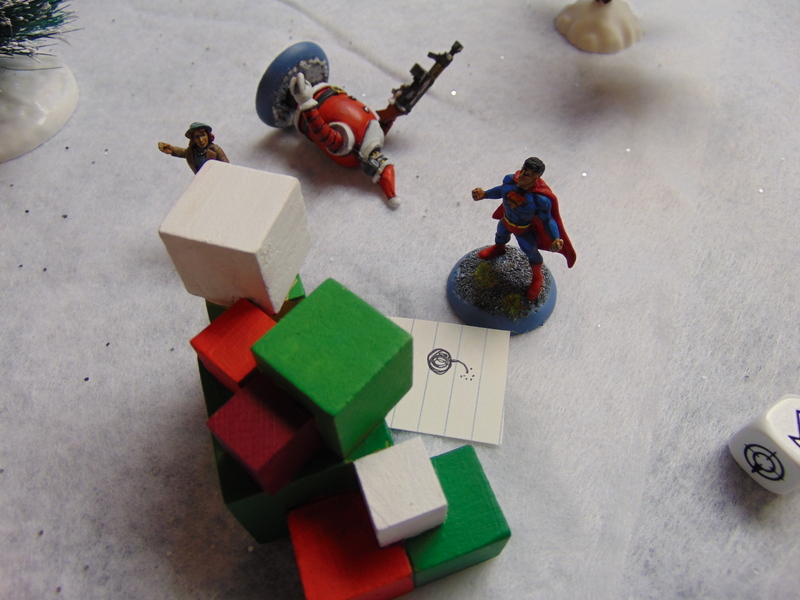
An eerie stillness descends on Central Park, broken only by the terrified gasps of the child hostage. The Mimic, wounded and under the influence of something, is like a cornered animal, snarling alternately at the Avengers and the police. Only the years of training stays the trigger-fingers of the NYPD; that and the commanding presence of the Sentinel of Liberty, Captain America.

Captain Marvel silently calculates her chances of blasting the Mimic without harming the child. She glances at Captain America. A subtle shake of his head tells her all she needs to know. “Stand down, Monica.” She hears it as clearly as if he shouts it aloud.


The Moment of Truth…

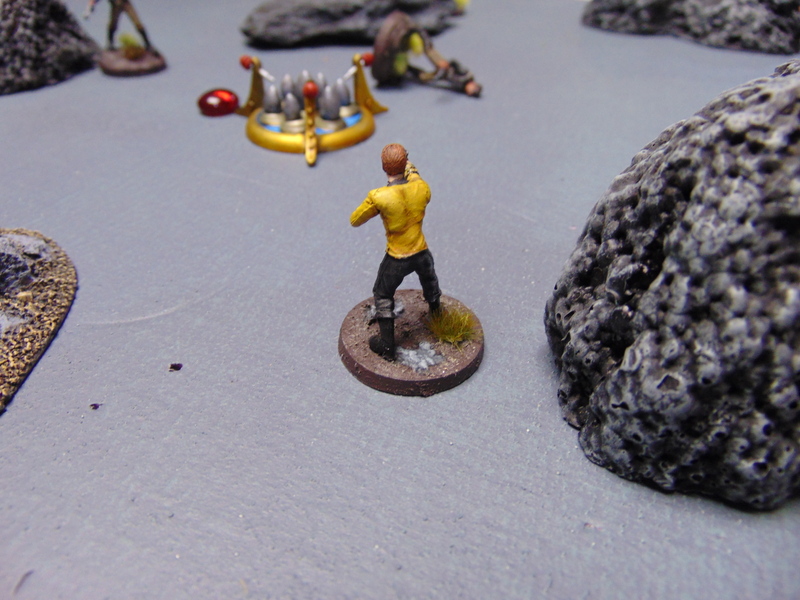
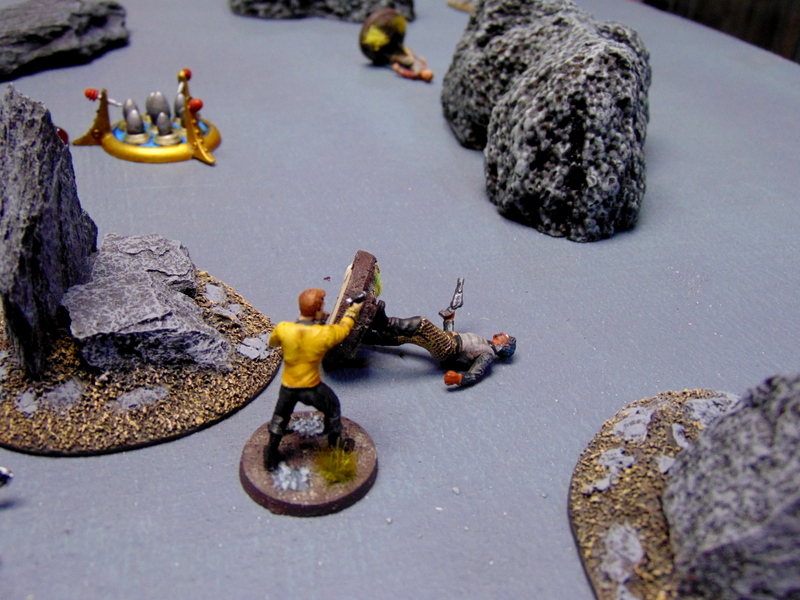
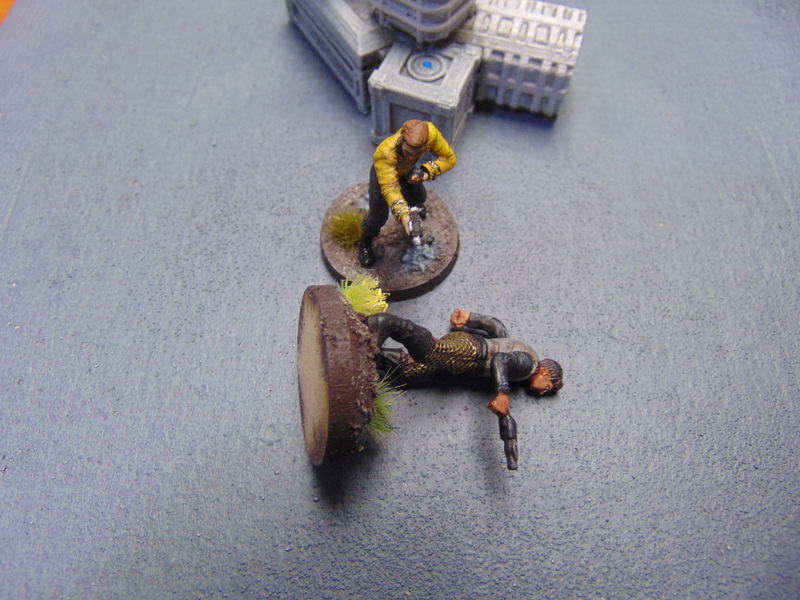
Captain America charges into hand-to-hand combat with the Mimic. The Mimic attempts to fend off Cap by placing the child in harm’s way, but Captain America is a seasoned combatant. He scores six total goals. The Mimic resists with only five! He takes one damage, enough to force a KO check. He fails!

Victory to the Avengers!

Captain Marvel soothes the child while Captain America checks Calvin Rankin’s vital signs and, finding them steady, removes the headset from his belt. “I don’t like playing around with people’s minds, Monica,” he says softly, as the child is led away by police.

“I know, Cap. But the alternative…I’ll go check on Wanda.”

Cap nods. He places the headset on Rankin’s head.

EPILOGUE

First up, apologies for the yellowish tinge the pictures have. I’m not sure what the problem is, but I find it annoying. I’m no photographer.

I changed this scenario a bit. As originally written, all the Avengers are present, and the Mimic has to fight the whole team. If things start to go badly, a bunch of his football player friends show up to help beat up the Avengers. (Uh-huh.)

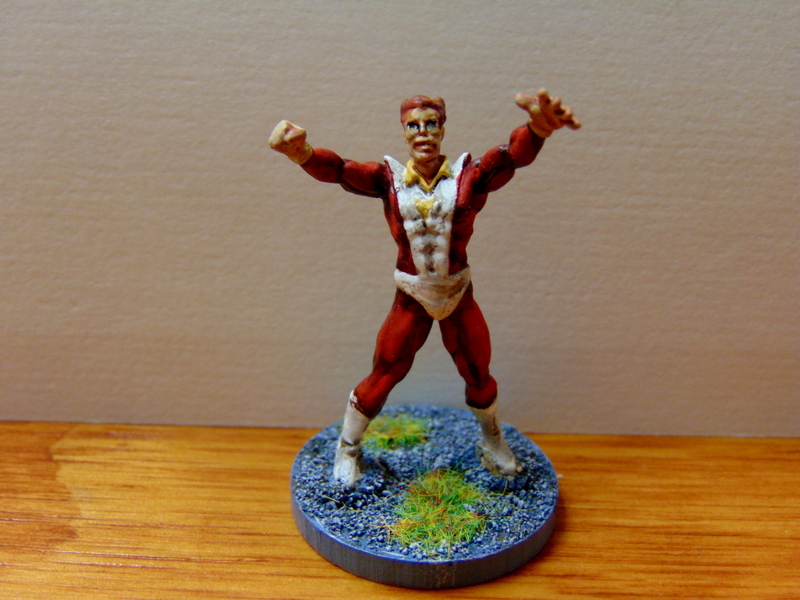
In Super Mission Force, 6 against 1 is a recipe for disaster, so I made the Mimic more powerful and split the team up. I think it worked out ok. I don’t have any high school football player miniatures, but I have plenty of cops. So I used them instead.

The dramatic scene at the end really wasn’t planned. It just kind of happened that way. Part of the fun of playing these adventures is trying to remain true to what I think the heroes would do in the comics, so having Cap take the shot seemed natural, as he was best equipped to take out the Mimic in hand to hand without harming the innocent hostage. Besides, he was carrying the headset…

Up next: Drax the Destroyer!

MH-2 Time Trap: a Super Mission Force Campaign

It’s been a while since I’ve posted an After Action Report, and Forgotten Heroes has given me a hankerin’ for some supers gaming. I’ve decided to convert another old TSR Marvel Super Heroes RPG module to Super Mission Force. This time around: MH-2: Time Trap, featuring the Mighty Avengers!

The antagonist of this adventure is none other than Kang the Conqueror, who is generally aggravated that—despite being a master of time travel—he keeps losing to the Avengers every time he tries to take over the world. The Avengers annoy Kang, so Kang comes up with a surprisingly good plan to deal with them: make sure they never exist. Disguising himself as Immortus (his future, somewhat good-aligned incarnation), Kang invents a story about how a huge solar flare will destroy Earth in a few days unless the Avengers can stop it. In order to do so, they must travel back in time to stop several key events from happening, thus ensuring the solar flare is never triggered.

In reality, Kang is sending the heroes back in time to undo their own existence. He figures that if the Avengers never form as a super team, he will have a much easier time conquering Earth. The Avengers must discover Kang’s plot and turn the tables on him lest they be trapped in time forever and lest Earth fall prey to Kang’s tyranny.

The Avengers team roster for this adventure consists of (L-R) Wasp, Vision, Scarlet Witch, Captain America, Starfox and Captain Marvel (and a cola machine). Not exactly the powerhouse team from the movies, but a solid slice of 1980’s, Bronze Age comic history, when Scarlet Witch was nowhere near as powerful as she is now and someone thought it would be cool to put Starfox in the Avengers.

Starfox = huge douche. Just my opinion.

As with any TSR Marvel adventure, adapting it to a miniatures game like Super Mission Force will require some tinkering. The general trend in TSR Marvel adventures is one encounter/battle per chapter. Often the villains battled are lame, and the super team can deal with them without too much trouble. This works better in a roleplaying game than on the miniatures table. For example, in my last Super Mission Force campaign, based on the adventure The Breeder Bombs, there was a chapter where the X-Men fought the Soviet Super Soldiers. As originally written, the X-Men travel to the USSR and fight the Crimson Dynamo and a bunch of Soviet Super Troopers (basically armored henchmen). To draw a clear picture, that’s Cyclops, Storm, Kitty Pryde, Rogue, Colossus, Nightcrawler and Wolverine vs. the Crimson Dynamo and a bunch of scrubs. That may be fun in a roleplaying game, but in SMF, the Russians are going to get their asses kicked pretty damn quick. Henchmen are rarely much of a problem for most heroes, and a team as powerful as the X-Men would wade through henchmen groups in no time. So I changed the opposition to the entire Soviet Super Soldiers team, and it was much more of a challenge. I will have to do similar altering of the original module for this campaign as well.

Here are my Super Mission Force builds for the Avengers:

Captain America (Powerhouse) Major: Scrapper, Enhance Minor: Clever, Melee Specialist, Shield, Super-Agility

Captain Marvel (Super) Major: Speed Minor: Density Decrease, Invisibility, Flight, Power Blasts

NOTE: In order for Captain Marvel to use her Speed or Flight powers, she MUST use and/or maintain Density Decrease first.

Vision (Super) Major: Super Strength Minor: Construct, Density Increase/Decrease, Power Blasts, Flight

Scarlet Witch (Blaster) Major: Power Blasts Minor: Fortune, Jinx

Starfox (Wild Card) Minor: Flight, Stun, Super Strength, Tough

Wasp (Blaster) Major: Power Blasts, Minor: Flight, Shrinking

Looking the team over as a whole, it’s pretty powerful by SMF standards, with one Powerhouse and two Supers. As usual, I ignored the SMF rules on team composition, opting instead to be true to the established characters. I think it’s pretty tough to imagine these heroes without the powers listed, even if that makes them more powerful than a typical SMF team would be. They’re the Avengers, dude! Don’t sweat the small stuff!

Up next, Scenario One:  The Menace of The Mimic!

Terror of the Toyman! Conclusion

Quick synopsis: The Toyman is attempting to detonate a bomb during the Christmas celebration in the town square. Superman is attempting to thwart his nefarious scheme and protect the civilians that have been drawn to the square by the big stacks of presents Toyman dropped to lure them there. For more detailed scenario information and special rules, please refer to my last post.

At the start of the game, here is the board setup:

There are 7 possible locations for the bomb.  Clockwise from the top right corner, they are: stack of presents 1, the fountain/Christmas tree, stack 2, the house, stack 3, stack 4, and the church.

Superman sets up in the middle of the board, while 6 civilians are scattered around the board.

ROUND 1

Toyman won’t arrive until the end of round 3, so no initiative roll is necessary. Superman has a few rounds to get a jump on finding the bomb’s location. First, though, the civilians randomly meander around.  Then, I draw from the location and hazard decks. I get stack of presents #3 as the location, but draw a “nothing happens” as an event. An early lucky break for the Man of Steel!

Superman moves to the closest possible location, which is the fountain and Christmas tree. He takes a Special Action to scan for the bomb. The secret counter underneath the tree reveals there is no bomb here (good thing, or this would have been a short game indeed). Superman uses the remainder of his Move action to fly to stack #1. Although he can easily reach it, he can’t take any further actions this turn, so the round ends!

Score: 0-0

ROUND 2

Once again, the civilians move around randomly. My deck draws indicate that the Santa Bot appears at stack #1, which just so happens to be where Superman is at the moment. And it’s a good thing, too, considering that 2 civilians are within range of the Santa Bot’s machine gun (Power Blasts) and would have certainly been easy targets if the Man of Steel wasn’t around to draw the Bot’s fire.

Since Toyman isn’t around to direct his toys yet, Superman automatically has initiative. Superman now has to decide whether to fight the robot or scan the stack of presents for the bomb; he can’t take both a Special Action and a Combat Action in the same turn! Being Superman, he decides the most immediate threat to the civilians is the Santa Bot, so he charges the Bot and attacks! He does a measly one net goal’s worth of damage, not enough to drop the Santa Bot. The Bot fights back, but fails to hurt Superman at all. The round ends!

Score: 0-0

ROUND 3

“Great Caesar’s Ghost!”

Once again, the civilians wander without purpose. My deck draws indicate that at stack #2, Teddy appears! Teddy is a big robotic teddy bear that isn’t very friendly. Unfortunately there is a civilian who looks an awful lot like Daily Planet editor Perry White standing right next to present stack #2. Perry White threatens the bear with a rolled-up copy of the Planet, but Teddy doesn’t seem too impressed.

Now Superman has a real dilemma: protect the civilians nearest him, protect Perry White on the other side of the board, or scan for the bomb??

Superman attacks the Santa Bot with a haymaker, flooring the robot with a net 7 goals of damage! That takes care of the civilians nearest to him, but should he scan stack #1 for the bomb next turn, or leave to protect Perry White from Teddy?

It’s no choice at all. Superman uses his Move action to fly across the board into base contact with Teddy, thus ensuring the big robotic bear has his full attention.  Teddy attacks Superman (leaving Perry White alone for now), but fails to do any damage.

At the end of round 3, the Toyman arrives in spectacular fashion by parachuting onto the middle of the square inside a huge Christmas present!

Score: 0-0

ROUND 4

The civilians move randomly, as usual. One of them takes the opportunity to get the hell out of the square and moves off the board, thus ensuring he lives to celebrate Christmas at all! Perry White’s random movement actually moves him closer to Teddy, but I decide that Mr. White is probably a lot smarter than that and move him in the opposite direction. The deck draws indicate that the house is the location for this round’s event, which is that the clockwork soldiers regenerate or that nothing happens. Since the soldiers aren’t in need of regeneration, nothing happens!

This is the first turn Toyman is on the board, and so initiative has to be determined. Toyman beats Superman’s roll. The huge present opens, and Toyman and his clockwork henchmen emerge!

Superman attacks Teddy, inflicting 2 net goals of damage and knocking Teddy back 8″.  Teddy is knocked down and can’t reach Superman to fight back on his turn.

Score: 0-1, Superman

ROUND 5

The civilians move randomly. The deck draws indicate that the 2 rock’em, sock’em robots burst out the front door of the church! Unfortunately, there are 2 civilians directly in the path of these clanking, metallic pugilists, and the Man of Steel is all the way across the board! What can he do?

Well, nothing yet, because Toyman keeps initiative this turn. He moves himself and his clockwork henchmen within firing range and open fire on Superman! They manage to inflict 2 net goals of damage. Ouch!

Superman is once again faced with a dilemma. Two civilians are in danger from the robots at the church, and Perry White is stuck between Teddy and the Toyman. Plus, there’s that pesky bomb to find…

Superman does the best he can. He flies over to Perry White and grabs him up, continuing to the nearest board edge and moving his boss to safety. Since this doesn’t count as an action, Superman returns to stack # 2 and uses his Special Action to scan it for the bomb, ignoring both Toyman and Teddy for now. Unfortunately, his gamble fails. Stack #2 doesn’t contain the bomb, either!

Teddy charges Superman, but Superman shrugs him off, and can only watch helplessly…

…as the robots move to attack the closest civilian and quickly pummel him into unconsciousness. Poor guy! Where’s Superman when you need him?

Score 1-2, Superman

ROUND 6

It’s halfway into the game, and Superman has only been able to scan 2 of the possible 7 bomb locations. That bomb could go off at any moment! He better get moving!

Of course, the civilians move randomly first. Another moves off the board to safety. The deck draws indicate that stack #4 is the location, and the event is once again that the clockwork soldiers regenerate or nothing happens. The soldiers have not been damaged, so nothing happens.

Superman gains initiative. A quick look at the board shows that there are only 2 civilians left to protect. One is all the way over by stack #1 and is in no immediate danger from anything, and the other is right next to the rock’em, sock’em robots. Superman leaves combat with Teddy to race across the board to the civilian near the robots. (Teddy gets a free attack on Superman as he flies away, but does no damage.) He flies the civilian off the board to safety and then lands next to the church, where he uses his Special Action to scan the church for the bomb.  Once again, there is no bomb.

Toyman marshals his henchmen and moves towards Superman. The robots move towards him, too; and Teddy moves as fast as he can in Superman’s general direction. That’s about all they can do.

Score: 1-4, Superman

ROUND 7

Civilians move. The Toyman’s deadly squadron of toy planes activates near stack #3.

Toyman gains initiative. He sends his planes over to attack Superman. They open fire, but fail to harm the Last Son of Krypton! Superman returns fire with his heat vision, destroying all but one of the planes. The robots charge into combat with Superman and mange to inflict one net goal of damage. (I probably should have moved Superman somewhere else and scanned another location, but instead I attacked the planes and forgot to move him at all! Dumb!) Toyman, his henchmen and Teddy all move towards Superman, but none of them can do anything else.

Score: 1-4, Superman

ROUND 8

The one remaining civilian on the board moves around, but she’s so far away she’s in no danger unless something activates at stack #1 this turn. Instead, nothing happens at the fountain and Christmas tree this round. That bomb is still out there, and there are not many turns left. There are still 4 possible locations that bomb could be: stack #1, stack #3, stack #4 and the house!

Superman keeps initiative and leaves combat with the robots,taking 1 goal of damage in the process. He moves to stack #4, directly in front of him, and scans the stack for the bomb. No luck! he still has plenty of movement left, so he speeds over to stack #3. He can’t do anything else on his turn, but at least he’s in position for next round…if it’s not too late!

Toyman’s group and the one remaining plane move into firing range and open fire, but Superman takes no damage. The robots and Teddy both chase after Superman, but they pose little threat to Superman at this point. There’s only one civilian left and she’s safely out of harm’s way. The main concern is the bomb!!!

Score 1-4, Superman

ROUND 9

The civilian wanders around stack #1. Holding my breath, I draw from both decks. Stack #2 is the location…and nothing happens!!!! Whew!

Superman keeps initiative. Superman immediately scans stack #3, hoping to find the bomb, but there is no bomb! There are only 3 rounds left in the game, and the bomb could go off on any one of them! Since one civilian has already fallen, if the bomb goes off, there is no way Superman can win this scenario.There are only 2 places it could be: stack #1, or the house. The house is closest…

Superman makes another calculated risk and flies across the board to stack #1., where he will scan for the bomb next turn. Even though the house is closer, he could get bogged down in combat with the Toyman’s toys, as they will all be in the same table quarter as the house by the end of this turn. It’s a gamble to be sure…

Toyman and all his toys consolidate near the house.

Score: 1-4, Superman

ROUND 10

The remaining civilian moves. Convinced I’m about to draw the Joker, I pull from both decks. The location is the church…the event is…the presents shuffle positions! Lucky for Superman, the stacks that switch positions are stack #3 and stack #4, so he doesn’t have to worry about chasing stack #1 around the board…

Superman keeps initiative. He scans stack #1, and discovers the bomb. And not a moment too soon! Victory for Superman!

Score: 1-9, Superman.

Analysis

Well, this game was the most fun I’ve had playing with myself since…well, never mind.

Despite going for 10 rounds, this game played very fast (about 30 minutes). The ending score was not as much of a runaway victory for Superman as it appears. If the bomb had gone off, there was no way Superman could have won the game, as he had already lost a point for the wounded civilian in round 5.  Even if Superman saved all the other civilians, had the bomb exploded, the final score would have been 5-6, Toyman.

The game went down to the final 3 turns. The last 3 cards were the 10, Jack and Joker; the two “present shuffle” events and the bomb going off. I really did shuffle the cards pretty well, or so I thought. In any event, despite all hazards being activated, Superman got really lucky by drawing all the “nothing happens” events during the game. This gave him the breathing room he needed to try to be everywhere at once.

Well, almost everywhere. This guy will be spending Christmas in the hospital.

I think the scenario works well. The random position of the bomb, and the randomness of the locations and hazards really makes the game difficult to predict, which is what I was going for. After all, what else can Toyman really do to Superman but keep him occupied and distracted? Superman has to do his best to balance getting the civilians to safety with finding the bomb before time runs out. The hazards work to delay him, as Superman really only has to engage them if they threaten civilians. If no civilians are threatened, he’s free to fly around the board and search for the bomb.

Ironically, the bomb was in the second location Superman visited, but he had to leave it to go protect Perry White from Teddy back in round 3! He didn’t have time to scan the location after destroying the Santa Bot, because if he did, that would have allowed Teddy to attack Perry White if the bomb wasn’t there. He never made it back to stack #1 until the very end of the game.

Here are my Super Mission Force builds for the characters:

Superman (Powerhouse) Major: Speed, Super Strength, Minor: Armor, Enhanced Senses, Flight, Power Blasts, Resistance, Tough

Toyman (Mastermind) Major: Enhance, Minor: Gadgets, Savant

Note: Toyman DID make use of his Gadgets power to gain re-rolls each round, but either he failed to do so or they were used without any real effect on the overall game.

Merry Christmas everyone!