Author Archives: The Angry Piper

Armies of Yesteryear: Warhammer Orcs and Goblins

I just got a brand new mat from Cigar Box Battle Mats, and I love it. To celebrate, I thought I’d photograph my old Warhammer Fantasy Orcs and Goblins on it. I haven’t played a game of Warhammer Fantasy since about 2003, so it’s been a while since these miniatures have seen battle. I’ve been using a few here and there for RPGs and skirmishes, but that’s about it.

The WAAAAAAGH is too big for me to photograph all at once, so I just took pictures of the individual units. This was my main WFB army from 1995 or so until about 2003. Previously I played Undead, but when GW split them into two different army books I never really went back. I was on a pretty limited gaming budget back then and couldn’t afford it.

Most of these miniatures were picked up in trades on Bartertown or in the boxed sets. The paint jobs aren’t terrible, but neither are they as good as they would be if I was painting them today. I tried to do a decent job as fast as possible so I could field them quickly. (I didn’t play with unpainted miniatures then, and I still don’t now.)

OLYMPUS DIGITAL CAMERA


First up, two units of archers. Night Goblins on the left, Orcs on the right. The Goblins came from the 4th edition boxed set. My friend bought the set for $60 bucks. It included Goblins and High Elves. He took the Elves and the rules sold me the goblins for $20. A good deal then and would still be now. The Orcs were old style Arrer Boyz, mostly plastic but a couple of metal ones too. This was the era when core troops were pretty much all the same sculpt with no variation. The armies today look better, but say what you will about the old style: at least they ranked up with no problems. Out in front are three Night Goblin Fanatics, as well as the old version of Skarsnik and Gobbla. In the back is the old Orc Rock Lobba.

OLYMPUS DIGITAL CAMERA


Moving onwards, here’s a unit of Goblin Wolf Riders and my main unit of Goblin spearmen (also from the 4th edition boxed set). Way in the back you can see an old-school Doom Diver Catapult.

OLYMPUS DIGITAL CAMERA


Next we come to my main core units of Boyz. On the left is a big brick of Orc Boyz from the 5th Edition boxed set. I forget who sold me these, but it was someone who was only interested in playing Empire. In the middle is my elite unit of Black Orcs (the old-school sculpts). This unit is one of the only ones I paid full retail for. On the right is another unit of Orc Boyz. These are mostly old Heroscape Orcs I picked up in trades. Once I had an opponent in a local tournament object to me using them, because, technically, they weren’t “purely GW miniatures”.  I took the unit out of my army and still trounced him. Then I told him to fuck off. Also in the picture is one of my Orc Bolt Throwers (which are now apparently crewed by Goblins in the newest version of the rules). More on the characters in front later.

OLYMPUS DIGITAL CAMERA


A better shot of the 5th Edition Boyz. In front are three Goblin Squig Hoppers. I loved the absolute randomness and fun of playing goblins. The Fanatics, the Doom Divers and the Squig Hoppers…none of them ever worked how you wanted them to, but they were just too fun not to include in the army. I don’t think any of the Hoppers ever killed anything. They always got shot before they could even make contact with an enemy.

OLYMPUS DIGITAL CAMERA


These guys won many a battle for me. Back in 4th-5th Edition, Savage Orc Boar Boyz were insane unit killers. I had 12 armed with spears and could usually break any unit on the charge (except for Dwarf Ironbreakers…Ooooo, how I hated them). Next to them is another Bolt Thrower, another unit of Orc Arrer Boyz (also from the 5th Edition boxed set) and another Doom Diver Catapult.

OLYMPUS DIGITAL CAMERA


Lastly, here’s another shot of the Orc Arrer Boyz. To the right is another Night Goblin archer unit (from the 4th edition Boxed set), a Night Goblin shaman, and a few more Fanatics.

OLYMPUS DIGITAL CAMERA


My Night Goblin archers couldn’t hit the ground if they aimed at it, but that’s not why I played two units of them. I did it for the Fanatics. I would always equip one of them with a Madcap Mushroom. That would be the guy riding the 8 Ball.

OLYMPUS DIGITAL CAMERA


A close up of one of the Doom Diver Catapults. The new model is pretty cool, but it’s also three times as big. I like the old one better.

OLYMPUS DIGITAL CAMERA


The old-school Rock Lobber. I was supposed to have two of these, but I got burned in a trade on Bartertown. I will always remember the name and email address of the asshole who screwed me. He lives in Healdsburg, California. So, Ben, if you’re reading this, go fuck yourself.

OLYMPUS DIGITAL CAMERA


A couple of character models. On the left was my Warboss. He was an exclusive Games Day miniature that my friend picked up for me. On the right is Nazgob, the Orc Shaman. He was a new miniature when I bought him. GW still makes him today. He was originally wearing bright blue, but I recently repainted him and he looks much better.

OLYMPUS DIGITAL CAMERA


Skarsnik and Gobbla, a very fun (but not very effective) Night Goblin team. I don’t think I ever won any battles with Skarsnik as my general;, but it was always fun to see which of my own troops Gobbla would eat. On the right is my old Warboss before I got the Games Day miniature.

OLYMPUS DIGITAL CAMERA


Last but not least, Gorfang Rotgut. I added some bitz from the zombie boxed set and added a shield to his shield. It was one of my first conversions. I once played a campaign against my friend using Gorfang as my army commander. My friend played Dwarfs. I got crushed. No sour grapes here, I still had a blast. But I realized that Gorfang was one of the most overpriced (points-wise) and ineffective special characters in the game.I chose him because he had a hatred of Dwarfs (believe me the Dwarfs felt the same way), but that didn’t help. In the end, my Orcs got curb-stomped by the Dwarfs. I think I won one out of eight battles.

I picked up a Battle for Skull Pass boxed set about two years ago, mainly for the Dwarfs. (I’ve always loved Dwarfs, and my friend kicking my ass with them did nothing to diminish that.) I considered painting up the Spider Riders and adding them to the WAAAAGH, but decided against it. I also thought about buying the Arachnarok Spider, but again, decided not to, even though it’s a really cool model. After all, I never play Warhammer anymore. I’d like to, but I’m not about to try to keep current with whatever version of WFB GW  is hawking, or whatever new units they come up with to replace units they arbitrarily deem obsolete.

Grom the Paunch didn’t make it to the table here because his chariot broke and is awaiting repair. Not that it matters. I never won a game with Grom as my general (Goblin generals suck), and, come to think of it, I never won a game with anyone in a chariot as my general. Chariots are huge targets for war machine and missile fire, and whenever I fielded Grom he got shot to death by turn 3, or his wolves got shot and effectively stranded him wherever they died.

More Armies of Yesteryear to come!

Alpha Flight

AlphaFlight1


Don’t ask me why I did this. For those who don’t know, Alpha Flight is the first all-Canadian superhero team, created by John Byrne (a  Canadian) in 1979. Byrne is legendary for his artwork on X-Men and Superman, among too many other credits to name.

Alpha Flight made their debut in X-Men #120, and soon had their own book. The thing is, Alpha Flight kinda sucks. I mean, to call them second-raters is an understatement. To call them third-stringers is still a kindness.

Still, I thought I’d have some fun and repaint and rebase some Heroclix for Supersystem. So here they are.

OLYMPUS DIGITAL CAMERA


Starting in the back, R-L: Snowbird, Guardian, Aurora, Northstar. Front row, L-R: Marinna, Sasquatch, Puck and Shaman.

Despite being a  really lame team (and that’s being kind), most of the Clix sculpts are pretty good. To me, Shaman, Snowbird and Puck really stand out. Shaman required the least in the way of repainting; he actually had a pretty good paint job right out of the box. The others, however, required a bit more effort to make them look good.

Now I have to find something for them to fight.

(WEN-DI-GO!!!!!!)

Expect a new SS3 After Action Report featuring Alpha Flight soon!!!


First Battlesystem Skirmish

It’s weird how I’ve been into miniatures and roleplaying since fifth grade, but I never actually played a miniatures game until I was in college. Then, like many others I got roped into Warhammer and 40K. I completely missed out on Battlesystem. Wizards of the Coast just released a new free ruleset compatible with 5th Ed. AD&D, but I have no interest in using the new version of AD&D. The old rules are found easily enough on eBay, and they’re based on 2nd Edition AD&D (the version I played all through high school and college) so I picked up a copy.

We got more snow over the weekend (because we really needed more of it), and I had just finished my highlander warband, so I figured why not try the skirmish rules out? So here’s my first Battlesystem  Skirmishes After Action Report!

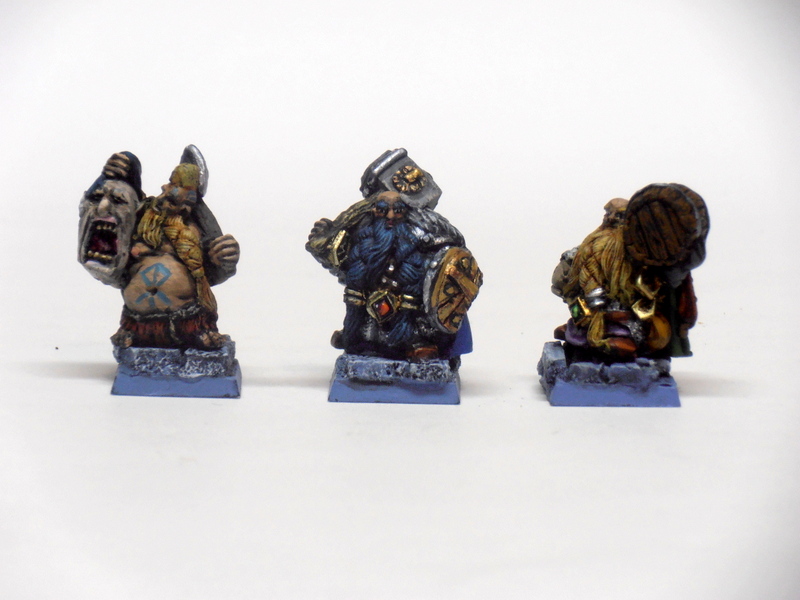
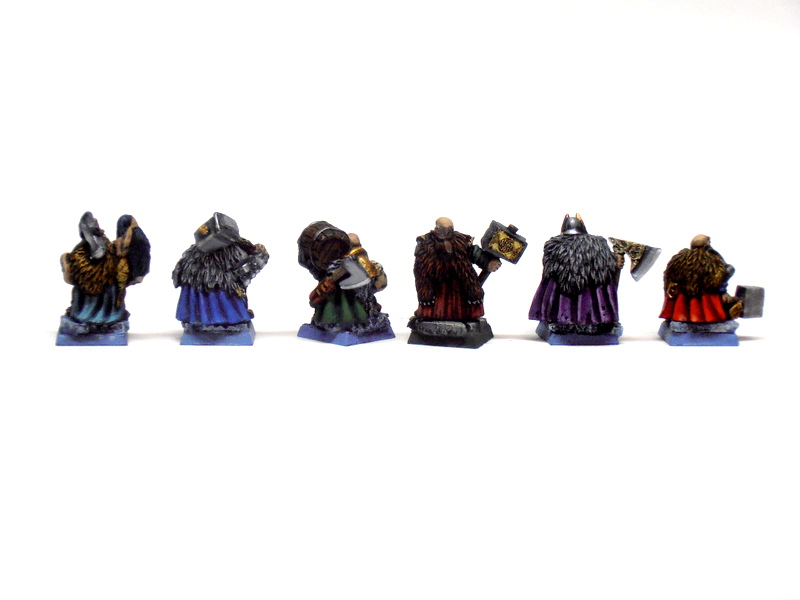
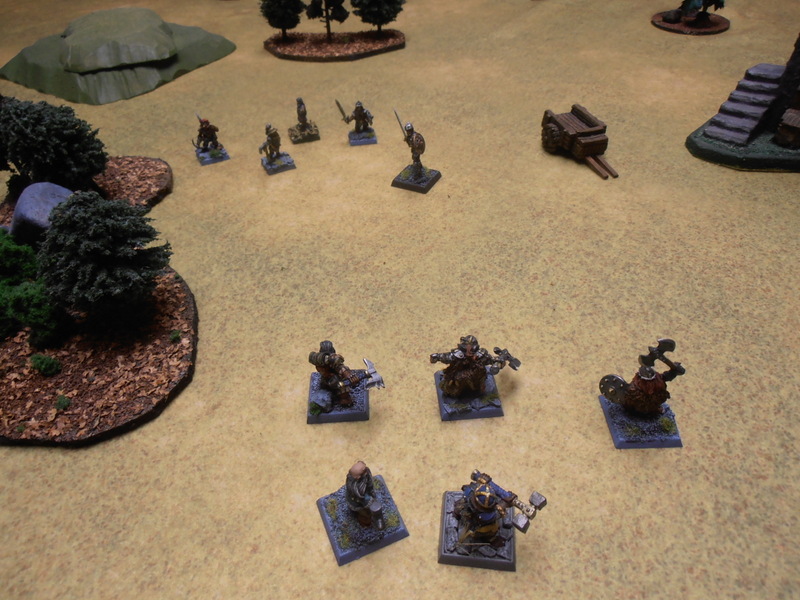
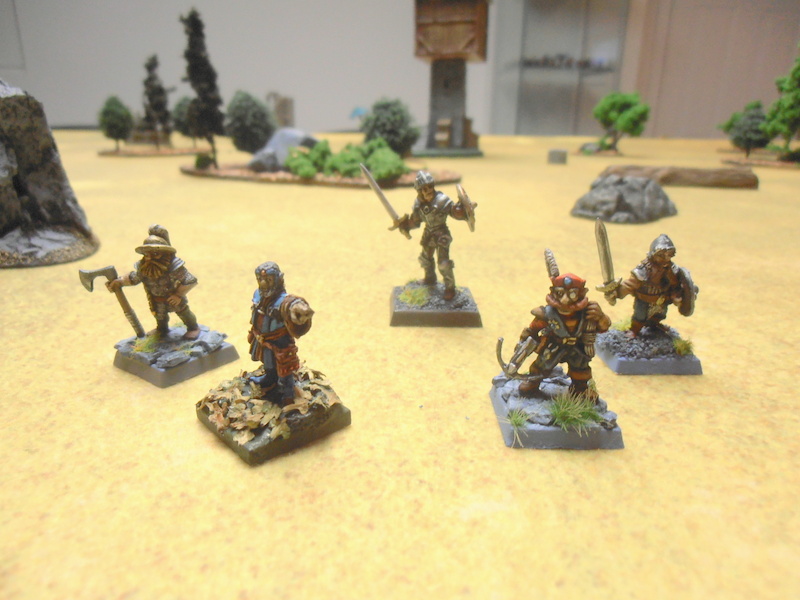
I chose Highlanders vs. Orcs as the forces. The highlanders were made up of two clans: The Mac Layrs (Green/Blue) and the Rennies (Red/Blue). I split them into separate units based on clan. Bran Mac Layr was the commander (a level 6 hero), and he was supported by Rory Mac Layr, (a level 3 cleric). The remaining 2 Mac Layrs were generic level 1 human fighters. The Rennies were all level 1 human fighters.

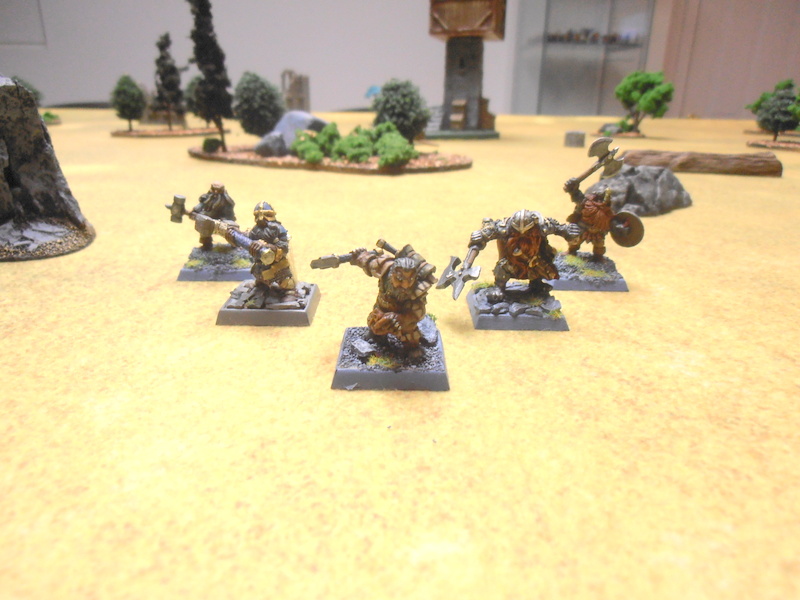
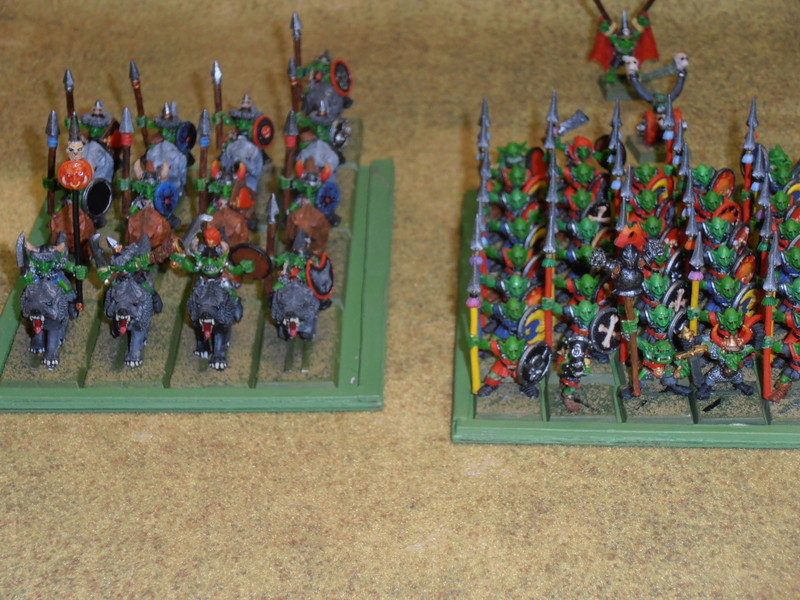
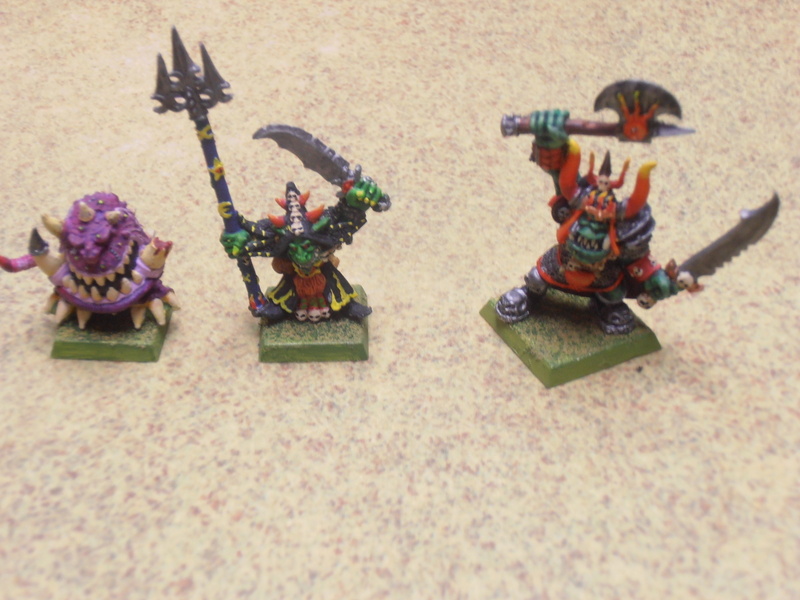
The orcs were led by Varg (Level 2 orc leader). Varg commanded 4 Level 1 orcs. Also on the orcs side was Gogzarak, an ogre (Level 4 monster). As a monster, he can move and act independently. I used the generic stats provided in the Battlesystem rulebook for all the miniatures.

OLYMPUS DIGITAL CAMERA


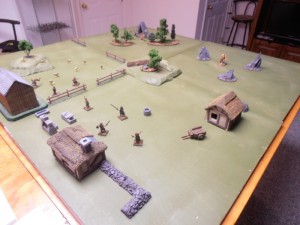
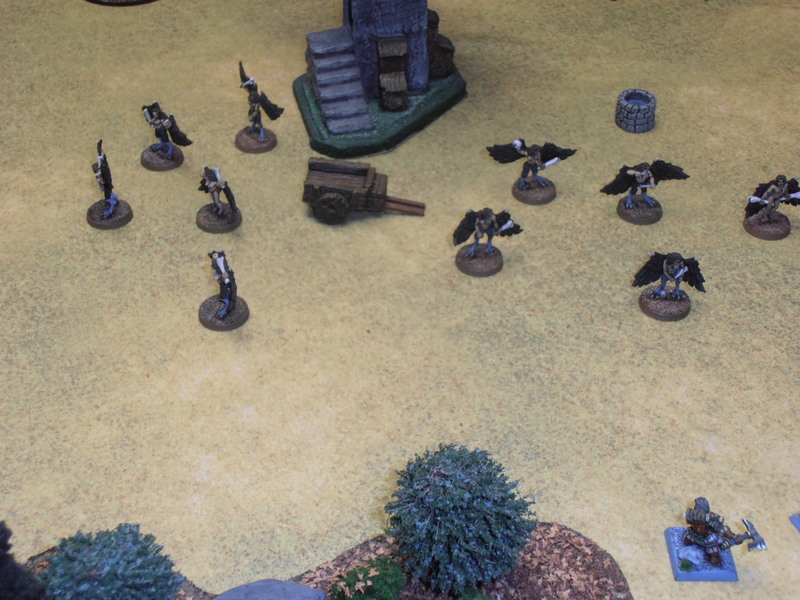
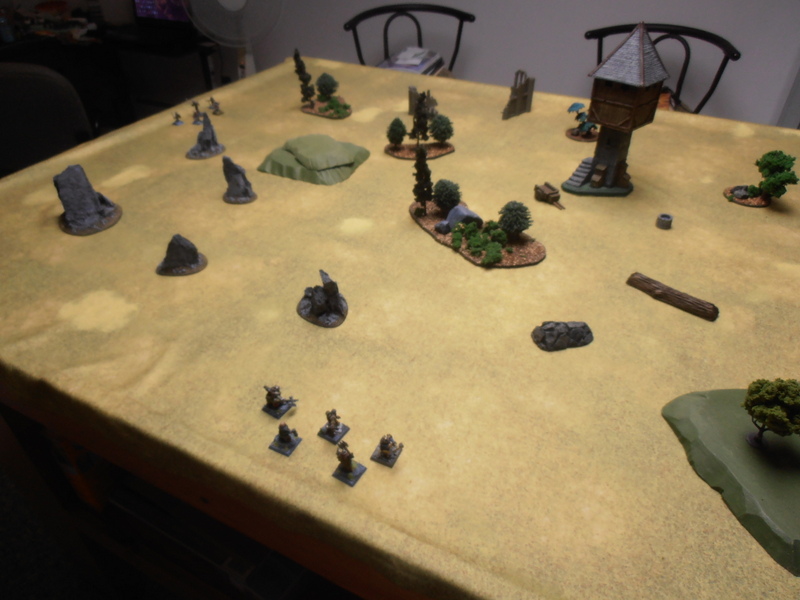
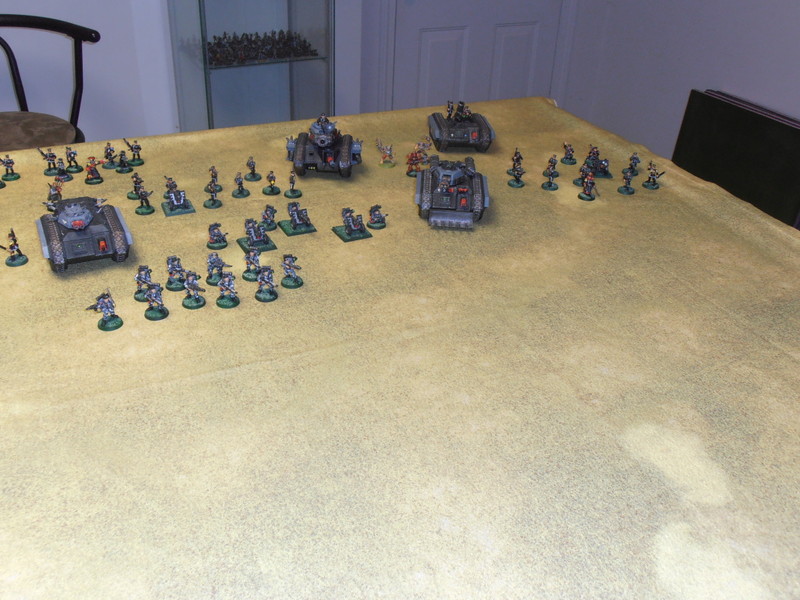
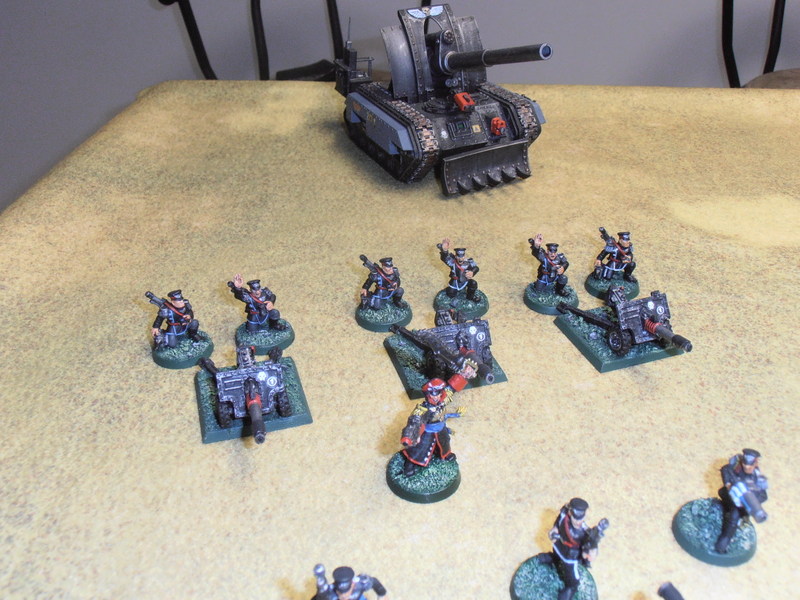
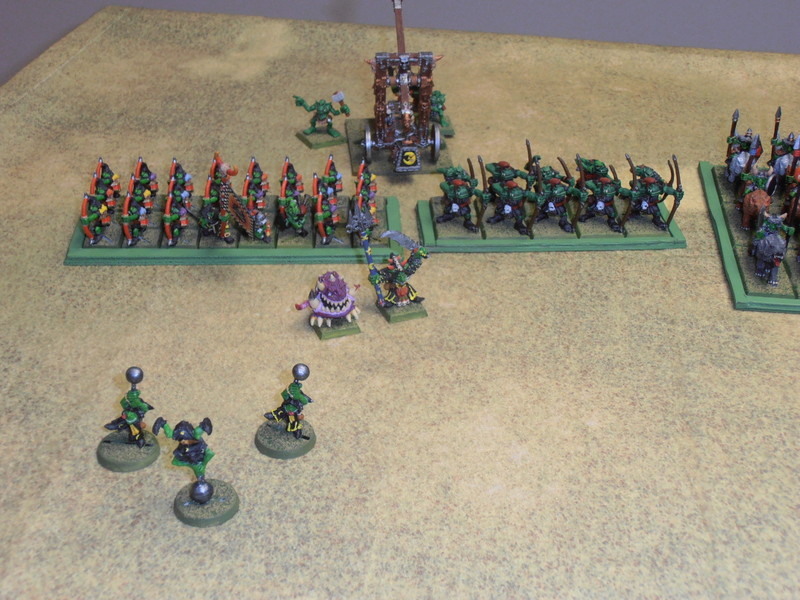
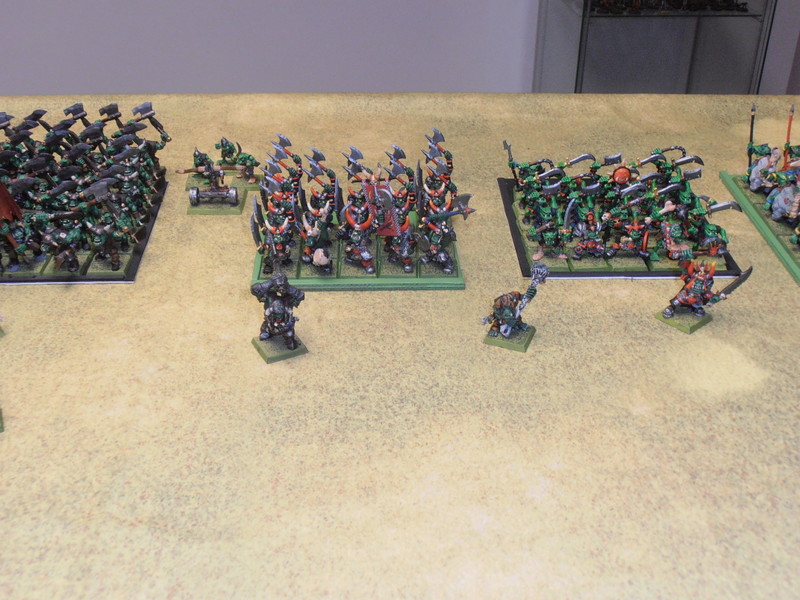
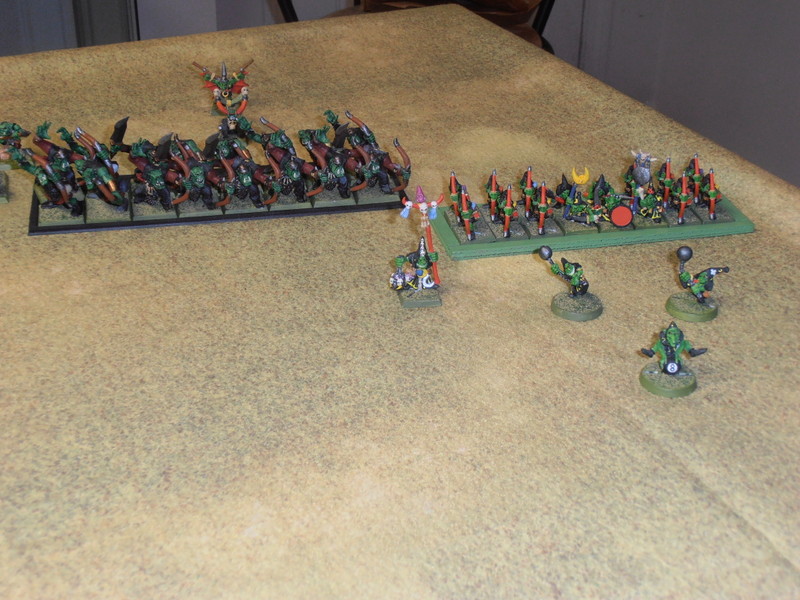
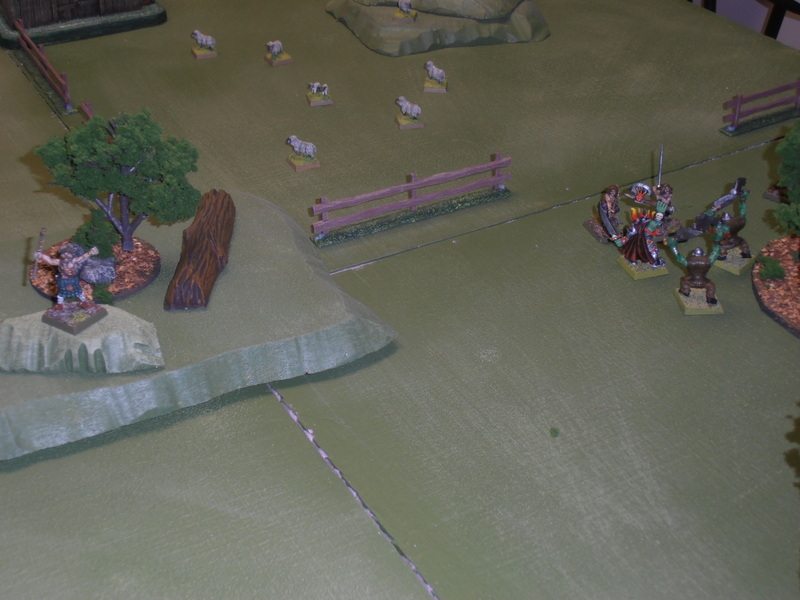
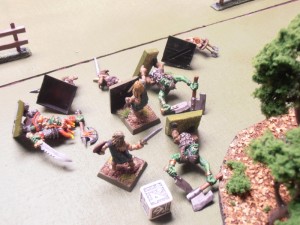
The orcs and the ogre are attacking the highlander settlement in the hopes of grabbing some sheep. The highlanders are trying to stop them. (Insert your own highlander/sheep joke here.) I deployed the Rennies in the pasture and the Mac Layrs in front of the houses. The orcs were deployed in the woods, and Gogzarak was deployed on his own, across from the Mac Layrs.

OLYMPUS DIGITAL CAMERA

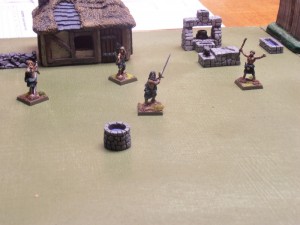
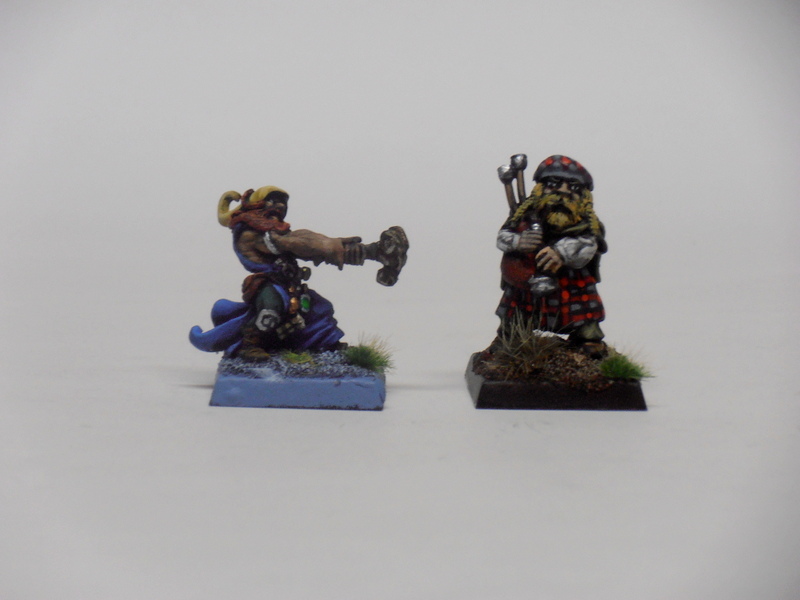
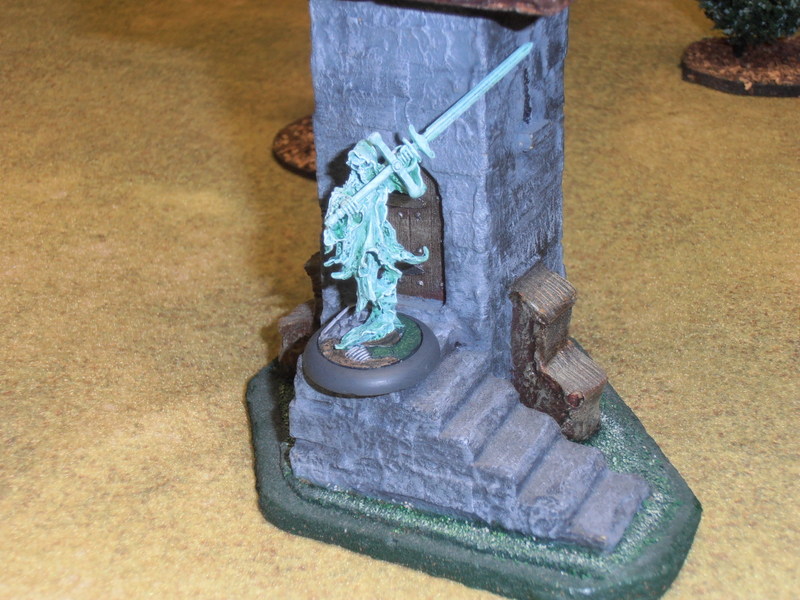
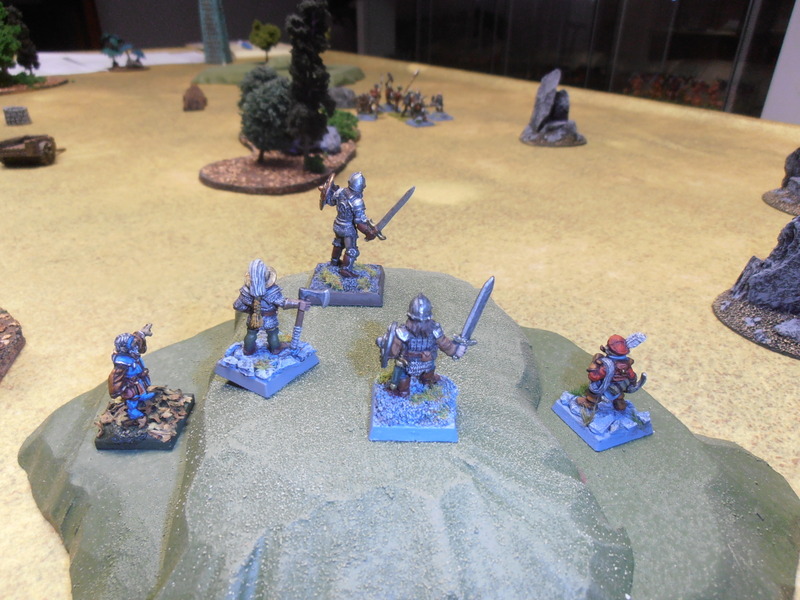
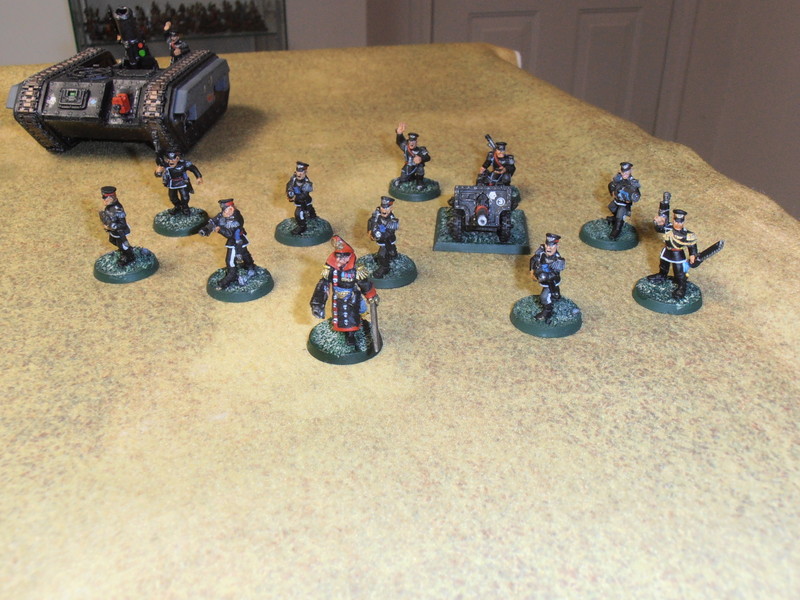
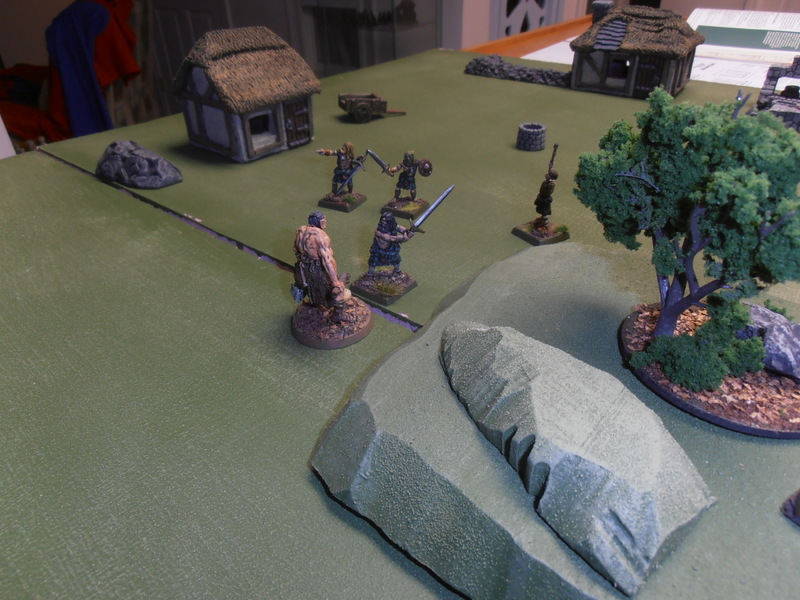
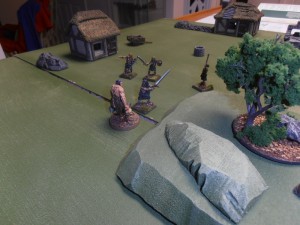
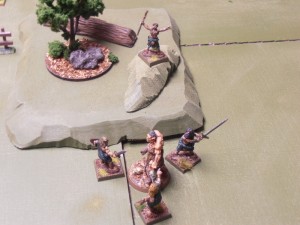
That’s Bran Mac Layr with the claymore, near the well.  Rory Mac Layr (the cleric) is all the way on the right.

OLYMPUS DIGITAL CAMERA
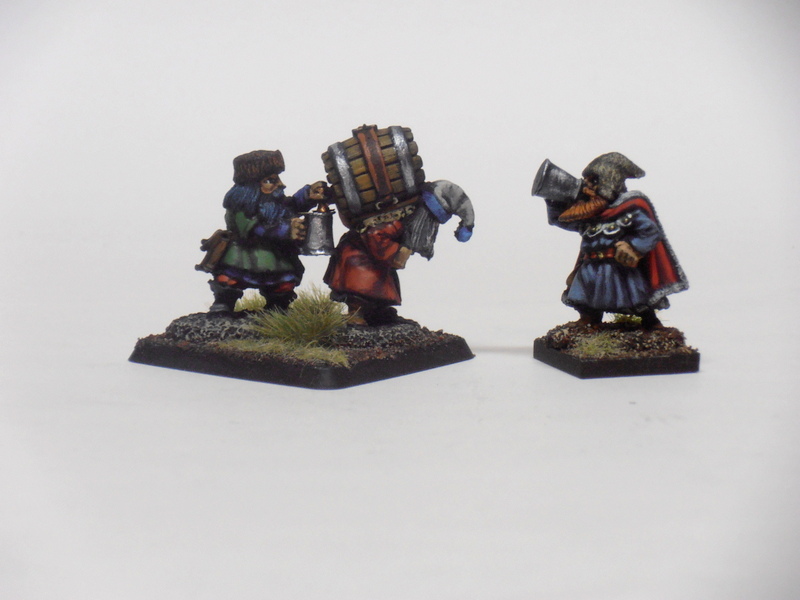
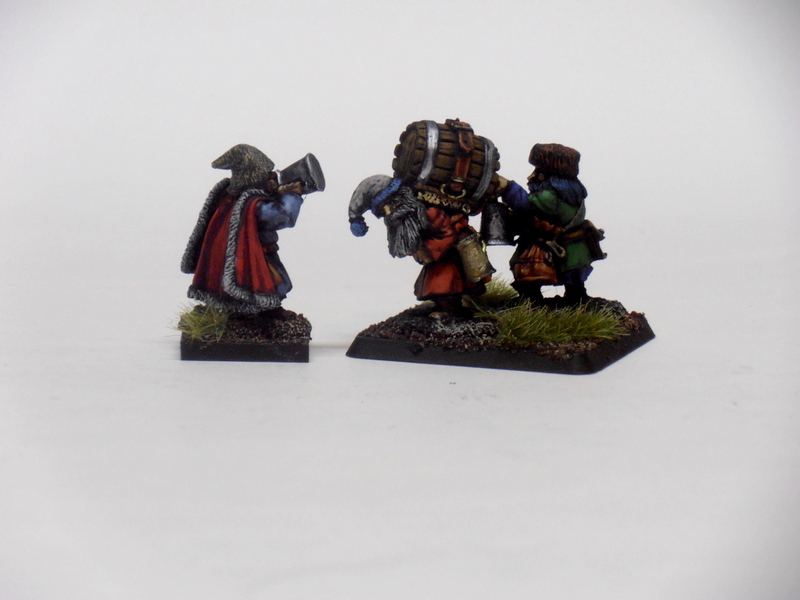
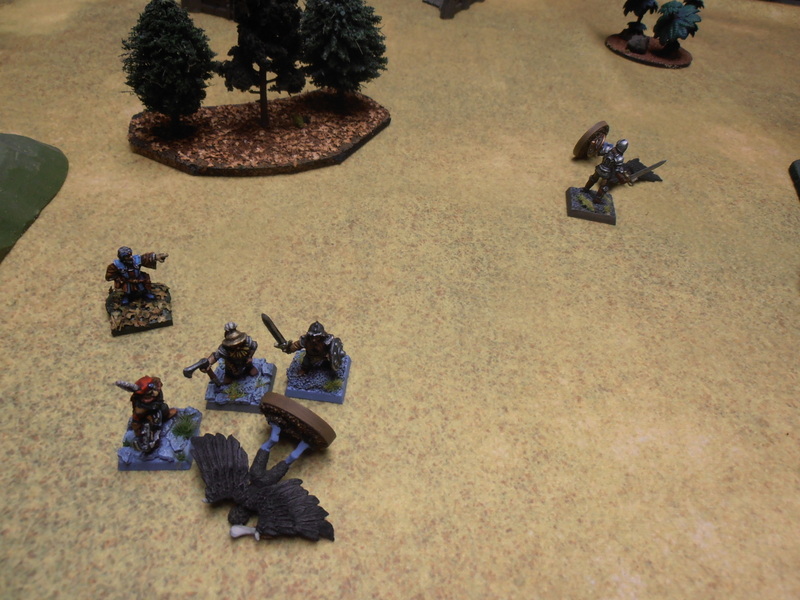
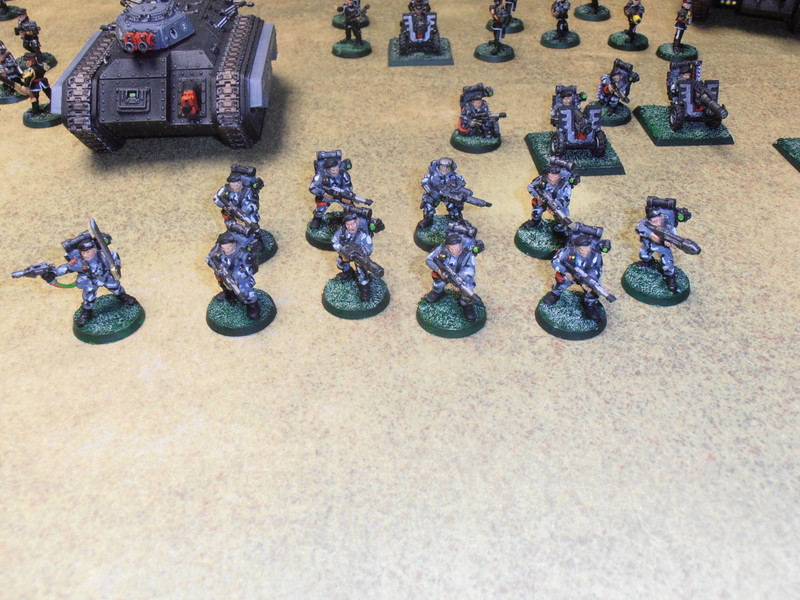
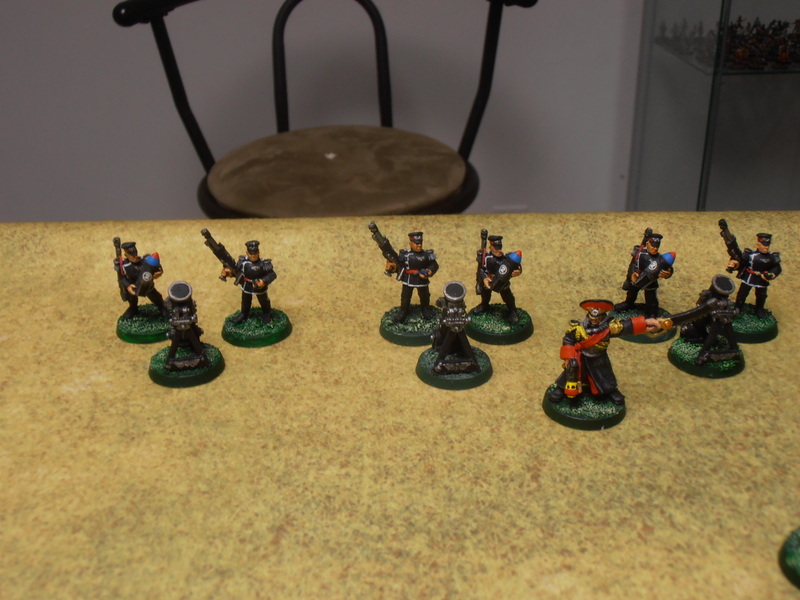
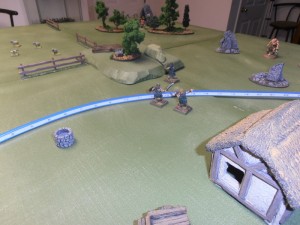
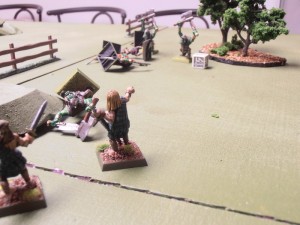
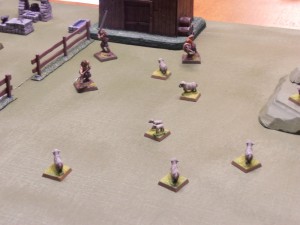
The Rennies are among the sheep.


OLYMPUS DIGITAL CAMERA


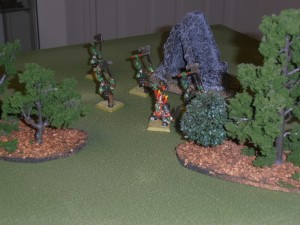
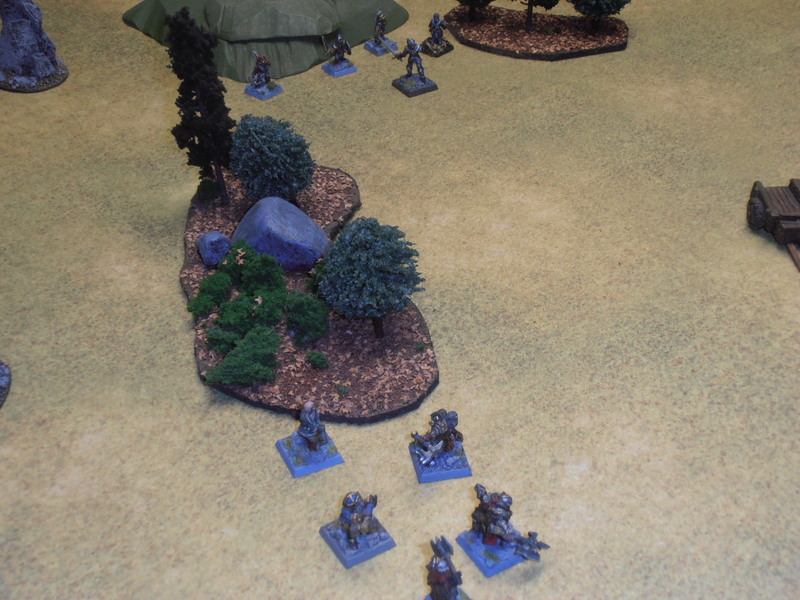
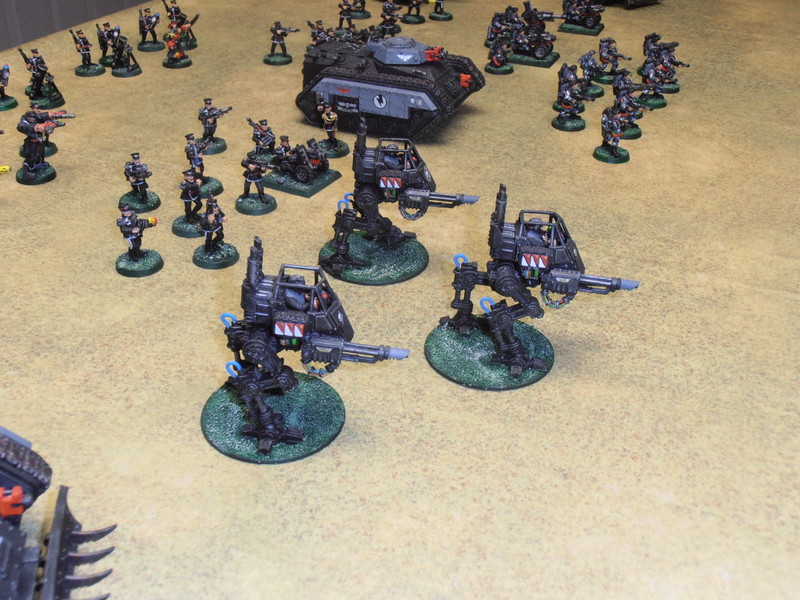
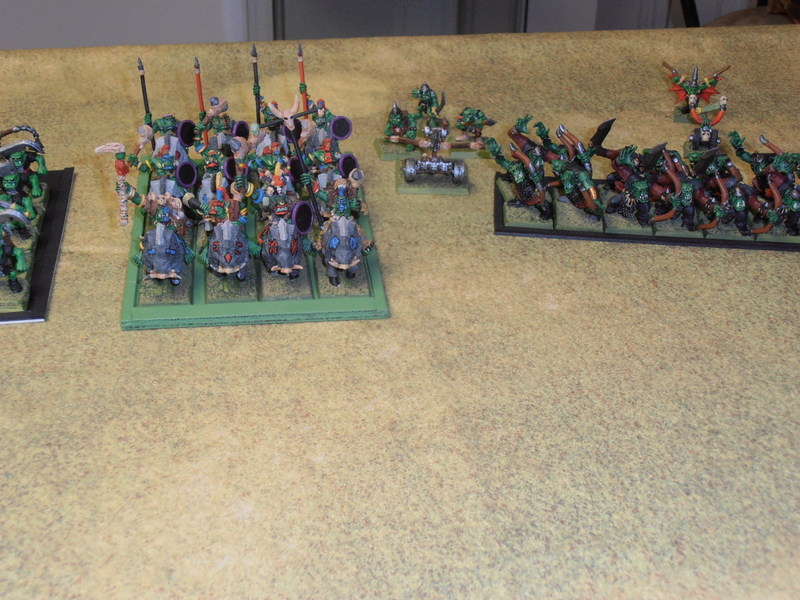
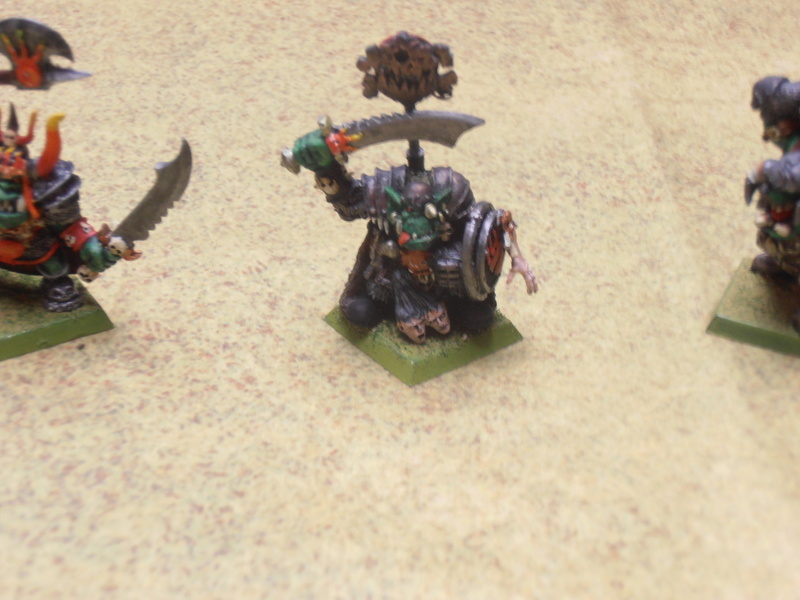
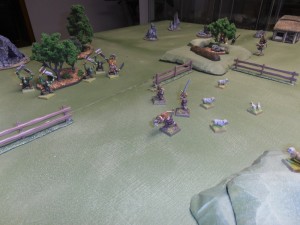
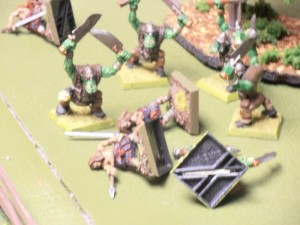
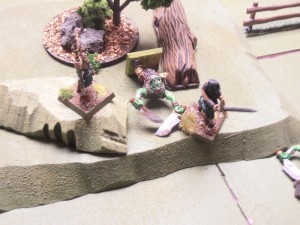
Varg is leading his orcs out of the woods.

OLYMPUS DIGITAL CAMERA

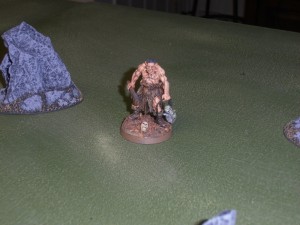
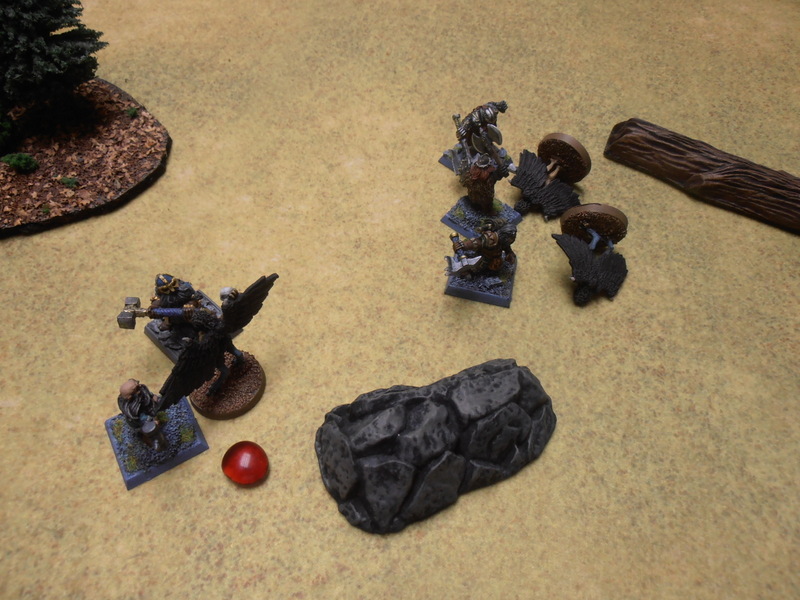
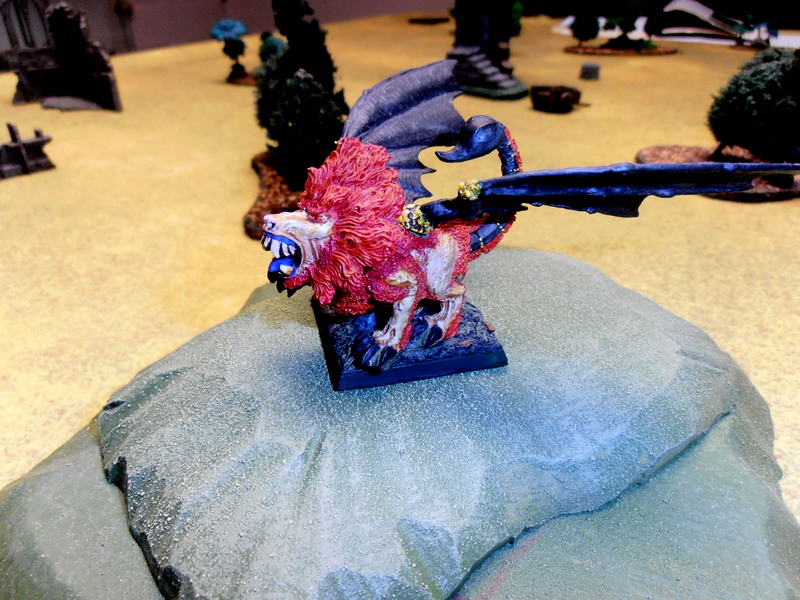
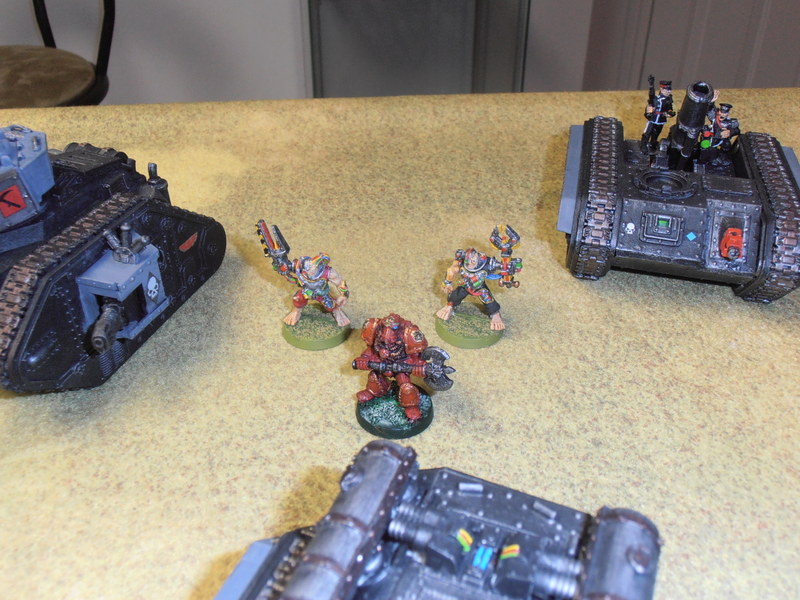
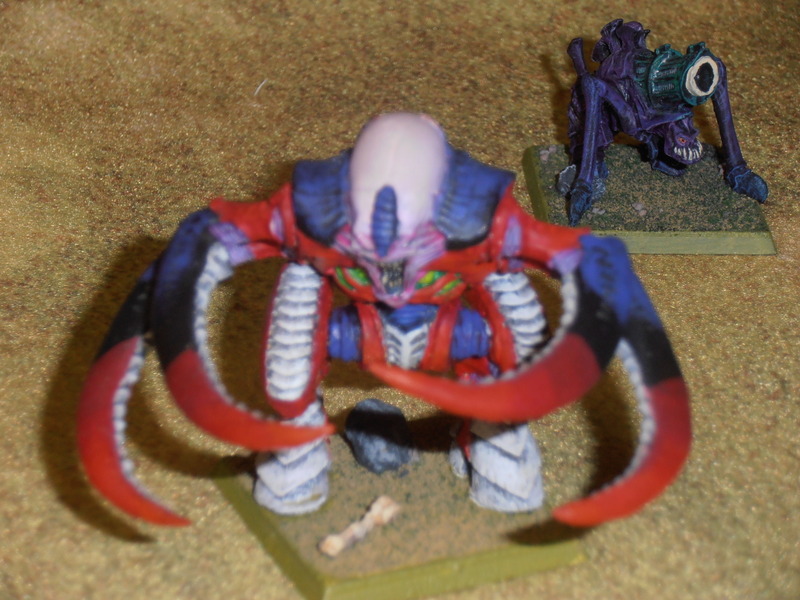
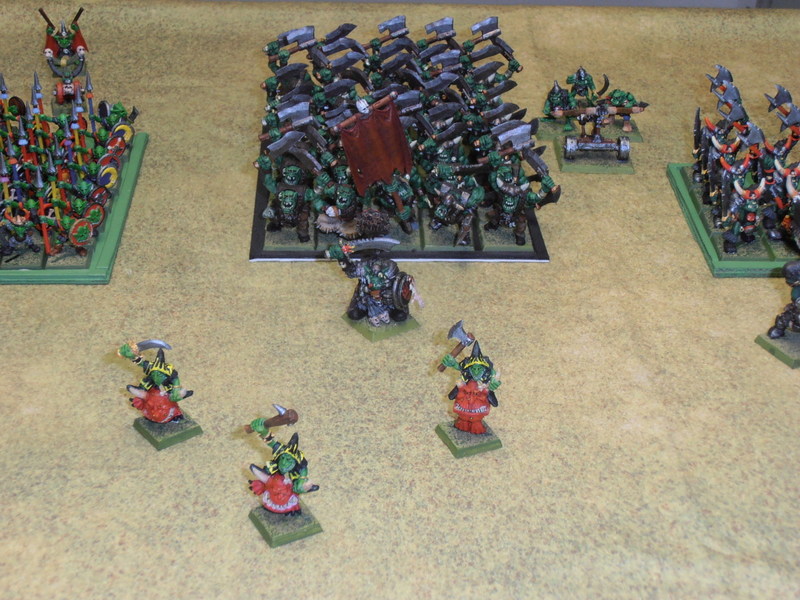
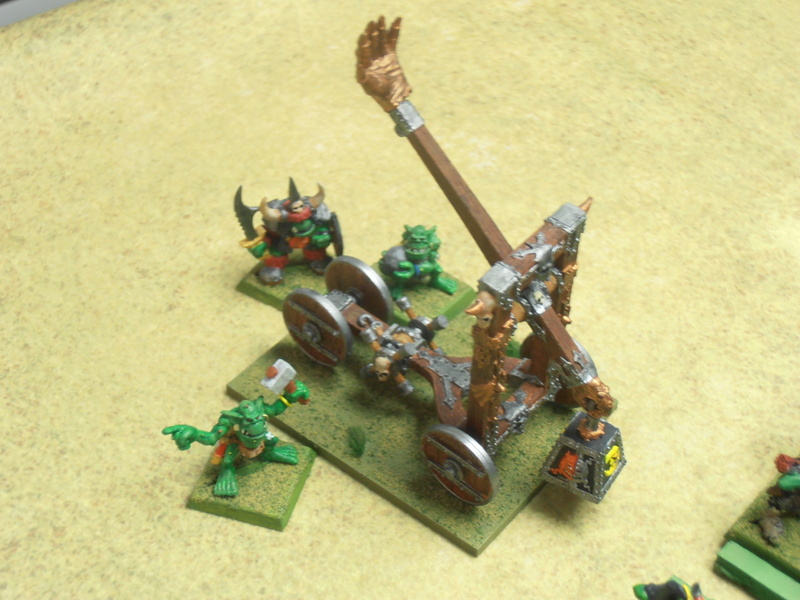
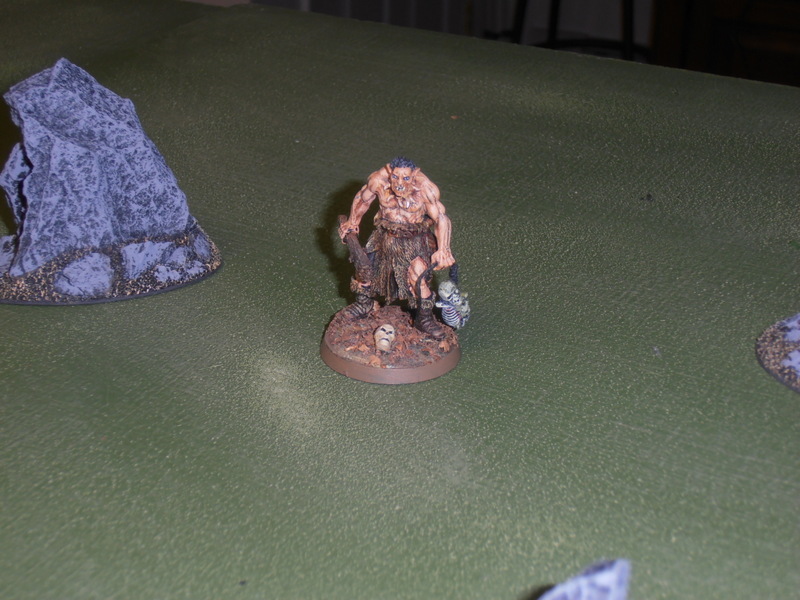
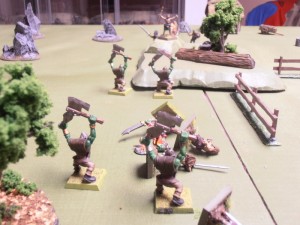
Gogzarak the ogre is on his own, taunting the Mac Layrs.


ROUND 1:

OLYMPUS DIGITAL CAMERA


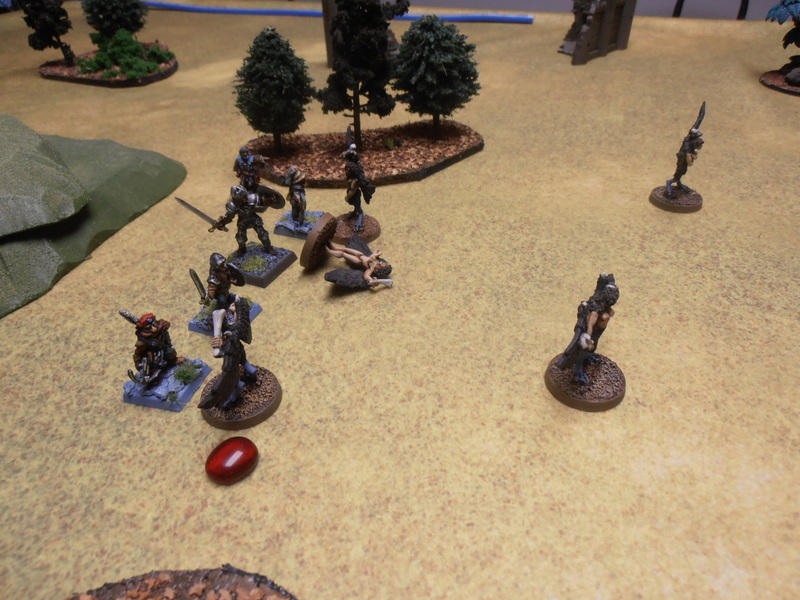
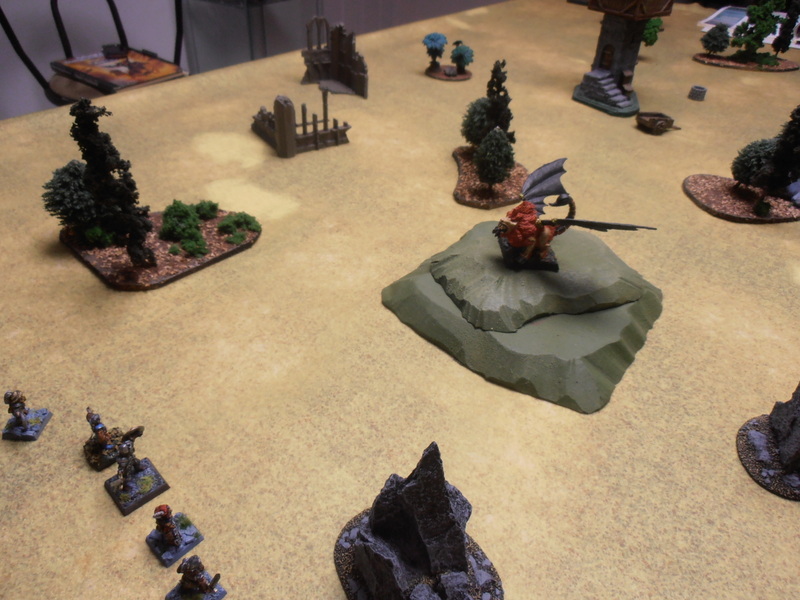
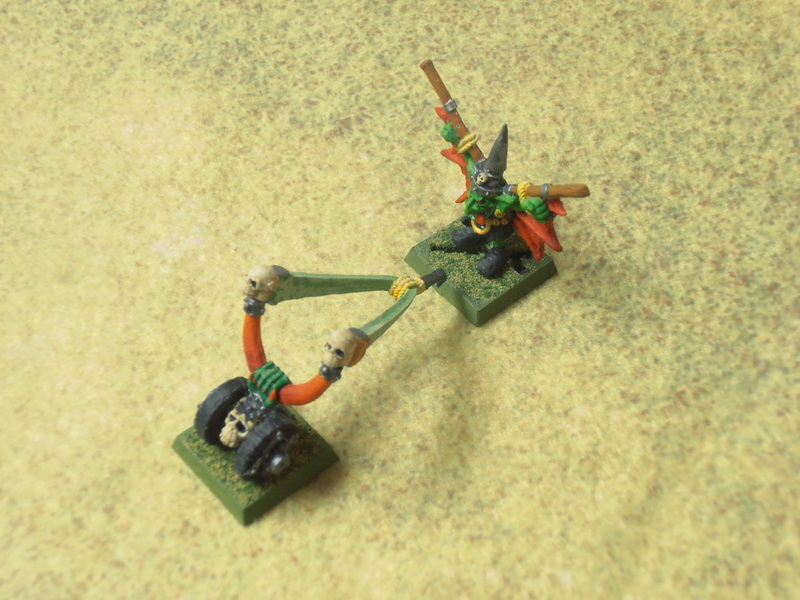
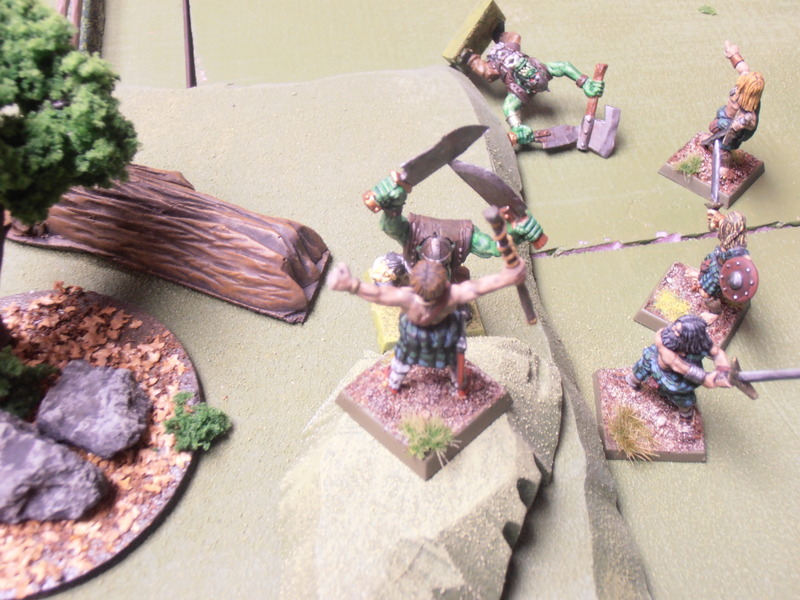
The monsters win initiative, which means the highlanders move first. Using this cool bendy-ruler, I measured out their full move (12″). No way are the Mac Layrs letting some scummy ogre get anywhere near their houses! Unfortunately, this puts them well within the ogre’s charge range.

OLYMPUS DIGITAL CAMERA

Gogzarak charges Bran Mac Layr, bellowing as ogres do. He smacks Bran for 1 hit. Bran responds, but rolls a 1. He misses, and initiative immediately switches to the highlanders (weird rule).

OLYMPUS DIGITAL CAMERA

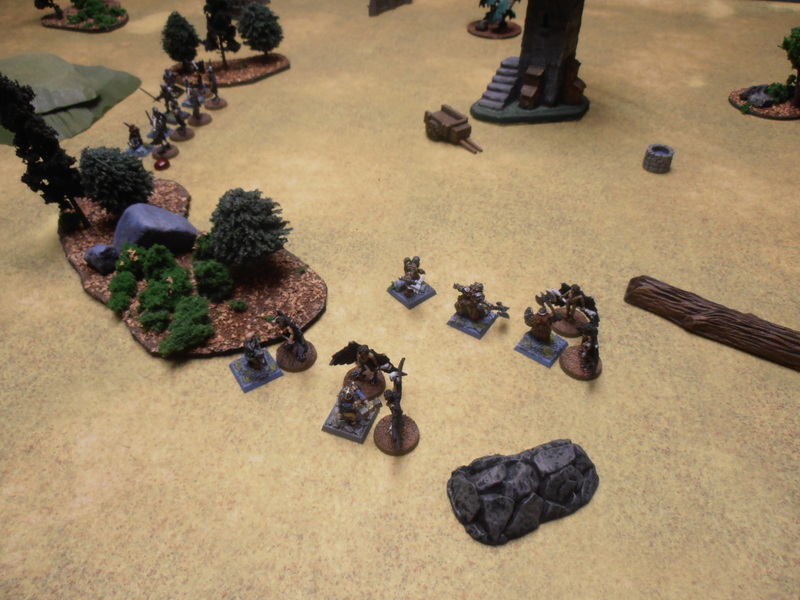
In the pasture, the Rennies move to intercept the orcs as the come out of the woods. Neither side can reach melee this round.

ROUND 2

OLYMPUS DIGITAL CAMERA

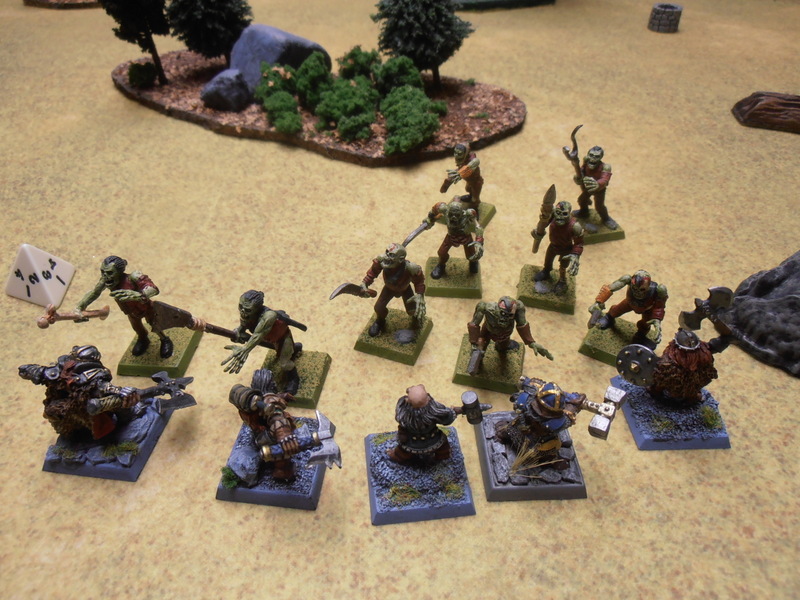
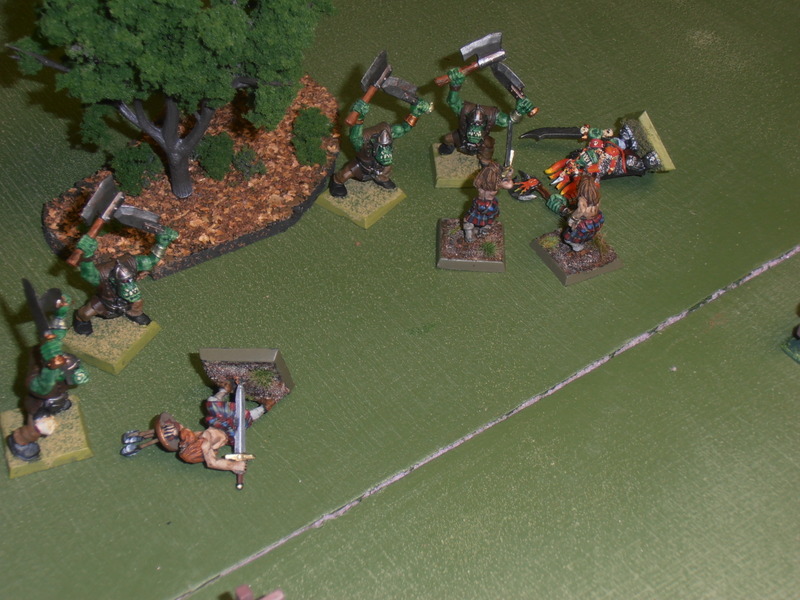
The Rennies charge into combat. Two of them concentrate on Varg, the leader, while the other closes with an orc. The strategy pays off as both Rennies score hits and Varg dies. In response, one of the orcs kills one of the Rennies.

OLYMPUS DIGITAL CAMERA


Meanwhile, Rory Mac Layr moves to the hilltop to better support both units. He casts Bless on the Rennies, giving them +1 to THAC0 and +1 to Morale. But it’s the orcs that have to check morale this round since their leader was killed. They pass and stay to fight.

The other  Mac Layrs all attack Gogzarak, and he attacks back, but no one hits anybody.

ROUND 3

OLYMPUS DIGITAL CAMERA


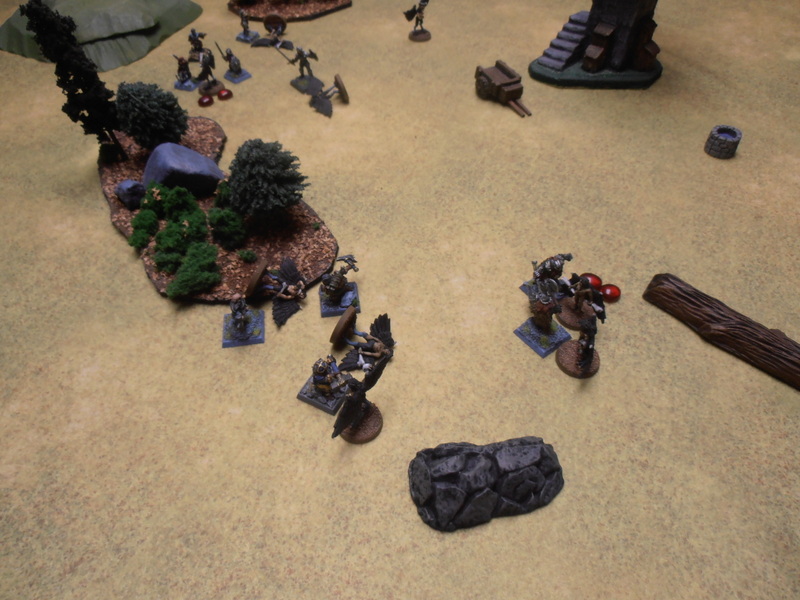
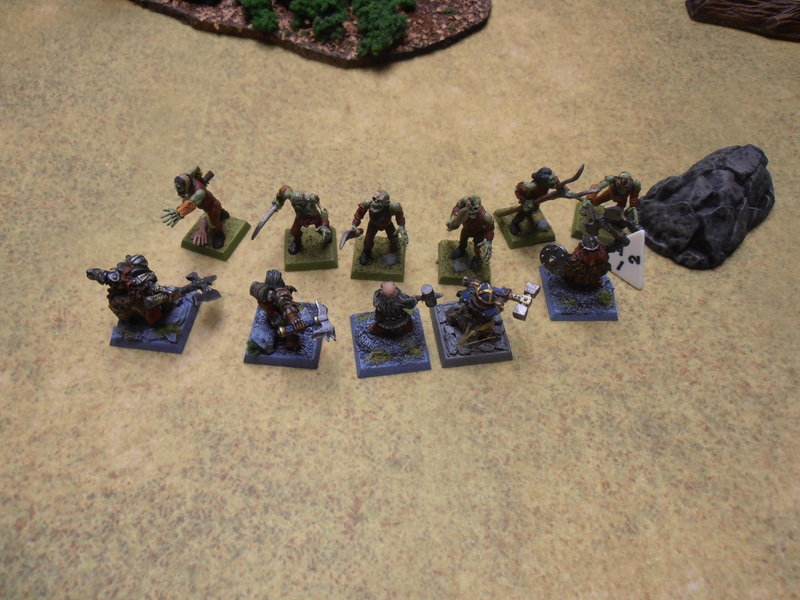
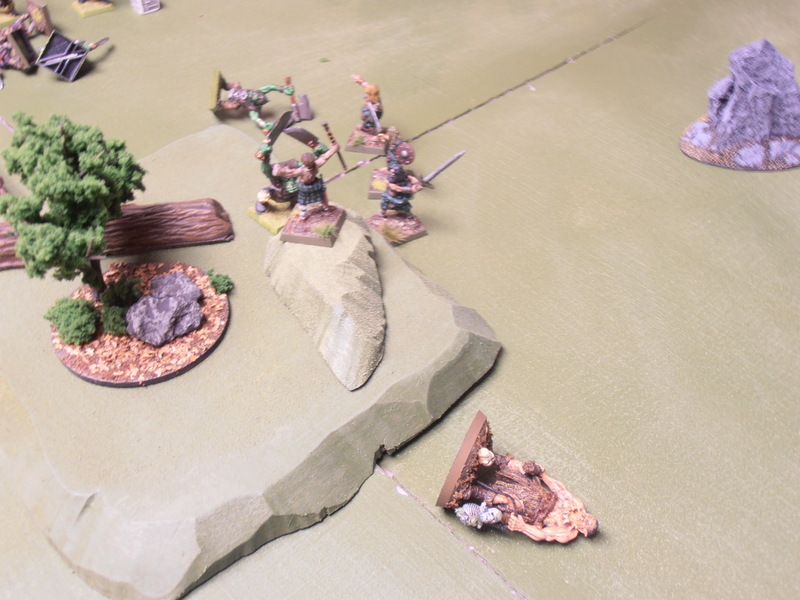
Bran Mac Layr circles Gogzarak  to get the +2 THAC0 bonus a rear attack gives. The other Mac Layrs flank the ogre. Bran hits Gogzarak for 2 hits! The other Mac Layrs miss. So does Gogzarak. Hoping to further support the Rennies, Rory Mac Layr casts Hold Person, rooting two orcs to the spot.

OLYMPUS DIGITAL CAMERA

However, despite his support, the two unhindered orcs still manage to cut down the Rennies like cornstalks.

ROUND 4

OLYMPUS DIGITAL CAMERA


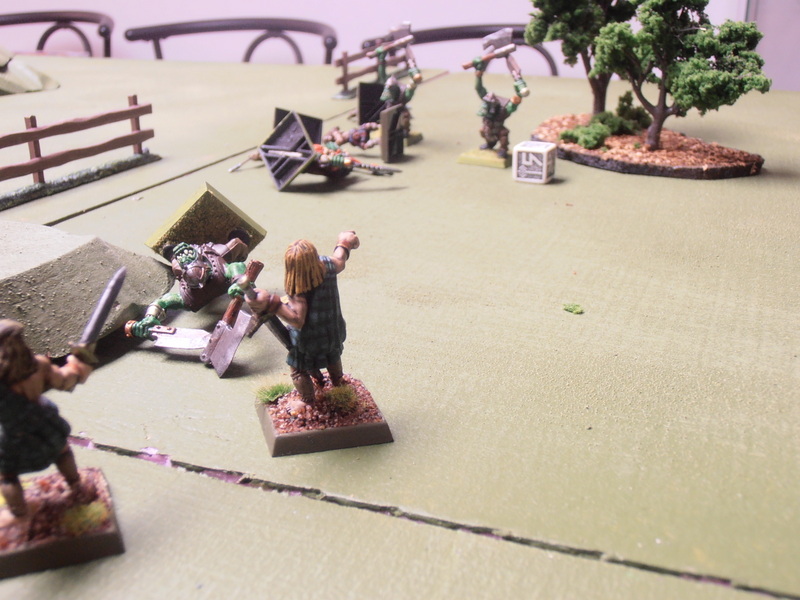
The two orcs who are still able to move break off and move towards the cleric on the hill. The Mac Layrs and Gogzarak fight another ineffective round of combat with no casualites. Seeing two orcs approaching his position with ill intent, Rory casts his final spell: Cause Light Wounds. One of the orcs drops dead halfway up the hill. The remaining orc checks morale as he had to form a new unit as a result of combat (the other orcs couldn’t move with him because they were held). He fails and is shaken.

ROUND 5

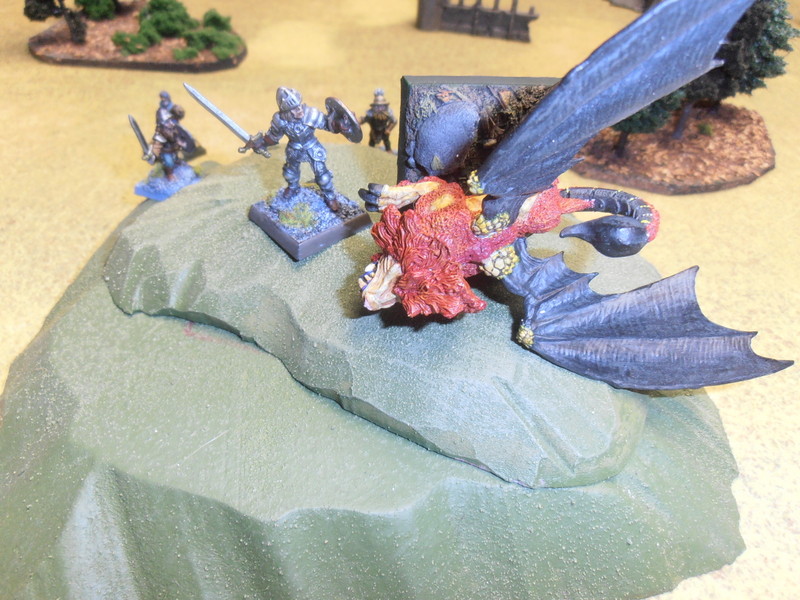
Bran kills Gogzarak. The orc rallies. (Sorry, no picture.)

ROUND 6

OLYMPUS DIGITAL CAMERA 

OLYMPUS DIGITAL CAMERA


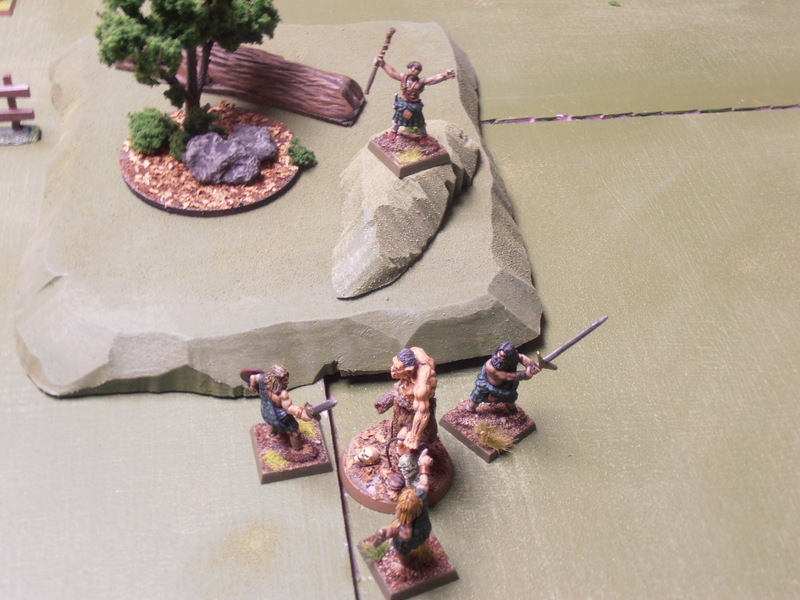
The lone orc charges the cleric while the Mac Layrs circle the hill. Even though the cleric has +1 THAC0 due to being on a higher elevation, he misses. The orc wounds the cleric for 1 hit.

ROUND 7

OLYMPUS DIGITAL CAMERA

OLYMPUS DIGITAL CAMERA

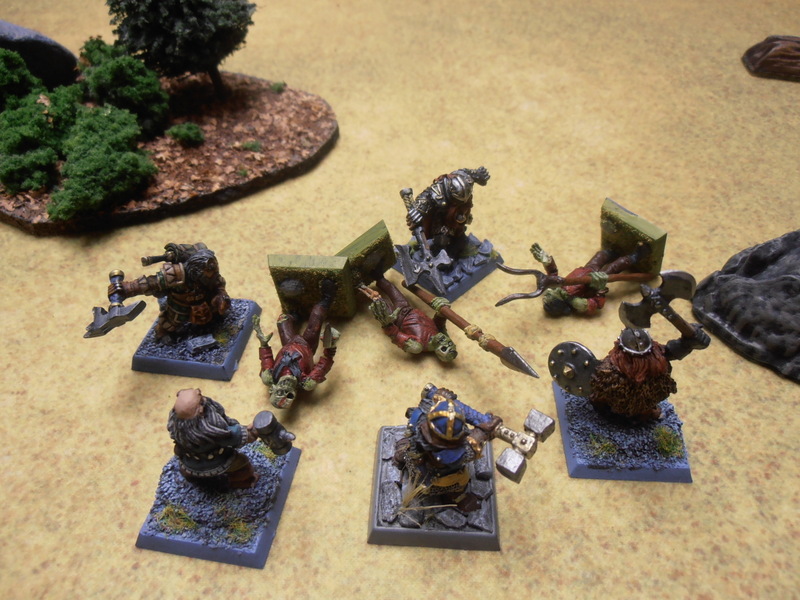
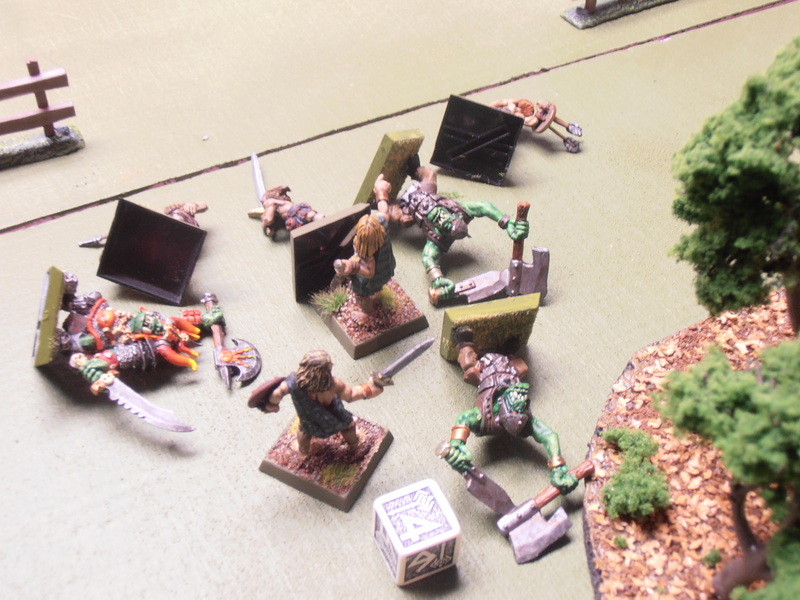
Rounding the hill, the Mac Layrs spy the held orcs and charge. Showing no mercy, they put the filthy greenskins to the sword!

Bran charges the orc from behind, but misses. So does the orc and so does the cleric.

ROUND 8

OLYMPUS DIGITAL CAMERA


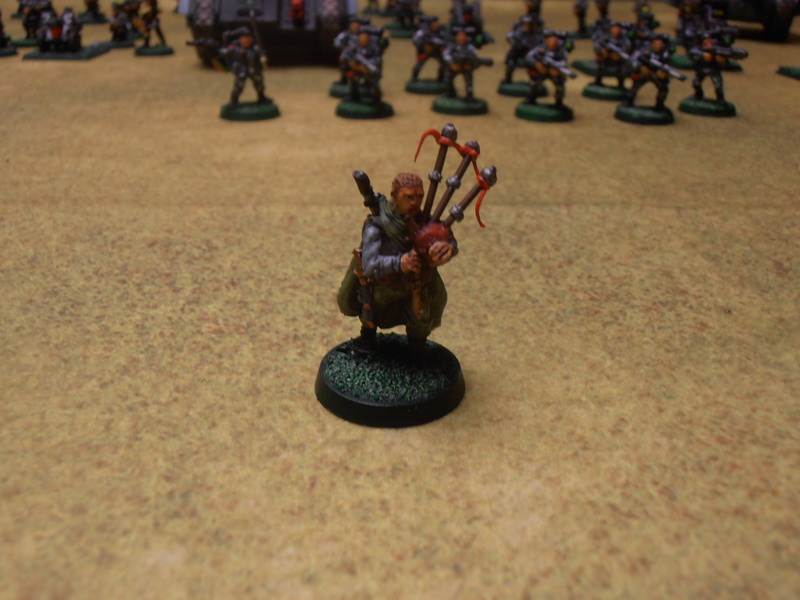
Bran Mac Layr kills the last remaining orc, cleaving him in twain from behind. Victory to the highlanders! Alas, the proud Rennie clan has fallen. Cue the bagpipes!

ANALYSIS:

Battlesystem Skirmishes is pretty easy to learn, especially if you have ever played 2nd Edition AD&D. This whole game took about 25 minutes to play, including the time I took looking up rules and taking pictures. It seems the forces were unbalanced in favor of the highlanders, despite the monsters having more points on their side. I purposely didn’t use missile weapons, which may have altered the battle for both sides.

The cleric seemed to make the most difference in this game. Although his Bless spell didn’t do much, his other two spells really made a difference in how the game played out. If I played this skirmish again I would bulk up the monsters a bit by giving them missile weapons or maybe a shaman of their own.


Scots Wha Ha’e!

I painted up some Reaper Highlanders for use as a warband in Battlesystem. I’ve had most of these miniatures for a while now, but I didn’t like the way they were painted, so I stripped them and repainted them. I’m happy with the results.

OLYMPUS DIGITAL CAMERA


These guys are some of Reaper’s earliest releases. I don’t think they’re part of their current line, but you can still get them on the website. This is my first real effort at painting tartans. While there are many different tutorials online, I used Trojan Art Painting’s method. I used a blue/green tartan for these guys above.

OLYMPUS DIGITAL CAMERA


I did a small conversion on the Highlander on the left above, adding arrows to his shield. The arrows are brass rod with fletching made from green stuff. I went with a red/blue tartan on these three.

OLYMPUS DIGITAL CAMERA


The last two models are a piper and a druid. I made another slight modification to the piper by removing his fourth drone pipe. I like the look of the 3-drone highland bagpipe better. His tartan is gray/black with red and yellow accents. I painted the druid in white robes to make him stand out more. Weird how he’s clutching wheat instead of mistletoe. Trying to make it look like mistletoe would just look like green wheat, so I didn’t try.

I played my first ever game of Battlesystem with these guys over the weekend. Batrep in the next post!

Product Review: Pegasus Hobbies Palm Trees Series A

I recently bought a couple of boxes of these Palm Trees for use in some tropical Pulp gaming. Here are my thoughts.

OLYMPUS DIGITAL CAMERA


First, I wish I thought to take pictures of the assembly and unboxing, but if you want that you can check out Tabletop Lenny’s video here. Second, these are Palm Trees Series A, which is a box of 5 trees. These differ from Series B which only has 3 trees per box. Series B trees are much larger and feature a different type of leaf.

PROS:

  • $8.50 a box retail. Pretty cheap!
  • Very easy to assemble once they’re prepared.
  • They look great right out of the box, no painting necessary.
  • They’re listed as 1/72 scale, which means they work well with 15mm-28mm miniatures.

CONS:

  • They’re kind of a pain in the ass to prepare. The leaves require a fair bit of trimming but once this is done, so is 90% of your work.

OLYMPUS DIGITAL CAMERA

Once I assembled them, I based them on cork tiles and added some rocks. I painted the bases but didn’t bother with the trees themselves. Painting the leaves would be a nightmare, and anyway, they look great as is! The picture above shows some 28mm Pulp Figures Melanesian Island Warriors for scale.

SHOULD YOU BUY THEM?

Absolutely. They’re cheap, easy to assemble, and they look fantastic. Thumbs up!


Product Review: Plastcraft Western Buildings

Production of my south-of-the-border town of Mescalero has slowed while I try to figure out some problems with the church roof. With all the amazing new Western buildings available from companies like 4Ground, Game On and Knuckleduster, to name a few, I thought I might as well start putting together a more traditional Western town. The trouble is those laser-cut MDF buildings can get pricey pretty quick.

OLYMPUS DIGITAL CAMERA

I first saw these PlastCraft Western Buildings on Miniature Market and I figured I’d give them a try. The kits are all basically the same, although the front of each building is different, and some have awnings while some do not. Each building kit comes with a resin door and window (varies by kit). You can’t beat the price: at less than $5 each I bought all six varieties.

OLYMPUS DIGITAL CAMERA


I posed some 28mm Blue Moon cowboys with these buildings to give you an idea of the scale. As you can see, the buildings are pretty small for 28mm and might be better suited to 15mm. The roofs are not designed to be removable, but I guess you don’t have to permanently attach them if you don’t want to. Regardless, the interiors are so small that there’s really no point in not attaching them.

OLYMPUS DIGITAL CAMERA


I have mixed feelings about these kits. I’ll give you my personal pros and cons, as well as discuss how I assembled them. I wish I had thought to take pictures of them before assembly, but I didn’t think I’d be writing a review of them. Sorry.

OLYMPUS DIGITAL CAMERAPROS:

  • The price. For less than $5 apiece, they make perfectly good small shops and won’t break your scenery budget.
  • Once assembled and painted, they look nice enough.
  • Once primed, the material takes paint well. Inexpensive craft paint was made for  projects like this!
  • You get a lot of extra card left over for each building, which is great for use in other projects, or to dress up these buildings (see below).

CONS:

  • The kits are somewhat fiddly to assemble, especially the awnings. Expect to get glue on your fingers.
  • The resin doors and windows do not often fit snugly into the holes. There’s usually a gap, so you need to fill it with Green Stuff or something else.
  • There is absolutely no texture to these buildings. Either you need to paint it to look like wood boards, or you need to score the material first. I opted for the latter. It’s easy enough to score, and it looks much better when assembled.
  • The signs, like the building walls, are just blank card.  Which means either stenciling, painting freehand, or doing what I did; which is printing out the name of the business in Playbill font and glueing it to the sign. The downside to this is it looks bright. I guess I could have used some other paper, but for the amount of use these buildings are going to get, it wasn’t worth it.
  • All of the above makes assembling these buildings a more time-consuming task than you might think.

OLYMPUS DIGITAL CAMERA

OVERALL:

The low price makes it easy to overlook the annoyances. These kits would compliment some nicer buildings by the abovementioned companies, or may provide adequate scenery for a small outdoor skirmish on their own. You may notice I used some extra card bits to make signs on a couple of buildings like the one above. It won’t win any awards, but it adds a little something extra. You get plenty of leftover card to use in any way you see fit. For example, I considered making a plank bridge from one building roof to another, but scrapped the idea.

After I painted them, I realized my Western buildings look pretty bright and clean! I’m thinking of adding some weathering pigments to them to dirty them up a bit. You could paint them with less color to give them a more hastily-constructed or ramshackle look, if you prefer.

SHOULD YOU BUY THEM?

Yeah, if you’re looking to add a little extra to a town or if you’re on a tight budget (or both). As long as you have the patience to assemble them, these kits are fine for what they are, and a steal at the price.

Brother Jerrod

Recently, one of my gaming buddies stepped up and decided to run a GURPS Fantasy game. I decided to play a monk so that I could make use of the fantastic 4th Edition GURPS Martial Arts rules. I give you…Brother Jerrod!

OLYMPUS DIGITAL CAMERAOLYMPUS DIGITAL CAMERA


The miniature is Reaper’s Friar Stone, Travelling Monk (03205), sculpted by Tre Manor. I bought and painted the miniature long before my friend decided to run this game, but once he did, I immediately wanted to use this miniature for my character. Brother Jerrod is a blast to play. He’s a jovial, garrulous fellow with a voice like Brian Blessed after drinking a quart of scotch.  I created his unique martial arts style to compliment his constant state of drunkenness.  In fact, more than once I was fully committed to my roleplaying and got more than a little drunk myself.

Good times.

Although I went into great detail creating his fighting style and giving amusing names to his maneuvers (Tip the Jug, Bear Stuns the Trout, etc.), I left the details of his religious order intentionally vague. It wasn’t going to be a big part of the game, and Brother Jerrod probably doesn’t remember much of his order’s precepts anyway. He’s too busy getting (and staying) drunk to care.


Some Old-School Miniatures

I went on a bit of a buying spree these past few months on some old Grenadier and Ral-Partha stuff. Mind you, I already have a ton of this stuff from my days of youth, but lately I’ve been feeling somewhat nostalgic. I present to you some of my recent painting efforts.

OLYMPUS DIGITAL CAMERA


Up first are these two knights. Both are repaints of miniatures I first painted when I thought using Testors gloss enamel was a great idea. I’ve been trying to identify them from The Lost Minis Wiki, but I haven’t been able to. I could have sworn they were Grenadier or Ral Partha, as I’ve had them since the early 80’s at least. For some reason I want to say the guy on the right was labeled a cavalier, but I’m not 100% on this. Anyway, they both have morningstars (or maces-and-chain, depending on who you ask), and that wasn’t so common on miniatures in those days. Any assistance identifying these guys would be most appreciated.

UPDATE: Thanks to some fellow enthusiasts on The Miniatures Page, I found out that the one on the left is from Superior Miniatures (Knight with Mace-and-Chain). The one on the right is from TSR, part of their “AD&D Heroes boxed set. And sure enough, he’s a cavalier!

OLYMPUS DIGITAL CAMERA

OLYMPUS DIGITAL CAMERA


I love miniatures that tell a story and aren’t just “generic guy holding weapon”. This one is an old miniature I bought recently. It was part of Grenadier’s “Woodland Adventurers” boxed set. I don’t have the rest of the set, but I love this halfling sniper. This is not a repaint. In fact, I don’t believe this miniature was ever painted before I got him.

I’m under a pile of lead now, but I’m going to continue to take a break and paint (or repaint) some of these old miniatures every now and then.

Death Soldiers of the Jade Hood: Part 2

When we last left our intrepid adventurers Bridget Rourke and Mo Shrevnitz, they had managed to obtain evidence that the Jade Hood was behind the strange disappearances of ordinary citizens in New Commerce. Bridget was able to snap a photo of some of the Jade Hood’s goons loading some suspicious chemicals onto trucks in the Warehouse District.  A shipping label from the Phillips Chemical Consortium was prominently displayed in the photo.

Bridgit went to alert the police and get the necessary warrants for a raid on the chemical plant, while Mo met up with New Commerce’s vigilante crimefighter, The Gargoyle, for a raid of their own. Meanwhile, the nefarious Jade Hood, aware that his schemes are threatened, sends a crew of goons to the chemical plant with orders to blow it sky-high…

 Scenario 2: Raid on the Phillips Chemical Consortium

Actually, this is technically Scenario 3, as Scenario 2 is a scenario to be run in the event the heroes are captured. The scene is an industrial complex, with lots of machinery and crates to hide behind. This gave me a good chance to break out my Aftermath Modular Terrain. I’m glad I bought in on this Kickstarter, as it’s really some great stuff. I bought in for $100, and the stuff shown below isn’t even half of what I got. The machinery was made by a fellow TMPer, Russell95403, and it works well for this scenario.

Basically, the good guys, Mo and The Gargoyle, need to find two key pieces of evidence and get out of the warehouse before the bad guys blow it up. The bad guys need to plant two time bombs and detonate them. The heroes get extra Victory Points if they can disarm the bombs or prevent the bad guys from planting them at all.

DSCN0519

This was the initial setup.  Once again, my buddy Matt took the part of the heroes. Opposing them, played by me, were two Grade 2 Enforcers, Chopper Murphy and Frankie the Fish; and two Grade 1 Gat Men, Limey Joe and Pete the Dentist (you don’t want to know how he got that nickname).

The scenario relies heavily on encounter markers. There are 12 in all, 6 for the heroes and 6 for the villains. Heroes can’t activate villain encounters and vice-versa. The interesting part is the type of encounter (hero or villain) is only revealed when the encounter marker falls within line-of-sight of one of the models on the board. The model still has to come in contact with it to activate it. Among other things, the pieces of evidence and the bomb locations are encounters which must be resolved, which means that each side is trying to get to their encounter markers as quickly as possible, while dodging the bullets and fists of the opposing team!

OLYMPUS DIGITAL CAMERA

On the first turn, both sides rushed in, trying to get to their encounter markers as quickly as possible. The villains activated one of theirs: a Tong Assassin! Not content to trust the safety of his schemes to his henchmen, the Jade Hood hired a Tong Assassin to ensure that the heroes don’t leave the warehouse alive. The assassin enters play through on of the side entrances.

OLYMPUS DIGITAL CAMERA

Soon after, Chopper Murphy finds one of the ideal locations to plant a time bomb. He sets it for two turns and prepares to move out of the blast radius.

DSCN0502

The Gargoyle knows he only has moments to act. He charges forward, guns blazing, and manages to wound Chopper Murphy. The crazed machine-gun maniac fires back, but the hasty expenditure of a Hero Point saves the Gargoyle from being riddled with bullets! Meanwhile, Mo runs at the other goons, but is intercepted by the Tong Assassin!

DSCN0503

The Gargoyle rushes to the ticking bomb, and, heedless of his own safety, attempts to disarm it! He succeeds! Chopper Murphy, slack-jawed at the Gargoyle’s boldness, opens fire again; this time wounding the Gargoyle. But the crimefighter isn’t down yet!

DSCN0504

With a flurry of hands the Tong Assassin leaps at Mo, delivering the 1000 needle strike! Mo barely feels it, and delivers two punishing body blows to the assassin. The Tong assassin drops like a wet bag of dirt and doesn’t move!

DSCN0505

Pete the Dentist sneaks around a piece of machinery and plugs the Gargoyle in the back! The Gargoyle, still reeling from Chopper Murphy’s machine gun rain, goes down!

DSCN0506

Mo takes this opportunity to charge Pete the Dentist, with predictable results. He levels Pete without breaking a sweat. I’m beginning to think no one has a chance against Mo, at lest not in hand-to-hand!

DSCN0507

The other two thugs, Frankie the Fish and Limey Joe, activate another encounter marker and find the other prime location to plant a bomb. Frankie sets the timer for three turns.

DSCN0508

Moe triggers an encounter, still hoping to find a piece of evidence. Instead, Bridget Rourke arrives with two Rookie cops! It’s not looking good for the bad guys!

DSCN0511

It looks even worse on the next turn, when The Gargoyle makes his Will roll and revives. Taking aim from the ground, The Gargoyle puts a slug between Chopper Murphy’s eyes! Then he gets shakily to his feet, scanning the warehouse…

DSCN0512

Limey Joe runs across the warehouse floor, taking a shot at Bridget Rourke on the way out. He misses. Frankie the Fish decides he’d better get out of the warehouse before it blows up, and runs off the board. But The Gargoyle spends another Hero point and sprints across the room towards the time bomb. He defuses it with seconds to spare!

Well, this turned out to be a pretty decisive victory for the good guys. The villains could only win if the bombs went off, and neither one did. The bad guys failed to kill or capture any of the heroes, even with the help of the Tong assassin. The heroes got extra Victory Points for defusing the bombs, but they could only win by finding the evidence, which they didn’t do. But since Frankie and Limey Joe fled the warehouse, the heroes had all the time in the world to search it. We decided the heroes found the evidence they needed after all.

And the Jade Hood? Well, let’s just say he wasn’t pleased. Frankie and Limey Joe won’t be returning for any further scenarios in the campaign…


54mm Batman

OLYMPUS DIGITAL CAMERA

I bought this old Grenadier figure set on eBay, mostly for posterity, since I don’t game in 54mm.  I remember when this came out. It was a set designed to go with the Batman RPG from Mayfair, which was really just a simplified DC Heroes RPG. Why they cast these miniatures in 54mm as opposed to the more popular 25mm is beyond me. Unless they were going for a collector’s market.

The set came with two miniatures, Batman and the Joker. Well, when I received my package in the mail, the Joker was missing. I contacted the seller and he immediately issued a refund. I would have gladly shipped Batman back to him, as his feedback was positive enough for me to think it was a fluke and not a deliberate attempt to screw me over, and I wasn’t trying to get anything for free. But he told me to just keep Batman. So I did.

Turns out I know a 13 year-old girl who is really into Batman. She’s the daughter of a friend, and I figured, since I have an incomplete set that’s not doing me any good, why not paint Batman up for her? So I did. And here’s what I used.

OLYMPUS DIGITAL CAMERA

First off, apologies for the paper plate. It’s the only white thing I had in reach when I decided to take the photo. I put Batman on a 50mm square base and applied green stuff to smooth out the contours of the base. Then I applied my first coat. Most of the colors are GW paints. I started with Deadly Nightshade for the blue, Iyanden Darksun for the yellow, and Skavenblight Dinge for the gray.

The next layers were Regal Blue, a mixture of Skavenblight Dinge/Dawnstone in a ratio of 70/30 for the gray, and a wash of Badab Black over the yellow.

OLYMPUS DIGITAL CAMERA

Once that was complete, I painted the base Shadow Grey and added the next layer of highlights: a mixture of Regal Blue/Mordian Blue in 50/50, straight Dawnstone for the gray, and Privateer Press’s Sulfuric Yellow for the belt and chest emblem.

OLYMPUS DIGITAL CAMERA

About this time I decided I would need something more on the base. So I added a 30mm RAFM sewer lid base and built it up with more green stuff. Then I did the next layer of highlights: Mordian Blue, Administratum Grey, and Bad Moon Yellow. Then I repainted the base with black Vallejo surface primer.

OLYMPUS DIGITAL CAMERA

OLYMPUS DIGITAL CAMERA

Lastly, I finalized the highlights. I did a watered down layer of Festering Blue, followed by a highlight of Teclis Blue. I painted the eyes Skull White and the bat emblem with Chaos Black. I painted the manhole cover with Tin Bitz and washed it in Armour Wash. Then I applied a little MIG rust pigment to the manhole cover and put sand on the base.

A note about the sand…it’s actually volcanic sand from the beaches of Sao Miguel, Azores. Most folks probably don’t have that stuff laying around their house. But I do. 🙂

Hopefully the kid I painted this for will like it. He was pretty easy to paint, all things considered.

Someday I’ll get the complete set and paint it up just for fun.