Category Archives: Terrain and Scenics

Christmas is all about…ME.

‘Tis the season, and as usual, I have taken advantage of the holiday sales to buy a bunch of shit for me that I don’t need, but definitely want.

A couple of months ago I broke down and subscribed to Amazon Prime, mainly so I could watch The Boys (one of my favorite comics of all time). Of course, Amazon Prime comes with free shipping on anything I order from Amazon, so guess who has been busy? (Hint: it’s me.) Now, I know Amazon is like Wal-Mart…the deep discounts they offer are bad for the economy, and certain death for brick-and-mortar stores. And I do feel bad when I order something from Amazon, and it arrives at my door at 9 pm the next night, because I don’t NEED anything that badly, and delivery drivers shouldn’t have to deliver dumb shit to my house at 9 pm in the freezing cold when they could be home instead.

I get it. I know Amazon is a bad company to work for. Yet I’m weak. I can’t say no to those sweet price cuts. For some reason, I can’t ignore Amazon the same way I refuse to deal with other asshole companies like Chick-Fil-A and Hobby Lobby (fuck those guys). The discounts are SO big…Right now, as I write this post, the Modiphius Original Series Away Team that I painted last month is on sale for $18.96. That’s a little over ONE THIRD the retail price (which, at $52.00, is fucking stupidly expensive, but still…) Less than $20 for 10 miniatures is a pretty good deal, I would say.

So, between Amazon and other vendors, I’ve racked up quite the grocery bill, and it’s not even Christmas. Here’s how to spend money irresponsibly on yourself before the holidays, so that whatever Santa brings you (or doesn’t), you won’t be disappointed.

Dungeons and Dragons 5th Edition (Amazon): I picked up this bundle for $82, which is 48% of what it retails for ($170). I get all the core rulebooks: (Player’s Handbook, DMG, Monster Manual) and a DM screen; all in a handsome slipcase. Why would I buy this when I’m already all-in on 3 out of 4 editions of Dungeons and Dragons (I skipped 4th, and assumed I was stopping at 3.5)? First: because it seems that’s all anyone plays around me, and I want desperately to get into a game; second: it’s supposedly a good system, and finally: because I got all the core books at 52% off.

Red Markets (Indie Press Revolution): I bought this PDF (after I bought the get started kit at DrivethruRPG) after hearing some pretty amazing things about this game. I listened to a bunch of actual play podcasts (which were alternately interesting and irritating; there’s always at least one annoying asshole in every gaming group, sometimes more) and an interview with the game’s creator, and I’m hooked. I wanna play. I’m an old-school kinda guy; I don’t like reading PDFs. I’d rather have a book in my hand. Red Markets is almost 500 pages of full-color awesomeness, so if I tried to print it out it would suck my printer dry and probably look like shit. Lucky for me, Indie Press Revolution printed it for me, and I got the PDF version as part of the package, too. I’m happy to say their printed book is very high-quality and durable; much better than if I had tried to do it myself. It’s a thing of beauty.

Savage Worlds Adventure Edition (Amazon): I got this new hardcover edition of the rules at 30% off. I’ve heard good things about Savage Worlds, but I’ve never played it. The discount (and some whisky, TBH) was enough to push me, in a weak moment, to buy it. I haven’t looked at it yet (too much Star Trek and Red Markets on the brain).

Wreck Age (eBay): I collect rules sets (which explains why I own a copy of Spinespur). This post-apocalyptic skirmish game was well-reviewed, and even had its own line of miniatures. This was a cheap purchase, so I guess that justifies it.

Note this doesn’t include my purchases from Troll and Toad (individual Star Trek Heroclix) and from Etsy shops (3D Printed Terrain).

Am I done? Maybe…I have my eye on a few other things. I want the latest version of Call of Cthulhu (7th Edition), and Delta Green, which I have heard great things about. And I have my eye on yet more Modiphius Trek miniatures: the Next Generation Away Team set, which, sadly, never seems to drop below $30. (Once it does, it’s fair game.)

The Pipes are Calling…

If wishes were horses, I’d have made more terrain…

TerrainTime 2019 is over, and I managed to complete only ONE terrain project all month, a gas (or sewer) pipeline. So much for all the other stuff I wanted to get done.

A while ago, I picked up this pumping station and this storage tank from Joerg Bender over at Things from the Basement. Joerg sells laser-cut MDF kits and dollhouse furniture. His stuff is awesome. I really can’t say enough good things about it. Many of his gaming kits are designed to fit commonly available supplies like electrical boxes, PVC pipe fittings and, in the case of the storage tank, a Chock Full o’Nuts coffee can. (I don’t drink Chock Full o’Nuts, but I bought some just to get the can.) They’re scaled for 28mm miniatures, but I plan on using the pipeline both for 28mm supers/pulp/sci-fi games and for Gaslands, as you will soon see.

The elevated pipe stands, spacer rings and terminal grates are all purchased from Things From the Basement. The pipes themselves are simple 1/2″ PVC pipe along with standard elbow, T and coupler fittings; readily available at Home Depot for super cheap. I think I spent less than $10.00 on this entire setup.

Once I cut the pipe into varying lengths, I gave it and the fittings a spray with this Rustoleum Metal Primer. I also primed the pipe platforms with a rusty bronze primer. Then, I painted the inside of the pipes a few centimeters deep with some Vallejo acrylic black primer, as I didn’t want the white pipe interior to be visible from the outside.

I want to add some of these buttons that look like steampunk gears as valve handles, but I wasn’t able to by month’s end. They don’t look right sitting flush against the pipe and require a spacer. (Ideally, I could just replace the faux-screw in the center with an actual screw and put it directly into the pipe, but I don’t have screws that small at present.)

Once I started playing around with my pipe (not what you think, Roger), I decided they would look better if the pipe ends were mounted on bases rather than just sitting flush on the table. The problem I encountered is that the pipe stands are designed to hold the pipes so that the ends rest flush against the surface, so if I used a base, would it lift the pipe off the stand? How much difference can 5 mm MDF make? Another quick order to Joerg for some 50mm circular bases (among other things) and I was good to go.

As you can see, I constructed a very sophisticated device to hold the pipes upright while I primed and weathered them. This took a lot of my time this month, which is why I didn’t complete as many projects as I would have liked.

Once assembled and primed, my pipes looked a bit too shiny for me. So, I decided to weather them up with some rust and grime. I used some Weather System rust pigments, after applying some black/brown wash made from craft paint. Once dry, I drybrushed more of the rust anywhere that made sense, in progressively lighter shades. This got messy real quick. I advise wearing gloves when using pigments. A mask wouldn’t hurt either. (I discovered I was breathing it in unaware when I sneezed later and thought my nose was hemhorraging.) After each layer of rust, I sealed the pipes with Dullcote.

I drybrushed the stands and pipe end rings with some Reaper brass, then washed it in Citadel Nihilakh Oxide, to get the verdigris effect. Then I sealed the whole shebang with Mod Podge, to ensure that the paint wouldn’t rub off when I was assembling the pipes in different configurations later. That didn’t work so well. The edges still chip easily.

For the pumping station, I also used a different rust technique for the electrical box.  I applied some Citadel Typhus Corrosion in patches and drybrushed some Citadel Ryza Rust over those areas.

Sadly, the storage tank was one of several planned projects that didn’t get done this month. But I did manage to make some burned out car wrecks for Gaslands, using cheap cars, Magic Sculpt and plenty of Stirland Mud.

My technique for these is quite simple, separate the top half of the car, apply a hammer liberally to the car body to simulate damage, then affix it to the base with some loose wheels and other detritus as you see fit. Prime, cover the base with Stirland Mud or the texture of your choice, and paint the car whatever color you want. Then apply a black wash and rust effects to make it look like burned-out wreckage. These are so easy and quick to do that I will probably do several more. They’ll look great as Gaslands scatter terrain.

As you can see, the pipeline works equally well for Gaslands as a large, aboveground sprawling rust monster….

…as it does for 28mm skirmish, as you can see with these Heroclix Teenage Mutant Ninja Turtles.

One look at this and I decided I need more pipe, and more fittings, in order to have maximum variation in my layouts. I bought another 5′ piece of 1/2″ PVC pipe, which will be more than enough. In addition to the extra fittings I already have, I purchased a few more. So I’m pretty much set to have games in a maze of pipes, should I desire.

My thanks to all who participated in TerrainTime 2019! You can see their contributions at their respective blogs. While you’re visiting, check out their other posts and drop a comment or two if so inclined!

Jeremy at Carrion Crow’s Buffet  scratch-built a terrific Star Wars Imperial bunker.

Kieron at Cheaphammer! made some ruins and a jungle board (complete with submerged alligator) for TerrainTime, as well has prolifically posting a lot of other cool stuff over the course of the month.

Daniel at Wade’s World of Wargaming  made a spectacular Wizard’s Tower from scratch.

Anton at Anton’s Wargame Blog  really went all out, scratchbuilding a hexagonal “Dark Tower”, complete with spiral staircases, and basing/converting a Playmobil coliseum that looks amazing! Inspiring work, Anton!

Charles the Modeller at All Hell Let Loose painted some 6mm Brigade Models buildings and made some terrain plates, complete with walls and foliage. I envy you, Charles. 6mm terrain must be so much easier to store…

Codsticker at Codsticker’s Historicals  made the Hornet’s Nest, an area of terrain specific to the Battle of Shiloh (ACW) which includes a road and lots of trees. It looks fantastic, and you can see it and the battle report in which it was used over at his site.

Thanks again to all who participated and all who dropped by to check out the results. I still want to get that storage tank done (and probably make some more pipes) but for now I’m happy to get back to some good old-fashioned miniature painting for a while.

TerrainTime 2019 kicks off!

This month is the first ever TerrainTime challenge, hosted by yours truly, The Angry Piper! If you need a refresher on the quote unquote rules of the challenge, you can go here (or just scroll down).

This month I’m fixin’ to do a whole heap of terrain, both for Gaslands and for some Old West gaming.

For Gaslands, I’m going to complete a rusty pipeline that has been in my partially-done pile for over a year now, along with some car wrecks. The good part of this is the pipeline can also be used in 28mm skirmishes (as somewhat smaller pipes).

I’m going to make some “badlands” terrain for Old West skirmishes…you know…cacti, cow skulls, dead trees…you get it. Then I’m planning on weathering some ERTL Cow Town buildings I bought off eBay. Finally, if time permits, I may weather my Marx Fort Apache playset (another recent rummage sale acquisition) or assemble and paint up a Western MDF building or two.

Lofty goals. But I am not alone in them. Joining me on this terrain-making journey are the following folks, all with their own projects for the coming month…

Jeremy at Carrion Crow’s Buffet

Kieron at Cheaphammer!

Daniel at Wade’s World of Wargaming

Anton at Anton’s Wargame Blog

Charles the Modeller at All Hell Let Loose

Peter at the Single-Handed Admiral

Codsticker at Codsticker’s Historicals

Feeling left out? Don’t! Just let me know you want to participate and I’ll add your name and site to the blogroll forthwith!

Now, let’s make some terrain!

TerrainTime 2019

One of my 2019 Resolutions was to make more terrain; a goal I have thus far failed to achieve this year. With that in mind, I’ve decided to host a terrain challenge for the month of August. I figure it’s the only way I’m going to get off my ass and do it.

I have some projects in mind, many of which have been waiting patiently for years. Gaslands, Old West…even some generic hills…it’s high time I worked on some table dressing rather than miniatures for a change.

So, without further ado, here are the “rules” of August’s Terrain Challenge, which I have dubbed “TerrainTime”:

  1. Construct and/or assemble and paint at least one piece of terrain in the month of August.
  2. “Terrain” can be anything that would grace a playing surface, i.e. something your miniatures can stand on, use as cover, move through or occupy; for example: hills, trees, forests, ruins, buildings, waterways…all these are fine. So are things like wreckage, objective markers, walls, barricades, statues…pretty much ANYTHING you would use as terrain.
  3. You can scratch-build it if you wish, but you don’t have to. You can assemble pre-fab terrain or buildings, whether resin, plastic or MDF kits. You can even repaint or “weather” existing terrain you have, like toy kits or model train terrain. Just do something terrain related.
  4. Scale and genre are of no consequence, as far as the challenge is concerned. Whatever scale(s) or genre(s)you game in are fine. If you can create a piece of terrain that works across different scales or genres, even better.
  5. To summarize, work on a piece of terrain (at least one, feel free to do more) in the month of August. This could be anything from a complete scratch-build to a quick paint or repaint, as long as it’s terrain related. Scale and genre don’t matter. It’s for your games, so do whatever works for you.

Drop me a comment or email me at angrypiper@angrypiper.com if you want your blog or site to be included in the blogroll for this challenge.

Lastly, I’ll include some links to two YouTube channels I enjoy that deal primarily with terrain building. These are great for inspiration and are cool places to visit regularly. There are many more channels such as these, but these are the ones I frequent. Feel free to share your own in the comments section, if so inclined.

The Terrain Tutor: Mel the Terrain Tutor is the undisputed king of terrain, a veritable terrain-making genius. He has an extensive library of posts dealing with basic terrain-making techniques all the way through advanced projects. His terrain basics series is a must; particularly his tutorials on foam board and extruded polystyrene (insulation board here in the USA).

The DMs Craft: DM Scotty makes some pretty interesting terrain on a budget, primarily for roleplaying games. You’d be amazed what he makes from wet paper towels, PVA glue and other cheap stuff. Not everything’s a winner, and some may not hold up to the rigors of regular wargaming, but if you need something inexpensive and fast for a one-off game, his channel is worth a look. His Tilescape series is pretty good.

That’s it. Hopefully I’ll post more in July, but if not, expect a terrain-fest in August!

Saddle Up, Boys! (and Girls, if applicable)

One of my 2019 Resolutions was to finally play GW’s Legends of the Old West, an out-of-print Old West skirmish game using the Warhammer engine. Despite using a variation of the IGO/UGO mechanic, it remains pretty popular among Old West gamers, as it’s easy to pick up and play, particularly if you’re familiar with Warhammer.

I’ve been wanting to play some Old West skirmish for years now, and even started making a Mexican border town, Mescalero, several years ago. Like many projects of mine, this got sidelined in favor of whatever else struck my fancy; but not before I also bought, assembled and painted some Plastcraft Western Buildings. I now have the beginnings of two towns; a traditional Mexican adobe village and a clapboard boom-town. (I also meant to make some Badlands scenery (and I still will), but, you know…sidelined.)

Recently I managed to get my hands on the holy grail of 28mm Western gaming, the OOP 1/64 scale ERTL Cow Town playset. It contains a Hotel/Saloon, a Sherriff’s Office, a Blacksmith, and an outbuilding and outhouse, along with lots of other scenic knick-knacks (like bar tables and desks). Between the Cow Town set, the Plastcraft buildings, and a couple of MDF buildings I bought from Knuckleduster, I have no excuse not to move forward with this project.

For Old West miniatures, I have a mixture from Blue Moon, Old Glory, Foundry, Knuckleduster and Reaper. Before the whole thing got sidelined, I painted up the Blue Moon cowboys that I got from Scale Creep. I really like this line a lot. The Old Glory and Foundry stuff looks a little small compared to the others (especially the Reaper Chronoscope stuff), but I’m hoping it won’t bother me too much when I actually start playing.

First up, the Blue Moon miniatures. The Earp brothers: Wyatt, Virgil and Morgan, along with Doc Holliday.

The Clantons: Ike, Billy and Johnny Ringo.

Frank and Billy McClaury; Billy the Kid and Pat Garrett.

The Daltons: Emmett, Bob and Grat. (Yes, Grat.)

A few Reaper Chronoscope miniatures: Stone (who I think is an undead gunslinger, although I didn’t paint him that way); Deadeye Slim; and a U.S. Agent (not to be confused with the guy who replaced Captain America). Both Stone and Slim are Bones miniatures. I bought the Agent because he has a pepperbox pistol, and that’s kinda cool.

Some Reaper fantasy townsfolk can serve double duty as Old West civilian miniatures, as seen here. The bartender and strumpet both work well as Old West miniatures.

Same can be said for the blacksmith (what moron parked a wagon full of hay near the forge?!)…

And this RAFM Call of Cthulhu doctor.

None of these miniatures count towards my painting queue progress, sadly; most were painted years ago. But THIS is my big project for this year; in lieu of starting a new army, I’ll get my Old West scenery and miniatures all done instead.

In between other stuff, of course…

Making a Fighting Arena Board

A couple of weeks ago my region was hammered with about 17 inches of snow, and I got to stay home from work. With blizzard conditions raging outside all day and well into the night, I wasn’t going anywhere, even if I could have. I figured it was a great day to get some painting done! Or it would have been, if I hadn’t lost power at 6:30 am, ten minutes after I woke up.

In such instances, my standby generator powers most of my palatial estate, with the notable exception of my basement, which contains my hobby space. When assigning which circuits would be backed up, I obviously prioritized important things like heat and water over painting space. (It’s nice to be able to flush a toilet when you need to.) Consequently, most of the basement didn’t make the list.  However; since my furnace is located in my tool room, that part of my basement has power. I couldn’t paint without moving everything, so I decided instead to start work on a project I’d been considering for a while: an arena board.

I’ve been toying with an idea for a martial arts skirmish game, something along the lines of the Street Fighter and Tekken video games. I purchased Osprey’s A Fistful of Kung Fu when it came out, but I was put off by the many charts and tables, and also by the fact that it’s a faction-specific game. (The figures by Northstar are admittedly impressive, but I don’t want to have to buy them.)

The “arena” board I have in mind is a 2′ x 2′ board with a fighting circle inscribed in the center. As it will be made of flagstones, the board can double as a dungeon floor, a ruined courtyard, or anything else that would have a stone floor for use in other games. Picture a sumo ring, or the courtyard in Crouching Tiger, Hidden Dragon, and you get the idea.

Designing the Arena

My starting materials are a 2′ x 2′ board made from 10mm thick MDF, some craft foam sheets, some PVA glue, a T-square and a razor knife. I bought a 2′ x 4′ MDF board from Home Depot for about 5 bucks. I had them cut it in half for me there, since their cutting station can make a much straighter cut than yours truly with a jigsaw (I hate jigsaws). I drew a roughly 18″ diameter circle in the center of the board, and then drew a perimeter 10 cm in from the edge all around the square.

As a side note, my brother once told me, while making my gaming table, that there is no such thing as a piece of wood from Home Depot that is truly “square”. The picture above proves this. I didn’t want to fuss with making it perfectly square (I lacked the tools to do so, anyway), so I just went with it. Also, as another side note, there is absolutely no whisky in that coffee cup. Honest.

Assembling the Board

After cutting the craft foam into 1 inch squares, I moved the project upstairs to my living room. While the blizzard raged on, I turned on my TV ( I love having power) and settled down for what I knew would be the most tedious part of building the arena board: gluing the “flagstones” down. I decided to watch a movie while I worked, and I picked Kong: Skull Island. I guessed it wasn’t the type of movie I needed to pay close attention to in order to capture all the director’s subtle nuances, and I was correct. Still, I enjoyed the movie. It’s King Kong, with no real pretensions to anything else, and it’s got a great cast. What’s not to like?

I measured the center point of the circle (and the board) as best I could and started laying down the squares.

I used this piece of wood as a spacer, to ensure the squares were more or less evenly spaced. Due to my own imprecision cutting the foam squares, they weren’t exact; but I thought uneven stones would give the board a rustic, imperfect character for the end result.

I worked from the center of the circle to the inside circumference, then I began trimming the stones so they would not overlap the inscribed circle.

Then, working from the perimeter, I started laying down squares to meet up with the outside circumference. I was careful to make sure that the spaces lined up as best I could with what was already down on the board. Again, I trimmed the pieces so they wouldn’t overlap the inscribed circle.

As you can see, the pattern is taking shape. Once everything is finished, there will be a visible circular pattern in the flagstones. I’m not going to lie, this was pretty boring and tedious work. (I have newfound respect for people who lay tile for a living. It sucks.) I finished Kong: Skull Island and had time to watch another movie about an autopsy subject who is really a dormant witch who starts killing people in the morgue. It was surprisingly watchable, but then again, my attention was split.

Once the board layout was complete, I used a ball point pen to inscribe some cracks on the craft foam flagstones. Hint: don’t do this with a pen you care about, as it will stop writing permanently.

This was also tedious work, but it took much less time than laying out the foam squares. Once complete, the board looked like this.

Adding Texture 

With the squares laid out, it was time to add some texture. I used Elmer’s wood glue and squeezed out a line throughout the gaps, being careful to make sure the circular gap was covered as well. I used an old, shitty paintbrush to spread the glue around.

I did it in sections to ensure the glue didn’t dry before I got to it. Then I dumped sand over the whole section.  I let each section absorb the sand and dry before I moved on, which enabled me to collect surplus sand (be sure to lay down newspaper, folks) from a dry section for reuse.

Once the whole board was covered in sand, I filled in any gaps I had overlooked. I scraped most of the sand that had adhered to the flagstones away, leaving a little bit for added texture. Then I moved on to the first phase of sealing the table: Woodland Scenics Scenic Cement. This stuff has the consistency of milk and brushes on very easily. I used it to soak the “grout” areas and let it dry overnight. Then I added another coat the next morning, before I had to go  outside to deal with the 17″ of snow in my driveway. With two layers of scenic cement on top of the wood glue, the sand wasn’t really going anywhere and should stand up well to painting.

Painting and Sealing

A week later, we got more snow. Not enough to be an issue, but enough for me to have an excuse to stay home again. Time to paint the arena!

I had some Asian-themed terrarium scenery I thought would go well with this board, so I decided to match my color scheme to that. Another trip to Home Depot and I got two small sample pots of Behr paint: Native Soil (basecoat) and Safari Vest (highlight). With the sand pretty well glued down, I applied a thorough coat of the Native Soil to the board. (That swatch there isn’t Safari Vest, it’s a color called Woven Straw. I thought I was going to use it as a highlight, but it’s too bright.)

Unfortunately, this somewhat obscured the cracks I had so painstakingly inscribed into the flagstones. I decided to give the whole thing a black wash, both to reinforce the spaces between the flagstones and to highlight the cracks. I used watered-down black craft paint and applied two coats of the wash over a day or so. (I didn’t really have to wait that long, but I was doing other stuff in the meantime, and it’s not like I was in a hurry.)

Once it was done, I gave the board a drybrush of the Native Soil, followed (once it dried) by another drybrush of Safari Vest. I actually regret buying the Safari Vest sample pot, since I used so little of it. I could have probably got the same effect by using craft paint (and it would have been much cheaper, too).

Anyway, I decided that the board would benefit from some flock in between the flagstones, to simulate  the irregular growth of weeds. Anyone who has ever seen a flagstone driveway, or even a sidewalk for that matter, knows that plants tend to grow in the cracks despite anyone’s best efforts.

Once the flock was down and dry, I decided to apply a coat of matte polyurethane to seal and protect the whole board. And done!

Or so I thought. Something was missing, so I decided to make a viewing platform where VIPs could watch the fights. I used plasticard for the flagstones and insulation board for the body of the platform. A little glue and textured paint (same colors), and it fits right in.

The evil Hai Feng observes the battle between his two lieutenants, each intent upon joining the ranks of his celestial bodyguard…

The beginnings of a tournament of World Warriors. Who will be crowned champion?

At the Shaolin Temple, Master Tsu Kang teaches the Iron Palm technique to his initiates…

The stone board can be used for other games as well:

In a tomb somewhere deep in the jungles of Ceylon, Lara Croft confronts Helmut Von Jurgen and his unsavory henchmen.

In the sacrificial shrine of the Reptile God, a small band of adventurers faces off against a Lizard Man shaman and his minions…

Not a bad way to spend a snow day or two. I’m mostly happy with how it looks, but if I had to do it again, I would make a smaller circle. 18″ is a pretty big diameter for a 24″ board, but I can make it work.

Now I just need to get crackin’ on those skirmish rules!


“Asteroids do not concern me, Admiral…”

I really like the new direction of Miniature Wargames magazine, particularly the monthly “Darker Horizons” fantasy and sci-fi feature. I’m also a fan of Diane Sutherland’s monthly scenery-building articles, as I like any good scratch-building tips. A couple of months back, John Treadaway penned an article on how to make cheap and easy asteroids for space combat games. The article is well worth a read, and John’s method couldn’t be easier. I encourage anyone in need of asteroids to track down the issue above.

I’ve been looking for a good method of asteroid construction for some time, and like many folks, I’ve considered everything from wood chips to lava rocks to just breaking down and buying some manufactured scenery, such as those offered by Battlefield in a Box. Then I saw what John did and I practically facepalmed myself at its simplicity. Put simply, John uses sponge chunks soaked in a mixture of paint, glue and sand. Let dry, drill holes, insert the flight stands of your choice (mine are from Litko), drybrush and done!

Here are the results. Lightweight, nigh-indestructible and pretty darn good-looking asteroids. I followed John’s method, including his idea for using a purple wash to add a bit more tone than mere drybrushing can achieve. I also added a few metallic streaks here and there to simulate metal veins, but that’s just me. My asteroids had a bit more time to dry than John’s, since I had to order the flight stands and wait for them to come in (about a week or so).

Here’s how they look with some War Rocket and X-Wing miniatures.

Imperials vs. Galacteers


“NEVER tell me the odds!”


Sure beats the crap out of cardboard templates. And it only took a couple of hours (not including drying time). Thanks, John!


Terror of the Toyman! Part 1

When it comes to superheroes, Superman isn’t one of my personal favorites. Of course, if I could be any superhero, I’d definitely pick Superman for x-ray vision alone (but having super-strength, invulnerability and flight wouldn’t suck either).  Despite this I never really found him all that interesting on his own.

That’s because it seems there are only three main ways to challenge Superman’s obvious superiority. Take away his powers (à la kryptonite), hit him with magic or mental manipulation (à la Mr. Mxyzptlk), or just be tougher and stronger than him (à la Doomsday).

The Toyman doesn’t really fit any of these criteria, and yet, he’s primarily considered a “Superman” villain.

For those not all that familiar with the Toyman, I could write a brief description of the character here. Or, I could just block quote and attribute a perfectly good description that needs no editing or embellishment. So, from DAMN Good Coffee, the blog of  Mr. Charles Skaggs, I present his description of the Toyman:

Created in 1943 by Don Cameron and Ed Dobrotka, The Toyman first appeared in Action Comics (vol.1) #64 as Winslow Percival Schott, a criminal who used various toy-themed devices and gimmicks when committing crimes. After Superman’s continuity was relaunched following the Crisis on Infinite Earths event miniseries and John Byrne’s The Man of Steel miniseries, The Toyman was reimagined in Superman (vol.2) #13 as an unemployed British toymaker who blames Lex Luthor for being fired from a toy company.

Years later, The Toyman became a darker, more sinister character who abducted and murdered Adam Morgan, the son of Cat Grant.  The character was reimagined once again in Action Comics (vol.1) #865 as a toymaker who lived with his wife Mary and agrees to sell his shop after Mary is killed in a car accident.  After learning that the buyer lied to him, Schott proceeds to bomb the business with an explosive teddy bear and Mary is revealed as one of his first robotic creations.

I can add nothing of substance to Mr. Skaggs’s words. That’s pretty much the history of the Toyman.

However, my favorite version of the Toyman is this one from the DC animated universe. This version is the unnamed son of Winslow Schott, and is obsessed with revenge against mob boss Bruno Mannheim, who he blames for his father’s imprisonment and eventual death, and his own miserable foster home upbringing as a result. He wears this creepy doll head and you never see his real face.

Anyway, about a year ago, I got an idea for a Supersystem 3 scenario featuring the Toyman. But, now I play Super Mission Force pretty much exclusively, and SMF being predominantly a game of Supers combat, I was in a quandary as to how to effectively use Toyman against Superman. After all, he has no super powers, and Superman could pretty easily wipe the floor with him in a straight-up fight. Toyman could, of course, have some super-tough toys for Superman to brawl with, but that just seemed kind of boring and not very imaginative.

I decided that Toyman isn’t really a threat to Superman, but he could easily be a threat to normal people. Protecting normal folks is what Superman is all about, so what if, for the purposes of the scenario, Superman had to protect as many civilians as possible? An idea took shape…

But first, if I was going to use the Toyman, I would need some toys. Behold what I found at the local dollar store:

For a grand total of $3.oo, I purchased these cool rock’em, sock’em robot finger puppets and some cars I could cannibalize. Some nippy cutters and superglue later, here is the result:

Instant toy-themed robot menace!

I did a quick search for a Heroclix version of Toyman. Sadly, it seems Wizkids don’t have the rights to the DC animated universe (Knight Models does, I think…) so I couldn’t get a version of the doll-head wearing Toyman that I like. I had to settle for this guy:

Not a bad start, and it naturally got me thinking about Christmas, which would be an ideal time of year for Toyman to start some trouble. With that in mind, I did a quick repaint and scoured my miniatures for other things that could be used as deadly toys.

My repaint is in the center. I purchased some (sadly OOP) Parroom Station clockwork soldiers (in the back) from Matt Beauchamp of Hydra Miniatures, and I took advantage of Armorcast’s 20% off Christmas sale to pick up the Santa bot. I already owned Wyrd’s Teddy from the Malifaux line.  I just needed to paint him, and I did.

Turns out these Hydra War Rocket Galacteer fighters are just the right scale to double as deadly toy planes. So I planned on using them, too.

If Christmas was to be the backdrop for the scenario, I would need some thematic scenery, like piles of presents! I thought a ring box would make a good giant present (from which something deadly could emerge). I bought some wood cubes from an art store and glued them together in random formations. A little red, white and green craft paint and I’d be good to go.

I figure once I’m done with this scenario, I can repaint the blocks to use as crates and boxes for warehouse scatter terrain.

Stay tuned! Scenario to follow next post!

Imperial Bunker

It’s been a while since I’ve posted anything. Time to jump back in the pool with a piece of terrain I’ve had for about 12-15 years or so. It’s an Imperial bunker I bought for use in Warhammer 40,000.

I have a few pieces of terrain cast from the same material. It feels like solidified Great Stuff (spray insulation), but a bit stronger. Looking closely, I can see it was made by a company called “Epicast”. The “Breeder Bomb” was also one of these pieces. As you can see, the bunker comes apart into 3 pieces, so it’s possible to put miniatures inside the balcony and on the roof.

Anyway, as you can see, it painted up pretty easily. It took me about an hour to apply the craft paint, shade and highlight it, and add some base turf here and there. Here’s what it looks like finished, front and back:

It seems to be a bit high for a bunker, but a bit too small for a fort.

An Ultramarine standard bearer from my first ever 40K army, circa 1994 or so. My marines were primarily beakies from the Rogue Trader boxed set. Guys like this were considered “new” at the time. I remember he retailed for $6.50.

A couple of Imperial Guard (yes, I said Imperial Guard, not Astra Militarium!), a commissar and a Mordian trooper, from my main 40K army, the Mordian IX.  The roof has been removed and they’re in the balcony.

Sadly, since I no longer play 40K, it’s unlikely I’ll ever use this piece in a game. Tough to use it for anything else, either, considering that big skull just screams GW. Still, it’s good to get it painted up after all these years.

The Breeder Bombs Finale: Savage Land Showdown!!!

We come now to the final chapter in our Super Mission Force campaign, True Believers! And hold onto your hats, because it’s a doozy!

The Scenario: Having thwarted Magneto’s plan thus far, the X-Men track the last Breeder Bomb to the Savage Land, where Magneto and the Brotherhood of Evil Mutants await!

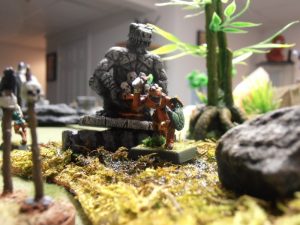
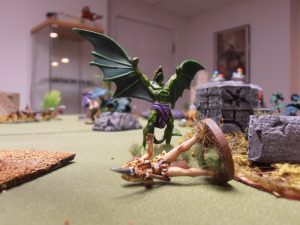
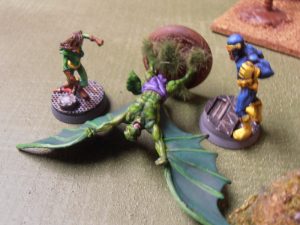
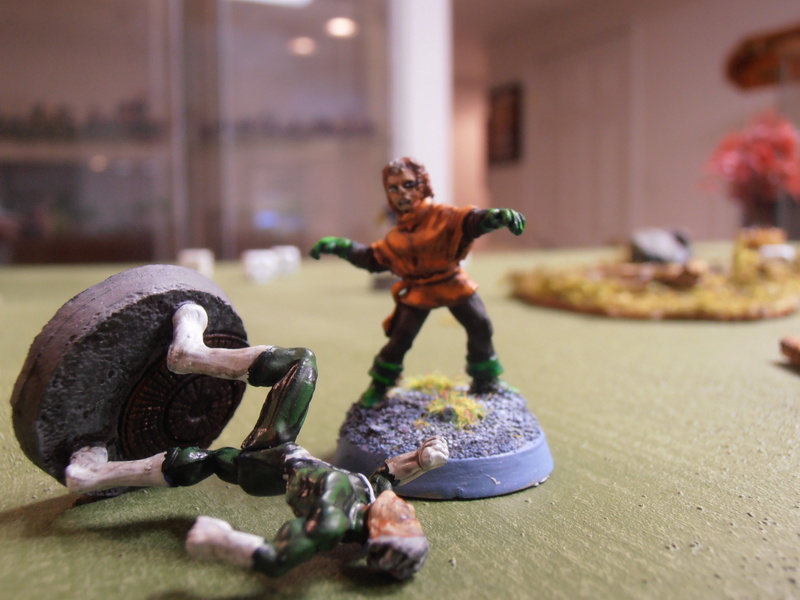
Friendly-looking fellow, isn’t he? A primitive saurian attacks!

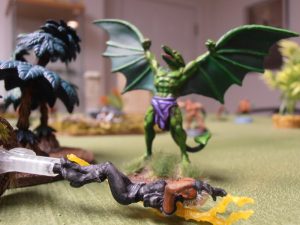
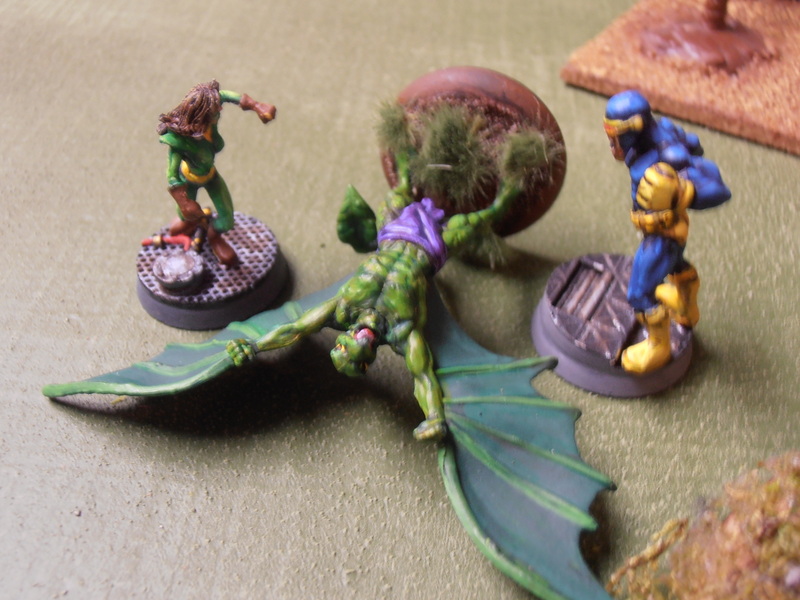
But they’re not alone. Everyone’s favorite Greek pterodactyl, Sauron (not to be confused with the Lord of the Rings guy) isn’t thrilled with this violation of his territory. Although he wants everyone out, he agrees to temporarily aid Magneto against the hated X-Men. To this end, has enslaved an army of primitive saurians to do his bidding!

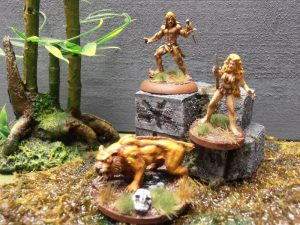
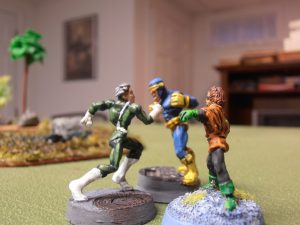
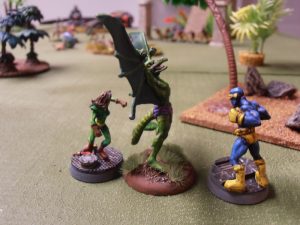
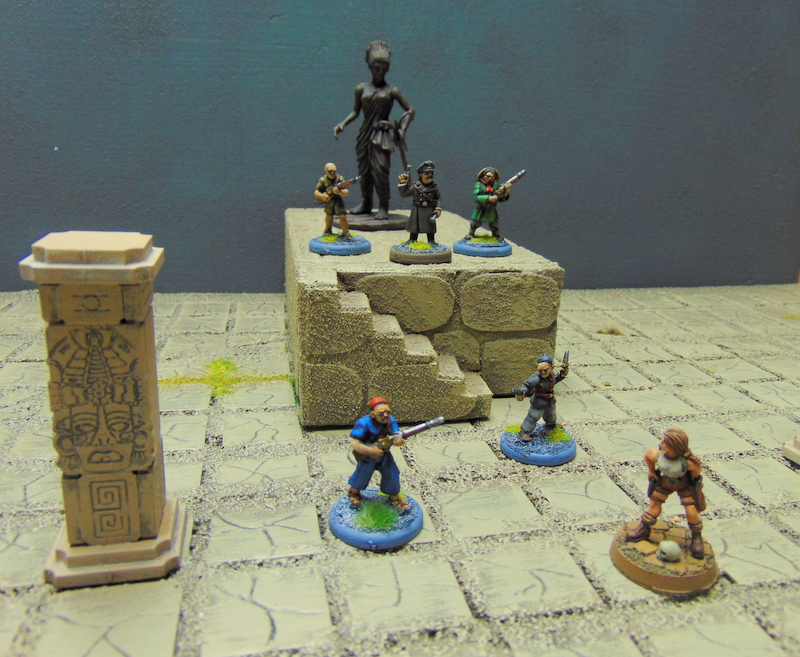
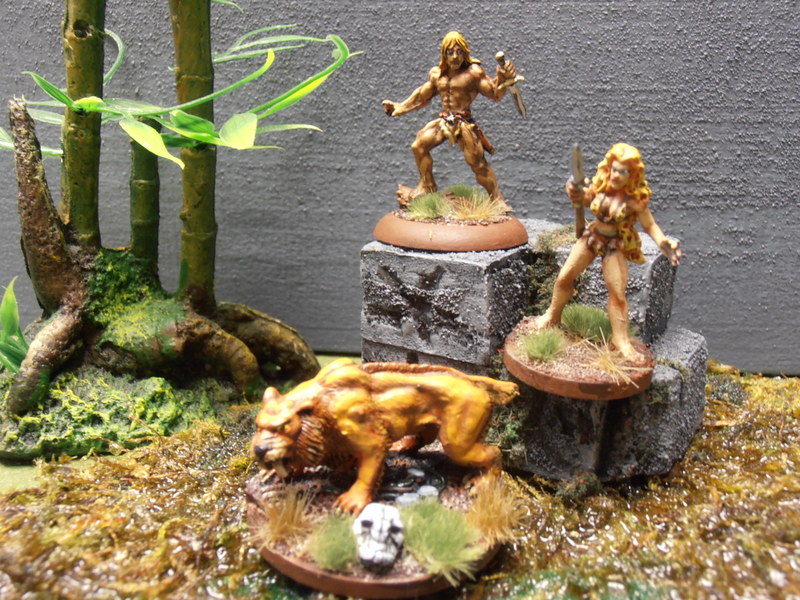
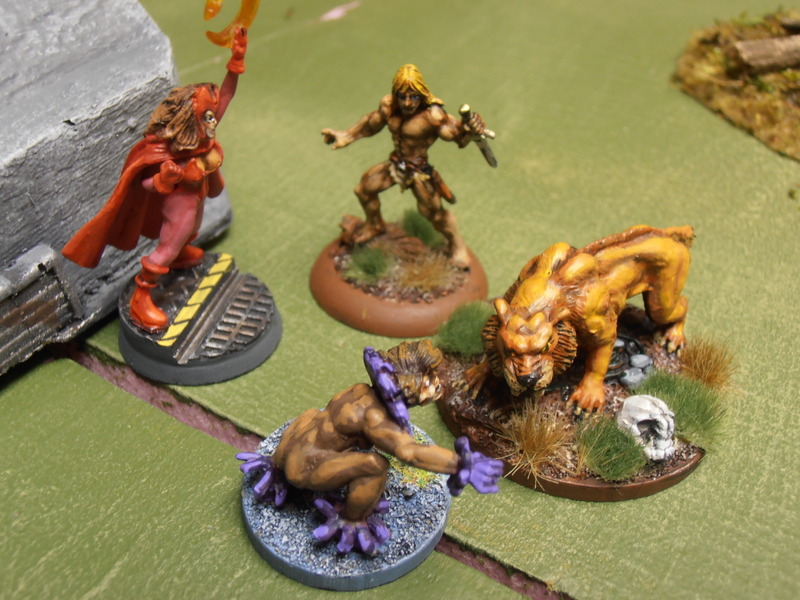
But the X-Men are not without allies in the Savage Land. Answering the call is Ka-Zar and his wife, Shanna the She Devil, accompanied as always by Ka-Zar’s adoptive Dad (really, look it up), the saber-tooth tiger Zabu!

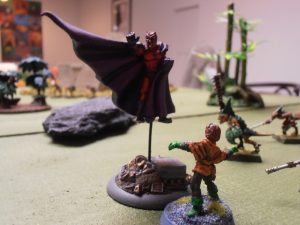
The SR-71 Blackbird’s VTOL engines whine as the pilot, Cyclops, sets the plane down in a clearing. Magneto watches from atop a sacrificial temple, nearby. Powerful energies surround him as he clenches and unclenches his hands. “X-Men!” he bellows, “Welcome…to DIE!!!”

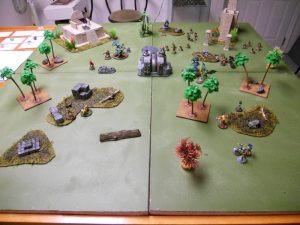
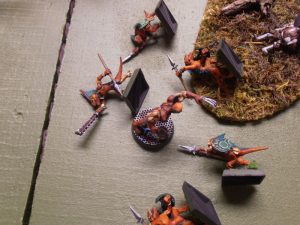
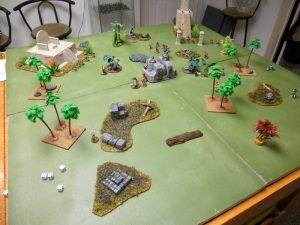
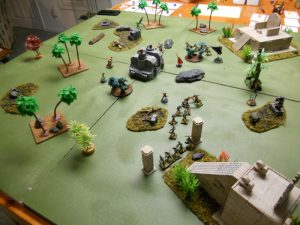
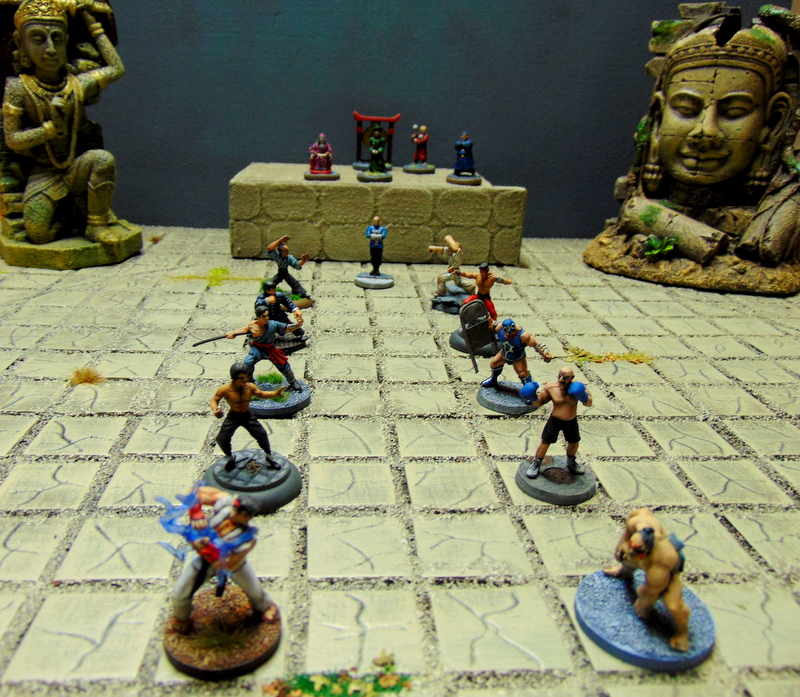
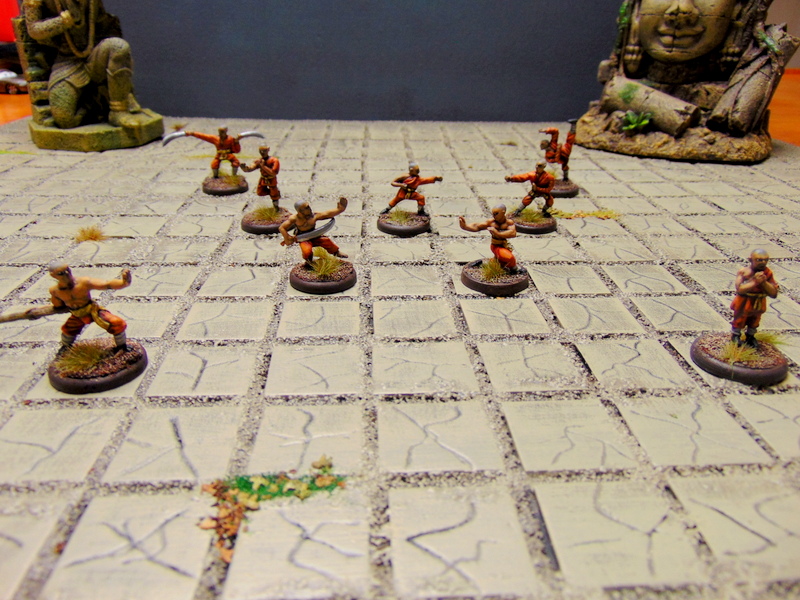
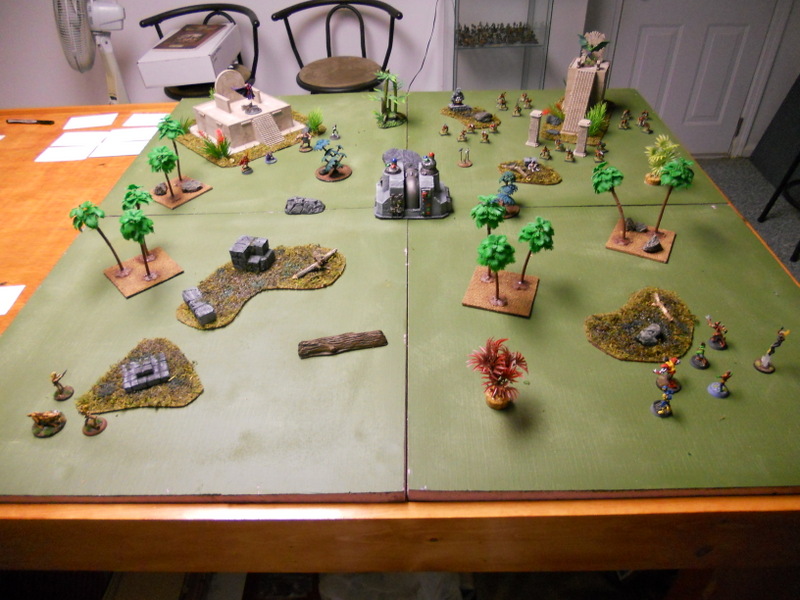
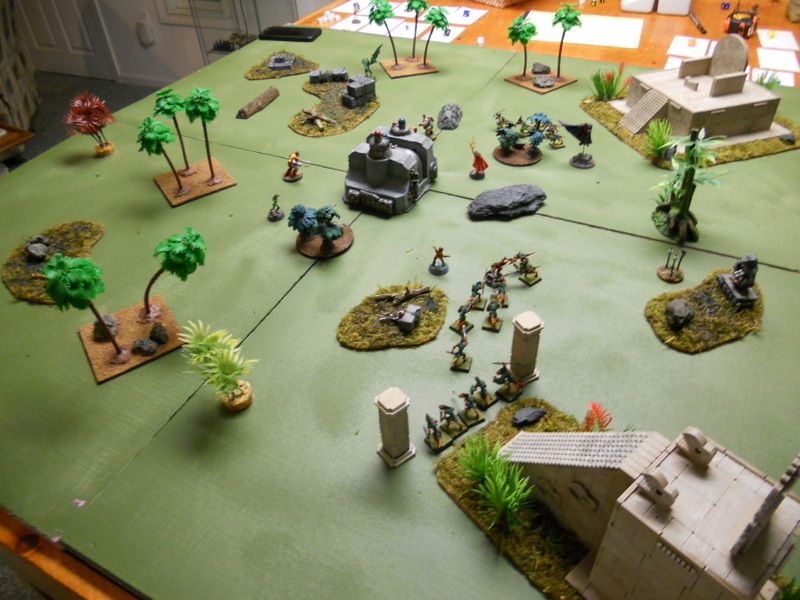
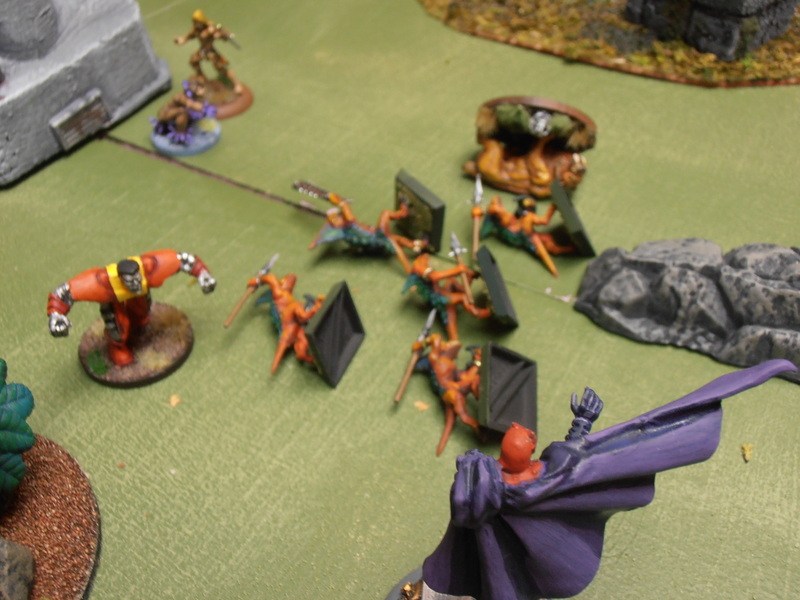
Setup: I used a 4′ x 4′ area, filled with jungle and swamp scenery. There are two large temple-like structures on the villain’s side of the board. One is a sacrificial altar, the other a temple. In the center is the Breeder Bomb (it’s inactive, see below). The X-Men and the Brotherhood deploy in opposite corners of the table. Ka-Zar and family deploy on opposite corner from Sauron and his army of saurian henchmen.  The 20 henchmen are all veterans, so they deploy in four groups of five and must be within 4″ of the temple in their deployment zone.

Special Rules:

Objectives: Magneto’s goal is to destroy the meddling X-Men once and for all. The X-Men must defeat Magneto in order to ensure his plan fails. In other words, it’s a straight-up fight to the end!

The Breeder Bomb: Since he’s been trying to convince Sauron to help him, Magneto hasn’t had time to arm his Breeder Bomb yet. There’s no need to disarm it. For this scenario it simply functions as a big, menacing obstacle. (This is because with this many models on the board, there would be virtually no chance to disarm the bomb if we used the same rules as in past scenarios.)

Sauron’s Henchmen: Sauron’s henchmen are veterans, thus they deploy in smaller groups and are a little better than normal scrubs. As long as Sauron is alive and well (i.e. not KO’ed), they are endless. Whenever a henchmen group is wiped out, it may reform at the end of the turn. This newly-reformed group must deploy within 2″ of one of the temples. This represents the saurian horde pouring out from underground tunnels, heeding the psychic summons of their reptilian overlord!

Difficult Ground: All the swamps and jungle terrain is considered difficult ground, and restricts movement by half as per the SMF rules. Ka-Zar and Shanna have no penalty when moving over difficult ground, as they are quite used to the terrain of the Savage Land.

Injured Heroes: As a result of their fight with the Soviet Super Soldiers last scenario, three of the X-Men were wounded. Nightcrawler was wounded most severely and is not available for this scenario. Storm is -1D to attacks and -3″ to her movement, while Rogue is -2″ to her Movement for this fight.

ROUND 1

With so many miniatures, going back and forth will be tedious, so I won’t necessarily cover the actions in the order in which they happened, rather I’ll lump them together where I can.

The villains gain initiative.

The henchmen groups all move forward towards the middle of the board. The Blob and Colossus both lumber forward their slow 5″ move (Bricks are SLOW).

Zabu, Ka-Zar and Shanna all move up into the swamp area and end their movement in hiding. Toad, the sneaky git, moves into hiding as well. Kitty Pryde phases and moves unhindered through the difficult swampland in front of her. Cyclops uses his Enhance power to shout some strategic tips to his teammates. He scores enough goals to give his teammate, Storm, 2 re-rolls she can use later in the game to help attack or defend as needed. (Hopefully, that will help to offset the injuries she sustained in Arganistan.)

The Scarlet Witch uses her Fortune power to giver herself some extra defense capability (it’s looking like she might have a face full of tiger pretty soon). Storm flies shakily towards the center of the board and focuses on Magneto, realizing that the faster they drop him the quicker they can all go home. She Power Blasts him from pretty far away and uses her re-rolls, but fails to inflict any damage.

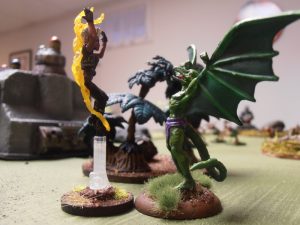
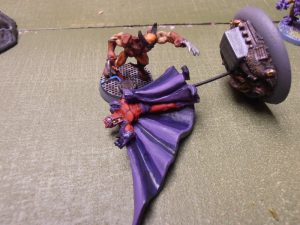
Sauron takes off from atop the temple and charges Storm. The two circle each other in a dazzling aerial display, but no damage is inflicted.

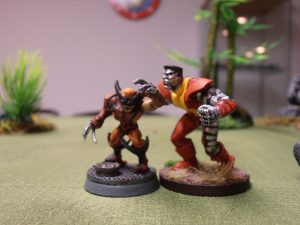
He’s the best he is at what he does…

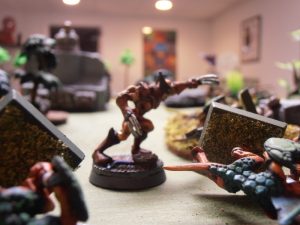
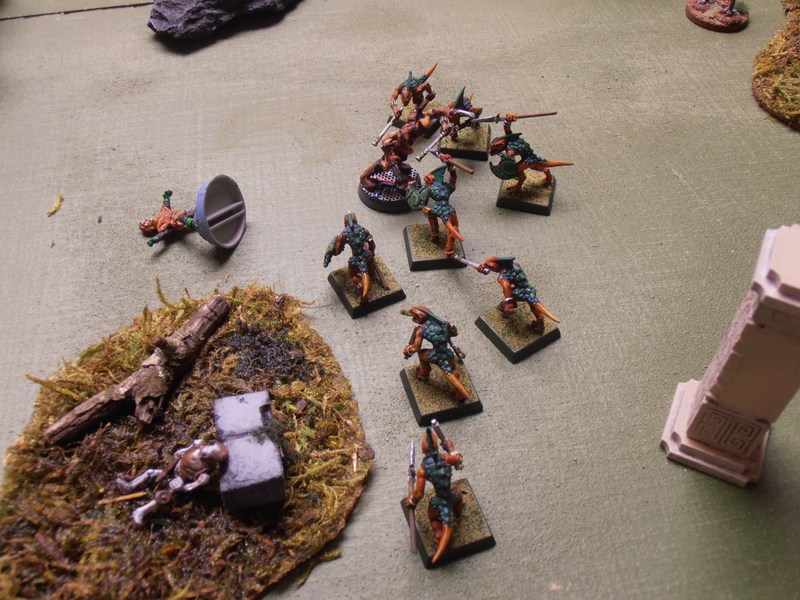
SNIKT!!! Wolverine uses a Brawler maneuver called Speed Burst to really move and charges henchmen group 1. When all is said and done, Wolverine scores enough goals to completely wipe out the group of five saurians (because that’s what Wolverine does).

Quicksilver tries to take out the X-Men’s leader, Cyclops. As a Speedster, he has more than enough movement (40″!) to run across the table, but it’s a risky maneuver that leaves him far in enemy territory. Quicksilver has never been much of a reasoned and cautious fellow, and he’s counting on his speed to get him out of a tough spot. Unfortunately, even after using a Machine Gun Punch (a Speedster maneuver), he only inflicts 1 damage on Cyclops, and is now locked in combat with him.

Nearby, Rogue decides that that Speed power is pretty cool and she wantses it, my precious…so she successfully uses Mimic and copies it. Unfortunately for Quicksilver, he’s the only guy near enough to attack. So Rogue attacks Quicksilver with his own Machine Gun Punch, but he manages to duck and weave at supersonic speeds and avoids damage! Of course, now he has one more person to fight next turn…

Finally, Magneto acts (he’s been pontificating the whole time). From atop the Sacrificial Altar, he Power Blasts Storm. Although he risks hitting Sauron instead, he misses them both.

End of Round 1

ROUND 2

The X-Men seize initiative. Rogue attacks Quicksilver and clobbers him for 4 damage, knocking him off his feet and back into the trees, generally ruining his day. Quicksilver gets up and charges Rogue, using a Move-by Attack, a Speedster maneuver that lets him attack a model and if successful, continue his move and another model, etc….until he either fails an attack or runs out of movement. With 38″ of movement (he lost 2″ for having to stand up), he successfully attacks Rogue for 1 damage, then moves onto Cyclops, attacking him for 1 damage, and finally runs around the swamp, attacking Kitty Pryde for 1 damage! Not too shabby! Quicksilver could conceivably reach Colossus too, but he would probably not do any damage to the big Russian and would then be locked in combat with him. Quicksilver’s a hothead but he’s not stupid, so he opts to use the last of his movement to run back the way he came, putting some distance between him and the X-Men.

G’night sugah!

Cyclops resents being punched in the face, so he moves after Quicksilver and fires an optic blast at his dust cloud. As is usual for Cyclops in this campaign, he misses. Rogue puts her new Speed powers to good use and does a Move-by attack on the fleeing Quicksilver, whom she smacks for 3 net damage. Since he only had 2 Body left, he makes a KO check and fails. Quicksilver goes down for the count and Rogue moves on into henchmen group 4, dropping 3 of its members. She has no movement left so she’s stuck in combat with the remaining 2 saurians. They attack Rogue, but fail to wound her.

Sauron rips into Storm, causing 6 damage, which drops her to zero health in one shot. She fails her KO check and is out of the fight! (Cue triumphant pterodactyl scream.) Scarlet Witch spots Shanna with a successful Perception check and attempts to Power Blast the She-Devil, but Shanna is too agile.

Ka-Zar charges out of the swamp and attacks Scarlet Witch, whose Fortune power serves her well. She only takes 1 damage after all the dice are tallied. Toad sees his opportunity and rushes to Scarlet Witch’s aid, but Ka-Zar easily avoids Toad’s attack. Zabu bounds into the fray, attacking Toad with no effect.

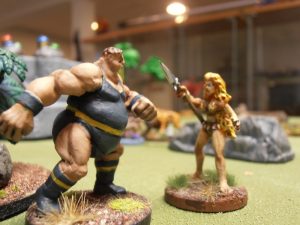
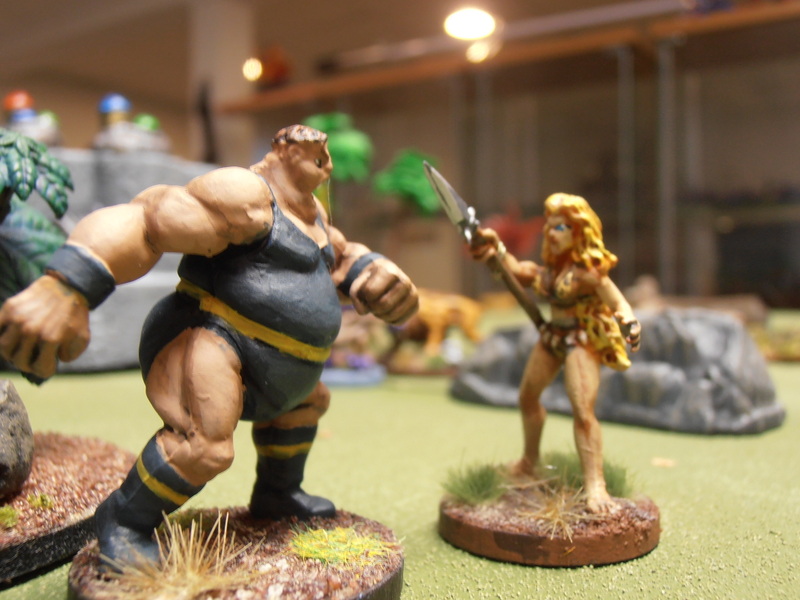
Shanna charges Blob. She inflicts 1 damage which is soaked up by Blob’s armor. Thus, she learns the hard way that “Nothing moves the Blob!” Blob activates his Density Increase power and pounds her for 4 damage, knocking her back 16″. She manages to keep her footing, but she’s a lot less cheerful than she was a minute ago.

Deja vu?

Wolverine moves rapidly into combat with henchmen group 3, and does a repeat performance of last round, wiping them all out in one fell swoop. This gets Magneto’s attention. He quickly finishes his soliloquy about the futility of resistance, flies off the Sacrificial Altar he’s been perched atop and Power Blasts Wolverine, but only inflicts 1 damage. Henchmen group 2 moves up to support Magneto (as if he needs it).

Kitty and Colossus both move towards the action, but can’t really do anything.

At the end of the round, henchmen group 1 respawns near the sacrificial altar (near Magneto) and group 2 reforms near the temple.

End of Round 2

ROUND 3

The X-Men keep initiative. Rogue leaves combat with the two remaining henchmen in group 4 to charge Magneto, who is hovering nearby. The saurians get a free shot on her as she leaves, but they fail to injure her. She serves Magneto a knuckle sandwich that dishes out 3 net goals of damage, enough to knock him back 12″ and drop him to half his health! Magneto has the sudden thought that it might be a good idea to activate his Force Field, so he does. He’s also a guy who holds a grudge, so he Power Blasts Rogue for enough damage to drop her to 1 remaining health.

Wolverine regenerates his lost damage and charges henchmen group 3. He drops 3 of them, leaving 2 alive (for now). They attack Wolverine, but do no damage. Henchmen group 2 charges Wolverine from where they respawned (near the Temple). They also fail to wound Wolverine.

Sauron has a close target in the nearby Kitty Pryde, but notices that the Blob just knocked Shanna the She-Devil into next week and that she’s vulnerable. He dive-bombs her from across the board and hands her a heapin’ helpin’ of pterodactyl justice. Shanna is KO’ed and isn’t getting up anytime soon.  (Cue triumphant pterodactyl scream.)

Blob charges into combat to assist Toad, making it 2 against 1 for Zabu. Blob knocks the Smilodon back 8″ and inflicts 2 body worth of damage. The giant cat springs right back into action and charges Blob, tearing into him for 5 damage, dropping him from 8 body to 3. Ouch! Scarlet Witch leaves combat with Ka-Zar (thinking perhaps she may get her ass handed to her soon). Ka-Zar gets a free whack at her but misses. She promptly Jinxes Ka-Zar, which will make it difficult for him to do anything henceforth.

Toad moves to intercept Ka-Zar. The two fight but neither does any damage (Ka-Zar would have hurt Toad if not for the Jinx). Henchmen group 1, Colossus and Kitty Pryde all move towards the central combat. Cyclops moves and fires at what remains of henchmen group 4, taking them out of action (hey! he hit something!).

Henchmen group 4 reforms at the temple.

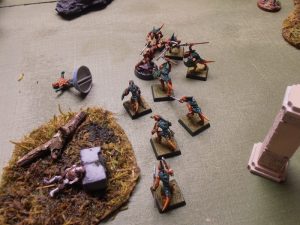
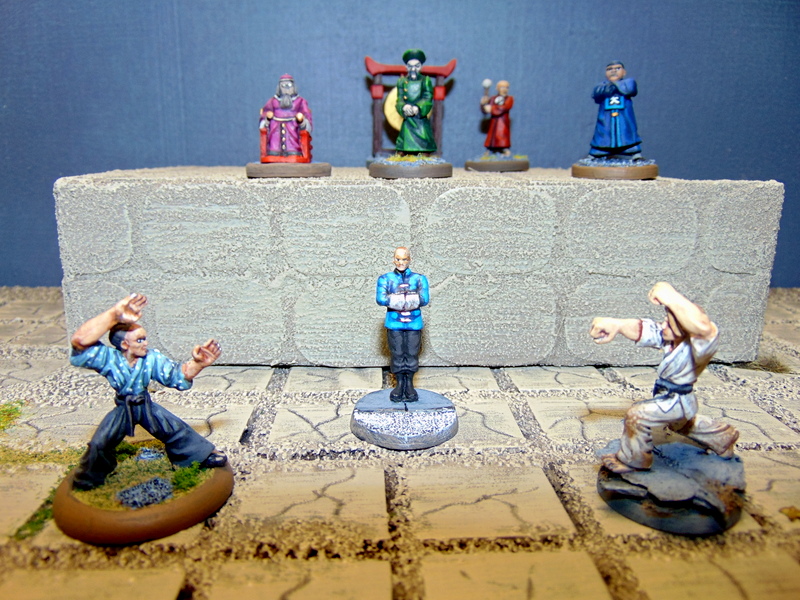
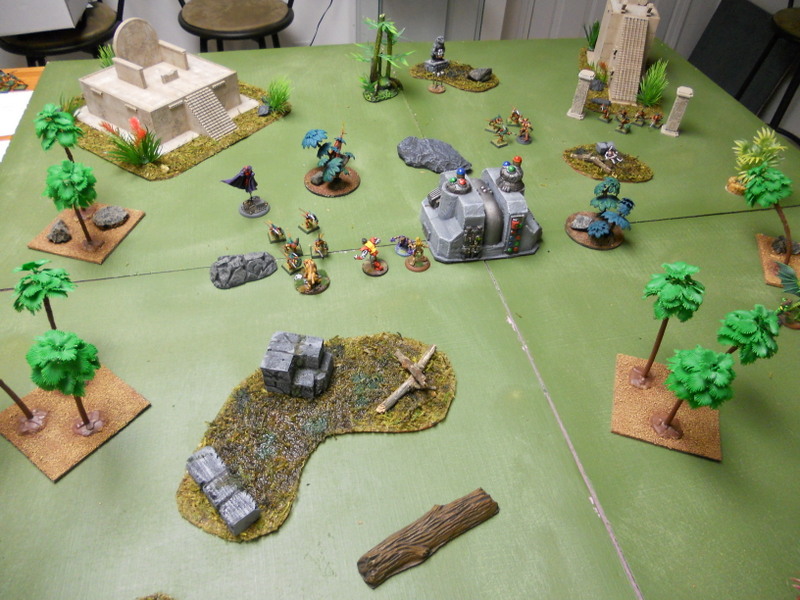
End of Round 3 (Side View)

ROUND 4

The X-Men keep initiative. Cyclops takes a long-rage shot at Magneto, who is hovering above the battlefield. He (naturally) misses.

How do you say “Good Night” in Transian?

Scarlet Witch turns her attention from Ka-Zar to Power Blast Rogue, scoring a ridiculous nine goals! Rogue fails to make even one resistance goal and fails her KO check, so she is out of the fight for good!

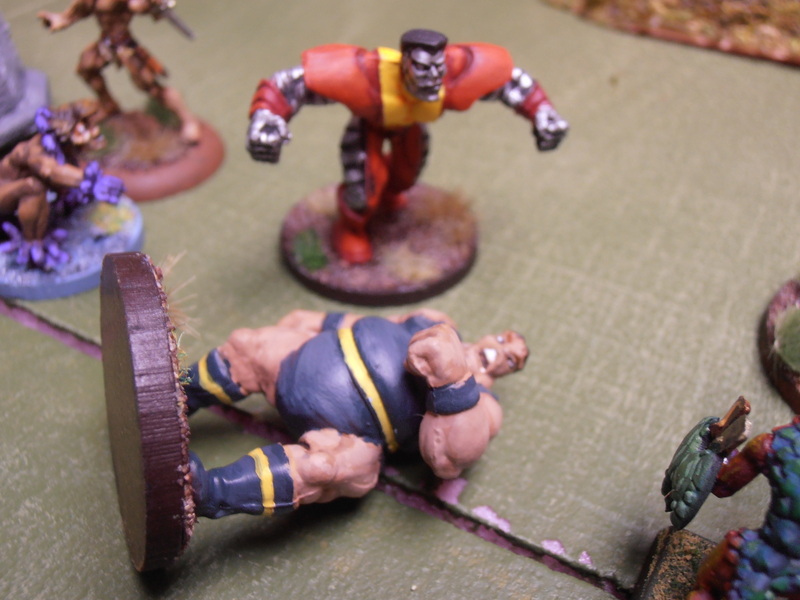
Blob activates his Density Increase power and trades blows with Zabu, but neither do any damage. It’s a good thing Blob activated his power first, because Colossus charges him and knocks him down to zero health! Blob makes his KO check and remains conscious. He’s also immune to knockback (Nothing moves the Blob!) thanks to the Density Increase, so he doesn’t go anywhere. Henchman group 1 charges into combat with Zabu, inflicting a net 3 goals of damage on the big cat.

He’s just one human! Get him!

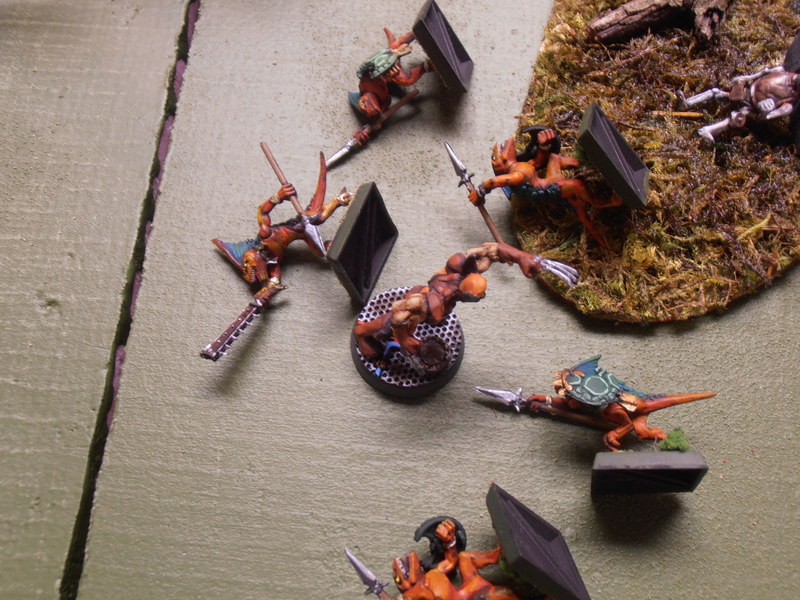
Henchmen group 4 charges into combat with Wolverine, but does no damage; Wolverine counters and wipes out 4 of them. That leaves Wolverine in combat with a two Henchman groups: one with 1 member and 1 with 2 members left. Wolverine’s active Rage power is giving him more dice to roll, but he is bogged down in endless waves of saurians as he keeps getting charged every round! To illustrate this point, Henchman group 3 charges into combat with Wolverine too, but Wolverine shrugs off their spears in a fury of bloodlust!

Toad and  Ka-Zar attack each other but both miss. Sauron takes to the air and charges Cyclops, but he also misses. Kitty Pryde charges Sauron, hitting him for 2 damage.

End of Round 4

ROUND 5

The X-Men keep initiative. Kitty Pryde activates her Density Decrease power which makes her immune to body-damaging attacks, so she won’t have to worry about getting eviscerated by Sauron on his turn. She then performs a Ghostly Attack, doing 1 damage to Sauron. Cyclops attacks Sauron with his bare hands (he’s giving up on his own optic blasts), but his punch is as effective as his shooting (he misses). Sauron attacks Cyclops, dropping him to 1 body.

Magneto uses his Mentalist ability, Mind Meld, to give everyone on his team +2 re-rolls until next turn on all attacks. He takes a point of Psyche damage in doing so, but that’s of no concern to him.

Colossus throws a Haymaker into Blob’s fat face, doing no knockback (Nothing moves the Blob!) but dropping him on the spot in a spectacular KO. Scarlet Witch runs away from Colossus, then tries and fails to Jinx him. Meanwhile, Toad and Ka-Zar continue to fight each other this round without anyone actually landing a punch. Zabu and Henchmen group 1 do the same.

Wolverine makes a strategic decision…rather than wipe out one of the weaker henchmen groups he’s fighting and having it respawn at the end of the round, he attacks the largest one (henchmen group 3) hoping to do some damage, but not allow a full group to respawn. But Wolverine is berserk, and he overdoes it a bit. He wipes out henchmen group 3 anyway, ensuring the endless tide of saurians continues. The other two groups do no damage to him.

Henchmen group 3 respawns at the temple…

End of Round 5

ROUND 6

The X-Men keep initiative. Colossus grabs something large (a rock, tree, whatever…) and hurls it at Magneto, but Magneto’s Force Field easily deflects it.

Meddlesome Dullards!! I AM MAGNETO!!!!

Magneto is fed up. He Power Blasts Colossus, but makes it a Radial Attack in the hopes of catching Ka-Zar and Zabu in the blast and ending this combat with finality. Of course, henchmen group 1 and Toad are in the blast radius too, but Magneto has proven often that he cares nothing for lesser beings, and little indeed for Toad. Colossus takes 4 damage, dropping him to half his Body. Zabu takes a whopping 6 damage, enough to drop him to zero. He fails his KO check and goes to sleep. Ka-Zar, despite the Jinx, manages to come out of it unscathed. The villains fared poorly; Toad takes 3 damage, while henchmen group 1 is totally wiped out. Oops.

Toad attacks Ka-Zar and misses. Ka-Zar finally scores a hit resulting in 1 damage to Toad.

Wolverine knows that as long as he’s stuck here in combat with the endless saurians, he’s effectively being kept out of where he’s needed most. So he leaves combat with the henchmen groups (no damage from the free henchmen hits) and charges Scarlet Witch, who just got a little too close…when he reaches her he guts her like a mackerel for 7 goals of damage, enough to take her from 6 down to zero. She fails her KO roll and drops. Both henchmen groups formerly in combat with Wolverine charge him again; they fail to damage him and he automatically wipes them out because of his Scrapper counterattack ability (something I’ve neglected for the ENTIRE campaign).

Sauron attacks Cyclops but misses completely. Kitty Pryde and Cyclops both attack Sauron and manage to put him down for good. With Sauron gone, the saurian henchmen groups will not respawn any more. Henchmen group 3 is now all alone, and moves towards the two X-Men that just put down their master, but they are far away indeed.

End of Round 6

ROUND 7

The X-Men keep initiative again. Cyclops fires at Magneto, and actually manages to inflict 1 damage on Magneto despite his Force Field! Magneto responds in kind, Power Blasting Cyclops for an obscene amount of damage. Cyclops fails his KO check (it’s a bad game for KO checks) and it’s lights out!

At this point in the game, I’m wondering how the X-Men are really going to win. Magneto is flying above the battlefield and has no reason to land. He can just stay up there and blast away. Kitty and Wolverine can’t attack him from the ground. Both the flyers (Rogue and Storm) are out of the fight, as is Cyclops, limiting ranged attacks to whatever Colossus can throw.

A quick look at the table and an idea began to take shape. Wolverine and Colossus are pretty close to one another, certainly close enough for Colossus to walk over and grab Wolverine.

“Petey, Fastball Special!”

Super Mission Force doesn’t currently have official rules for the Fastball Special, but it’s certainly thematically appropriate and a classic maneuver perfected by these very two heroes! I decided that if Colossus can hit with a normal ranged attack, then he tosses Wolverine into Magneto. Wolverine then makes an attack. Should he count as charging? I decided HELL YES!

The odds were against them, as Colossus only has 4D to make the throw and Magneto has a Force Field up. They’d only get one shot at this…

Colossus managed to hit with one net goal. Wolverine inflicted 4 net damage. Magneto, like almost everyone else this game, failed his KO roll.

An awesome end to the campaign! Victory for the X-Men!!!

AFTERWORD

Well, the X-Men did it! They beat Magneto and the Brotherhood! They stopped the Breeder Bombs! They hit ’em with the Hein!

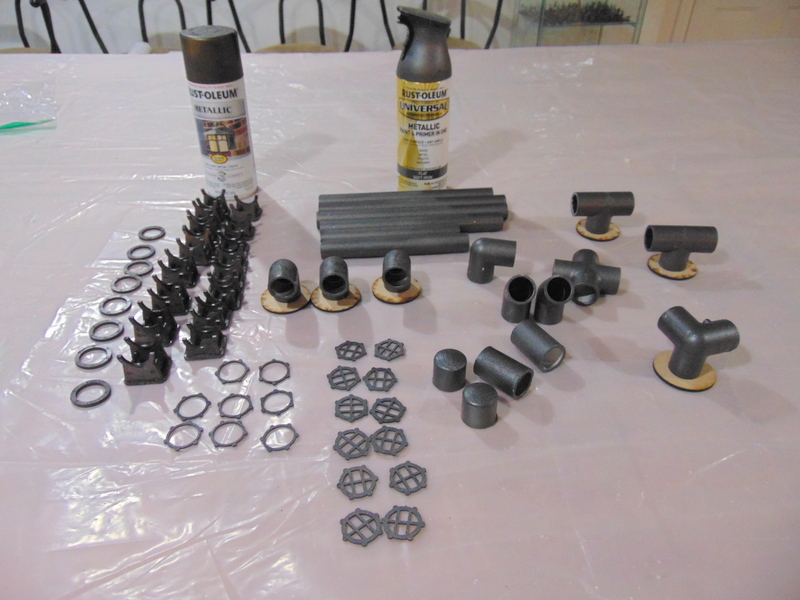
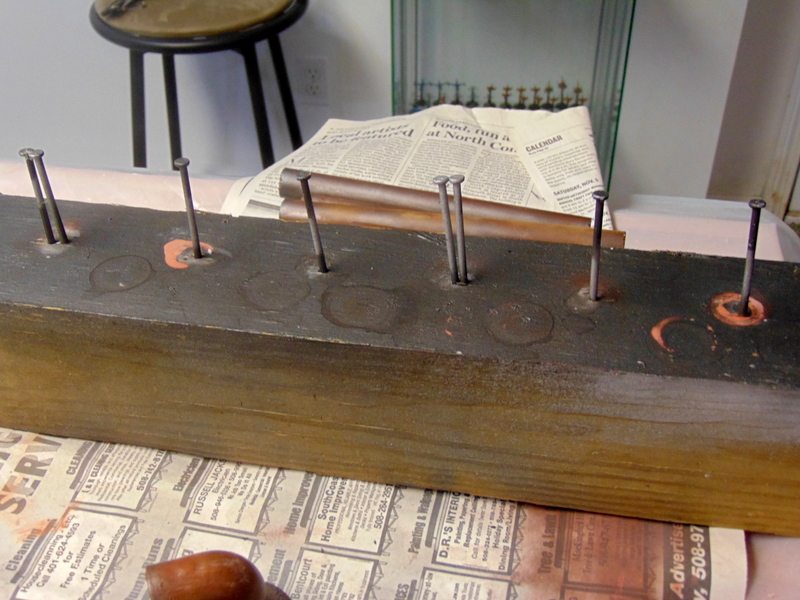
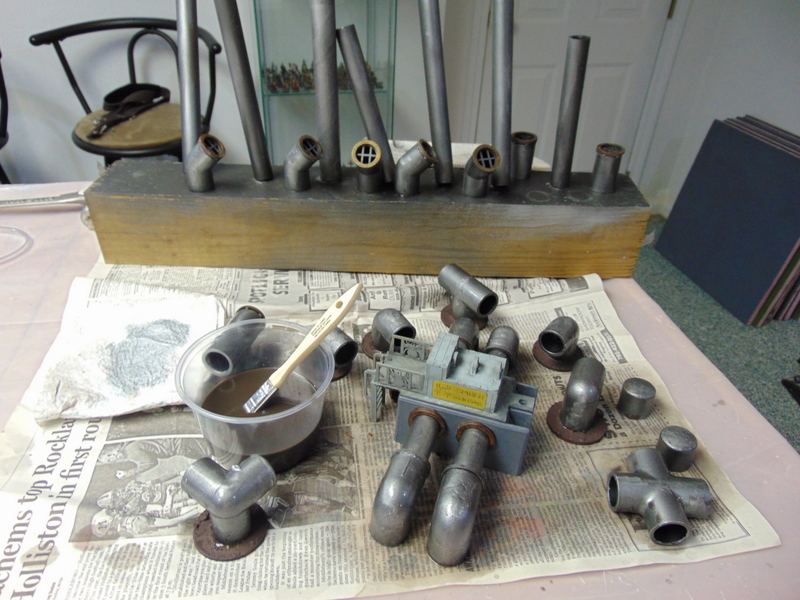
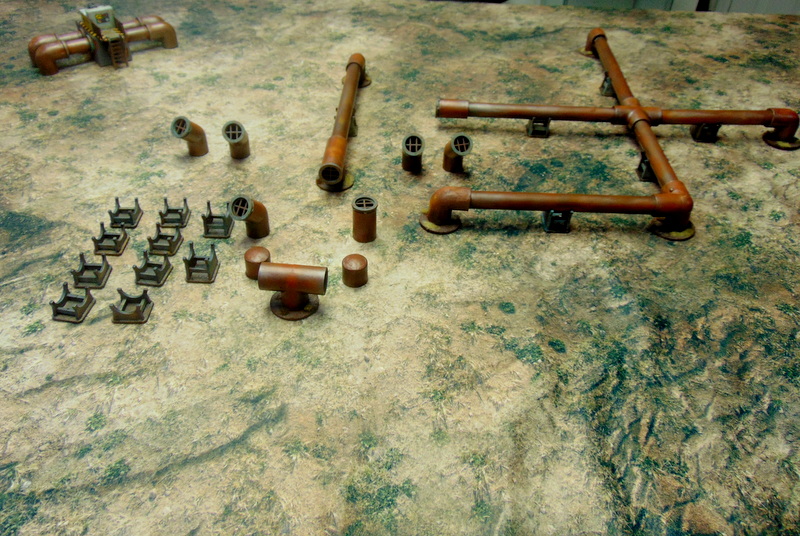
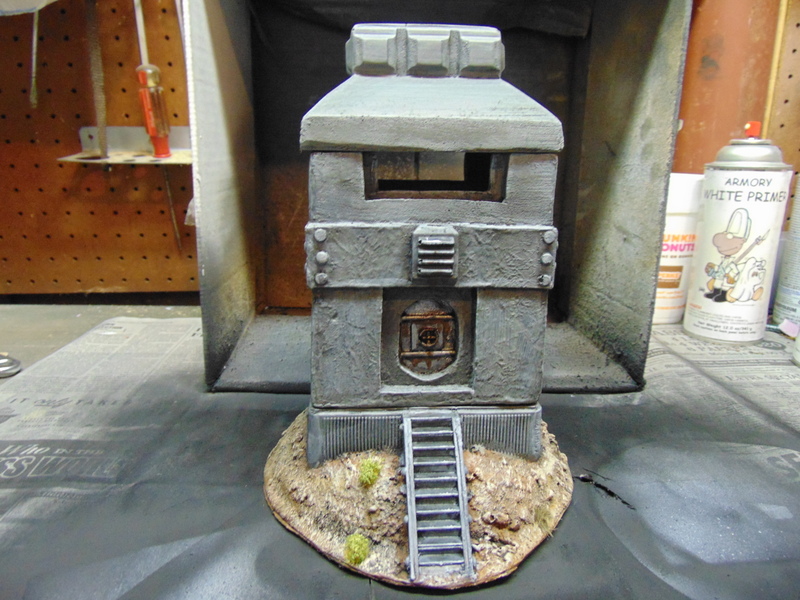
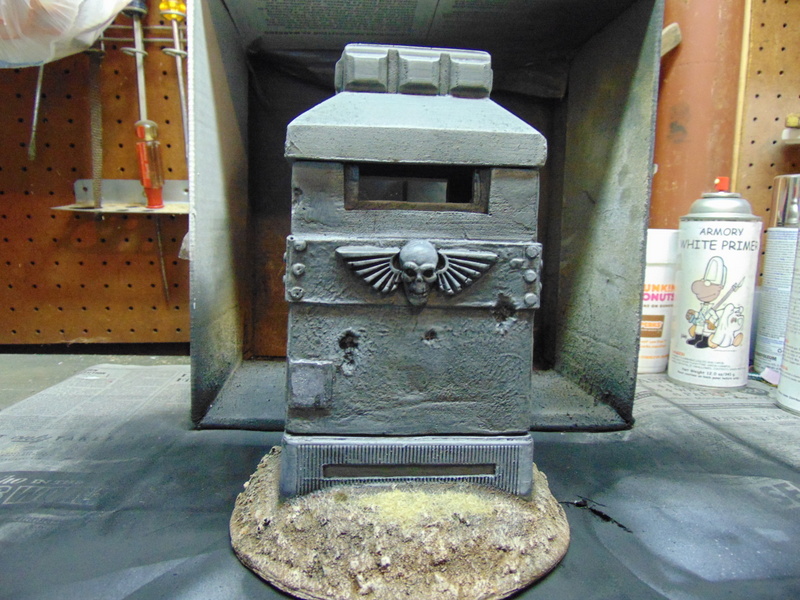
I’d like to extend special thanks to Joerg Bender from Things from the Basement, LLC. for all his help with the temple MDF kits. I was staring at a stack of pink insulation board, thinking I was going to have to construct the temple for this scenario, when I logged onto The Miniatures Page and saw these kits advertised. They’re from Joerg’s Frostgrave: Ghost Archipelago terrain. It couldn’t have been better timing. I immediately purchased the set. I was worried that painting them would obscure the detail, but Joerg assured me it wouldn’t and shared his painting technique. He even offered to replace the pieces if the paint job obscured the detail. As you can see, it didn’t. So thanks, Joerg!

Also, thanks to Scott Pyle and company for creating Super Mission Force and making the playdoc version available to gamers early!

This scenario was by far the most fun scenario to play in the campaign. The classic match-up between the X-Men and Magneto didn’t disappoint. I made a lot of changes from the original as it was written for the RPG. In the original, Magneto and the Brotherhood were robots, the Breeder Bomb was active, and Magneto had some generic mutants helping him out. I decided to add Sauron and the saurian henchmen instead of the generic mutants. Once I decided to use Sauron, I couldn’t resist using Ka-Zar, Shanna and Zabu. (More on them in the next post!)

I think that throughout the five scenarios of the campaign I managed to learn the rules pretty well, although I was using an early version of the playdoc Scott Pyle graciously provided (version 1.30 to be exact). I know the test rules have been updated and modified since then, and I eagerly wait the final product. In the meantime I think I used a lot of the powers and maneuvers and got a pretty good handle on combat.

Of course I’m sure I made mistakes and overlooked some stuff, just as I consciously changed and ignored some things. There’s a lot more to the game than what you read here: I pretty much ignored backgrounds and character development, because I was using established comic characters that I adapted to the system. Perhaps when the finished rules come out I’ll create my own supers team to experience more of what Super Mission Force has to offer.

Here are my SMF builds for the villains and team-ups in this scenario:

Magneto (Powerhouse) Major: Power Blasts, Mentalism, Minor: Flight, Force Field, Iron Will, Telekinesis

Quicksilver (Speedster) Major: Speed,  Minor: Armor, Clever

Scarlet Witch (Blaster) Major: Power Blasts, Minor: Fortune, Jinx

Blob (Brick) Major: Super Strength, Minor: Armor, Density Increase

Toad (Brawler) Major: Scrapper, Minor: Leaping, Super Agility

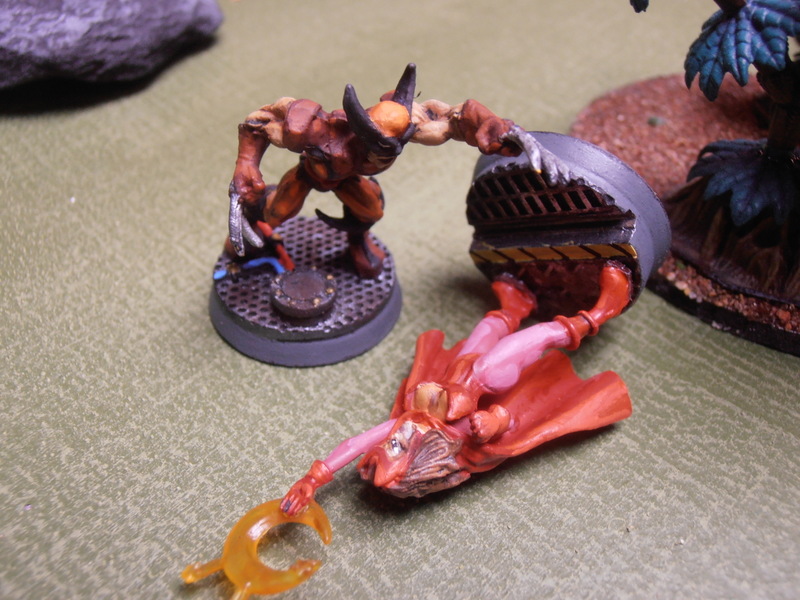
Sauron (Wild Card) Minor: Flight, Melee Specialist, Stun, Parasite

Saurian Henchmen (Veterans) Minor: Power Blasts, Melee Specialist

(Note that these archetypes represent the early versions of these characters, before Scarlet Witch became one of the most powerful mutants on earth, before Toad was a badass and before Sauron could breathe fire.)

Ka-Zar the Savage (Wild Card) Minor: Fast, Melee Specialist, Rapport (Shanna), Super Agility

Shanna the She-Devil (Wild Card) Minor: Fast, Melee Specialist, Rapport (Ka-Zar), Super Agility

Zabu (Big Cat) Minor: Enhanced Senses, Melee Specialist, Leaping, Super Agility.

Yes, Ka-Zar and Shanna are essentially the same character. (Shouldn’t they be?) For Zabu, I didn’t follow any rules. I just gave him what I thought an intelligent Smilodon should have. I also gave him a base movement of 12 and a body of 8, in case anyone cares.

And that’s about it for now! I think I’ll take a break from SMF (and supers gaming in general) until I get my hands on the finished rules. I may adapt more TSR Marvel Super Heroes adventures when that happens, so stay tuned! In the meantime I have something big (pun soon to be understood) planned for May.

See you soon!