A couple of weeks ago my region was hammered with about 17 inches of snow, and I got to stay home from work. With blizzard conditions raging outside all day and well into the night, I wasn’t going anywhere, even if I could have. I figured it was a great day to get some painting done! Or it would have been, if I hadn’t lost power at 6:30 am, ten minutes after I woke up.
In such instances, my standby generator powers most of my palatial estate, with the notable exception of my basement, which contains my hobby space. When assigning which circuits would be backed up, I obviously prioritized important things like heat and water over painting space. (It’s nice to be able to flush a toilet when you need to.) Consequently, most of the basement didn’t make the list. However; since my furnace is located in my tool room, that part of my basement has power. I couldn’t paint without moving everything, so I decided instead to start work on a project I’d been considering for a while: an arena board.
I’ve been toying with an idea for a martial arts skirmish game, something along the lines of the Street Fighter and Tekken video games. I purchased Osprey’s A Fistful of Kung Fu when it came out, but I was put off by the many charts and tables, and also by the fact that it’s a faction-specific game. (The figures by Northstar are admittedly impressive, but I don’t want to have to buy them.)
The “arena” board I have in mind is a 2′ x 2′ board with a fighting circle inscribed in the center. As it will be made of flagstones, the board can double as a dungeon floor, a ruined courtyard, or anything else that would have a stone floor for use in other games. Picture a sumo ring, or the courtyard in Crouching Tiger, Hidden Dragon, and you get the idea.
Designing the Arena
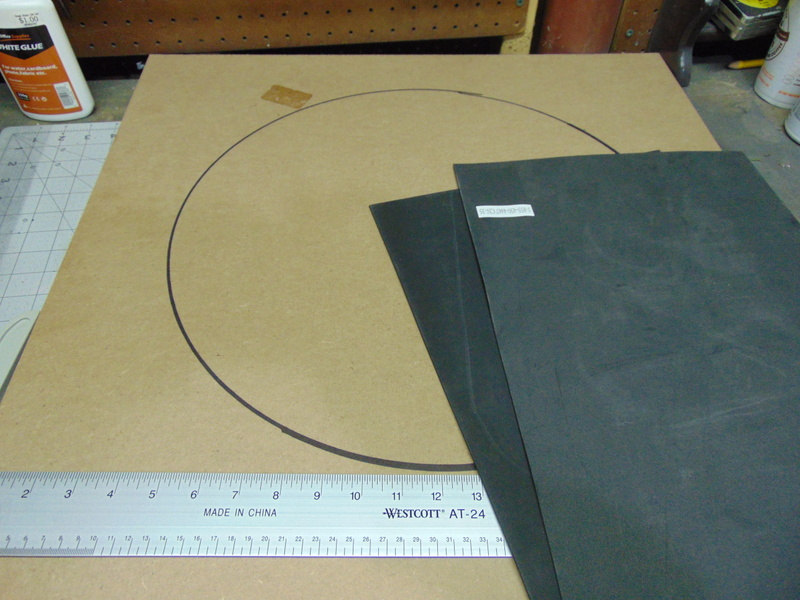
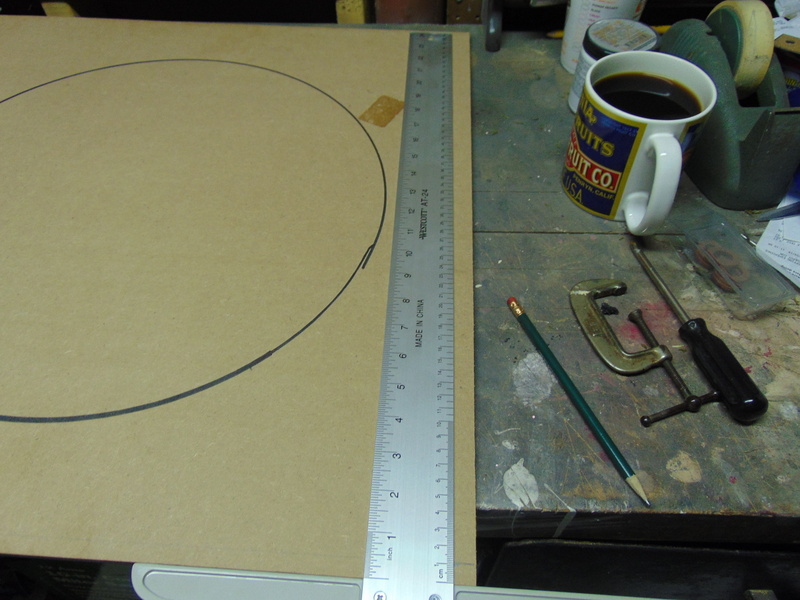
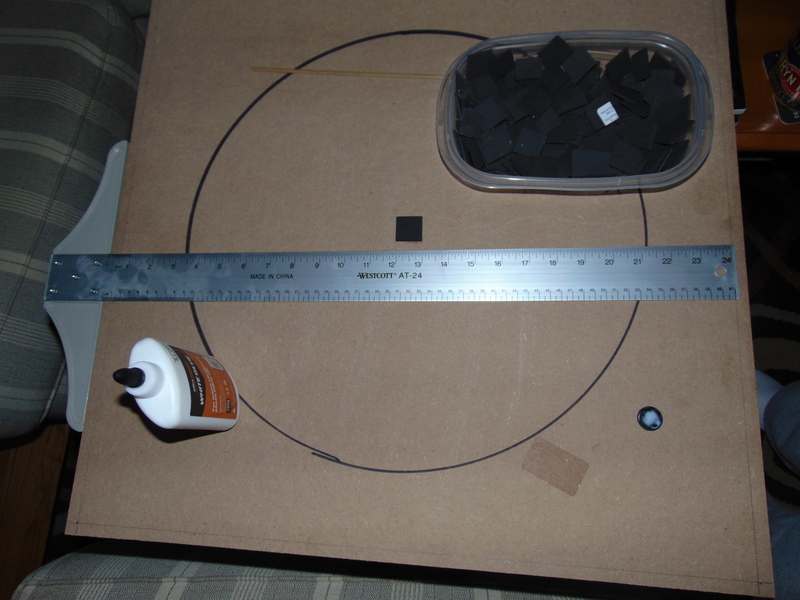
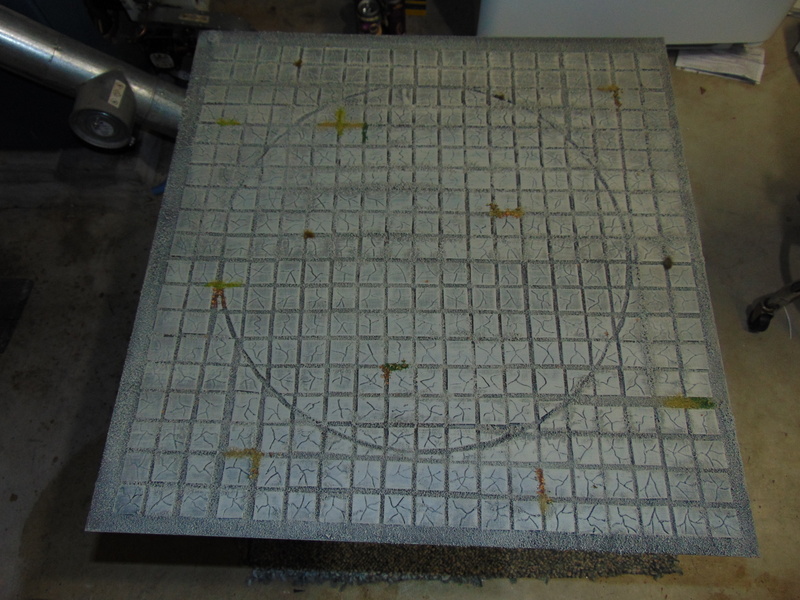
My starting materials are a 2′ x 2′ board made from 10mm thick MDF, some craft foam sheets, some PVA glue, a T-square and a razor knife. I bought a 2′ x 4′ MDF board from Home Depot for about 5 bucks. I had them cut it in half for me there, since their cutting station can make a much straighter cut than yours truly with a jigsaw (I hate jigsaws). I drew a roughly 18″ diameter circle in the center of the board, and then drew a perimeter 10 cm in from the edge all around the square.
As a side note, my brother once told me, while making my gaming table, that there is no such thing as a piece of wood from Home Depot that is truly “square”. The picture above proves this. I didn’t want to fuss with making it perfectly square (I lacked the tools to do so, anyway), so I just went with it. Also, as another side note, there is absolutely no whisky in that coffee cup. Honest.
Assembling the Board
After cutting the craft foam into 1 inch squares, I moved the project upstairs to my living room. While the blizzard raged on, I turned on my TV ( I love having power) and settled down for what I knew would be the most tedious part of building the arena board: gluing the “flagstones” down. I decided to watch a movie while I worked, and I picked Kong: Skull Island. I guessed it wasn’t the type of movie I needed to pay close attention to in order to capture all the director’s subtle nuances, and I was correct. Still, I enjoyed the movie. It’s King Kong, with no real pretensions to anything else, and it’s got a great cast. What’s not to like?
I measured the center point of the circle (and the board) as best I could and started laying down the squares.
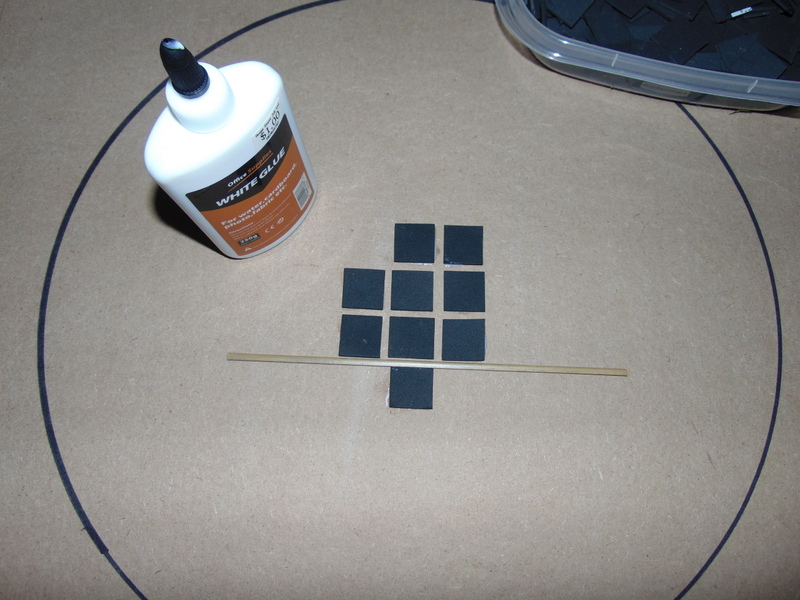
I used this piece of wood as a spacer, to ensure the squares were more or less evenly spaced. Due to my own imprecision cutting the foam squares, they weren’t exact; but I thought uneven stones would give the board a rustic, imperfect character for the end result.
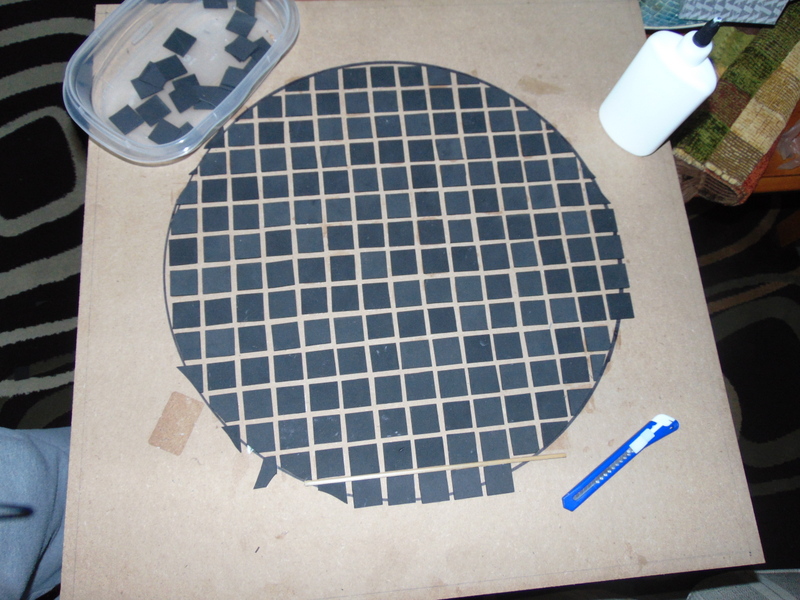
I worked from the center of the circle to the inside circumference, then I began trimming the stones so they would not overlap the inscribed circle.

Then, working from the perimeter, I started laying down squares to meet up with the outside circumference. I was careful to make sure that the spaces lined up as best I could with what was already down on the board. Again, I trimmed the pieces so they wouldn’t overlap the inscribed circle.
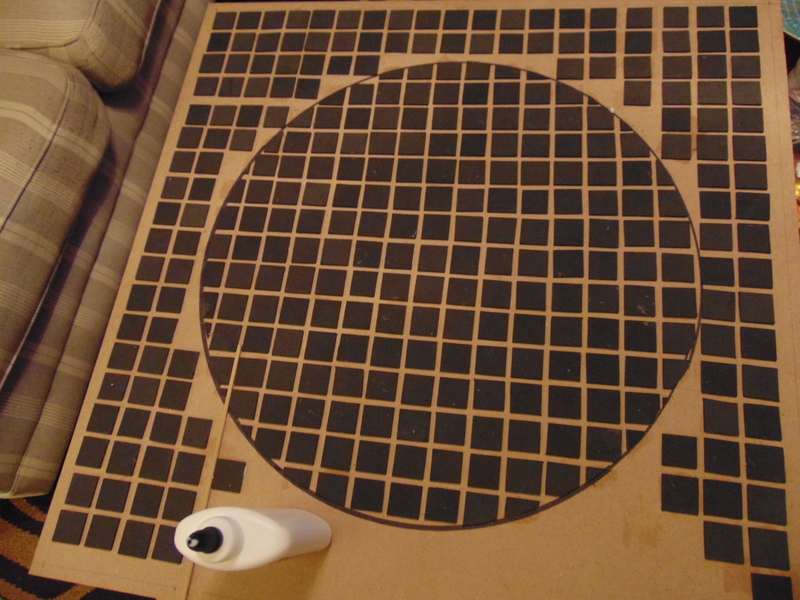
As you can see, the pattern is taking shape. Once everything is finished, there will be a visible circular pattern in the flagstones. I’m not going to lie, this was pretty boring and tedious work. (I have newfound respect for people who lay tile for a living. It sucks.) I finished Kong: Skull Island and had time to watch another movie about an autopsy subject who is really a dormant witch who starts killing people in the morgue. It was surprisingly watchable, but then again, my attention was split.

Once the board layout was complete, I used a ball point pen to inscribe some cracks on the craft foam flagstones. Hint: don’t do this with a pen you care about, as it will stop writing permanently.

This was also tedious work, but it took much less time than laying out the foam squares. Once complete, the board looked like this.
Adding Texture
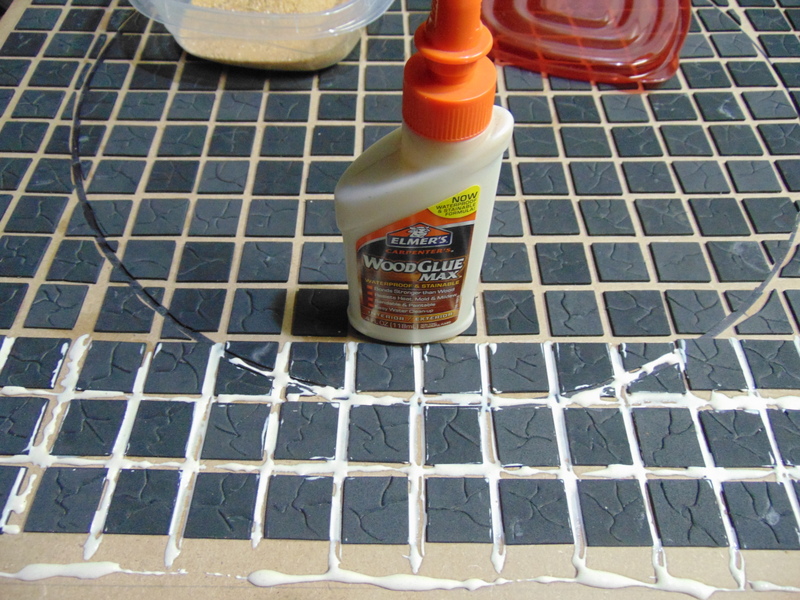
With the squares laid out, it was time to add some texture. I used Elmer’s wood glue and squeezed out a line throughout the gaps, being careful to make sure the circular gap was covered as well. I used an old, shitty paintbrush to spread the glue around.
I did it in sections to ensure the glue didn’t dry before I got to it. Then I dumped sand over the whole section. I let each section absorb the sand and dry before I moved on, which enabled me to collect surplus sand (be sure to lay down newspaper, folks) from a dry section for reuse.
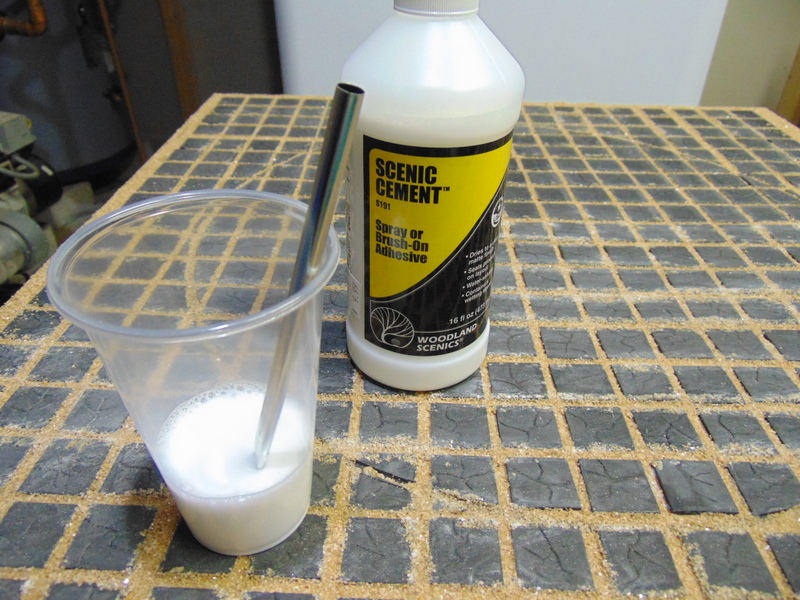
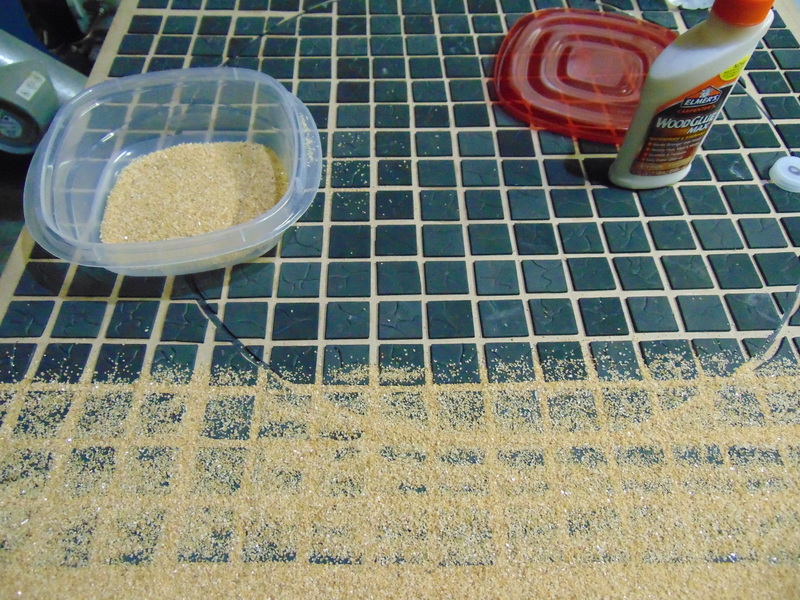
Once the whole board was covered in sand, I filled in any gaps I had overlooked. I scraped most of the sand that had adhered to the flagstones away, leaving a little bit for added texture. Then I moved on to the first phase of sealing the table: Woodland Scenics Scenic Cement. This stuff has the consistency of milk and brushes on very easily. I used it to soak the “grout” areas and let it dry overnight. Then I added another coat the next morning, before I had to go outside to deal with the 17″ of snow in my driveway. With two layers of scenic cement on top of the wood glue, the sand wasn’t really going anywhere and should stand up well to painting.
Painting and Sealing
A week later, we got more snow. Not enough to be an issue, but enough for me to have an excuse to stay home again. Time to paint the arena!
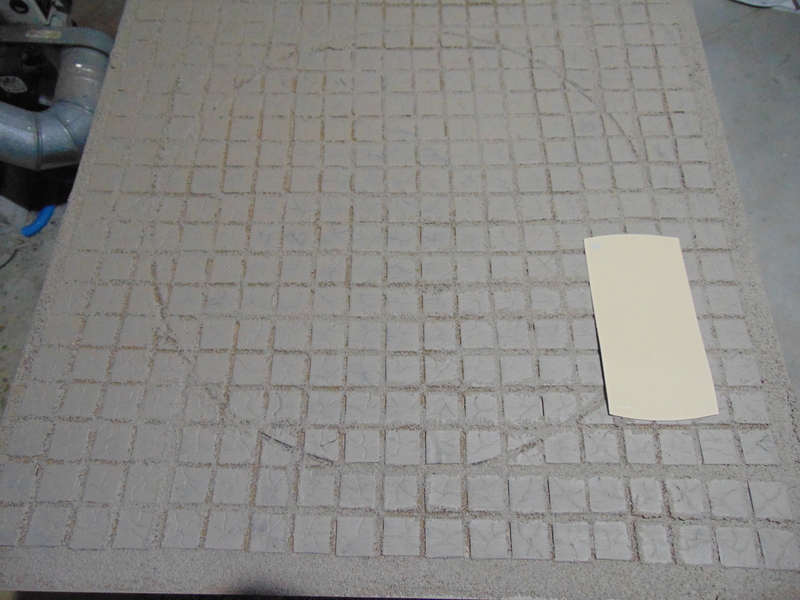
I had some Asian-themed terrarium scenery I thought would go well with this board, so I decided to match my color scheme to that. Another trip to Home Depot and I got two small sample pots of Behr paint: Native Soil (basecoat) and Safari Vest (highlight). With the sand pretty well glued down, I applied a thorough coat of the Native Soil to the board. (That swatch there isn’t Safari Vest, it’s a color called Woven Straw. I thought I was going to use it as a highlight, but it’s too bright.)
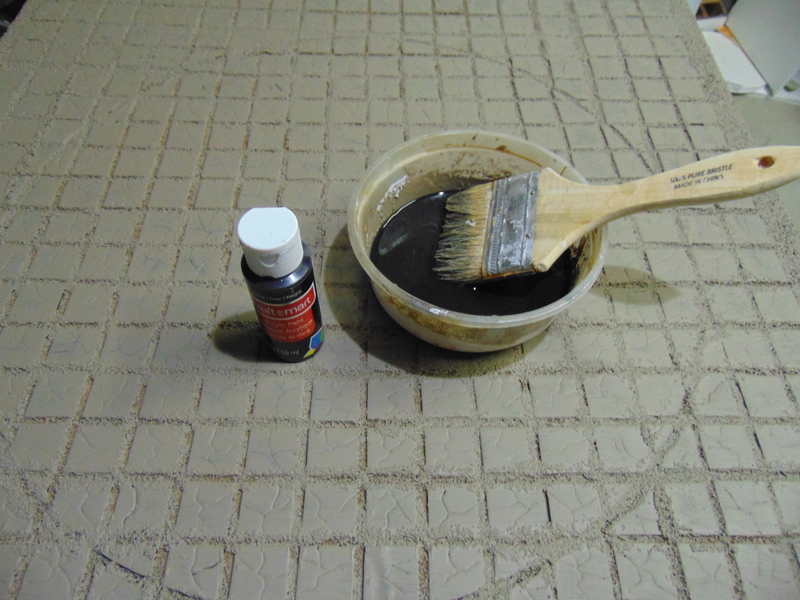

Unfortunately, this somewhat obscured the cracks I had so painstakingly inscribed into the flagstones. I decided to give the whole thing a black wash, both to reinforce the spaces between the flagstones and to highlight the cracks. I used watered-down black craft paint and applied two coats of the wash over a day or so. (I didn’t really have to wait that long, but I was doing other stuff in the meantime, and it’s not like I was in a hurry.)
Once it was done, I gave the board a drybrush of the Native Soil, followed (once it dried) by another drybrush of Safari Vest. I actually regret buying the Safari Vest sample pot, since I used so little of it. I could have probably got the same effect by using craft paint (and it would have been much cheaper, too).
Anyway, I decided that the board would benefit from some flock in between the flagstones, to simulate the irregular growth of weeds. Anyone who has ever seen a flagstone driveway, or even a sidewalk for that matter, knows that plants tend to grow in the cracks despite anyone’s best efforts.

Once the flock was down and dry, I decided to apply a coat of matte polyurethane to seal and protect the whole board. And done!
Or so I thought. Something was missing, so I decided to make a viewing platform where VIPs could watch the fights. I used plasticard for the flagstones and insulation board for the body of the platform. A little glue and textured paint (same colors), and it fits right in.
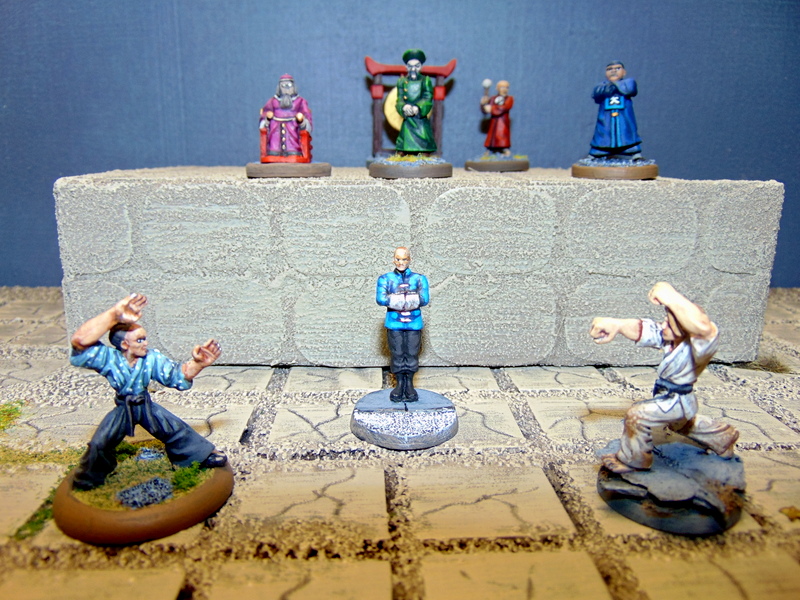
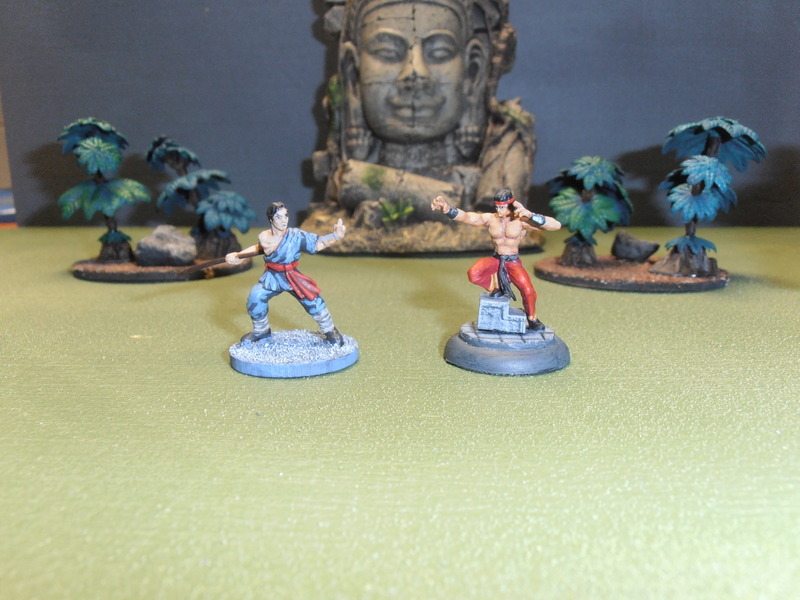
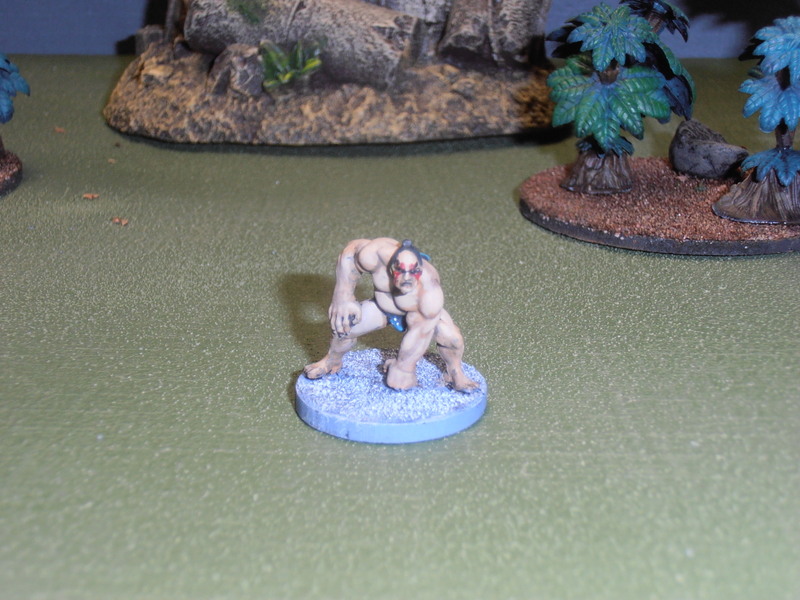
The evil Hai Feng observes the battle between his two lieutenants, each intent upon joining the ranks of his celestial bodyguard…
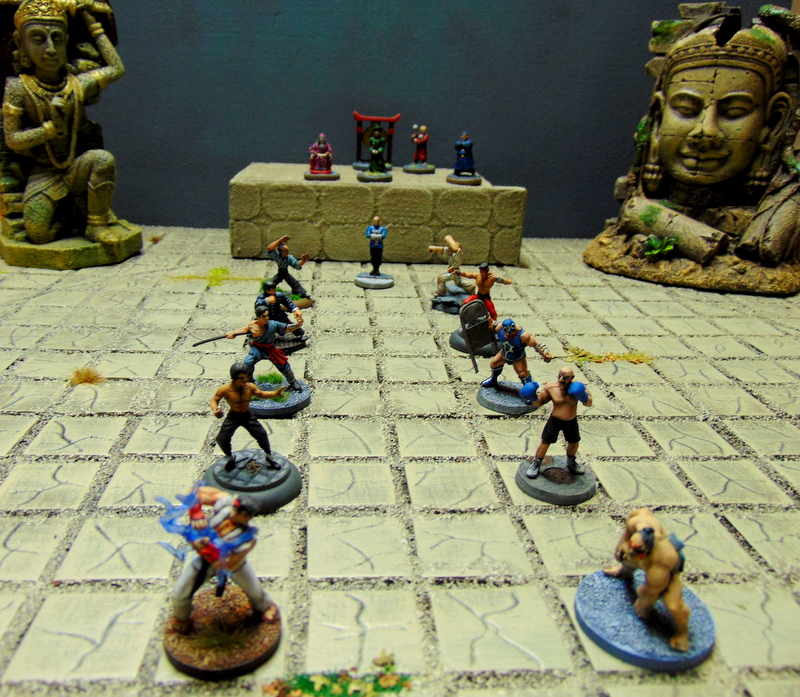
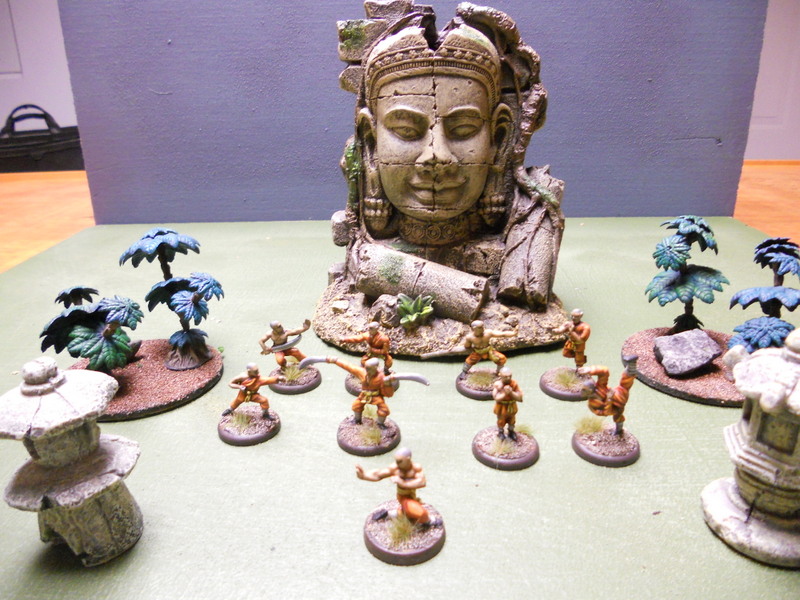
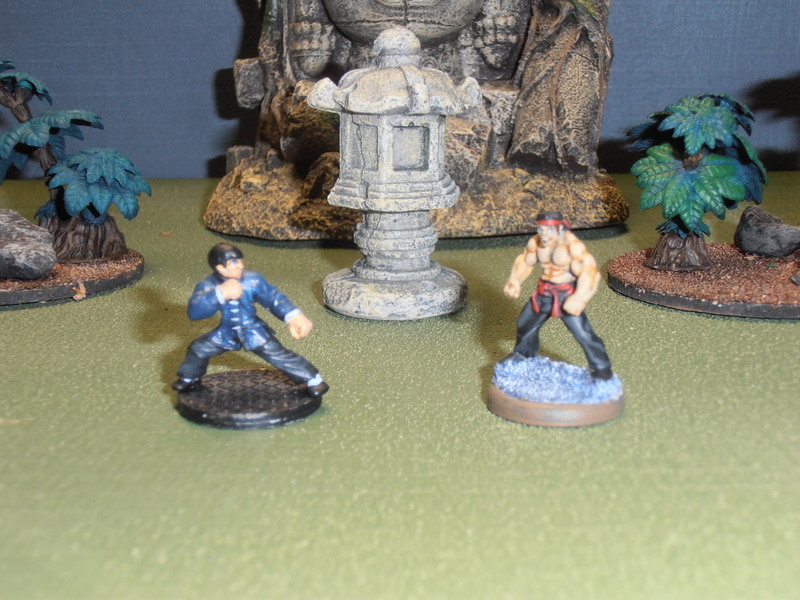
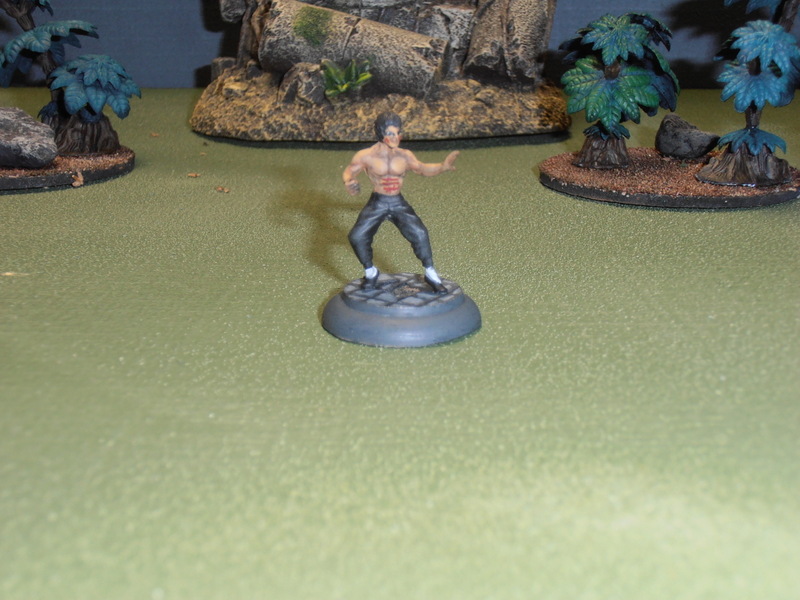
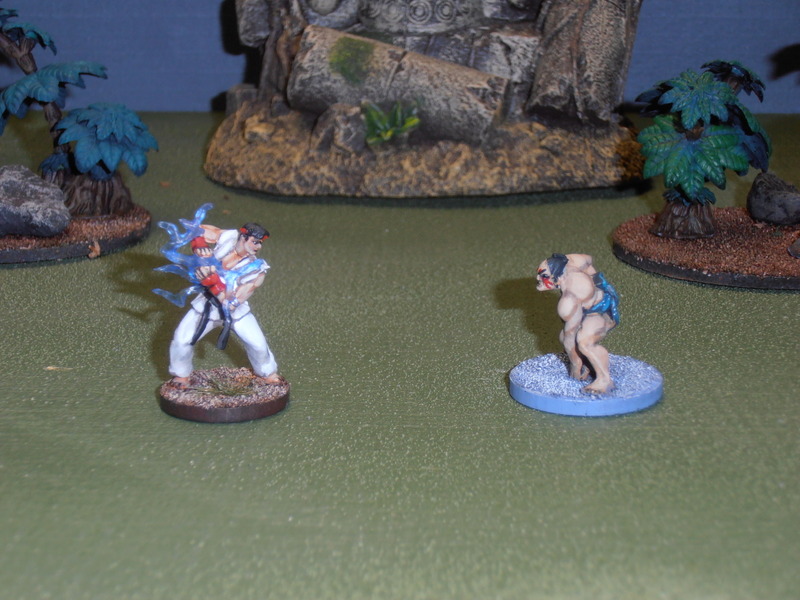
The beginnings of a tournament of World Warriors. Who will be crowned champion?
At the Shaolin Temple, Master Tsu Kang teaches the Iron Palm technique to his initiates…
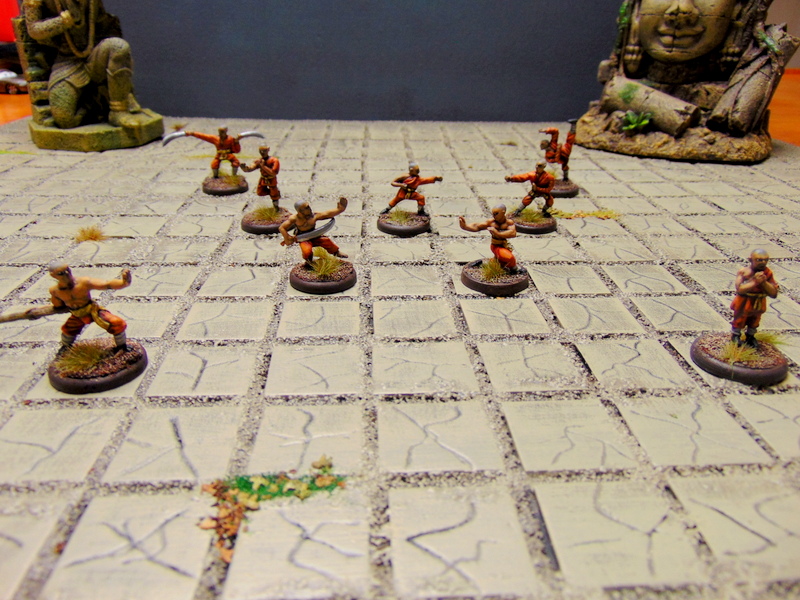
The stone board can be used for other games as well:
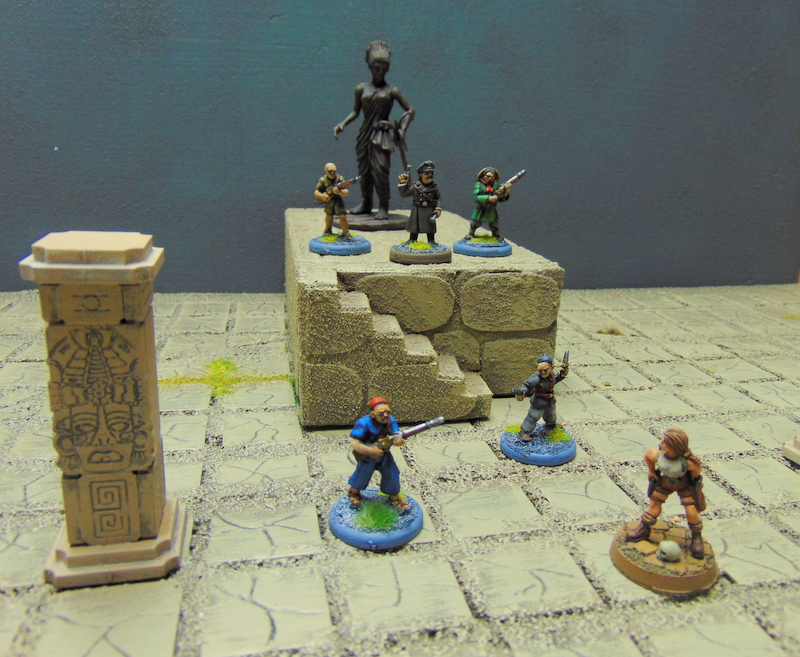
In a tomb somewhere deep in the jungles of Ceylon, Lara Croft confronts Helmut Von Jurgen and his unsavory henchmen.

In the sacrificial shrine of the Reptile God, a small band of adventurers faces off against a Lizard Man shaman and his minions…
Not a bad way to spend a snow day or two. I’m mostly happy with how it looks, but if I had to do it again, I would make a smaller circle. 18″ is a pretty big diameter for a 24″ board, but I can make it work.
Now I just need to get crackin’ on those skirmish rules!