Category Archives: After Action Reports

MH-2 Time Trap Part 3: A Murder of…Skrulls?!

PROLOGUE

The smoke clears, and the Avengers stand reunited in their mansion before Immortus, Lord of Limbo!

“Both your groups achieved success,” says Immortus. “This is good, but there is still another task ahead, and it is by far the most important.”

“Hold on a second,” interrupts Captain Marvel. “I think we’re entitled to some answers, friend. A child was almost seriously hurt or killed, and we still don’t know the whole story.”

“And yet because of your quick actions, the child was unhurt. He grew up to be a postal clerk, if that is of importance to you,” says Immortus. “More importantly, Rankin was prevented from his path, which would have led to the formation of the solar flare.”

“We have only your word on that,” says Scarlet Witch.

Immortus scowls. “I will try not to take that as the insult you so obviously intend. I seek only to prevent disaster.”

“Sorry to hurt your feelings, but Drax did not know about the satellites you claim he was on his way to destroy, either,” says Wasp. She looks at Captain America. “And Vision says there’s no record they ever existed.”

Cap glances at Vision. The android nods. “Well, that’s sure strange, Immortus,” says Captain America. “Any explanation?”

Immortus sighs with impatience. “Again, because of your quick actions, the aliens likely never even got a chance to tell Drax about the satellites. Rest assured, that is a good thing. As for your computer’s deficiencies, I am sure I am not the person to ask. Now, enough of this nonsense! There is an important task that will require all of you, and it must be done presently! I have used my mastery of the time streams to heal all your injuries for those who have sustained harm. Hardly the actions of one with ill intent.”

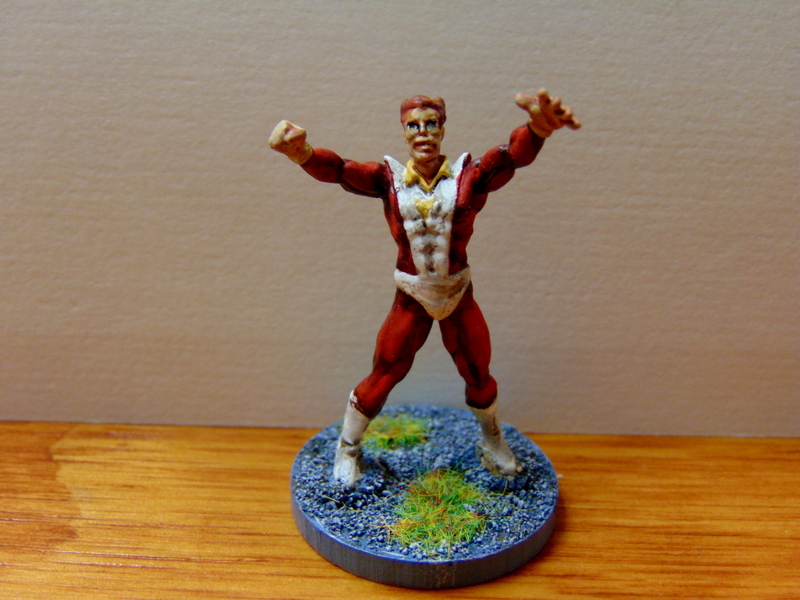
Starfox folds his arms. “All right. We’re listening.”

“You must go back in time again, but not far; only yesterday,” Immortus says.

“Yesterday…” says Starfox, “…when all our troubles seemed so far away…” He smiles, looking around at the others.  “You all see what I did there, right? Right?”

“Why yesterday?” asks Vision, ignoring Starfox. He subtly increases his density, rooting himself to the spot lest he lunge at Starfox and punch him in the dick.

“Because that is when Reed Richards launched a solar probe into space from the top of a building here in Manhattan.”

“That’s quite simply impossible,” says Vision. “Our computers would have detected such a launch, and Dr. Richards would have certainly informed us of his plans.”

“The launch was secret,” snaps Immortus. “Do you doubt Reed Richards could launch something into space undetected?”

“No,” says Captain America. “Only that he would.”

“Well, you can ask him about it yourself when you see him. If the launch is allowed to happen, the probe becomes the very catalyst that sets in motion the flare. You must convince him to abort the launch. Richards miscalculated a key equation, and has inadvertently doomed the solar system.”

“Mr. Fantastic doesn’t make mistakes like that,” says Scarlet Witch.

“Does he not?” Immortus scoffs. ” Have you forgotten how the Fantastic Four came to be, Ms. Maximoff? How Reed Richards became “Mr. Fantastic” in the first place? Now prepare yourselves!”

“Well, this should be interesting,” says Wasp, as the temporal energies gather around the team.

Captain America raises an eyebrow. “In what way?”

Wasp grins. “I can’t wait to see the look on his face when you tell Reed Richards he needs to check his math.”

The Scenario

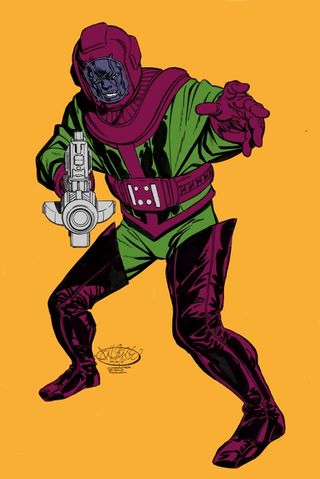
Surprise! Kang is lying. While the heroes were off dealing with Mimic and Drax, Kang made arrangements for them to be ambushed in the past by two powerful enemies: Blastaar, the Living Bomb-burst, and the Super-Skrull! He’s not sending them back to yesterday, he’s sending them back years, shortly after the Super-Skrull first got his powers. Kang doesn’t care whether the Avengers beat the Super-Skrull or not; it really doesn’t matter. If the Super-Skrull wins, the Avengers are wiped out before they become a team. If the Avengers win, the Super-Skrull reports back to the Skrull emperor that Earth is better defended than the Skrulls thought. They never attack Earth and the Fantastic Four is the only super-team that is really needed, so the Avengers never become a permanent team. Either way, when Kang’s future rolls around, he’s ensured himself an easy time conquering Earth.

The Avengers need to defeat the Super-Skrull, his Skrull soldiers, and Blastaar. Anything else is complete failure!

Setup

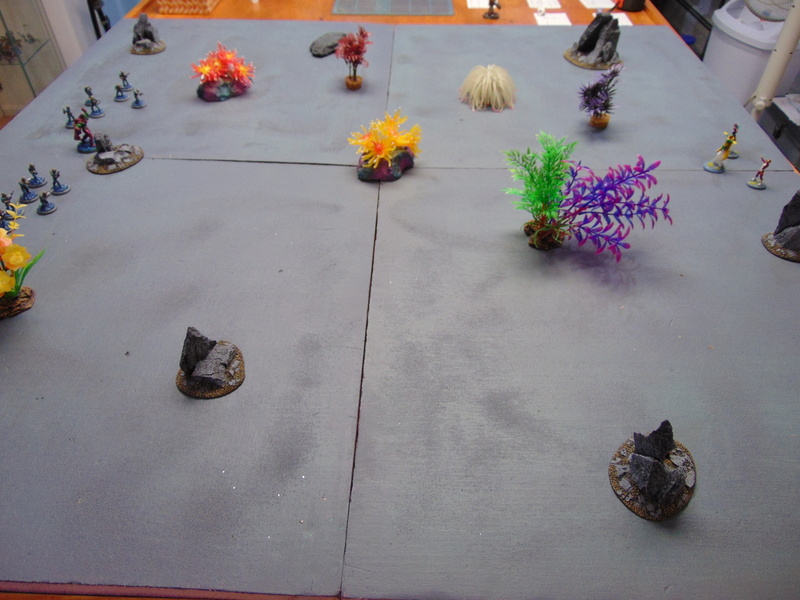
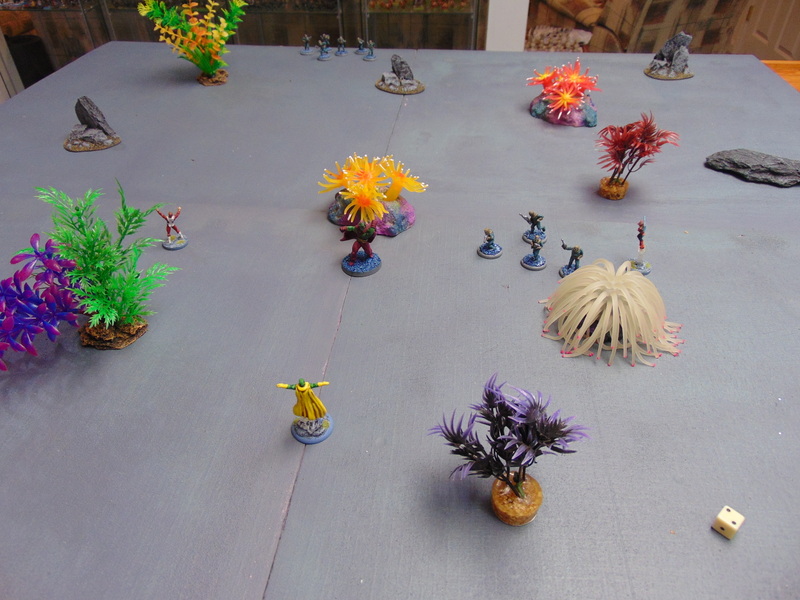
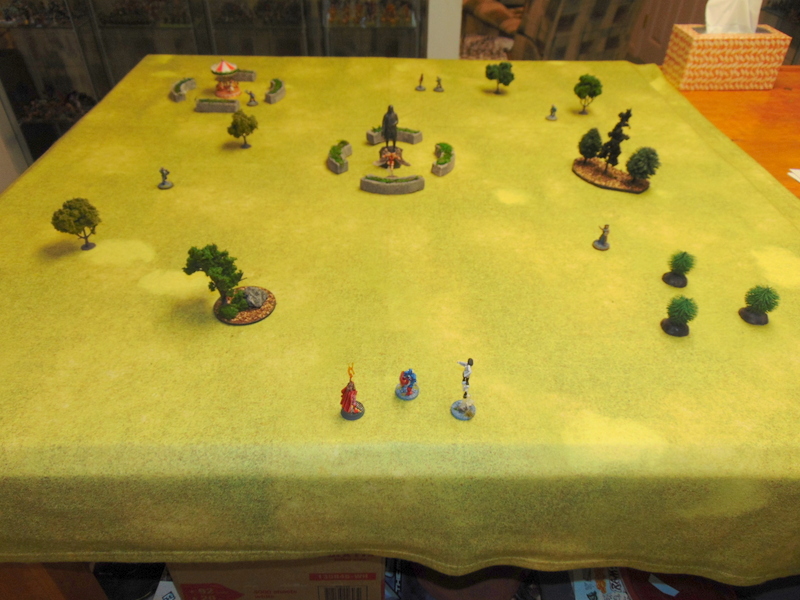
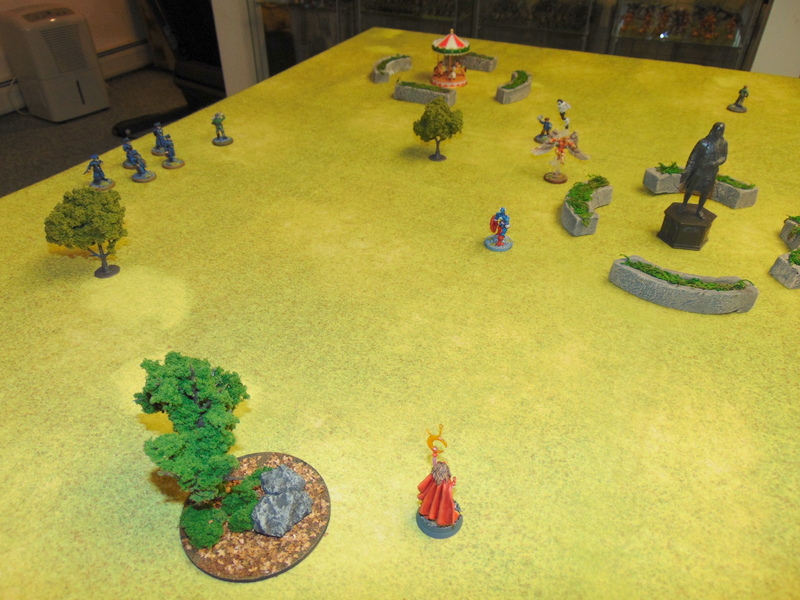
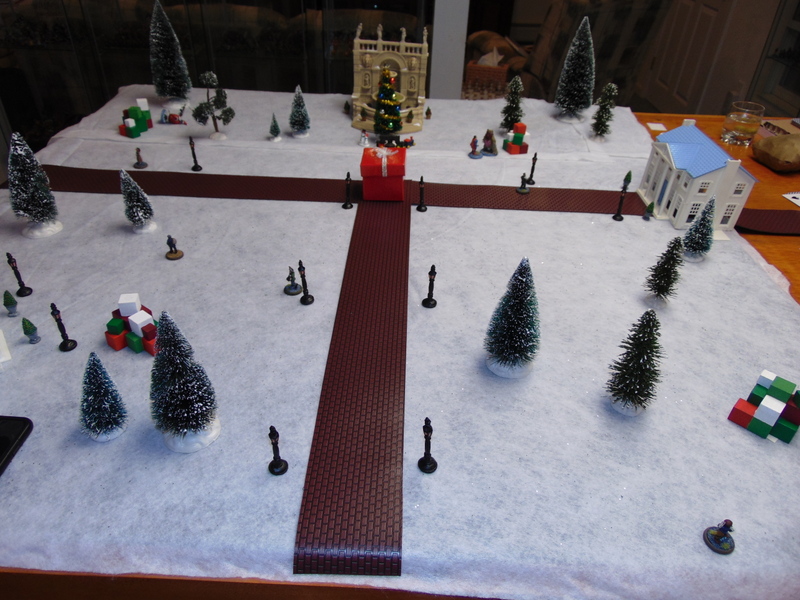
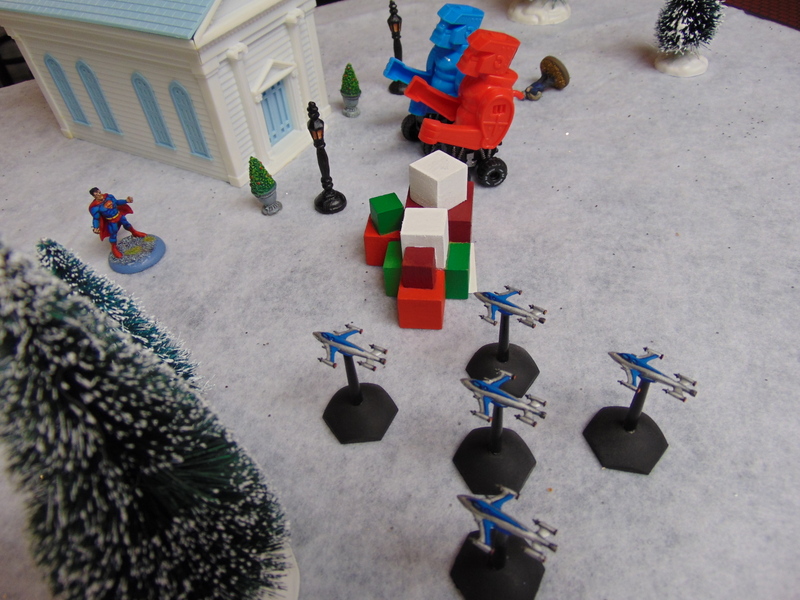
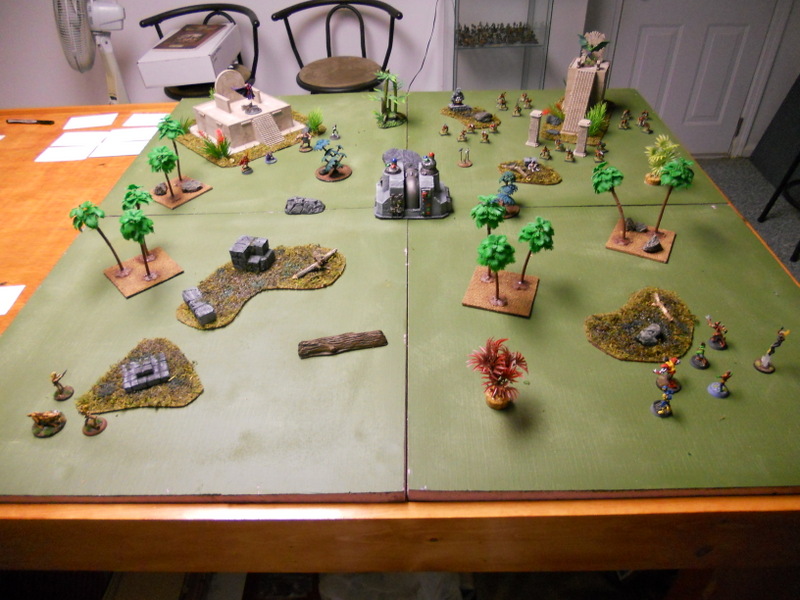
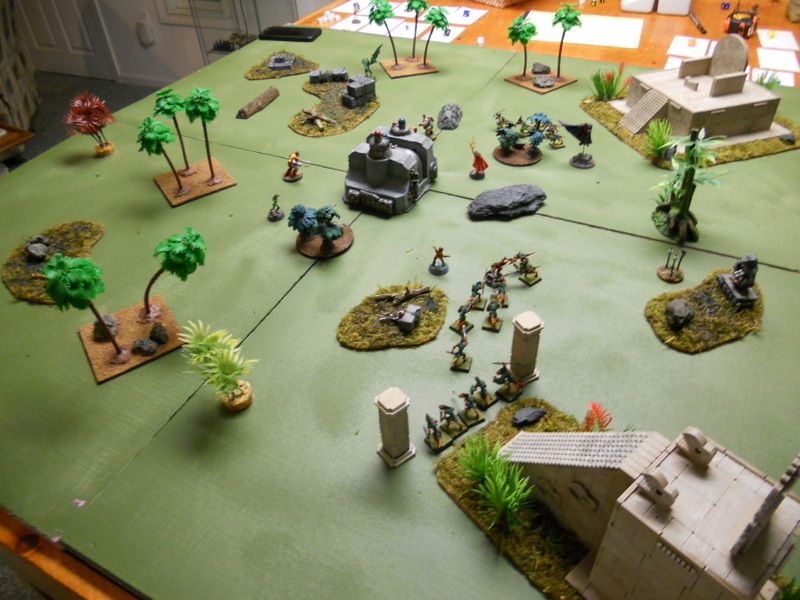
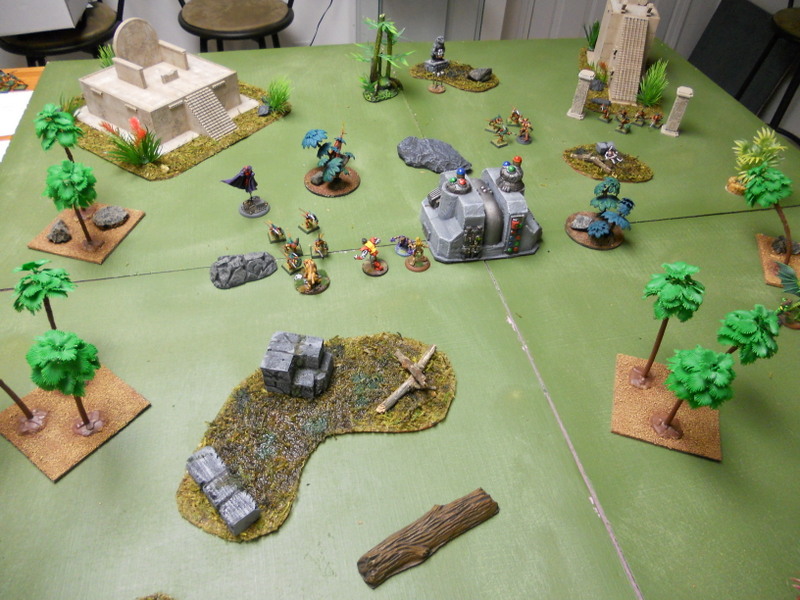
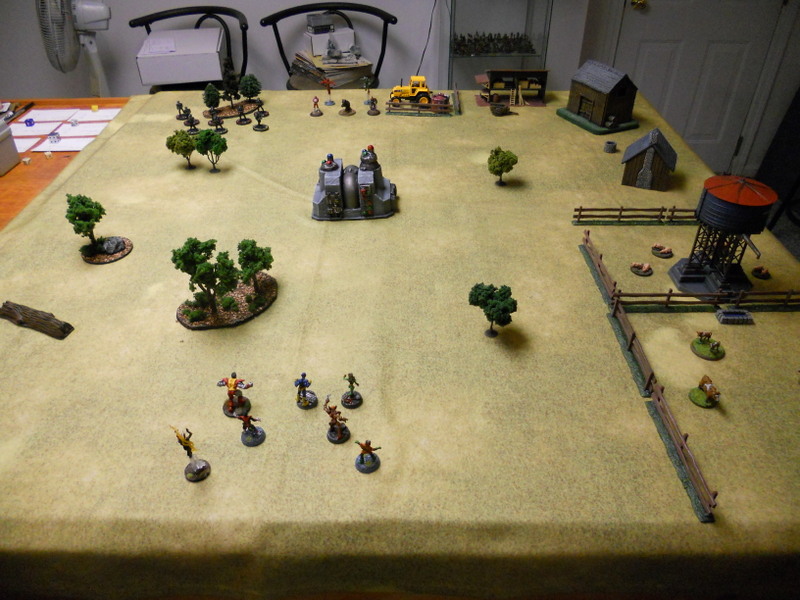
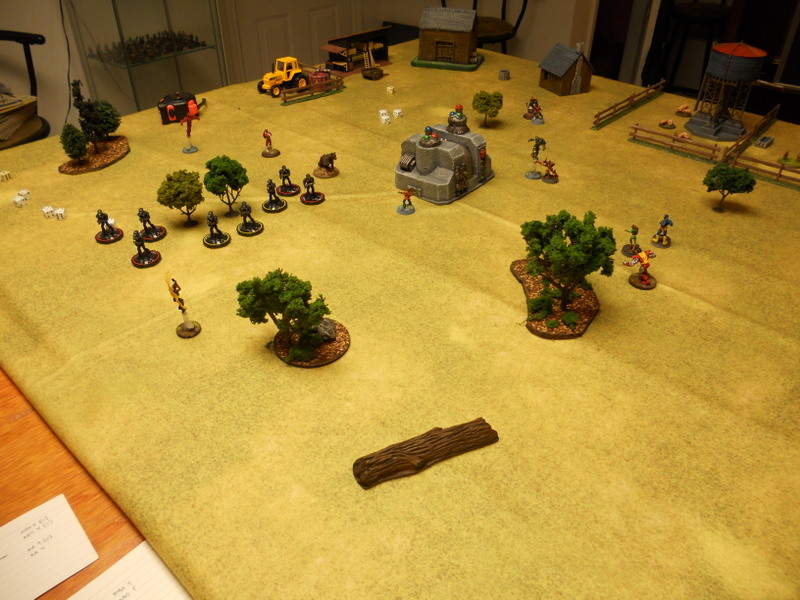
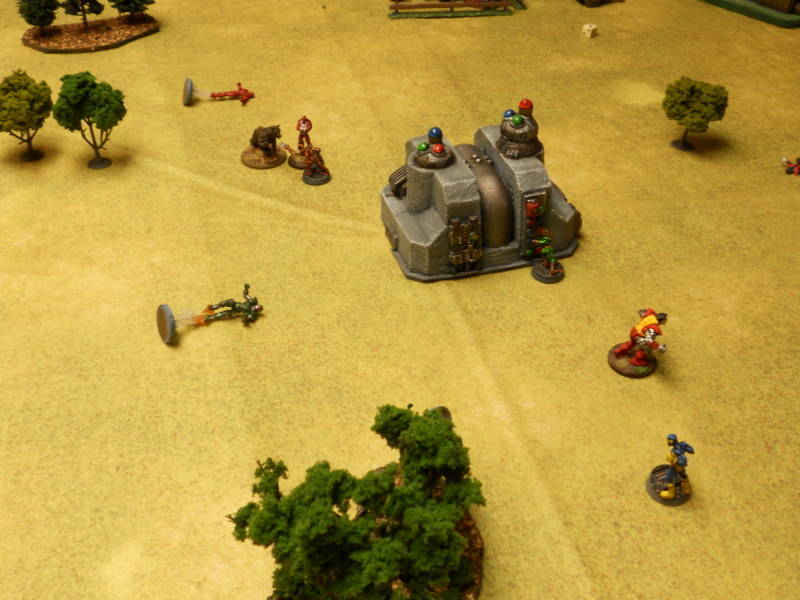
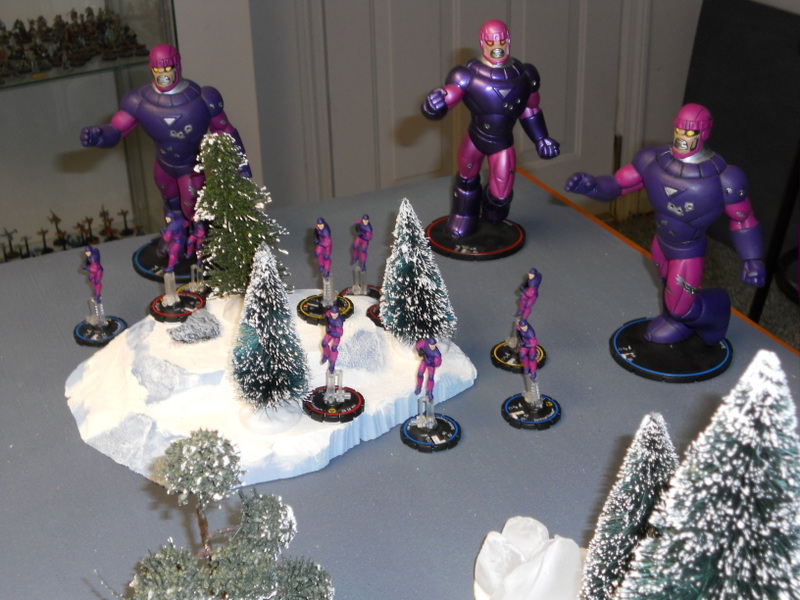
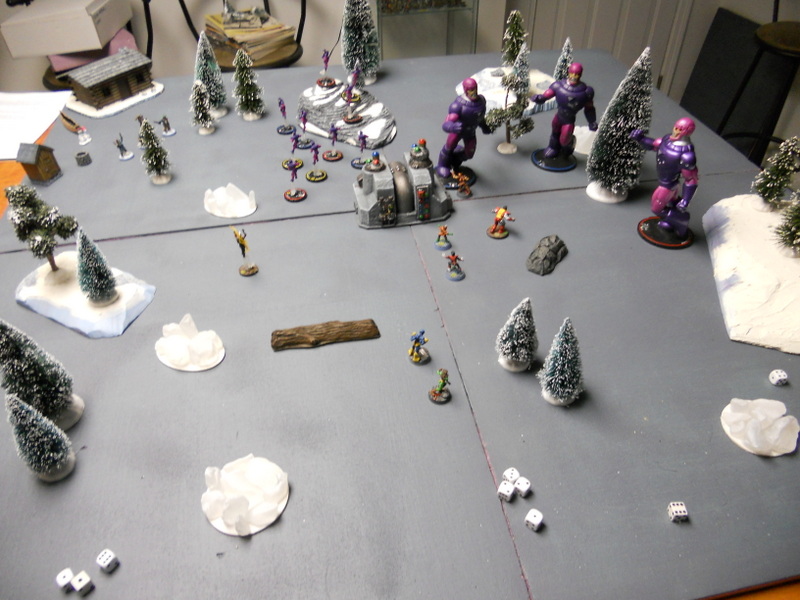
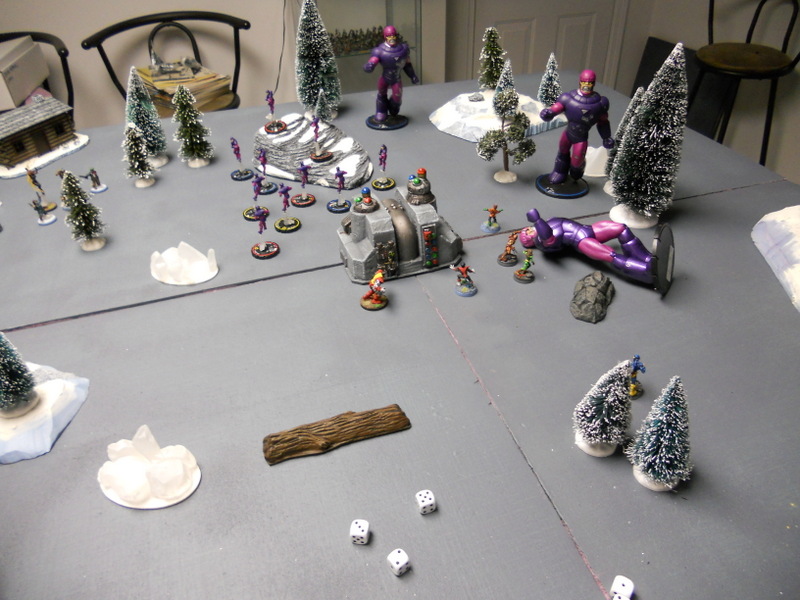
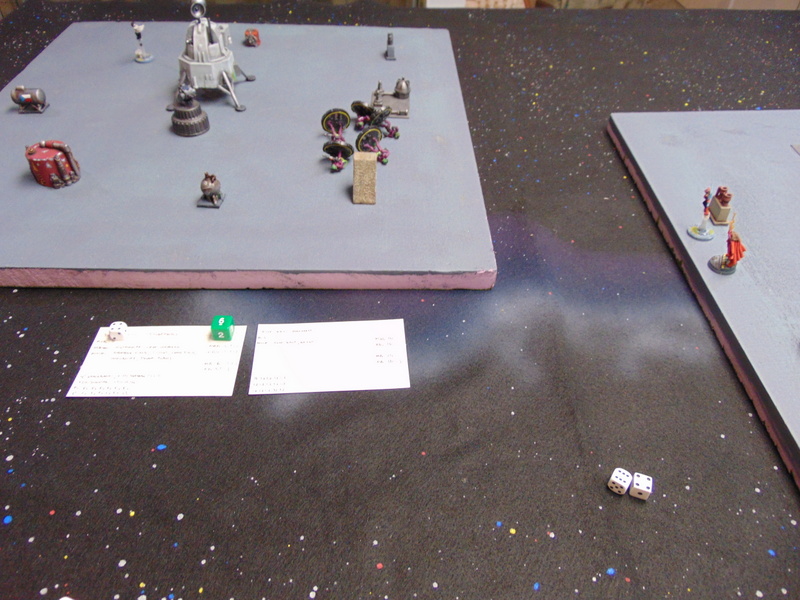
I used two 2′ x 2′ boards, representing the tops of two skyscrapers in Midtown Manhattan. At their closest point, the rooftops are 8″ away from each other. Both rooftops contain scatter terrain, such as ventilation ducts, elevator motors, water tanks, AC units, etc. One of the rooftops contains a strange-looking spacecraft.

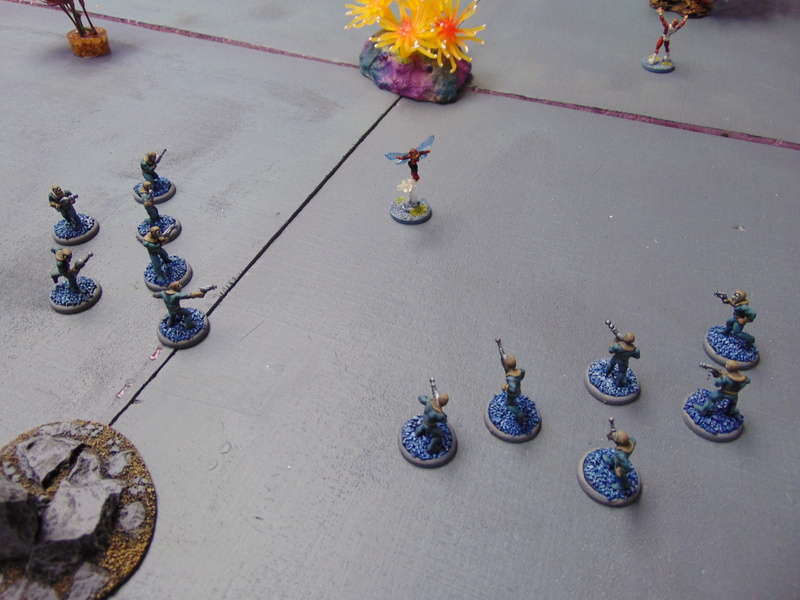
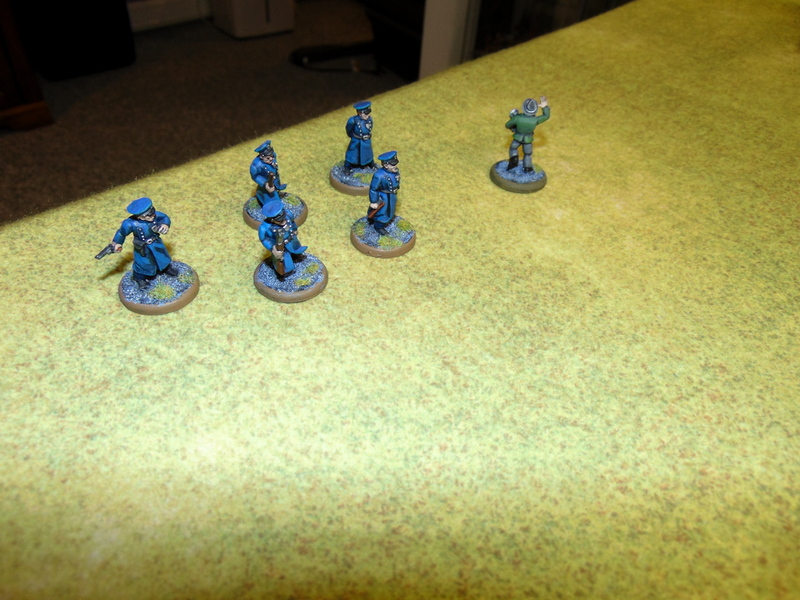
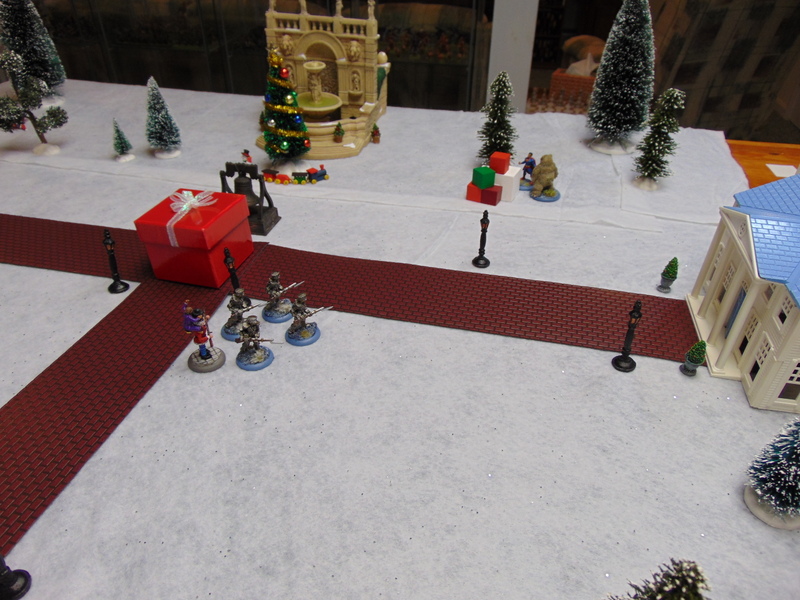
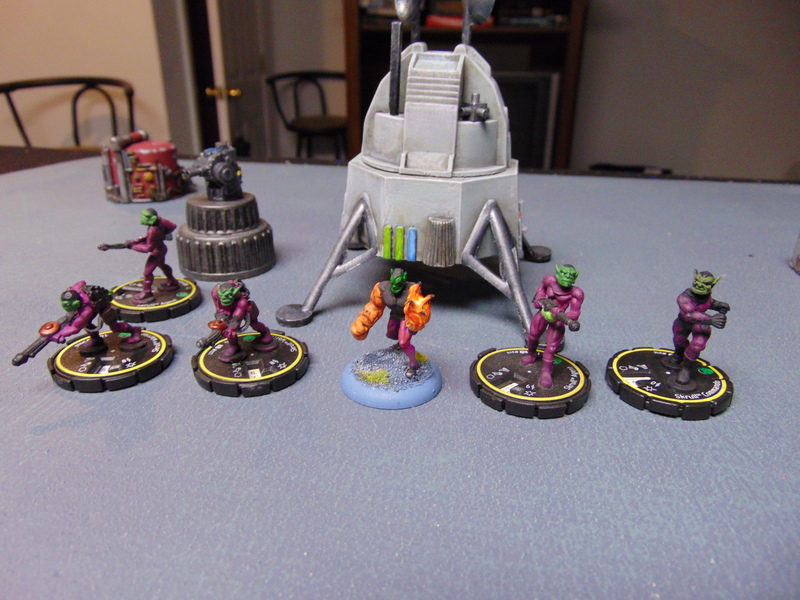
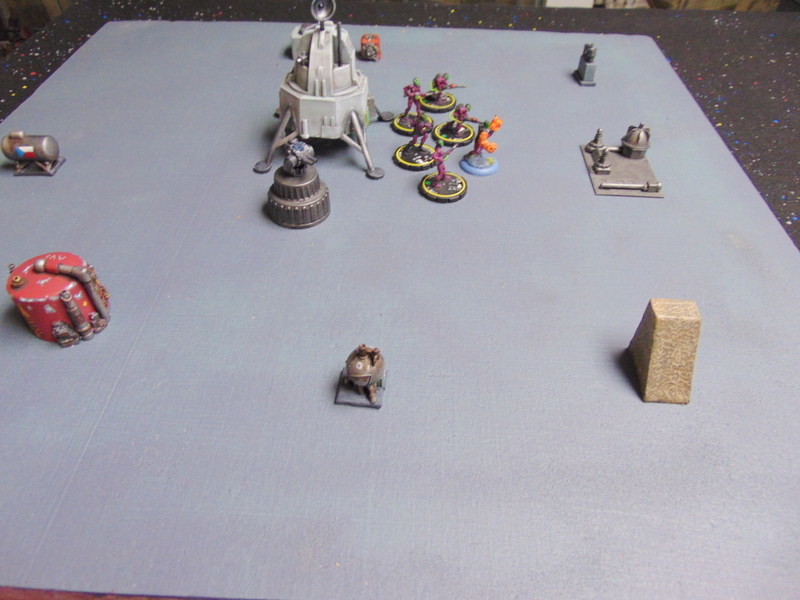
The Avengers deploy on the roof without the spacecraft. Blastaar and two groups of elite Skrull henchmen deploy on the same roof, surrounding the Avengers. The Super-Skrull and the last group of elite Skrull henchmen deploy on the opposite roof, close to the spacecraft.

Special Rules

Moving Between Buildings: With the exception of Scarlet Witch, all the heroes have no problem moving between the two buildings. Starfox, Vision, Wasp and Captain Marvel can all fly, and Captain America’s Super-Agility makes an 8″ leap child’s play. Unfortunately for the Scarlet Witch, if she wants to move from building to building she’ll have to hitch a ride with Starfox, Vision or a non-shrunken Wasp. Captain Marvel can only fly while intangible, so she can’t carry a passenger, and Captain America’s Super-Agility doesn’t allow him to carry passengers, either. On the villains’ side, Blastaar and Super-Skrull can also easily fly (or stretch) between buildings, but the Skrull henchmen groups are stuck on whatever building they deployed on at the start of the game.

Attacking Between Buildings: Both buildings are roughly the same height, so models can make ranged attacks at one another from building to building. The Super-Skrull can also attack between buildings in melee if he uses his Metamorph power to stretch and increase his reach.

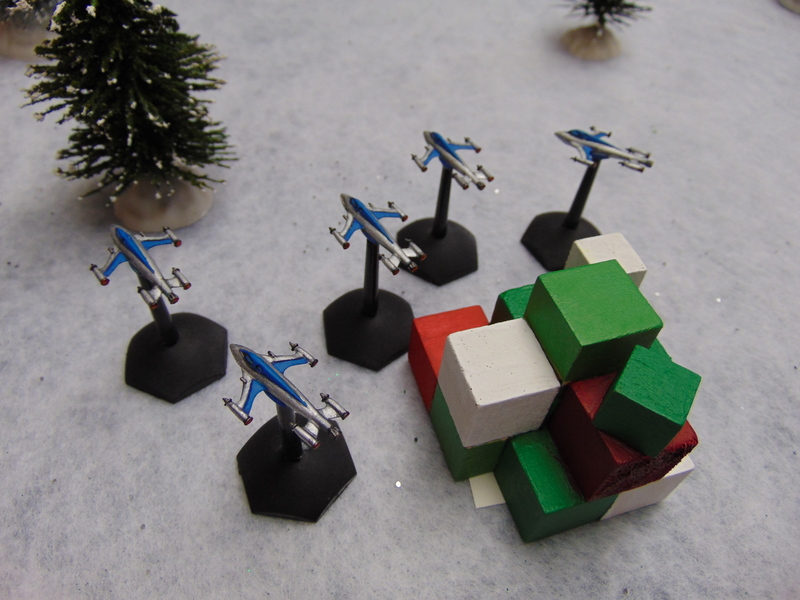
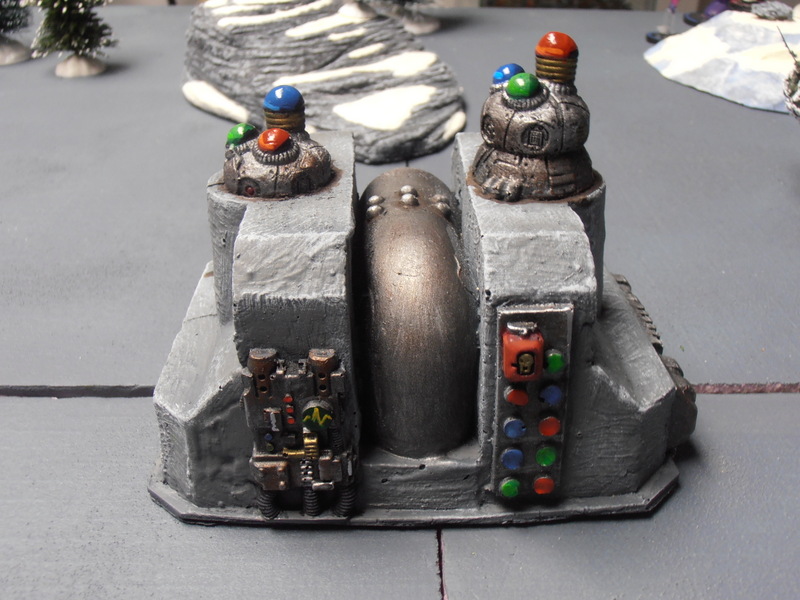
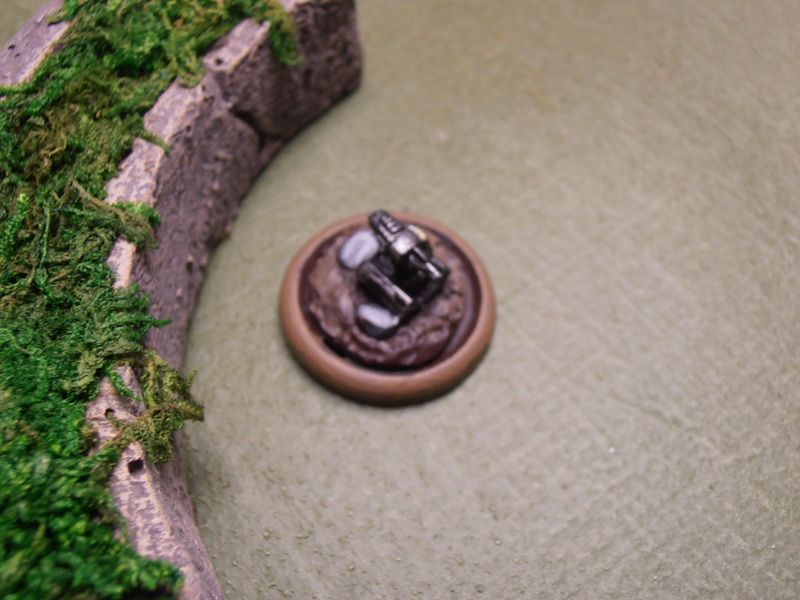
The Spacecraft: The spacecraft functions as a constant source of cosmic energy. It has a directional antenna that constantly beams cosmic energy to the Super-Skrull, making him stronger than normal. In game terms, this gives the Super Skrull the Regeneration power in addition to his already considerable power list. Destroying the spacecraft should be a high priority for the heroes; unfortunately it’s not easy. The spacecraft is enveloped by a standard force field (4D) and is made of steel (or the Skrull equivalent), which is TN5 and Body 4. It’s also surrounded by an elite group of Skrull henchmen, and is protected by a blaster turret (see below).

If the spacecraft is successfully destroyed, the Super-Skrull immediately loses the Regeneration power and takes a 6D attack as the beam is disrupted. He resists this normally, but his Force Field cannot protect him against this attack.

The Blaster Turret: The Skrulls have set up a sentry gun to protect the spacecraft. At the start of each round, it opens fire on the closest model that is not a Skrull. Note that this could be Blastaar! The Skrulls haven’t had time to configure it to ignore Blastaar yet. It can be targeted and destroyed (TN5 Body 4).

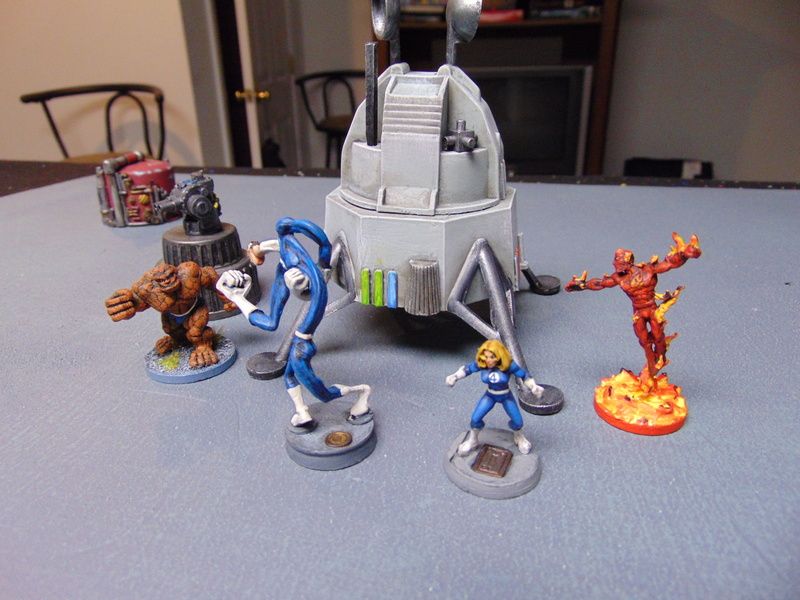
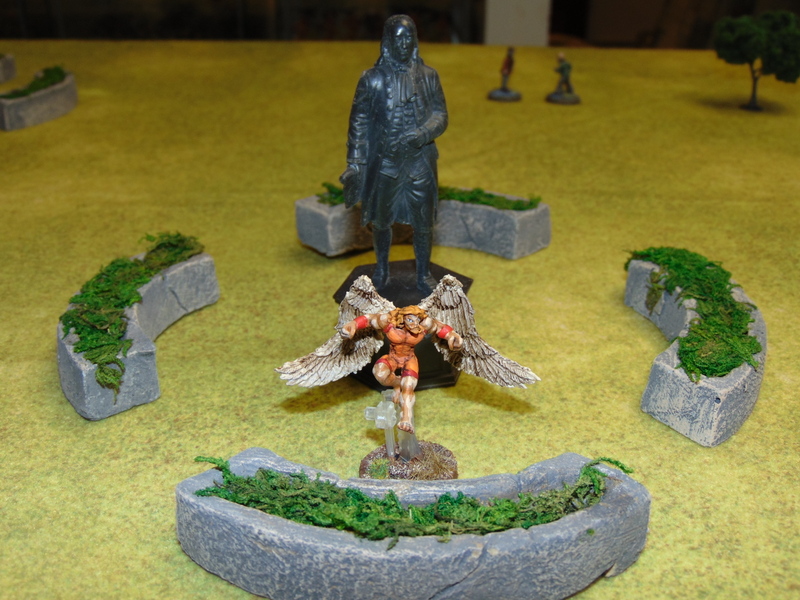
The mists of time part, and the Avengers find themselves on the roof of a tall building in Manhattan, just as Immortus said they would. On an adjacent rooftop they spy the Fantastic Four, gathered around a strange-looking device.

“Good. They’re here, and so is the ship,” says Wasp. “Let’s go tell the FF they have to stop their science project for now.”

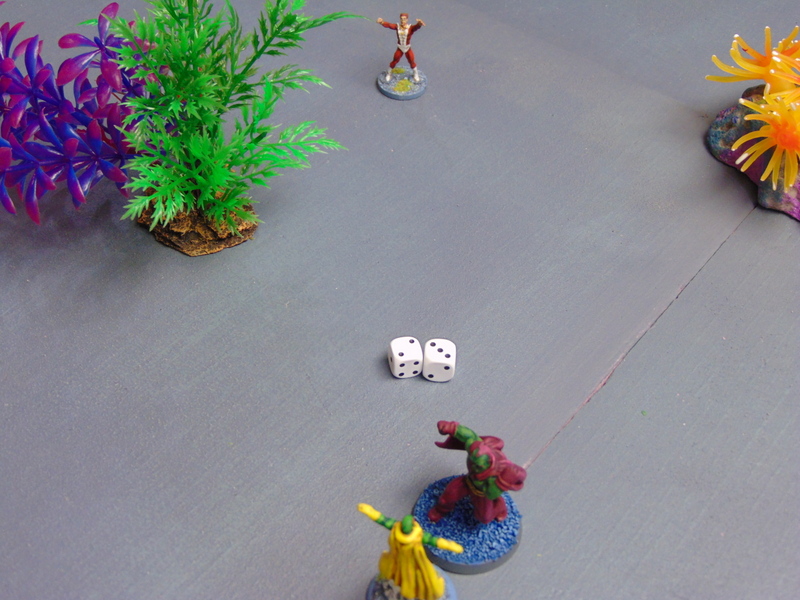
The Avengers walk towards the rooftop where the Fantastic Four are tinkering with the device. The Thing catches sight of them immediately and says something to the rest of the team, who turn to watch the Avengers approach.

“That ship…” says Starfox, trailing off. “It almost looks like—”

“Something’s wrong here,” says Captain America, as diabolical grins spread across the faces of the Fantastic Four.

Suddenly, the familiar forms of the FF waver and fade, only to be replaced by…

“Skrulls!” says Vision. “It’s a trap!”

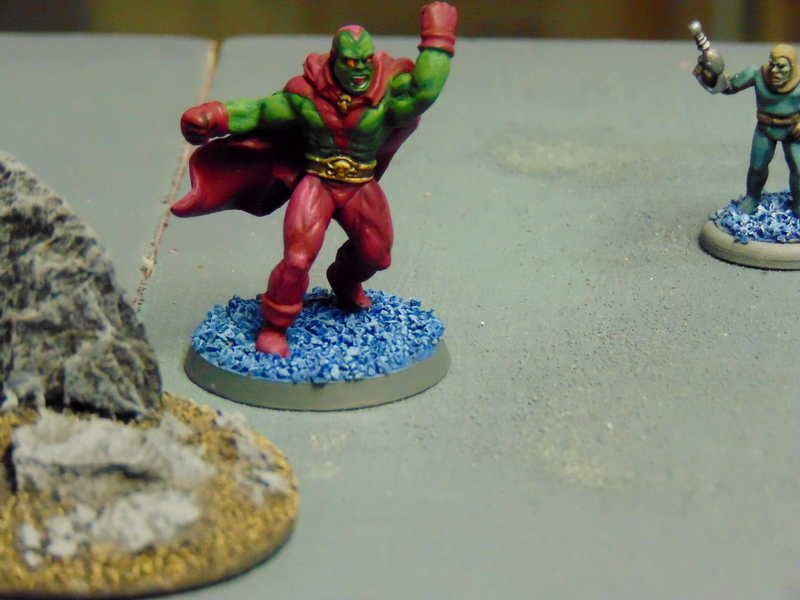
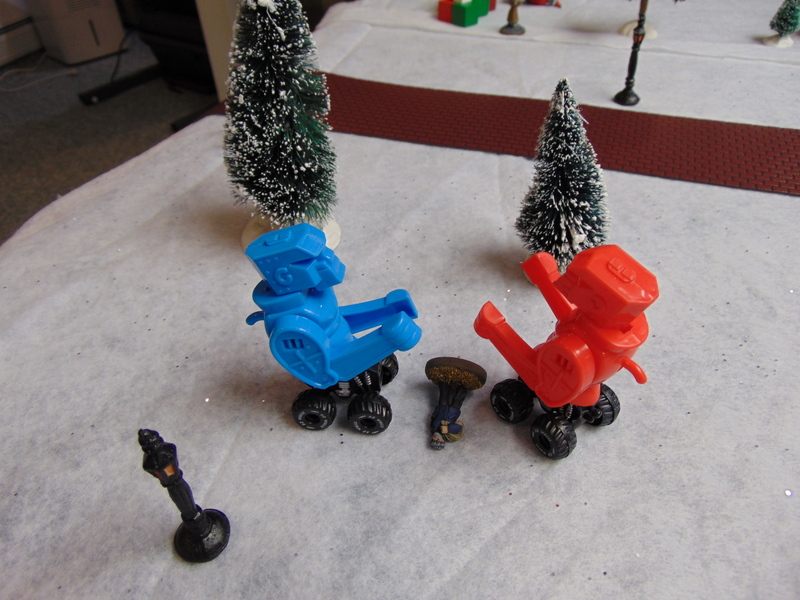
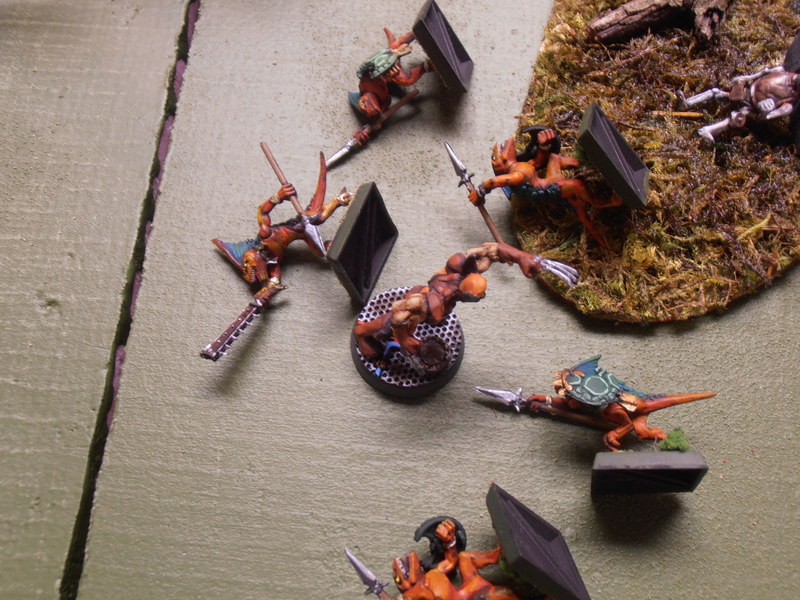
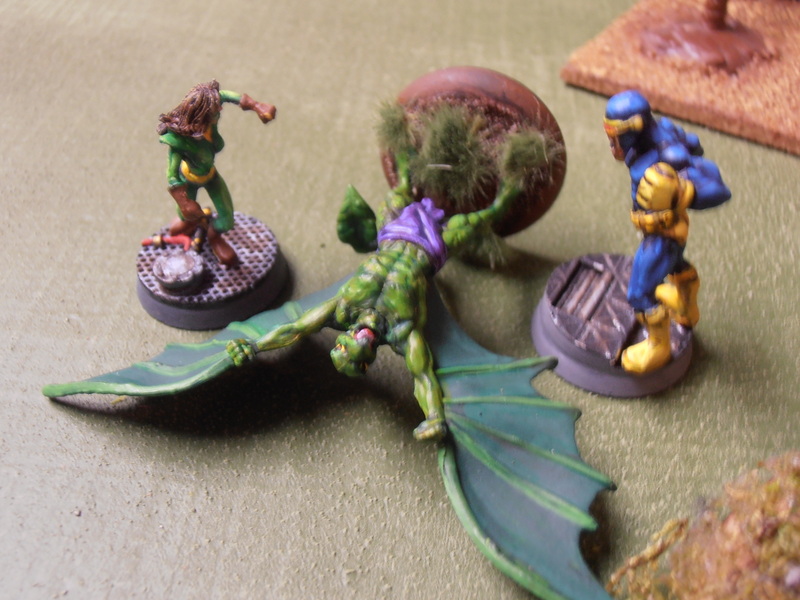
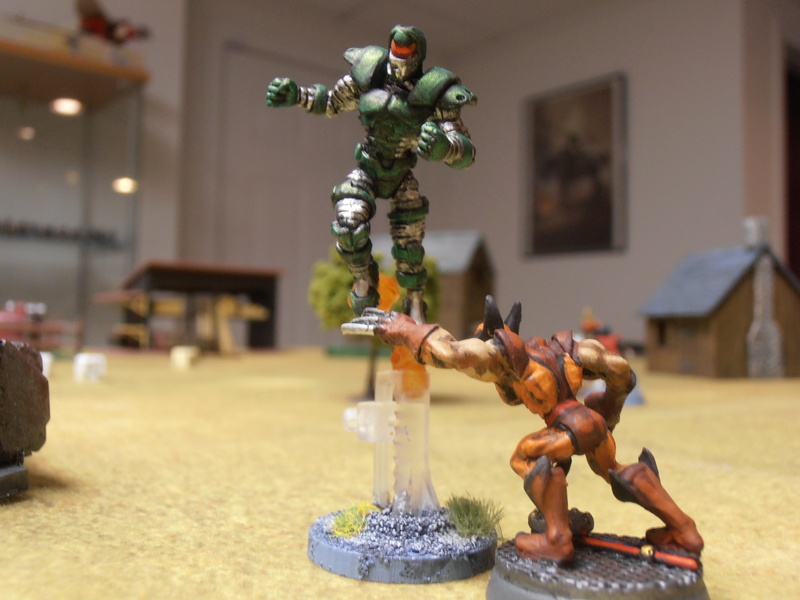
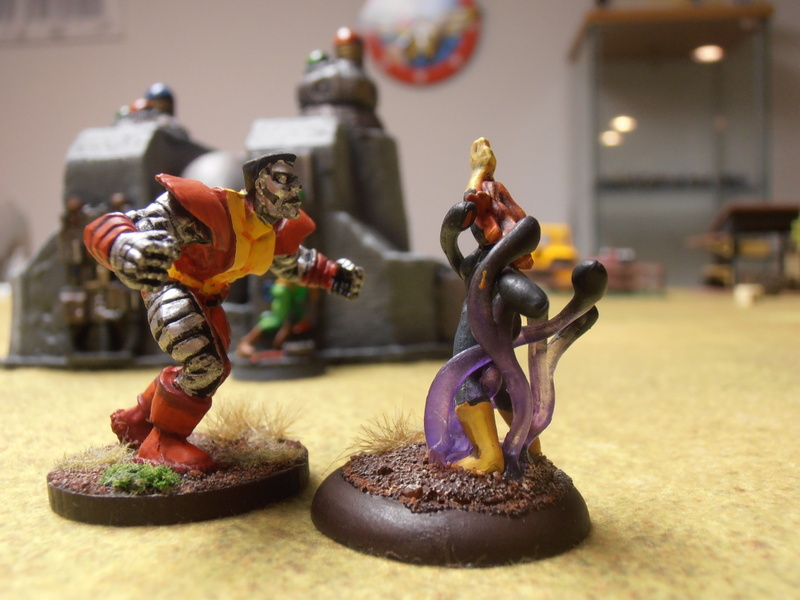
All around the Avengers, Skrull soldiers suddenly appear, until that moment hidden by the Invisibility powers of their leader, The Super-Skrull! A harsh, booming laugh comes from behind the group. They whirl, only to see Blastaar of Baluur, the Living Bomb-blast!

“Immortus set us up!” exclaims Captain Marvel. “It’s an ambush!”

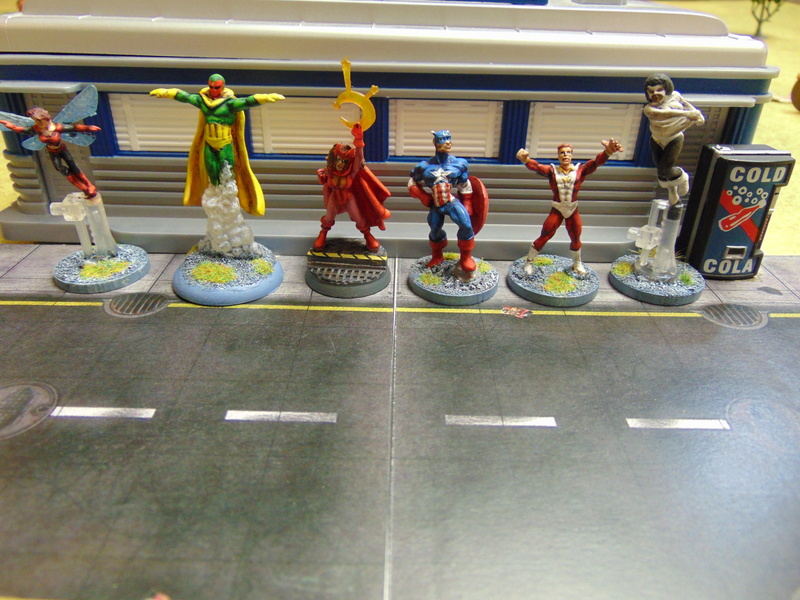
“Avengers, Assemble!” cries Captain America, unslinging his shield from his back. “Formation Alpha 2-3, on me! Let’s end this quickly, team!”

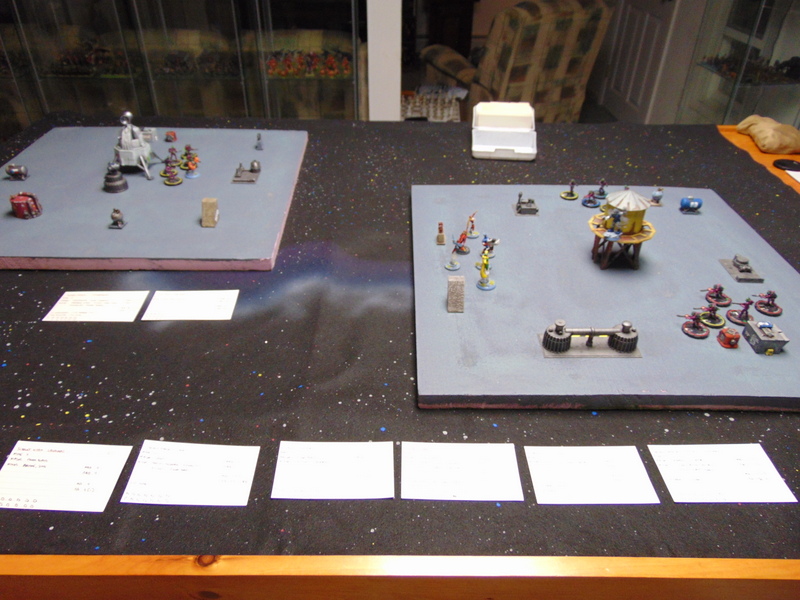
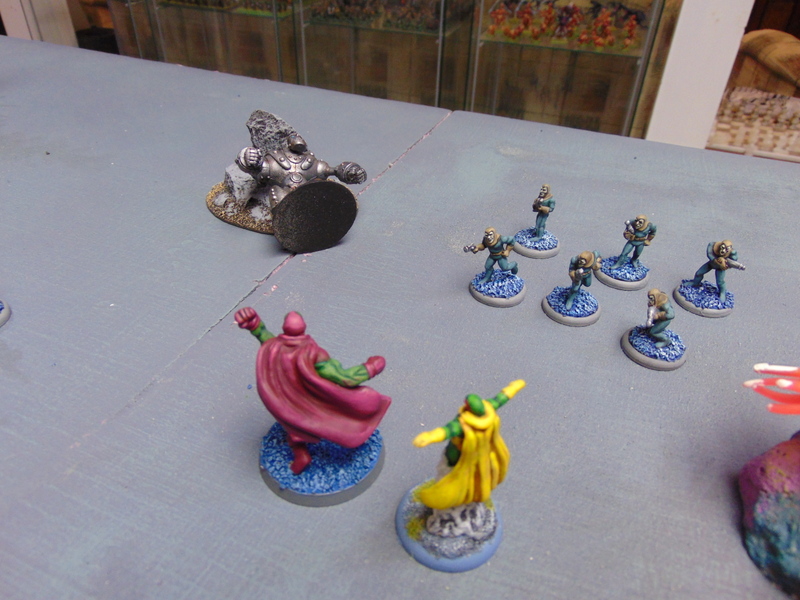
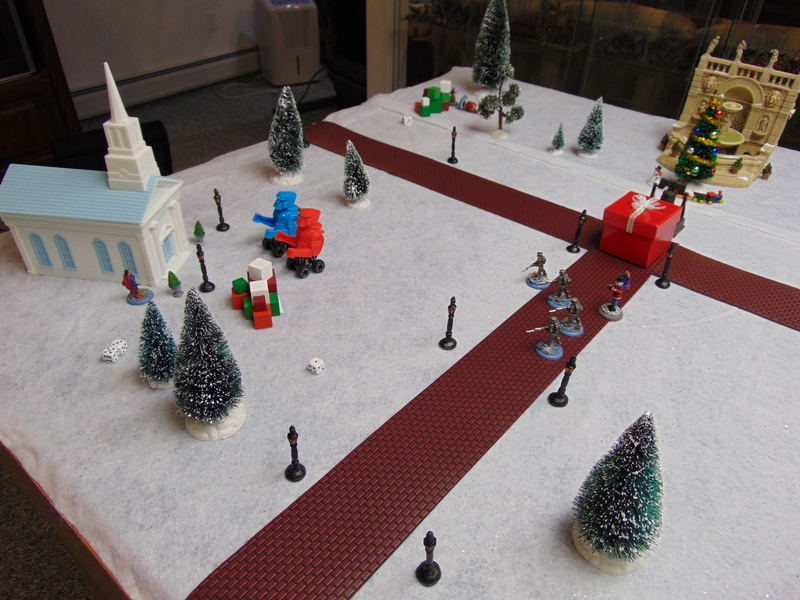
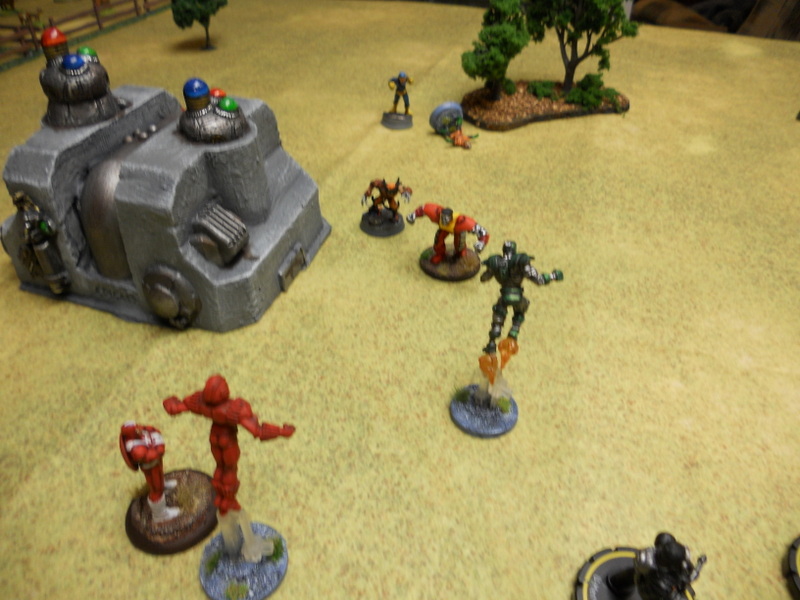
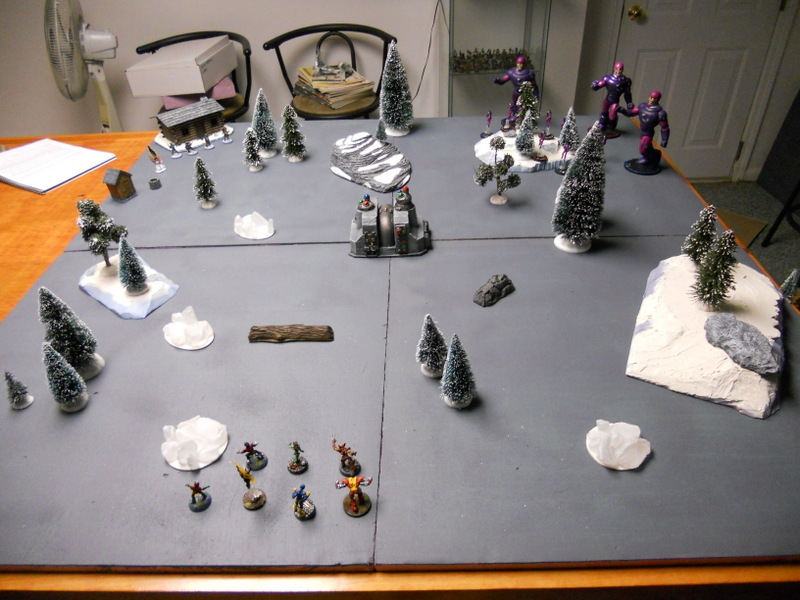
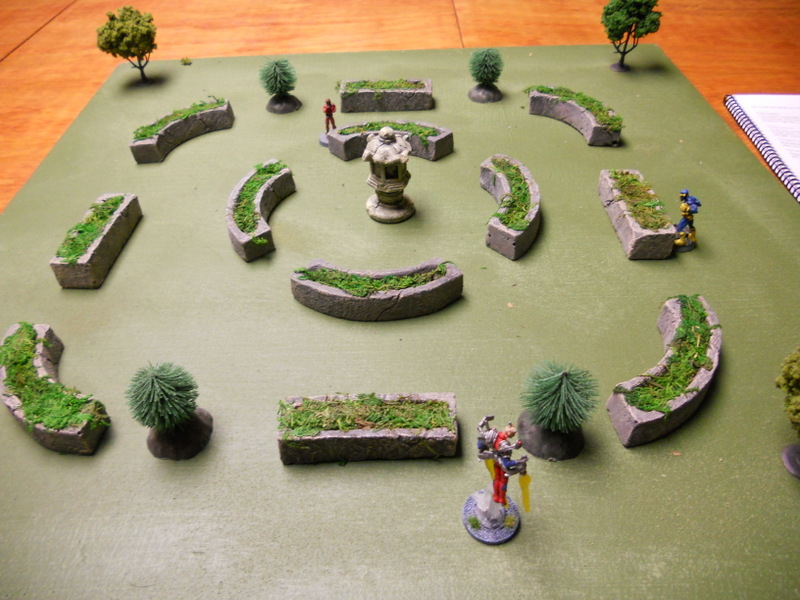
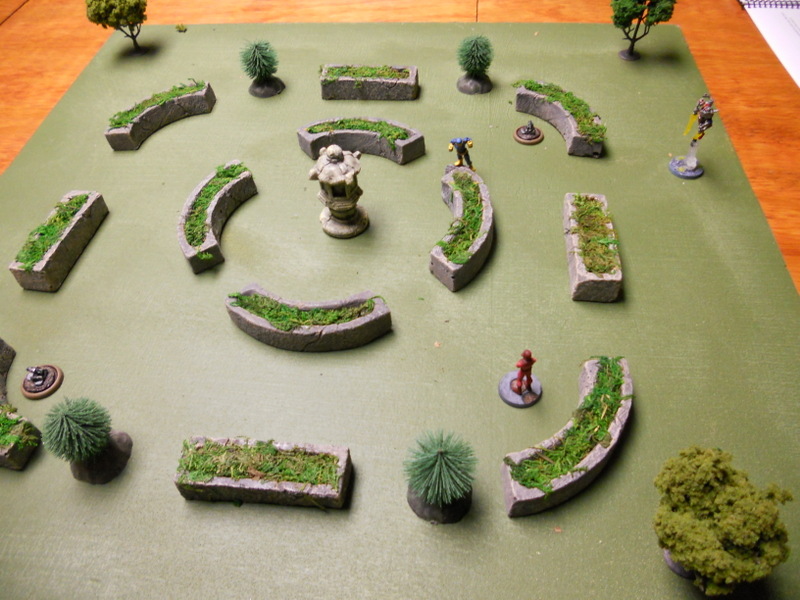
The start of the game. Board 1 on the left, Board 2 on the right.

Board 1 Deployment

Board 2 Deployment

ROUND 1

Before initiative is rolled, the blaster turret opens fire on the closest non-Skrull model: Wasp! This surprise attack hits her for 3 damage, half her Body! Ouch!

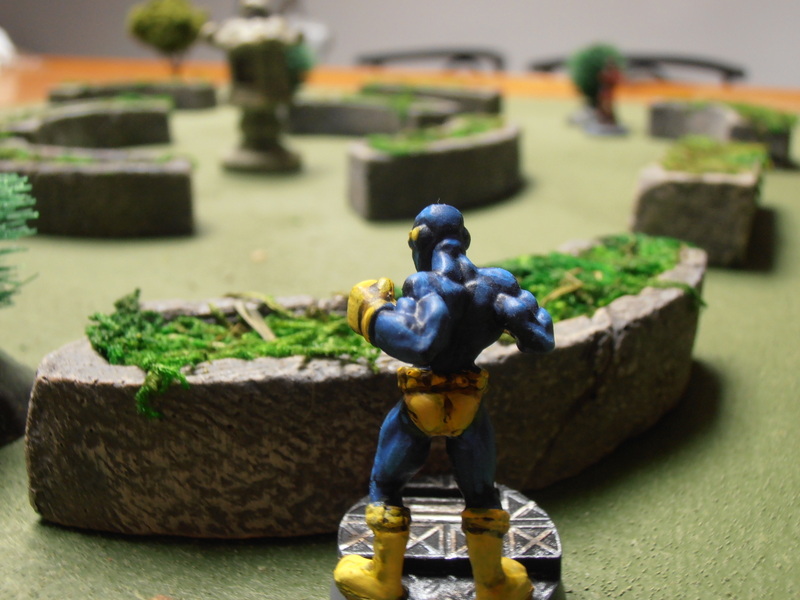
Also at the start of the round, the Super-Skrull has to pick what Metamorph form he will use for the round. I picked form #1, which gives him +6″ to Move, Melee Specialist, and +10″ reach. This pretty accurately represents his elasticity and he will stay this way throughout the whole game; I see no reason to change it.

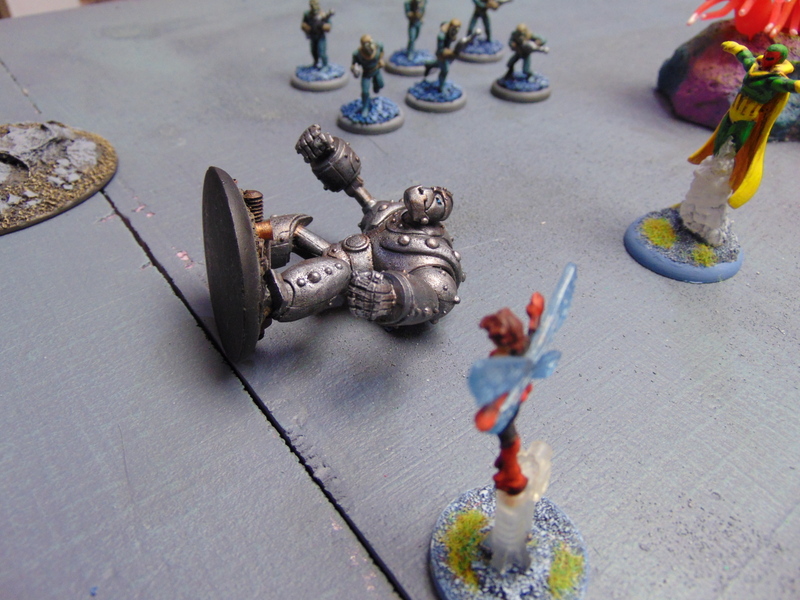
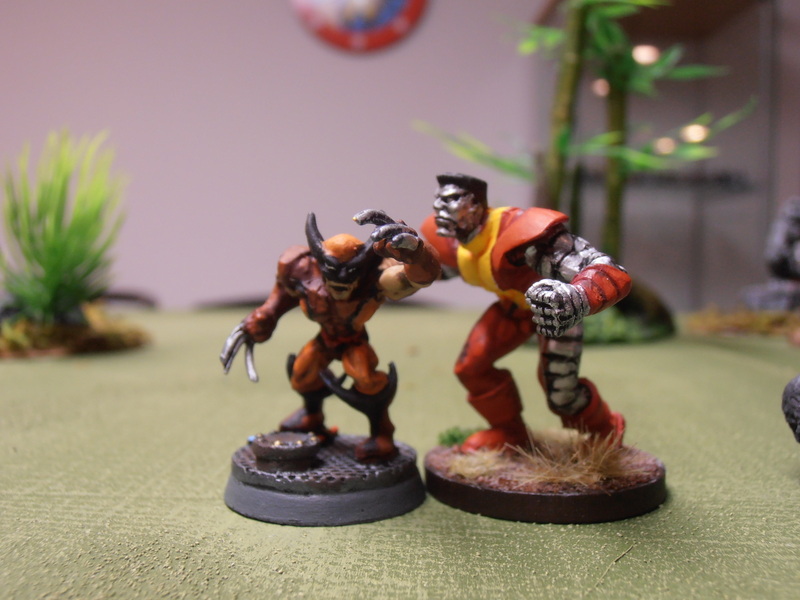
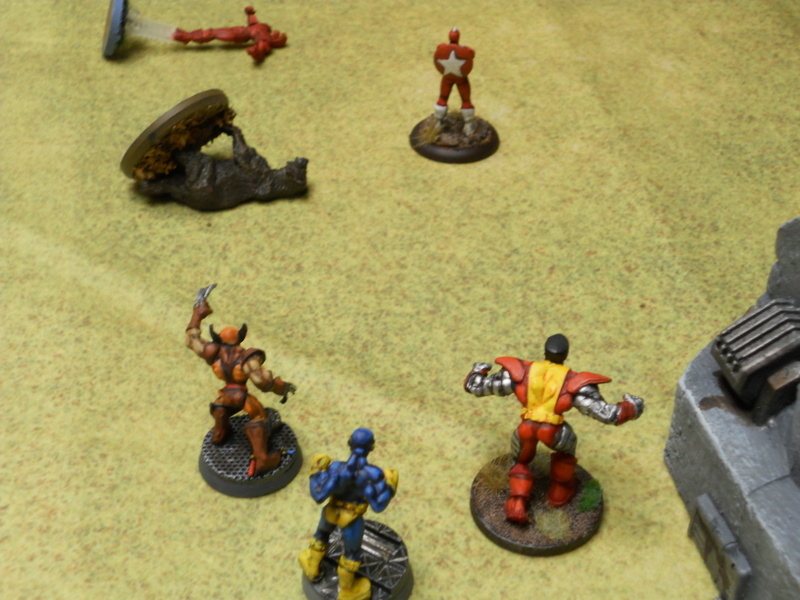
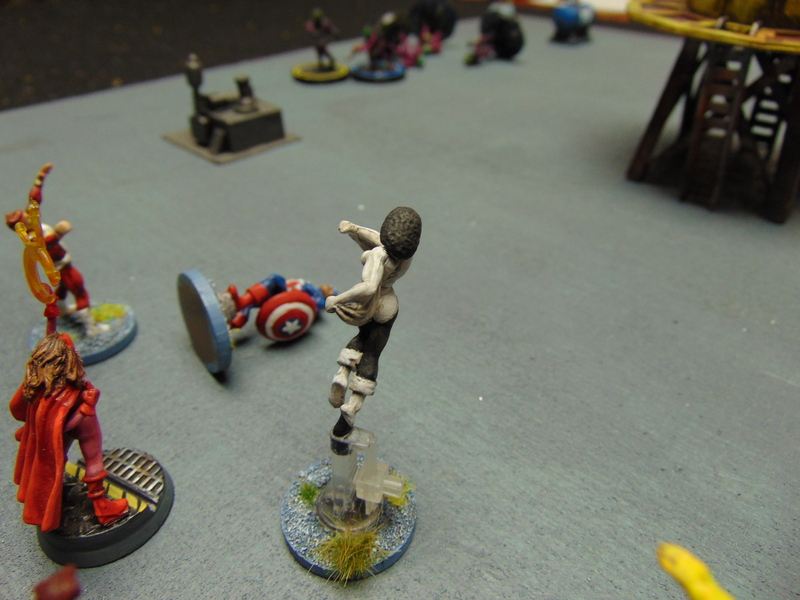
The Avengers gain initiative. Captain America wastes no time. He activates his Enhance power and says some inspiring words. He manages to give Scarlet Witch one re-roll she can bank until she needs it. Then he takes the fight straight to Blastaar by charging the warlord of Baluur! He leaps atop the water tower with an Acrobatic Attack (a Brawler special maneuver); when all is said and done, Blastaar takes 4 Body worth of damage and gets knocked off the tower! He manages to keep his footing, but he just lost 2/3 of his health! Blastaar only has 2 Body left!

In response, Blastaar does what he does best, he blasts Captain America with concussive kinetic energy, scoring 6 net goals worth of damage, dropping Cap’s Body from 7 to 1!! Blastaar uses the Blast Back maneuver (a Blaster maneuver), and knocks Captain America off the water tower and onto his star-spangled ass. Cap fails his knockdown check and is back to where he started the round. How embarrassing!

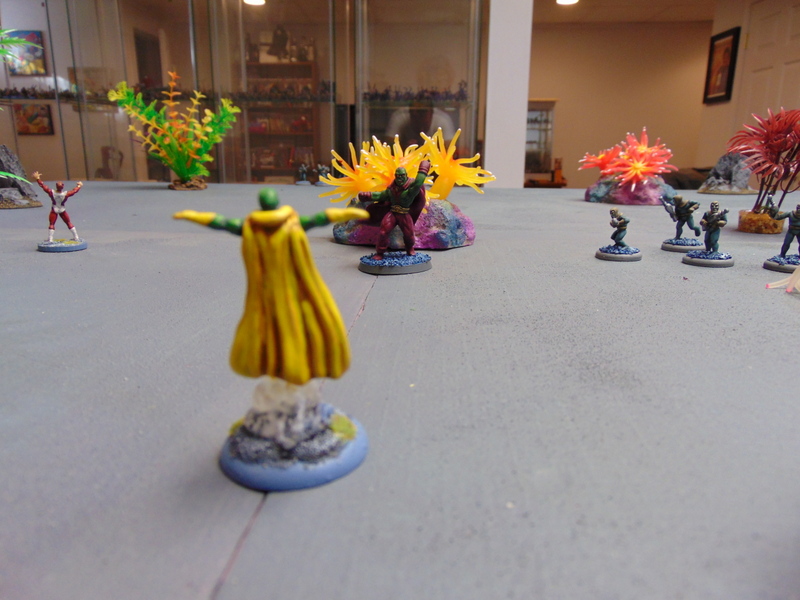
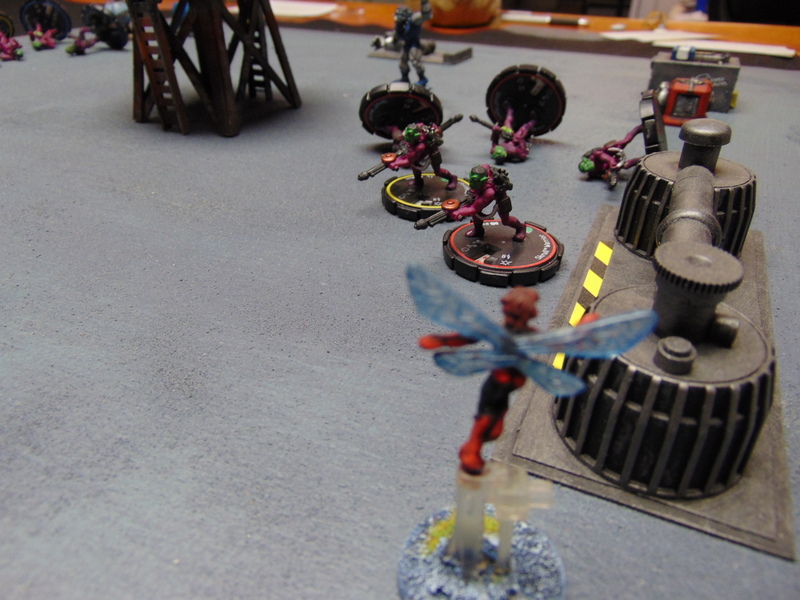
Captain Marvel activates her Density Decrease and Invisibility powers, then Power Blasts Skrull group #2, taking 3 of their number out of the action. Then she uses her Flight and Speed to head over to Board #1, close to that Skull spacecraft and the Blaster Turret.

Skrull group #3 moves up and concentrates their fire on Vision. He rolls poorly to resist and takes 5 Body worth of damage, dropping from 9 to 4!

Wasp activates her Shrinking power and flies towards Skrull group #3, Power Blasting them and taking out 3 of their soldiers in a mirror image of Captain Marvel’s attack! Both henchmen groups on board 2 are down to 2 members each! Wasp continues the rest of her movement, putting her closer to Blastaar.

Skrull group #2 opens fire on Captain America, managing to inflict 1 more Body worth of damage, dropping Cap to zero health and forcing him to make a KO check. He passes! Cap is still in the fight, but he has lost all his Body in the first round of the game!

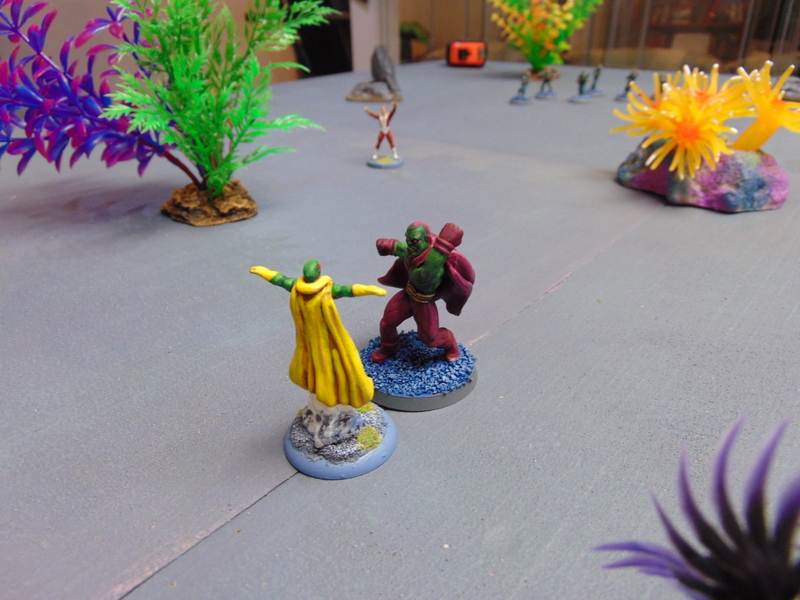
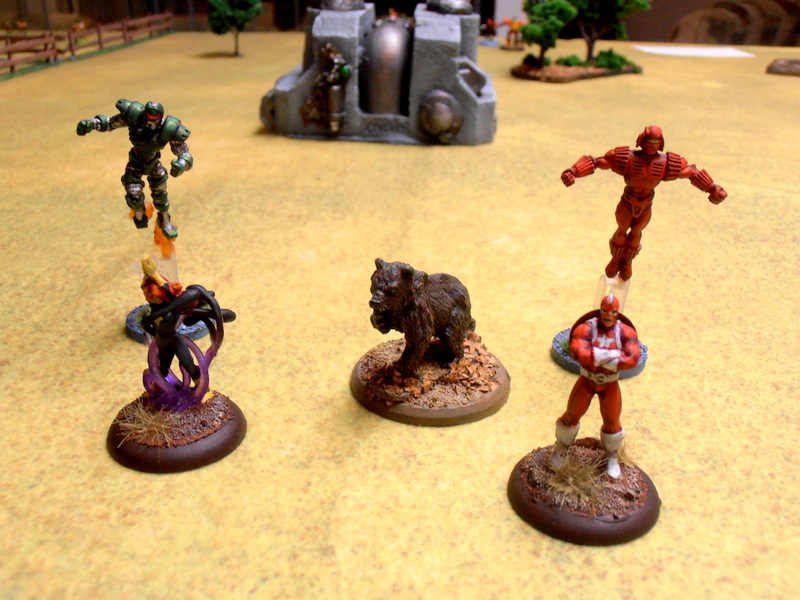
Vision charges into combat with Blastaar and delivers a Haymaker. He only scores 1 damage, but that knocks Blastaar back 3″ and he fails to remain on his feet.

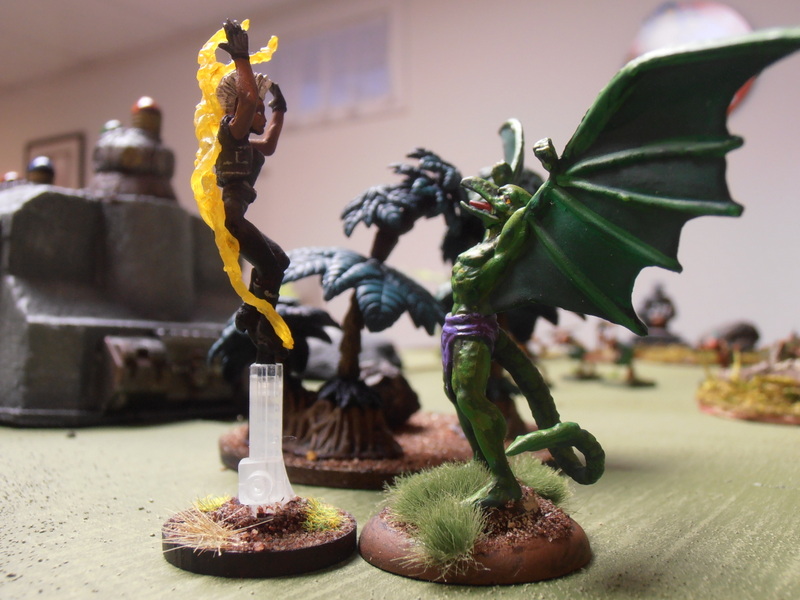
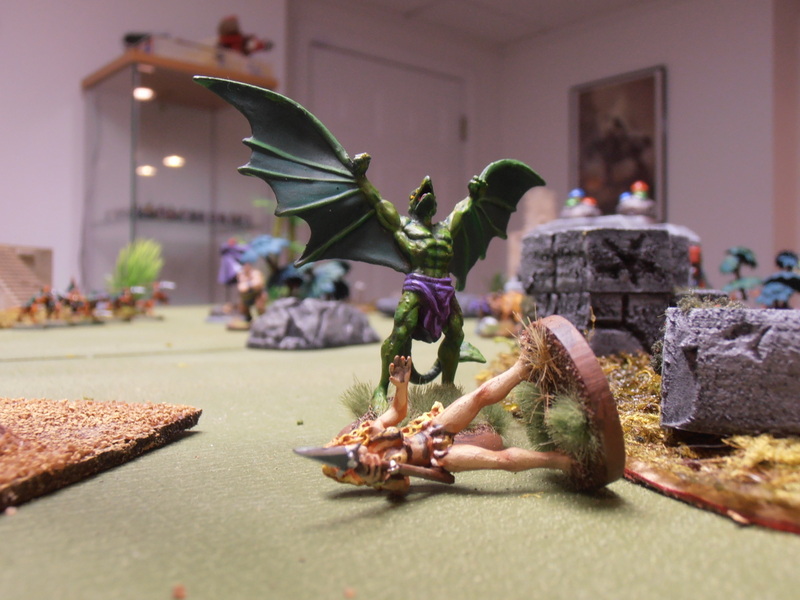
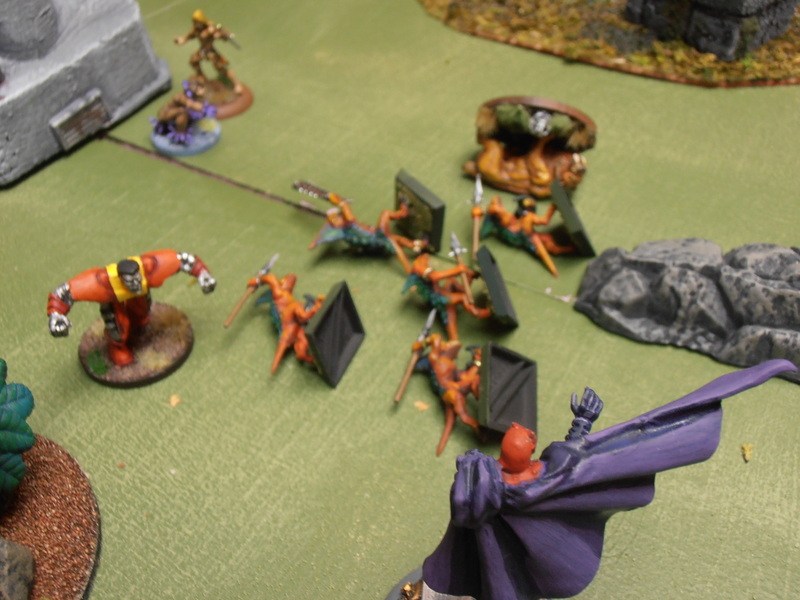
Meanwhile, over on Board #1, the Super Skrull makes good use of the Fantastic Four’s powers. He activates his Damage Field and Invisibility powers, then moves to the edge of the building. With his 10″ reach, he can just barely hit Starfox by stretching across the gap between buildings. Using a combination of the Human Torch’s flame, Mr. Fantastic’s elasticity (and the Melee Specialist ability from Metamorph form #1), the Thing’s strength and Sue Storm’s invisibility, the Super Skrull is rolling and re-rolling a shit-ton of dice on this one attack. He does 4 Body worth of damage on the unsuspecting Starfox, enough to knock him back 12″ into the water tower. Starfox fails his knockdown check and wonders what the hell just happened.

Starfox uses 2″ of his movement to stand up and look around, but he doesn’t see the invisible Super-Skrull. Instead he charges Skrull group #2 and vents his frustration on them, wiping out the remaining two members.

Skrull group #1 fail to spot Captain Marvel, so they move towards the edge of their roof. No one is within range of their attacks, however; so they just sneer at the Avengers on the other rooftop.

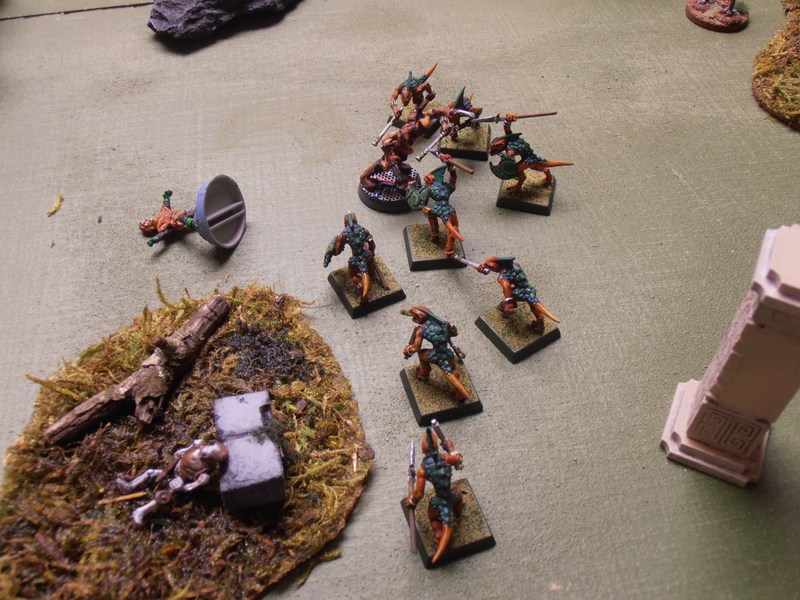
Scarlet Witch moves forward and Power Blasts Skrull group #3, taking out the remaining 2 Skrulls.

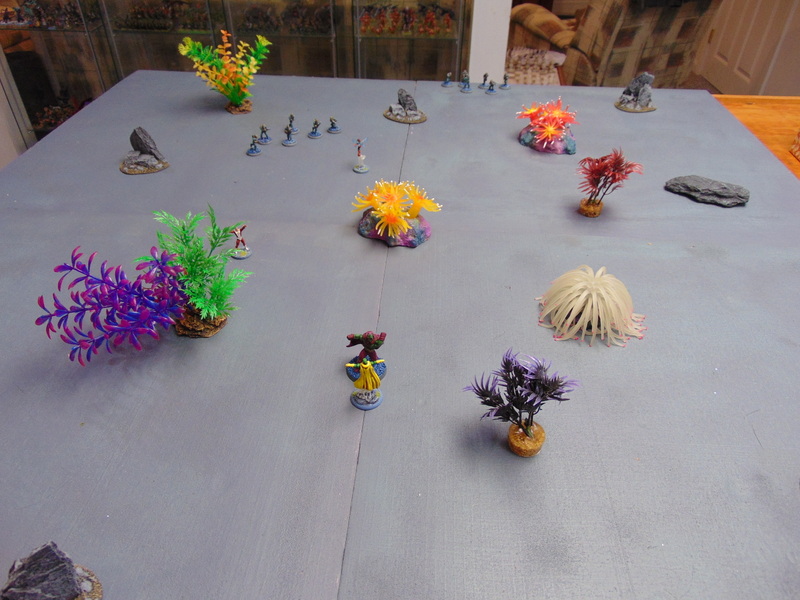
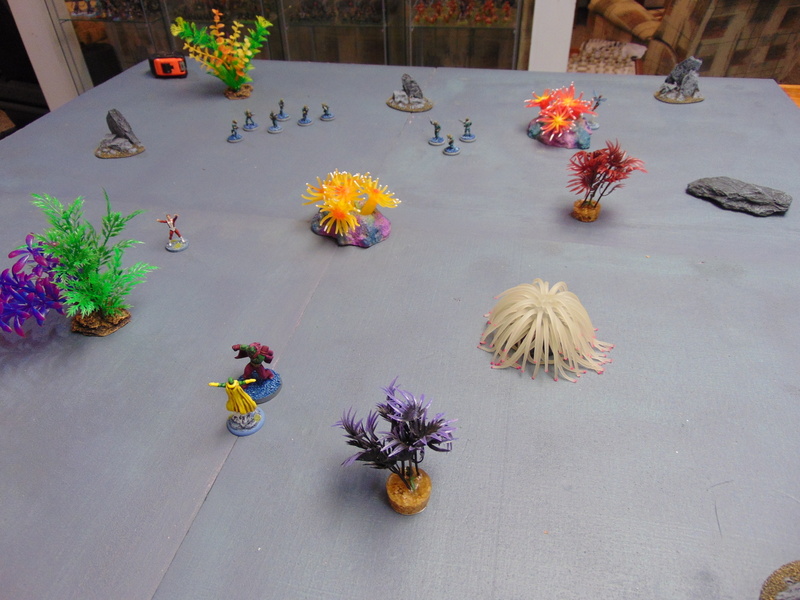
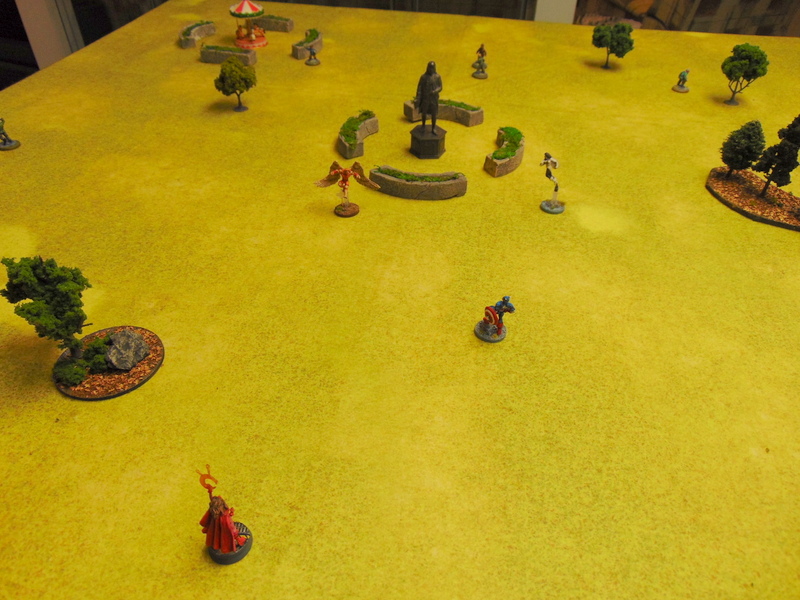
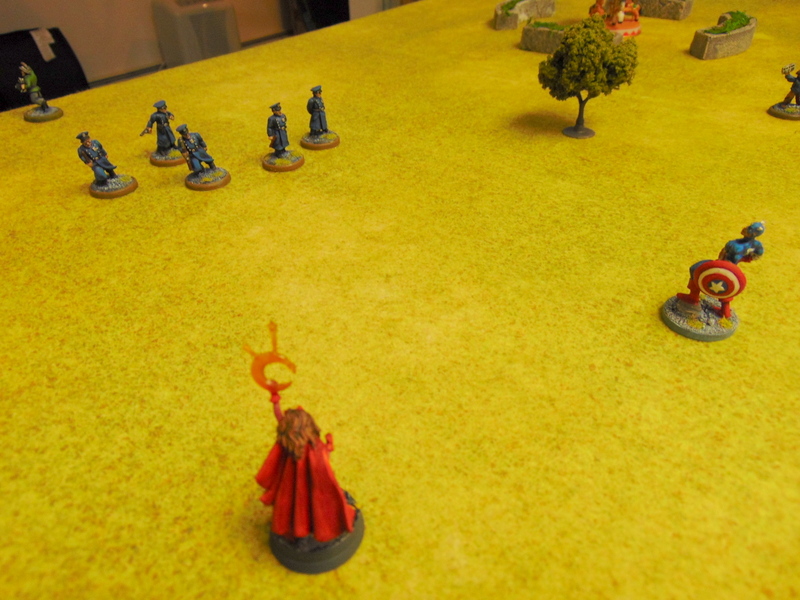
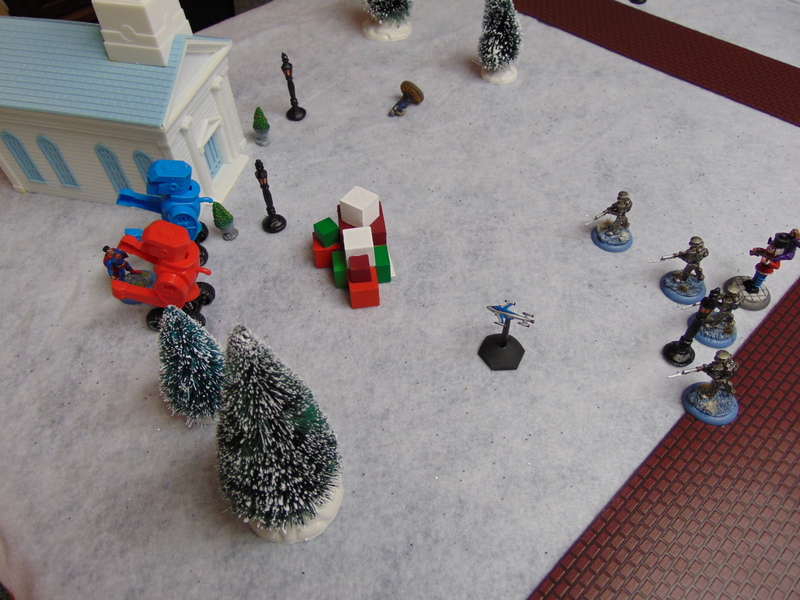
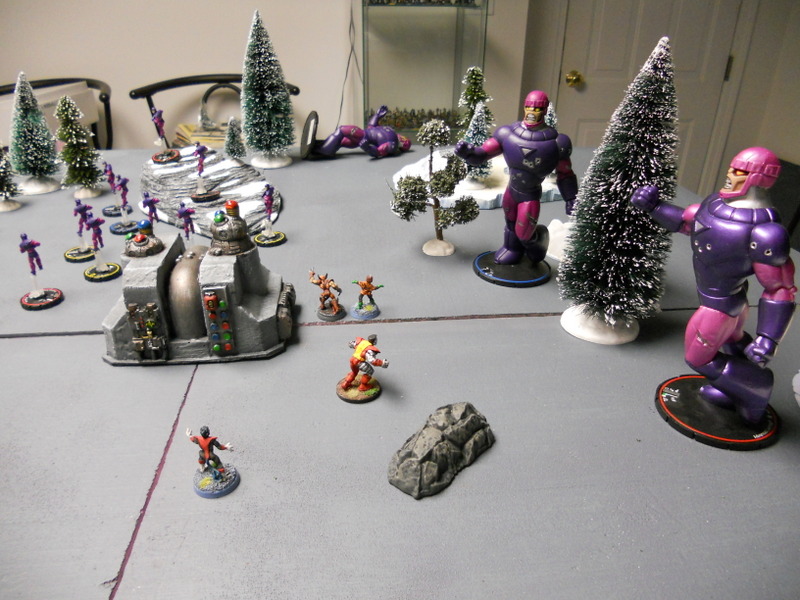
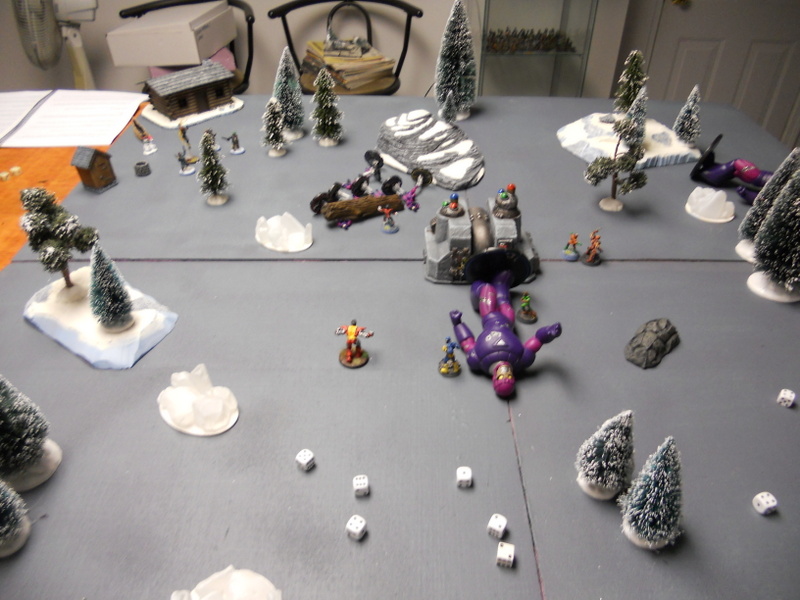
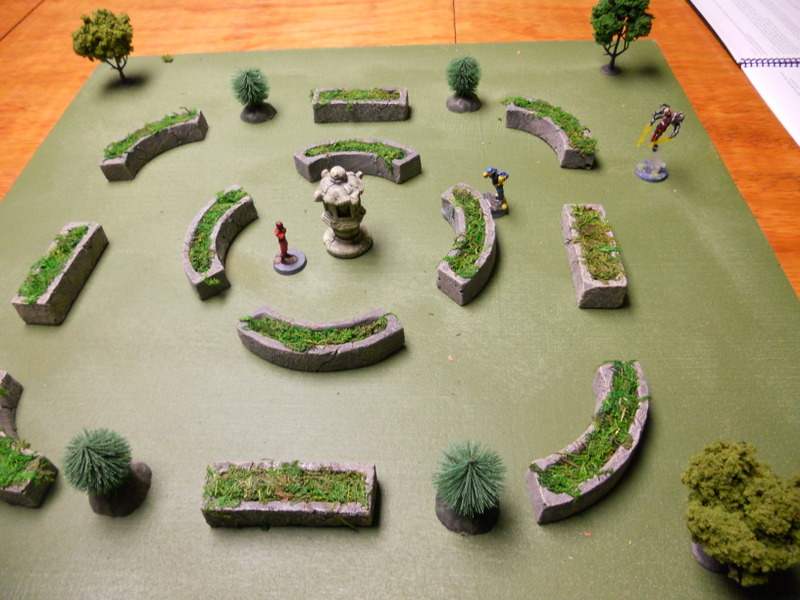
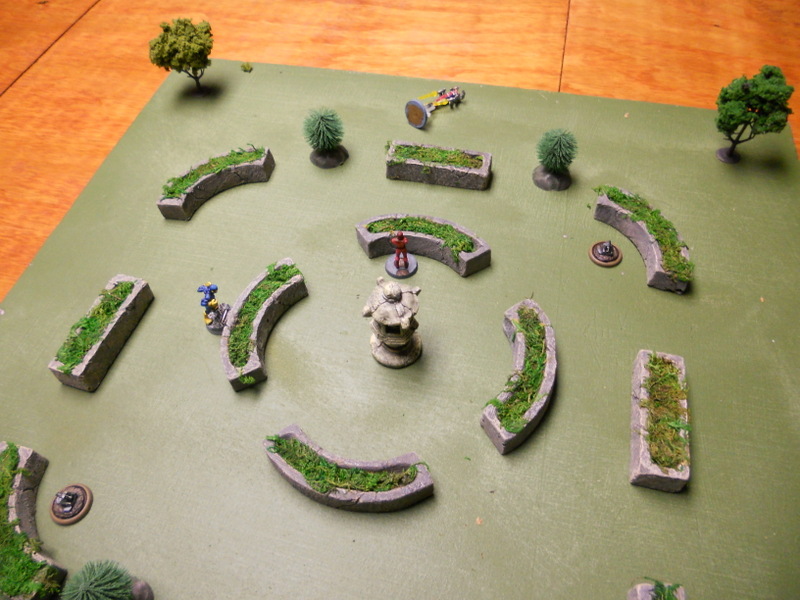
Board 1: End of Round 1.

Board 2: End of Round 1


HOLY SHIT! That brings Round 1 to a close: one of the bloodiest Rounds in Super Mission Force History, at least in my experience. In the span of about 10 minutes, the results are staggering: Captain America, at zero Body! Wasp at half Body! Vision and Starfox, both at less than half their starting Body! Skrull groups #2 and #3 wiped out! Blastaar at 1 Body! In the immortal words of Charlton Heston: “It’s a madhouse! A maaaaaadhouuuusse!!!!”

ROUND 2

Both Captain Marvel and Super-Skrull maintain their Invisibility.

The Blaster Turret can’t see Captain Marvel, so it fires at the next closest non-Skrull: Scarlet Witch. After an impressive shot, Scarlet Witch manages to only take 1 damage (she had Cap’s re-roll and her Fortune power to thank for that).

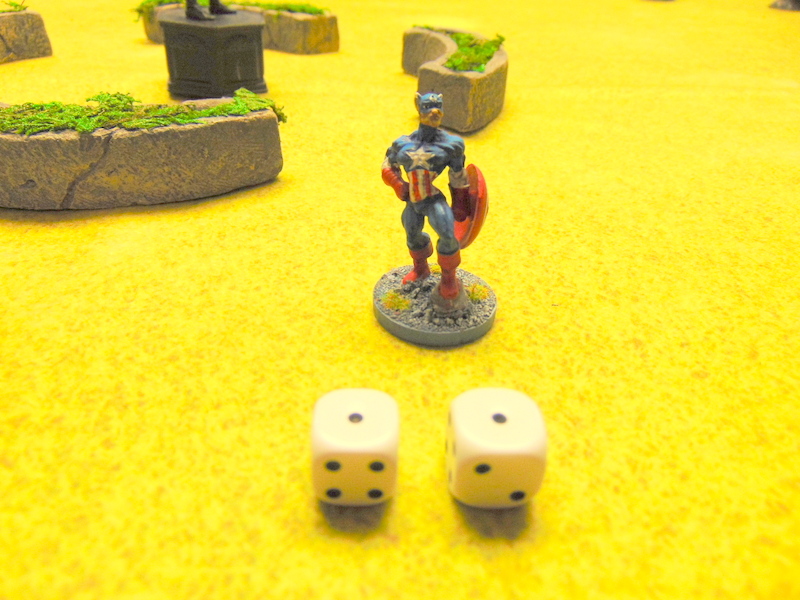
Captain America stands up and moves into position where his Enhance power can do the most good. Unfortunately, he only manages to impart one re-roll to the group. He gives it to Vision. Then, because he’s close enough, he throws his shield at the prone Blastaar, but he misses!

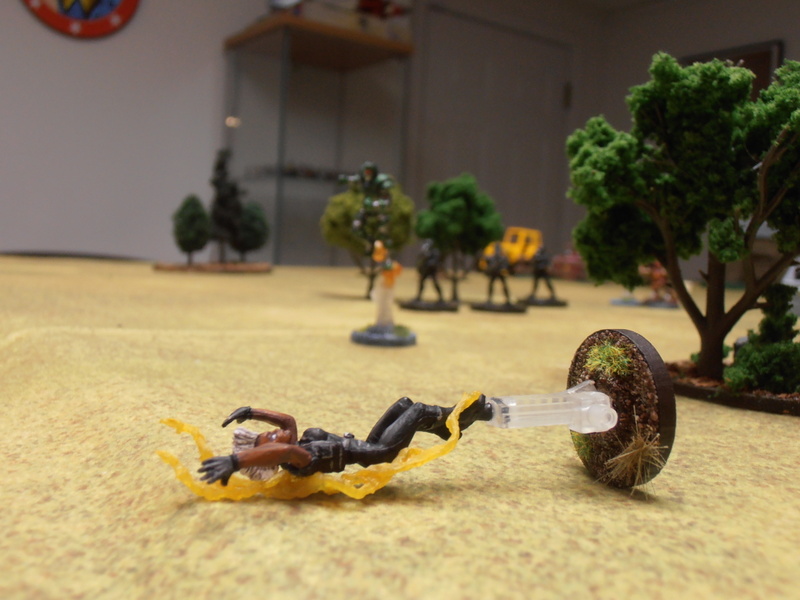
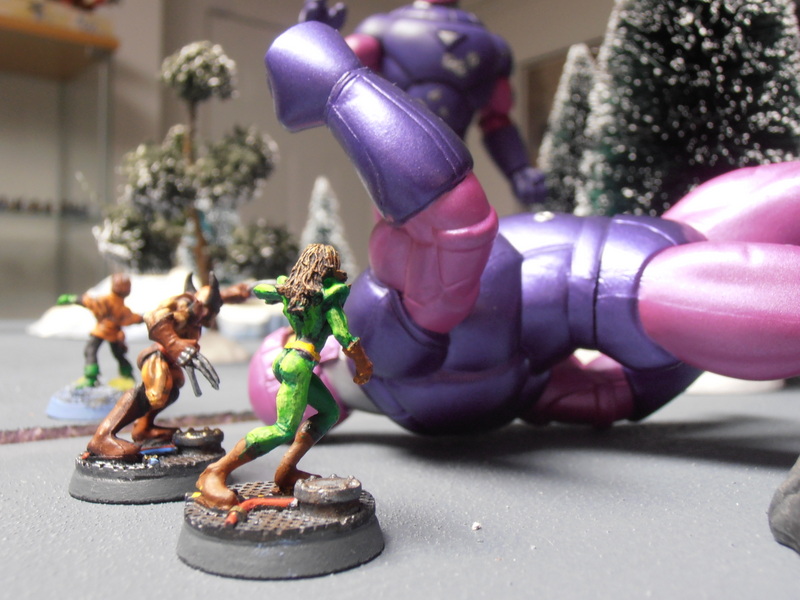
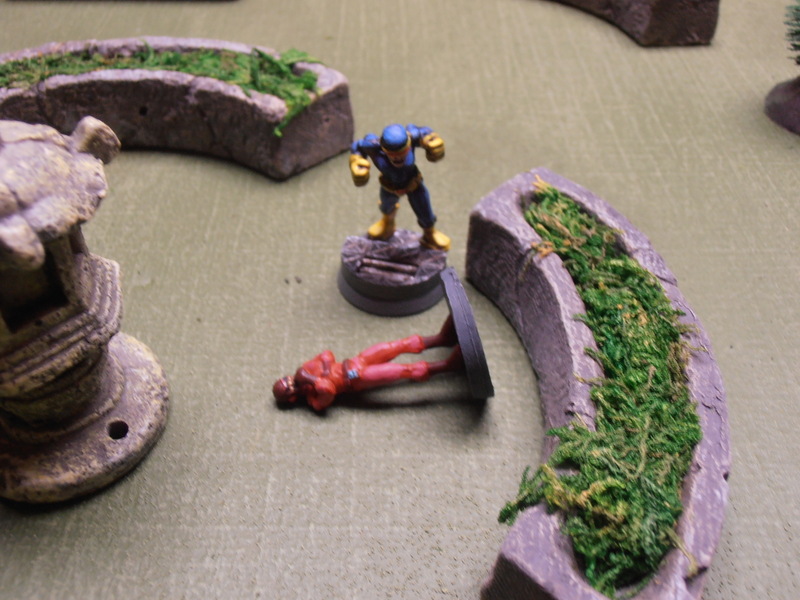
The invisible Super-Skrull charges at Starfox, who, at the last moment, makes his Perception roll and notices something is attacking him. Nonetheless, the Super-Skrull clobbers Starfox right in the dick, dropping the Eternal to zero Body and knocking him back 9″. Starfox manages to stay both conscious and upright, but (as anyone who has ever been punched in the dick can attest) his mood immediately suffers.

Vision activates his Density Increase power and charges Blastaar. He makes use of Captain America’s gifted re-roll and pummels the Living Bomb-burst into next week. Blastaar fails his KO check and is out of action!

On Board 1, Skrull group #1 makes their Perception check and notices Captain Marvel. They concentrate their fire on her, and she loses 2 Body, dropping her from 6 to 4.

Starfox tries to get some payback. He charges Super-Skrull, using the Wild Card maneuver Power Attack, which gives him a couple of re-rolls. Despite rolling 6 dice with 2 re-rolls, Starfox fails to damage the Super-Skrull. Not really surprising; his recent experience is probably quite distracting.

Captain Marvel decides to attack the Skrull spacecraft, and Power Blasts it hard enough to penetrate the Force Field and do 3 Body worth of damage to it. It starts to spark and smoke, and on the other rooftop, the Super-Skrull feels a shudder in the cosmic force beam supplying him with power…

Wasp flies over to the edge of rooftop #2 and fires across the way at Skrull group #1. She only manages to pick off 1 Skrull, but that’s ok. Scarlet Witch moves up alongside her and shows Wasp how it’s done. She Power Blasts Skrull group #1 and wipes out the remaining four Skrulls.

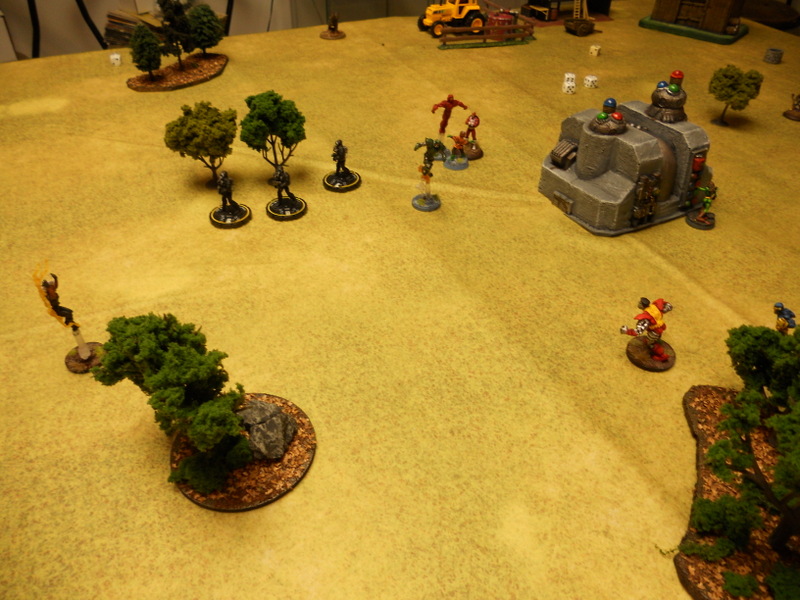
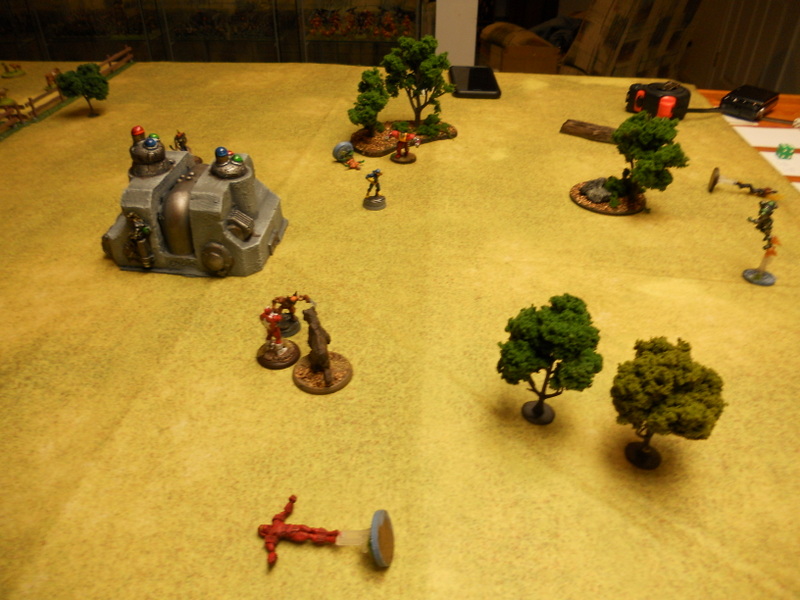
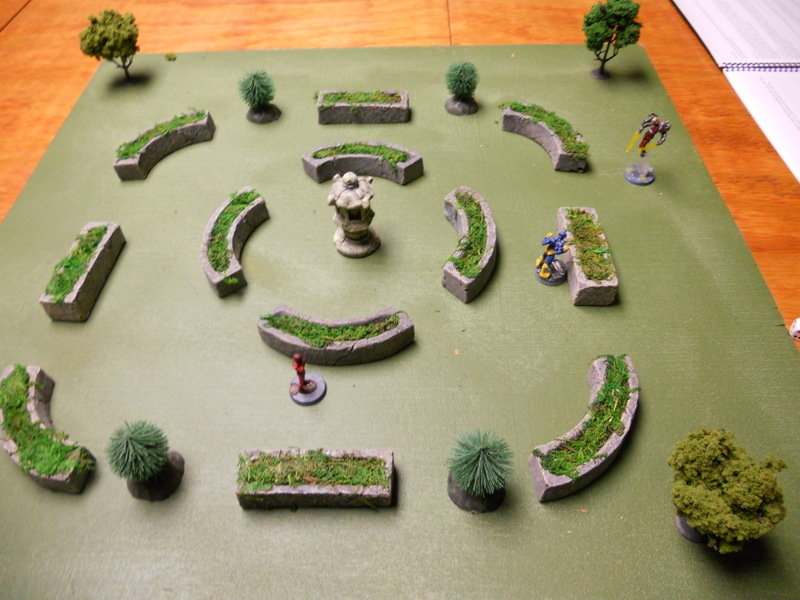
Board 1: End of Round 2

Board 2: End of Round 2

ROUND 3

Captain Marvel fails to sustain her Invisibility, but Super-Skrull keeps his invisibility active.

The Blaster Turret shoots at Captain Marvel, clipping her for 1 damage.

Captain Marvel fires at the spacecraft again. This time she blows it to smithereens. The disruption of the cosmic energy beam causes 1 damage to the Super-Skrull and removes his ability to Regenerate, which is something he hasn’t needed to do yet as he hasn’t taken any damage.

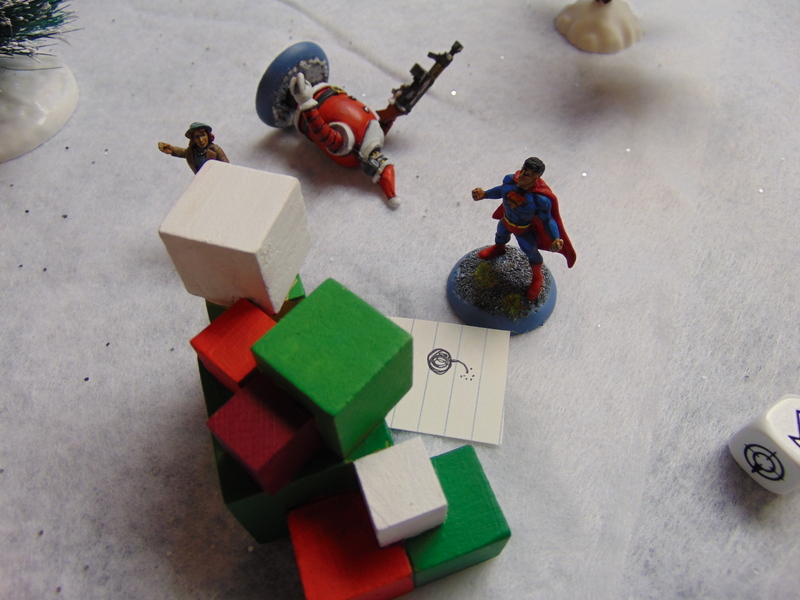
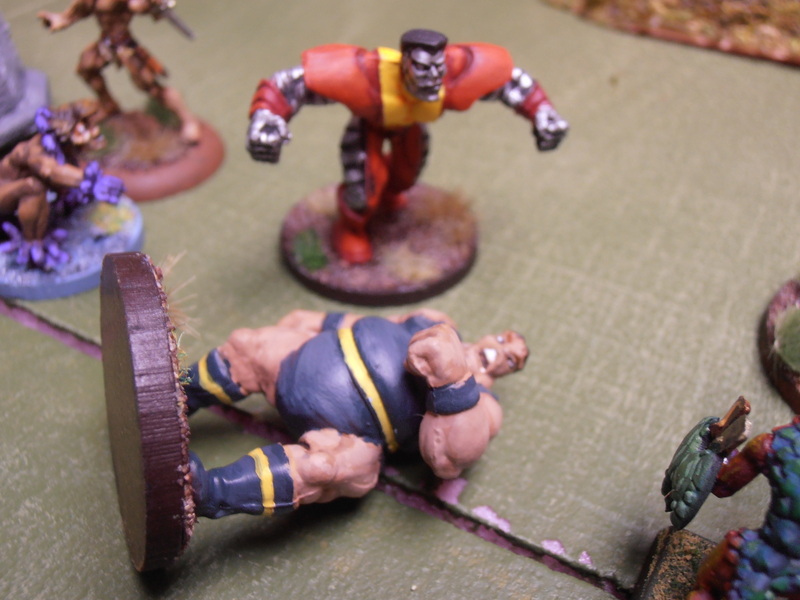
Super-Skrull has had just about enough of Starfox, so he belts him hard, knocking him back another 9″. Starfox is KOed!

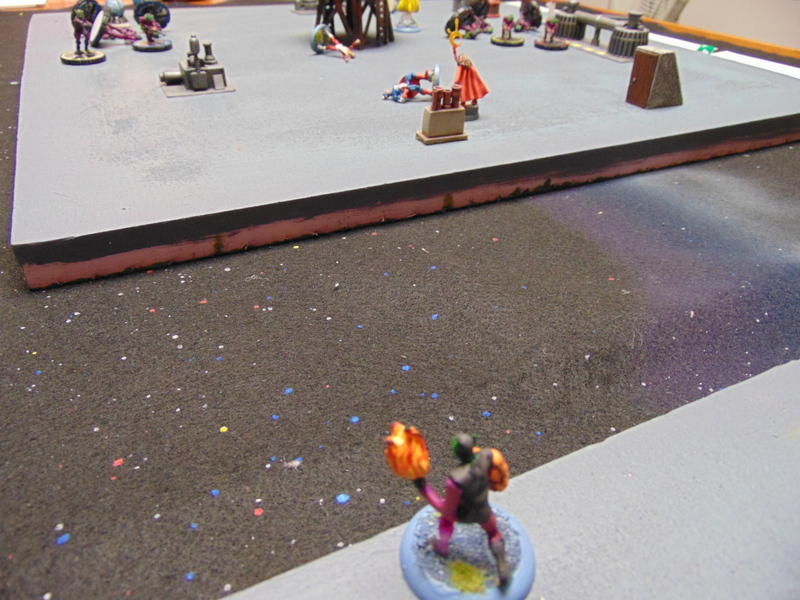
Captain America spots Super-Skrull,  recharges his Acrobatic Attack and charges! He drops Super-Skrull down to 1 Body with his heroic charge, but falls to Super-Skrull’s Damage Field, which does 3 goals of damage to Cap. Cap is KOed!

If Super-Skrull somehow survives this round, the Blaster Turret will fire again. With this in mind, over on Board #1, Wasp attacks the turret and blasts it to bits.

Scarlet Witch tries to locate the invisible Super-Skrull so she can attack him, but she can’t find him. All she does is move closer to where she thinks he is.

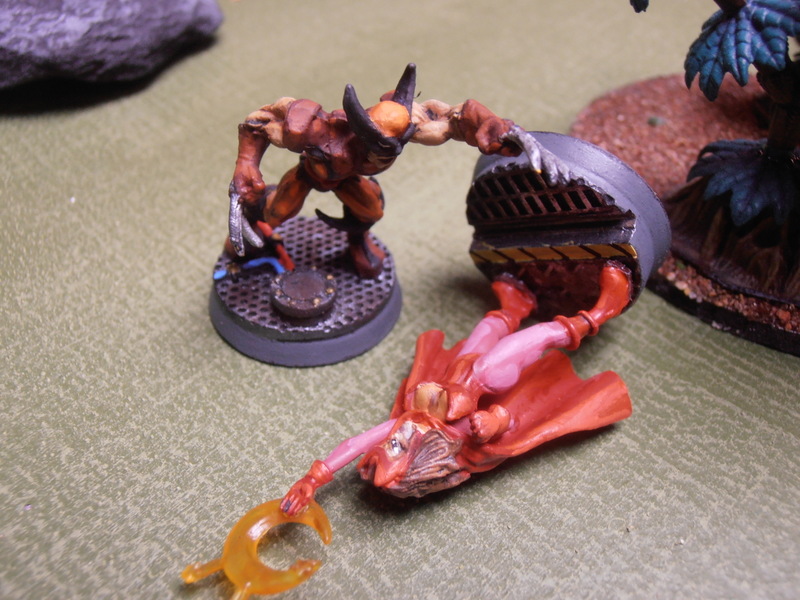
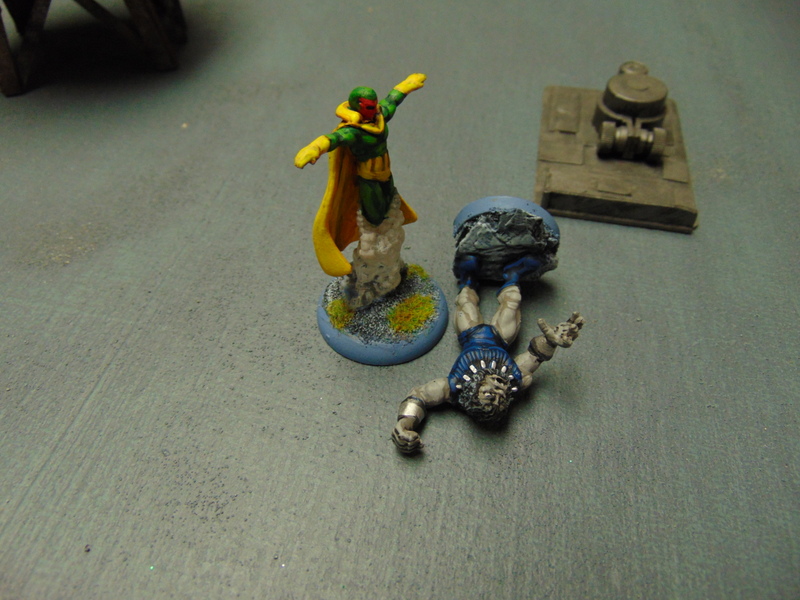
Finally, Vision activates his Density Decrease power, effectively becoming a ghost. He perceives the Super-Skrull and flies directly through him, doing a Ghostly Attack. Super-Skrul takes 1 damage from the attack and fails his KO roll. Super-Skrull is KOed!

Victory to the Avengers!


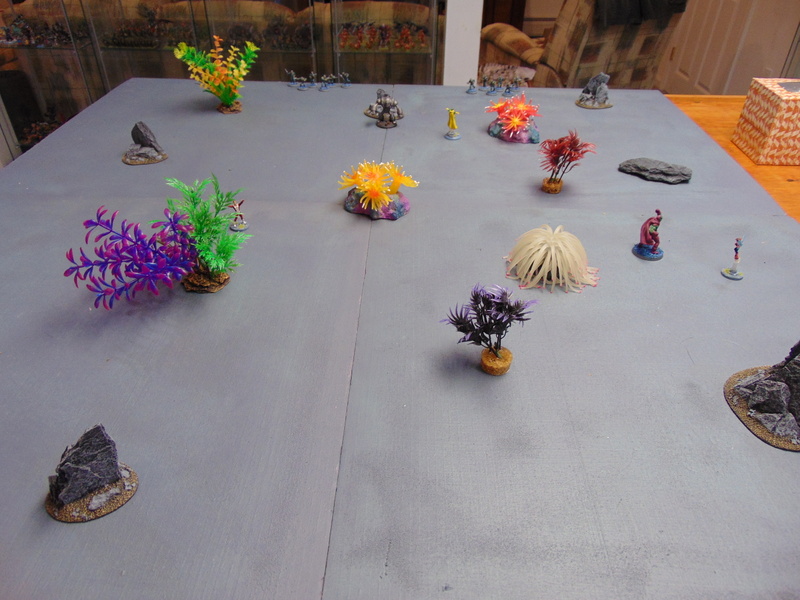
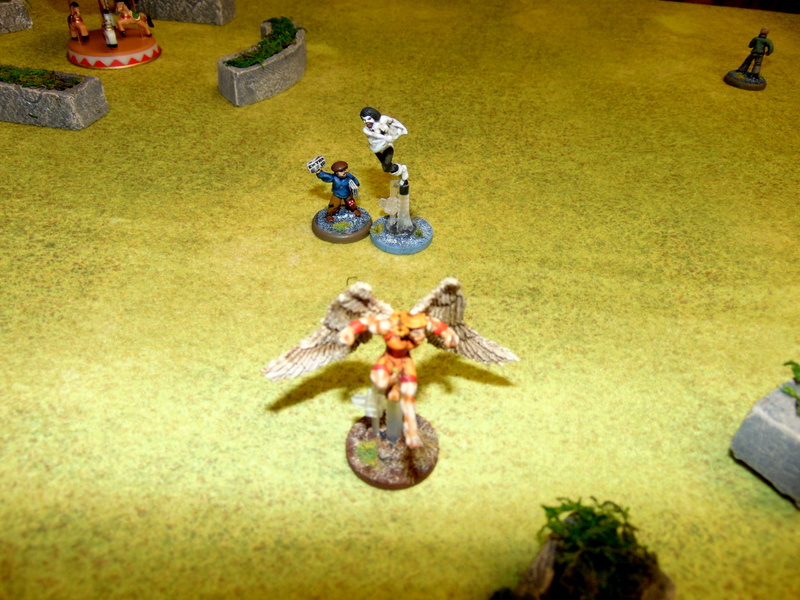
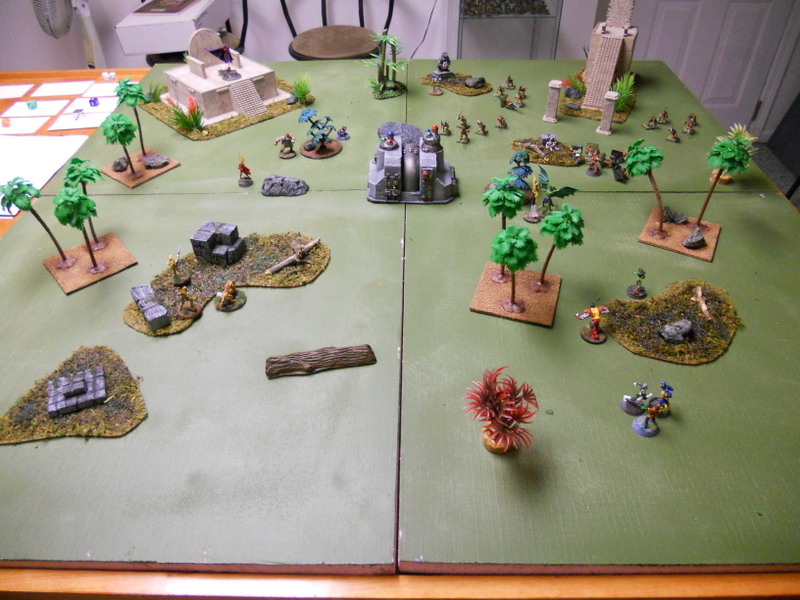
Board #1: End of Game

Board #2: End of Game

EPILOGUE

Wow. That was a fast game, indeed. Three total rounds saw three henchmen groups, two heroes and two villains wiped out, three more heroes reduced to half or less health, and one more hero wounded. No one escaped pain! All in the span of about 25 minutes real time!

I changed this scenario in several ways. First, I spread the battle out over two separate rooftops. Second, I felt the Super-Skrull needed a little help, so I increased the number of Skrull soldiers and added Blastaar to his team. I also added the blaster turret as additional security. Other than these additions, the battle was pretty similar to the original publication.

Since Kang isn’t bringing the heroes back this time around, he has no intention of healing their injuries. That means I have to roll on the Fate of the Fallen table for anyone KOed during this scenario: namely Starfox and Captain America. Starfox sustained a rather serious groin injury (who saw that coming?). As such, he is -3″ to his Move and -1D to all his attacks for the next battle. (Groin pain lingers, my friends…)

Despite being blasted by Blastaar and some Skrulls and being burned by Super-Skrull’s flames, Captain America manages to come through with only minor scrapes. He’ll be ready to go next scenario with no ill-effects. That’s because Captain America is Captain America, and not Starfox.

It’s also noteworthy that I rolled very high for most of the game, including all the Recharge rolls I was required to make. That’s why the Super-Skrull and Captain Marvel were invisible for most of the game. That’s not usually how it goes.

Here are my Super Mission Force builds for the Skrull force:

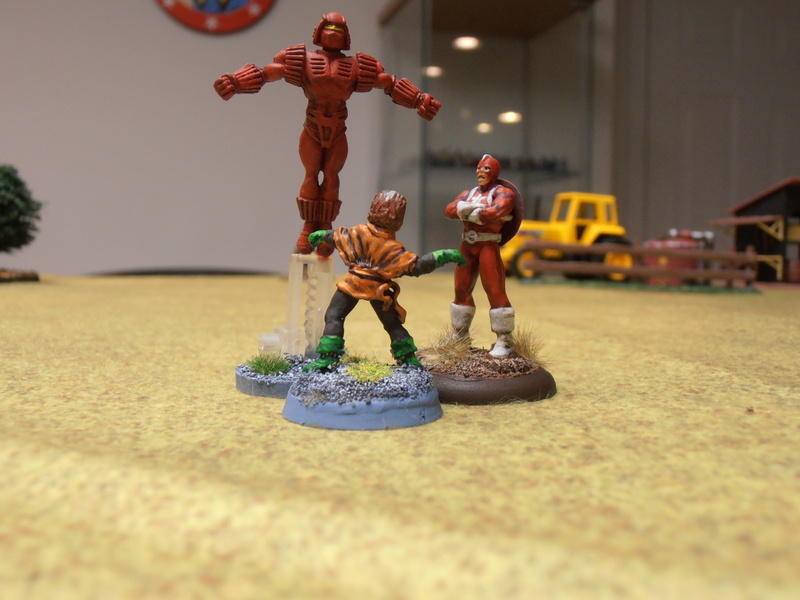
Super-Skrull (Powerhouse): Major: Metamorph, Super-Strength Minor: Damage Field, Flight, Force Field, Invisibility, Power Blasts, Regeneration (only when cosmic beam is active)

Blastaar (Super): Major: Power Blasts Minor: Armor, Flight, Resistance, Super-Strength

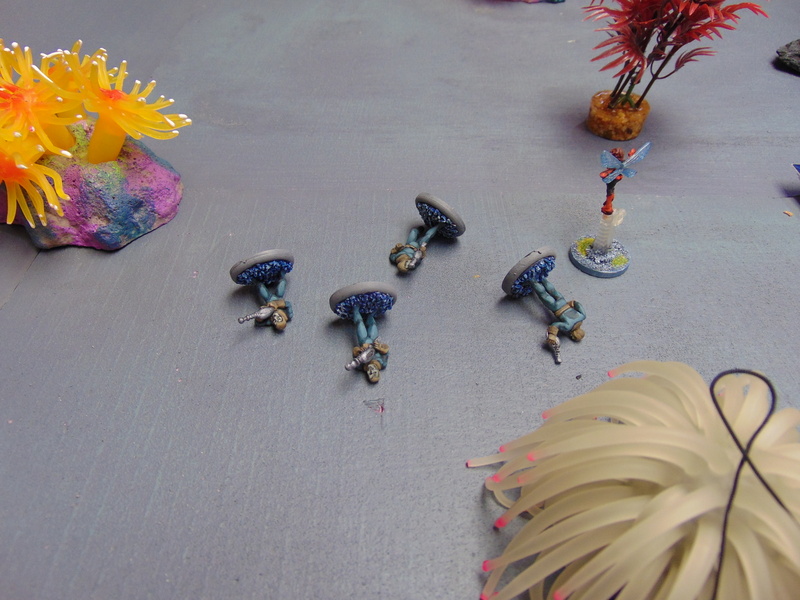
Elite Skrull Henchmen: Minor: Armor, Power Blasts

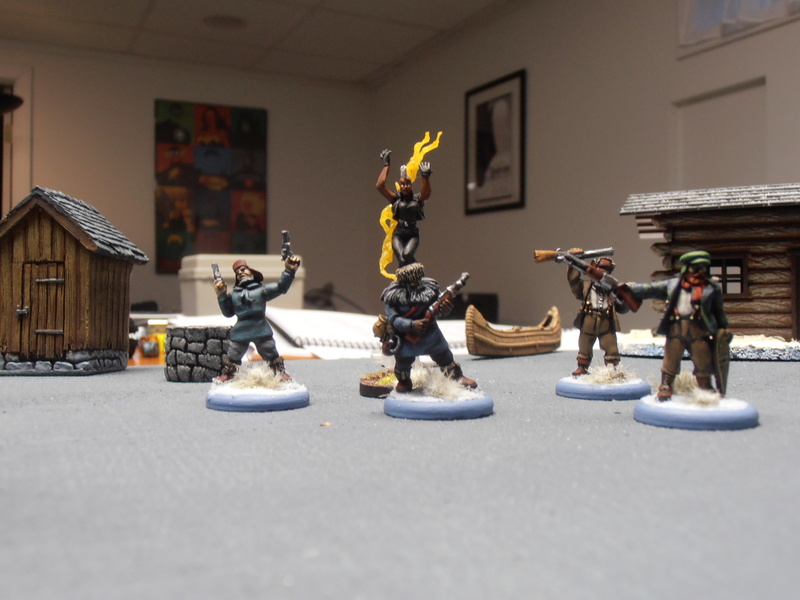
The battle in Midtown Manhattan was bound to draw attention, and it caught the notice of the world’s first super-team, the Fantastic Four! They arrive in their patented Fantasti-car, and after several minutes of introductions and explanations, the Avengers from the future and the Fantastic Four from the past come to an understanding.

“So that’s basically it, Dr. Richards,” says Captain America. It will be several years before they will be on a first name basis, at least by Mr. Fantastic’s timeline. “It seems we were duped, and I blame myself.”

“You can’t think that way, Captain America,” says Reed Richards. “Immortus is generally trustworthy; therefore I suspect it is Kang, his earlier incarnation, that is to blame.”

“Kang!” exclaims Scarlet Witch. “That would explain a lot.”

“Indeed it would,” says Vision. “But, how do we repair the damage to the timeline that we have already caused?”

“Don’t worry”, says Thing. “I’m sure Big Brain has already figured that out.” He unceremoniously drops the unconscious Super-Skrull into the Fantasti-car, while Invisible Girl claps the villain in power-dampening restraints. Similar restraints have already been applied to Blastaar, who glares at the Human Torch while the Torch, only feet away, makes faces at him.

“That’s essentially correct, Ben,” says Mr. Fantastic. “I think I have a plan to set things right.” Thing gives Captain America an “I told you so” look, then walks over to Starfox, who is moaning and clutching a cryo-pack between his legs. “Got ya right in the cubes, huh pal?” says Thing. Starfox nods weakly. “Ya just gotta walk it off. Just walk it off, buddy. S’all ya can do.”

Up next: the final showdown between the Avengers and Kang, the Conqueror!


MH-2 Time Trap Part 2: Drax the Destroyer!

PROLOGUE

As Captain America, Captain Marvel and Scarlet Witch vanish into the swirling mists of time, Immortus turns towards the remainder of the team. “You three must act no less swiftly if we are to save the galaxy from solar destruction. You will be sent to Earth’s moon, several decades in the past. There you will find Drax the Destroyer, in parley with an alien race that secretly works for the Eternal, Thanos.”

“But Drax hates Thanos, and has sworn to kill him,” says Thanos’s brother, Starfox.

“Just so,” says Immortus irritably, “but since I just told you they work for Thanos secretly, Drax does not know they work for Thanos. If he is not stopped, the aliens will convince Drax to destroy two Earth-made satellites in orbit around Mercury. These satellites study solar flare activity and without the data they provide, Earth will be unable to prevent the flare from destroying the galaxy.”

“So we must battle Drax,” Starfox says. “This isn’t going to be fun.”

“You need not battle Drax, only somehow prevent him from leaving with the aliens,” says Immortus.

“Perhaps we can ask him nicely to stay,” says Wasp. She glances around. “Just kidding.”

“Janet, your beauty truly inspires the most melancholy of poets,” says Starfox. “Sadly, I have never known Drax to be influenced by beauty.” He smiles. “Unlike myself.”

Vision stares at Immortus. The android’s face is inscrutable, revealing little of his true thoughts, although they very likely involve punching Starfox in the dick. “I am linked with the Avengers Mainframe,” he says. “We have no record of any satellites of Earthly origin placed around Mercury during the time you mention.”

“The inaccuracy of your computers is the least of our problems,” snaps Immortus. “Now, prepare yourselves, for we have no more time for discourse!” With that, billowing clouds of smoke envelop the Avengers, hurling them through space and time!

The Scenario:

It’s pretty straightforward: the Avengers must delay Drax the Destroyer long enough so that he doesn’t leave the Moon in the company of the aliens. They can accomplish this one of two ways: beat Drax and the aliens in a straight-up fight, or convince Drax that the aliens work for Thanos, his hated enemy. If they succeed in convincing Drax, he fights alongside the Avengers for the rest of the game.

Setup:

I used a 4′ x 4′ board depicting a strange area of Earth’s moon. There are rocky outcroppings and alien flora liberally scattered around the board, providing cover and blocking line-of-sight. Drax and two groups of alien henchmen set up on one side of the board. The Avengers deploy on the opposite side.

SPECIAL RULES

You were expecting this guy, perhaps?


Nope! This is Drax.

Convincing Drax: Drax is no deep thinker, but he’s not a dummy, either. Something about this whole thing seems fishy to him.  Any hero can spend an entire round trying to convince Drax to join their side.  It requires 3 Goals on a Chance roll to persuade Drax that the aliens really work for Thanos, and he’s fighting on the wrong side. At this time in history, the only member of the Avengers Drax knows is Starfox, who he recognizes as Thanos’s brother. Drax knows Starfox and Thanos hate each other, so Starfox only needs 2 Goals on his Chance roll to persuade Drax.

The Aliens: The alien henchmen groups are endless. Once a group is wiped out, a new group will deploy from the same table edge as they did at the start of the game. This occurs at the end of the round the group is wiped out. With their jetpacks, the alien henchmen groups can get to the action fairly quickly. The aliens try to avoid physical combat, instead using their maneuverability to get into good positions from which they can shoot at the heroes. If two groups can set up a crossfire and attack the same hero in a round, they will; if not, they attack separate targets.

The BFR: In the likely scenario that the Avengers convince Drax to switch sides, the aliens deploy their last resort: a Big F(ighting) Robot. The robot fights alongside endless henchmen groups against both the Avengers and Drax while the bulk of the alien force withdraws from the Moon. The scenario ends once either the robot or the heroes (and Drax) are defeated.

ROUND 1

As team leader in Captain America’s absence, Wasp quickly sizes up the situation. Two groups of the aliens, armed with energy rifles and wearing what looks like jet packs. That makes them fast and dangerous. And then there’s Drax. He’s the toughest guy on the Moon, and he knows it. “Starfox, you and I will take care of the aliens,” she says. “Vision, you tie Drax up long enough so he will listen to reason.”

“Understood,” says Vision. It doesn’t sound like he’s looking forward to what’s coming. “Please hurry.”

Initiative goes to the villains. Henchmen Group #1 flies out and takes cover behind a weird alien plant, then concentrates fire on the Vision, who is barely within range. They miss. Wasp activates her Shrinking power, then flanks the group and fires off her power blasts, managing to take out one of the aliens. Henchmen Group #2 activates and flies toward the center of the board. They take aim at Wasp, trying to eliminate one Avenger at a time; but they miss, too.

>drops mike<

Starfox charges into Henchmen Group #2, and scores enough net goals to completely wipe out all 6 aliens! (I did not see that one coming.)

Drax flies out to meet Vision, but since he’s too far away to charge, he blasts Vision with his ranged attack instead. Vision shrugs it off, taking no damage, and activates his Density Increase power. He knows he’s shortly going to go toe-to-toe with Drax, so it seems like a good idea. Not wanting to provoke someone who calls himself “The Destroyer” any further, Vision fires his power blasts at Henchmen Group #1, managing to inflict  1 more casualty on the group, dropping their number to 4.

At the end of the round, Henchmen Group #2 re-spawns at the table edge. These guys are endless!

End of Round 1

ROUND 2

The villains keep initiative, and Drax wastes no time charging into combat. He belts Vision with a Haymaker that ends up doing 2 Body worth of damage. Good thing Vision activated his Density Increase power, or he would have been knocked back 8″! Vision tries to grapple Drax, hoping to bind him up and make him listen to reason. He fails; and Drax rebuffs his embrace.

Henchmen Group #1 fires again at Wasp, but she nimbly dodges out of the way.

Dude, you had one job….

Starfox uses his entire turn to make an impassioned plea to Drax, trying to convince him that the Avengers are on his side. Even though he only needs 2 goals, he blows it. Drax silently vows to punch him in the dick as soon as he’s done with Vision.

Wasp blasts Henchmen Group #1, wiping them all out before flying off towards the center of the board, where she guesses Henchmen Group #2 will soon be. She’s right. They unload their guns on her, but miss.

End of Round 2

At the end of the round, Henchmen Group #1 re-spawns at the table edge.

ROUND 3

The villains keep initiative.

Henchmen Group #1 flies out takes up position around the Wasp, setting up a crossfire with Henchmen Group #2 (already in position). They open fire and manage to clip her for 1 Body worth of damage.

Starfox tries his best to persuade Drax again, using his entire round’s actions to do so. He fails.

“Hey…er… why don’t we all just…uh…relax, Drax?” says Starfox. Drax thinks it must be pure torture to have to hang out with an idiot like Starfox. He looks at Vision with pity before punching him with another Haymaker for another 2 Body worth of damage. Vision responds in kind with his own Haymaker, but Drax just takes the hit and smiles, unhurt.

Henchmen Group #2 opens fire on Wasp, managing to hit her for another 1 Body worth of damage. Wasp is taking heavy fire, so she blasts back, taking out 3 of the aliens before high-tailing it away to seek cover!

End of Round 3

ROUND 4

The heroes gain initiative!

Starfox tries again to convince Drax that the aliens are working for Thanos, this time with success! Drax suddenly remembers were he knows Starfox from and realizes he’s been duped. Man, is he pissed!

Henchmen Group #1 chases after Wasp, firing on her and inflicting another 1 damage, dropping her to half her overall Body!  Wasp fires back and blasts 3 of them before taking off. Henchmen Group #2 (only 3 strong), gives chase and fires at her again, but they miss.

“You DARE dupe Drax?!”

Drax activates, charging into combat with Henchmen Group #2. No surprise, he wipes the group out completely.

Vision targets what remains of Henchmen Group #1 with his solar gem, blasting them into unconsciousness.

End of Round 4

At the end of the round, both Henchmen Groups re-spawn at the table edge. Now that Drax is fighting on the side of the Avengers, the aliens deploy their secret weapon: the Big F(ighting) Robot!

ROUND 5

The BFR!

The villains take back the initiative. The BFR rumbles to life, eyes glowing with menace!

It charges into combat with the closest hero, who happens to be Vision, and decks him for a net 5 goals! Vision drops to zero Health with that one shot. Because of Density Increase, he doesn’t get knocked into next week, but he definitely needs a KO check. He passes, and manages to stay conscious!

Vision punches back, but in his weakened state he inflicts no damage. Henchmen Group #2 fires into the melee, heedless of the BFR. They’re hoping to hit Vision, who is clearly on the ropes, but they miss.

Starfox charges Henchmen Group #2, taking out 4 of them and dropping their number to 2. They’re effectively locked in melee with Starfox.

Henchmen Group #1 also fires into the melee, but they also miss Vision. Hey, they tried.

Drax charges the BFR, and busts it in the mouth (?) for 4 damage, knocking it back and down. Wasp flies over and blasts it for another 2 damage!

ROUND 6

Not many pictures here.

The villains keep initiative. The BFR struggles to its feet and charges Drax, walloping him for 2 damage and knocking The Destroyer back 8″. Drax manages to keep his footing.

Vision activates his Density Decease power, turning into a ghostly form (and protecting himself from any physical attacks). He blasts the BFR for another 2 damage. Sparks start to fly!

Henchmen Group #1 opens fire on Wasp, and riddles her with energy blasts, dropping her to 1 Body!

Being a pro, Wasp focuses on the main threat, the BFR, rather than sweet retaliation. It pays off! She blasts the BFR, doing 2 damage, dropping it to zero! It fails its KO check and is destroyed!

Victory to the Avengers!

Starfox turns, expecting to see more of the aliens coming. Instead, he sees their backs as they flee.

“It seems they are withdrawing,” says Vision, wearily. “I can’t say I’m sorry to see them go.”

“I will pursue them to the ends of the universe!” vows Drax. “I am no one’s pawn! Thanos will rue the day he dared—”

“Yes, yes… you’re welcome, Drax,” says Wasp. “But before you go, now that you know the aliens work for Thanos, promise us you won’t destroy those satellites.”

Drax looks confused, then suspicious. “What satellites?”

The Avengers exchange glances. “The ones the aliens asked you to destroy,” says Wasp.

“I don’t know who you are or what the hell you’re talking about,” says Drax. “Now get out of my way. I need to chase down Thanos’s minions and kill them. Then I need to kill Thanos.” With that, Drax flies off, just as the Avengers feel themselves once again drawn through time, summoned before Immortus!

EPILOGUE

Well, that was a quick game. It took about half an hour, not counting the time I took taking pictures and recording the action.

You may naturally ask: why did Kang want Drax delayed? Well, according to the original module, delaying Drax  “allows one of Thanos’s (unnamed) schemes to proceed, which would result in the destruction of the Avengers.” Not much detail there, but I guess Kang has his reasons.

I changed the scenario, but not much. I just added the big robot, because once the Avengers convince Drax to work with them, the scenario is essentially over. Drax helps the Avengers beat on the aliens, which is really no challenge at all in SMF. I didn’t expect it to take Starfox so long to convince Drax, but the dice weren’t his friend. Despite this, Starfox is the only Avenger who didn’t get hurt at all!

This scenario allowed me to use my Pulp Figures “Radon Zombies of the Ionosphere” miniatures for the aliens. I painted them up years ago and I’ve never had a chance to game with them until now. I love these guys!

Here are my Super Mission Force builds for Drax and the aliens:

Drax the Destroyer: (Super) Major: Super Strength;  Minor: Armor, Flight, Power Blasts, Resistance

Alien Henchmen: Minor: Flight, Power Blasts

Big F(ighting) Robot: (Powerhouse) Major: Scrapper, Super Strength; Minor: Armor, Construct, Resistance, Tough

Up next: “Skrulls….Why did it have to be Skrulls?”

MH-2 Time Trap Part 1: The Menace of the Mimic!

PROLOGUE

They are Earth’s Mightiest Heroes, the Avengers! Captain America, Captain Marvel, Vision, Scarlet Witch, Starfox and Wasp! Their quiet afternoon at Avengers Mansion is shattered, as suddenly, without warning, a visitor appears in their midst, trailing a mysterious, billowing smoke! They recognize him immediately as Immortus, Lord of Limbo!

“Avengers,” says Immortus. “We have no time to exchange pleasantries. In several days, a solar flare will destroy this galaxy. You must act quickly to prevent this, or Earth is doomed. The only way to do this is to allow me to use my mastery of time to send you back to various points in history, where you must prevent certain events from occurring. The flare develops as a result of these events, so you must alter the course of time and ensure they do not take place.”

“Wait a minute, Immortus,” Captain America says. “How do we know that this is the best course of action? Messing around with the timeline seems drastic. Perhaps we can consult with Dr. Richards and come up with a better plan?” Several of the Avengers nod in agreement.

“I am Master of Time, Captain, and I assure you we have little of it left. You must act now. There are two events that require immediate attention. The first involves a young man named Calvin Rankin. The other event concerns Drax the Destroyer. Both must be stopped!”

“Drax!” exclaims Wasp. “That’s never good news.”

“I assure you that Rankin is every bit as formidable. Nonetheless, we have little time to debate.”

Captain America nods reluctantly. “All right, then. Captain Marvel, Wanda…you’re with me. We’ll deal with Rankin. Starfox, Wasp, Vision…you handle Drax. And be careful.”

“How fortunate you are, Captain, to enjoy the assistance of these two beautiful women,” says Starfox, “but Janet’s beauty is so sublime that I consider myself equally fortunate.”

“Keep your mind on the mission, Starfox,” says Cap. I’d love to punch him in the dick, he thinks to himself.

Immortus turns towards Captain America’s group. “Very well, then. You will be sent back to the year 1969. Calvin Rankin is in Central Park. You must find him and convince him to put this on.” Immortus holds up a strange-looking headset.

“Why?” asks the Scarlet Witch.

Immortus sighs in irritation. “Have I not impressed upon you the need for haste? Because Rankin will eventually come in contact with an alien device that will increase his intellect a thousand fold, allowing him to develop dangerous technologies that will directly lead to the formation of the solar flare. This headset will ensure his mind will not be altered in this fashion. It will not otherwise harm him.”

“What if he won’t put it on?” asks Captain Marvel.

“Then you must put it on him,” Immortus says, as though talking to a child. He hands the headset to Captain America. “Now, enough talk. Prepare yourselves!”

The mysterious smoke billows forth from Immortus’s hands, surrounding the small team. They are transported through time!

The Scenario:

The prologue pretty much sums it up. The Avengers must find Calvin Rankin in the park and make sure he puts on the headset. What Immortus didn’t tell them is that Calvin Rankin is a powerful mutant with the ability to absorb and mimic the powers of anyone he comes across, and that he’s not going down without a fight. To add challenge, there are innocent civilians in harm’s way and the fight quickly draws the attention and intervention of law enforcement.

Setup:

I used a 4′ x 4′ area set up like a park, with trees and natural terrain scattered around. There is a lot of open space. A statue is in the middle of the board. The Avengers deploy on one side of the board. The Mimic is deployed at the statue. There are six civilians deployed randomly around the board. The police do not deploy at the start of the game (see below).

SPECIAL RULES

The Mimic: At the start of the game, The Mimic has a Move, Body and Psyche of 6 and has only one power: Mimic. The Mimic’s power is a stronger version of the Mimic super power in Super Mission Force. Once per round, the Mimic can attempt to copy the powers of EVERY hero within 15″ of him. The mechanism is the same: a 5D Psyche-based opposed roll, every goal allows the Mimic to mimic one minor power of his choice, while major powers require two goals. Obviously, the Mimic can’t copy powers that are not technically powers, such as Captain America’s shield, and cannot copy both the major and minor versions of the same power. (This is stronger then the normal Mimic power, which only targets one individual at a time, and has a range of only 5″.) Once copied, the mimicked powers are usable for the remainder of the scenario.

The Cops: It’s 1969, and those damn dirty hippies are protesting everywhere. The NYPD has a strong presence in Central Park, and they are not about to take any shit from a bunch of barefoot longhairs. There are 3 Henchmen groups of police officers that may eventually be drawn to the combat. The first group enters at the end of Round 2; the next at the end of Round 4, and the last at the end of Round 6. The groups enter via the board edge that is closest to the majority of the action.

“We’re here to help!”: Unfortunately for the Avengers, with the exception of Captain America, the cops have no idea who they are. (1969 is well before the formation of the team.) This means they’re just as likely to open fire on the heroes, especially if they feel there is a threat to public safety (and there is). The Avengers CANNOT harm the police officers in any way. They’re the good guys, remember? Instead, they must either work around the cops, or convince them that they’re the good guys. Any hero can spend an entire round trying to convince the cops to join their side. This is tough to do, as the cops are used to seeing outlandishly dressed youths rebelling against authorit-aah pretty regularly. It requires a 3 Goals on a Chance roll to persuade the police to stop shooting at the Avengers.

Cap has it easier. Some of these cops are veterans and fought in the Big One, and all of them know Captain America (who was technically still active at this time, although Steve Rogers is still in a block of ice somewhere…) It only takes Cap 2 goals to convince the cops that the Avengers are not the bad guys. Once the cops recognize this, they assist in any way they can.

Civilians: There are 6 civilians milling around the park at the start of the game. They move randomly at the start of each turn and follow the standard rules for civilians in Super Mission Force. If things go poorly, the Mimic will not hesitate to threaten innocent bystanders.

The Headset: The Mimic will not willingly put on the headset provided by Immortus (Kang). In order to slip it on his head while he is still conscious, a hero must win an opposed grapple check in close combat with the Mimic. Of course, it can be easily placed on his head if the Mimic is KO’ed. Captain America has the headset at the start of the game. Big surprise: the headset doesn’t do what Immortus says it does. Rather, it strips the Mimic of his powers entirely, thus ensuring he never joins the X-Men. As a result, more mutants, including some future Avengers, are subverted to future lives of crime rather than heroism. MU-HU-HAHAHAHAHAHAHA!

ROUND 1

Calvin Rankin sits on a stone bench, eyes glazed, riding a reefer buzz. The new Hendrix is on the transistor radio of the girl across the way: “Let Me Stand Next to Your Fire.” Hendrix reaches the chorus right around the time Calvin hears his name being called by a cat dressed like Captain America.

“Calvin Rankin,” Cap calls. “It’s important that we speak to you, son. Please come here.”

For a minute, Calvin considers it. After all, whoever this cat is, he has a couple of fab foxes with him. The he remembers the reefer. These three are probably from the draft board. Complete squares, man…

The civilians move randomly. The Mimic gains initiative for the round.

First, he moves just enough to catch all three heroes within 15″. Then he tries to mimic the powers of all 3 heroes. He gets enough goals to absorb Power Blasts (Major), Fortune and Jinx from Scarlet Witch; and Density Decrease, Flight and Invisibility from Captain Marvel. The only “power” he could absorb from Captain America is Super Agility, but he fails to do that. He promptly turns invisible. Then he decides to try out another of his new powers: Jinx. He successfully uses it on Scarlet Witch (who fails to detect him), which will make things tough for her on her next turn.

Captain Marvel fails to spot the Mimic, so all she can do is activate her Density Decrease power and fly out to the general vicinity of where she thinks he is. Scarlet Witch, possibly because she was jinxed, spots the Mimic and moves towards him. She trips and face-plants ( a result of the jinx), taking one Body worth of damage. She then successfully jinxes the Mimic right back, giving him a taste of his own bad luck. Captain America fails to spot the Mimic, so he moves to a position between his teammates and uses his Enhance power, granting Scarlet Witch two re-rolls to her dice pool and Captain Marvel one re-roll to hers.

End of Round 1

ROUND 2

The civilians move randomly; about half move away while the other half move towards the action. Gotta love scatter dice and random movement.

The Mimic keeps initiative. He fails to absorb any powers from Captain Marvel and Captain America. He becomes visible, as invisibility only lasts from turn to turn unless successfully recharged. He tries to recharge it, but fails (due to the higher difficulty as a result of being jinxed). He attempts to activate his Density Decrease power, but fails to do that, too. He Power Blasts Captain America, but Cap easily dodges. Mimic decides he needs to put some space between himself and the heroes and flies away. Unfortunately, because of the jinx on him, he twists his ankle taking off and takes 2 Body worth of damage. Ouch.

Scarlet Witch sees the Mimic getting closer to civilians and decides to blast him. She succeeds, inflicting another 2 Body worth of damage on the Mimic. Captain Marvel maintains her Density Decrease power and flies straight through the statue, coming into base contact with a nearby civilian. This means she is protecting him, and any attacks against the civilian will target Captain Marvel instead. She takes her attack action to blast the Mimic again, but fails to damage him. Finally, Captain America charges forward, trying to get close enough to at least throw his shield. Unfortunately, he’s just out of range.

Here comes The Fuzz!

At the end of the round, the first group of police arrive at the closest table edge, drawn by the sounds of combat! Not a good round for the Mimic, as he’s lost 2/3 of his health!

End of Round 2


ROUND 3

The civilians move randomly, and one of them moves off the board to safety. The initiative goes to the Avengers, followed by the Mimic and finally, the cops.

Scarlet Witch wastes no time firing at the Mimic again, but fails to hit. The Mimic absorbs Speed, a major power, from Captain Marvel. He fails again to recharge his Invisibility power, so he instead activates Density Decrease and fires his Power Blasts at Captain America, wounding him for 1 Body worth of damage. He then uses his newfound Speed power to beat a hasty retreat, flying far across the board and into base contact with a civilian! What nefarious plans could he have?

The cops activate, and, seeing how Scarlet Witch is the closest target and is obviously a dirty hippie in a slinky costume, they open fire on her, inflicting 1 Body worth of damage, despite both her Fortune power and the re-rolls Cap gave her through Enhance. Captain America forgoes all his actions to try to convince the police that the Avengers are not the enemy…

“You, sir, are NO Captain America!”

…but totally screws the pooch. The cops ain’t buyin’ it.

Captain Marvel tries to blast Mimic before he can harm the civilian, but misses. She decides to stay and protect the civilian she’s currently with.

ROUND 4

The civilians move randomly. The initiative goes to the Mimic, then the cops, and lastly, the Avengers.

The Mimic fails again to recharge his Invisibilty and fails to maintain his Density Decrease power. Ignoring the civilian, he uses Speed to position himself behind the Scarlet Witch. He fires his Power Blasts at her, but misses.

Ignoring Captain America, the cops open fire on the Scarlet Witch again, but due to her Fortune power, they miss. Captain Marvel chases after the Mimic, blasting him for 1 more damage. The Mimic is reeling, with only 1 Body left!

Captain America once again tries to convince the cops that the Avengers are no threat, but the cops still aren’t buying it. (He’s really rolling like crap.)

At the end of the round, another group of cops enters from the opposite side of the board.

ROUND 5

The civilians move randomly. Another moves off the board. (“Feets, don’t fail me now!”)

The initiative order is The Avengers, the cops, then the Mimic.

Captain Marvel presses her attack, but fails to hit the Mimic with her blasts. The cops closest to Scarlet Witch fire upon her again. Her Fortune power didn’t recharge, but lucky for her she dives on the ground fast enough to avoid being riddled with bullets. The newly-arrived group of police fire upon the Mimic but miss.

End of Round 5.

The Mimic finally succeeds in recharging his Invisibility power. He turns invisible and blasts the Scarlet Witch, who fails to spot him. He does enough damage to KO her handily, and she fails her check to stay up. Captain America tries one more time to convince the police to help, and this time he finally succeeds (perhaps watching the Scarlet Witch get blasted into next week drove the point home). From now on, all the cops will target the Mimic, if possible.

ROUND 6

The remaining civilians move randomly as usual. The Avengers will act first, then the Mimic and finally, the police.

Captain America manages to spot the Mimic, despite his invisibility. He charges forward and hurls his shield at the Mimic, but misses.

“He’s got a kid!”

The Mimic loses his Invisibility and fails to recharge it. He’s getting desperate now, and decides he will take a hostage. He flies across the board into base contact with a civilian and grabs him, intending to use him as a bargaining chip, or, failing that, as a human shield! All attacks targeting the Mimic may hit the civilian instead!

End of Round 6

For the rest of the round, the cops closest to the Mimic surround him with guns drawn, but hesitate to open fire because of the hostage. The other cops move closer to the hostage situation, as does Captain Marvel. Finally, at the end of the turn, more cops arrive: two motorcycle cops and a heavy machine gun. They’re done playing!

ROUND 7

Whatever civilians are left move randomly, except for the kid being used as a human shield by the Mimic.

The cops act first, followed by the Avengers and the Mimic.

All the cops move to surround the Mimic. They don’t do anything else.

An eerie stillness descends on Central Park, broken only by the terrified gasps of the child hostage. The Mimic, wounded and under the influence of something, is like a cornered animal, snarling alternately at the Avengers and the police. Only the years of training stays the trigger-fingers of the NYPD; that and the commanding presence of the Sentinel of Liberty, Captain America.

Captain Marvel silently calculates her chances of blasting the Mimic without harming the child. She glances at Captain America. A subtle shake of his head tells her all she needs to know. “Stand down, Monica.” She hears it as clearly as if he shouts it aloud.


The Moment of Truth…

Captain America charges into hand-to-hand combat with the Mimic. The Mimic attempts to fend off Cap by placing the child in harm’s way, but Captain America is a seasoned combatant. He scores six total goals. The Mimic resists with only five! He takes one damage, enough to force a KO check. He fails!

Victory to the Avengers!

Captain Marvel soothes the child while Captain America checks Calvin Rankin’s vital signs and, finding them steady, removes the headset from his belt. “I don’t like playing around with people’s minds, Monica,” he says softly, as the child is led away by police.

“I know, Cap. But the alternative…I’ll go check on Wanda.”

Cap nods. He places the headset on Rankin’s head.

EPILOGUE

First up, apologies for the yellowish tinge the pictures have. I’m not sure what the problem is, but I find it annoying. I’m no photographer.

I changed this scenario a bit. As originally written, all the Avengers are present, and the Mimic has to fight the whole team. If things start to go badly, a bunch of his football player friends show up to help beat up the Avengers. (Uh-huh.)

In Super Mission Force, 6 against 1 is a recipe for disaster, so I made the Mimic more powerful and split the team up. I think it worked out ok. I don’t have any high school football player miniatures, but I have plenty of cops. So I used them instead.

The dramatic scene at the end really wasn’t planned. It just kind of happened that way. Part of the fun of playing these adventures is trying to remain true to what I think the heroes would do in the comics, so having Cap take the shot seemed natural, as he was best equipped to take out the Mimic in hand to hand without harming the innocent hostage. Besides, he was carrying the headset…

Up next: Drax the Destroyer!

MH-2 Time Trap: a Super Mission Force Campaign

It’s been a while since I’ve posted an After Action Report, and Forgotten Heroes has given me a hankerin’ for some supers gaming. I’ve decided to convert another old TSR Marvel Super Heroes RPG module to Super Mission Force. This time around: MH-2: Time Trap, featuring the Mighty Avengers!

The antagonist of this adventure is none other than Kang the Conqueror, who is generally aggravated that—despite being a master of time travel—he keeps losing to the Avengers every time he tries to take over the world. The Avengers annoy Kang, so Kang comes up with a surprisingly good plan to deal with them: make sure they never exist. Disguising himself as Immortus (his future, somewhat good-aligned incarnation), Kang invents a story about how a huge solar flare will destroy Earth in a few days unless the Avengers can stop it. In order to do so, they must travel back in time to stop several key events from happening, thus ensuring the solar flare is never triggered.

In reality, Kang is sending the heroes back in time to undo their own existence. He figures that if the Avengers never form as a super team, he will have a much easier time conquering Earth. The Avengers must discover Kang’s plot and turn the tables on him lest they be trapped in time forever and lest Earth fall prey to Kang’s tyranny.

The Avengers team roster for this adventure consists of (L-R) Wasp, Vision, Scarlet Witch, Captain America, Starfox and Captain Marvel (and a cola machine). Not exactly the powerhouse team from the movies, but a solid slice of 1980’s, Bronze Age comic history, when Scarlet Witch was nowhere near as powerful as she is now and someone thought it would be cool to put Starfox in the Avengers.

Starfox = huge douche. Just my opinion.

As with any TSR Marvel adventure, adapting it to a miniatures game like Super Mission Force will require some tinkering. The general trend in TSR Marvel adventures is one encounter/battle per chapter. Often the villains battled are lame, and the super team can deal with them without too much trouble. This works better in a roleplaying game than on the miniatures table. For example, in my last Super Mission Force campaign, based on the adventure The Breeder Bombs, there was a chapter where the X-Men fought the Soviet Super Soldiers. As originally written, the X-Men travel to the USSR and fight the Crimson Dynamo and a bunch of Soviet Super Troopers (basically armored henchmen). To draw a clear picture, that’s Cyclops, Storm, Kitty Pryde, Rogue, Colossus, Nightcrawler and Wolverine vs. the Crimson Dynamo and a bunch of scrubs. That may be fun in a roleplaying game, but in SMF, the Russians are going to get their asses kicked pretty damn quick. Henchmen are rarely much of a problem for most heroes, and a team as powerful as the X-Men would wade through henchmen groups in no time. So I changed the opposition to the entire Soviet Super Soldiers team, and it was much more of a challenge. I will have to do similar altering of the original module for this campaign as well.

Here are my Super Mission Force builds for the Avengers:

Captain America (Powerhouse) Major: Scrapper, Enhance Minor: Clever, Melee Specialist, Shield, Super-Agility

Captain Marvel (Super) Major: Speed Minor: Density Decrease, Invisibility, Flight, Power Blasts

NOTE: In order for Captain Marvel to use her Speed or Flight powers, she MUST use and/or maintain Density Decrease first.

Vision (Super) Major: Super Strength Minor: Construct, Density Increase/Decrease, Power Blasts, Flight

Scarlet Witch (Blaster) Major: Power Blasts Minor: Fortune, Jinx

Starfox (Wild Card) Minor: Flight, Stun, Super Strength, Tough

Wasp (Blaster) Major: Power Blasts, Minor: Flight, Shrinking

Looking the team over as a whole, it’s pretty powerful by SMF standards, with one Powerhouse and two Supers. As usual, I ignored the SMF rules on team composition, opting instead to be true to the established characters. I think it’s pretty tough to imagine these heroes without the powers listed, even if that makes them more powerful than a typical SMF team would be. They’re the Avengers, dude! Don’t sweat the small stuff!

Up next, Scenario One:  The Menace of The Mimic!

Terror of the Toyman! Conclusion

Quick synopsis: The Toyman is attempting to detonate a bomb during the Christmas celebration in the town square. Superman is attempting to thwart his nefarious scheme and protect the civilians that have been drawn to the square by the big stacks of presents Toyman dropped to lure them there. For more detailed scenario information and special rules, please refer to my last post.

At the start of the game, here is the board setup:

There are 7 possible locations for the bomb.  Clockwise from the top right corner, they are: stack of presents 1, the fountain/Christmas tree, stack 2, the house, stack 3, stack 4, and the church.

Superman sets up in the middle of the board, while 6 civilians are scattered around the board.

ROUND 1

Toyman won’t arrive until the end of round 3, so no initiative roll is necessary. Superman has a few rounds to get a jump on finding the bomb’s location. First, though, the civilians randomly meander around.  Then, I draw from the location and hazard decks. I get stack of presents #3 as the location, but draw a “nothing happens” as an event. An early lucky break for the Man of Steel!

Superman moves to the closest possible location, which is the fountain and Christmas tree. He takes a Special Action to scan for the bomb. The secret counter underneath the tree reveals there is no bomb here (good thing, or this would have been a short game indeed). Superman uses the remainder of his Move action to fly to stack #1. Although he can easily reach it, he can’t take any further actions this turn, so the round ends!

Score: 0-0

ROUND 2

Once again, the civilians move around randomly. My deck draws indicate that the Santa Bot appears at stack #1, which just so happens to be where Superman is at the moment. And it’s a good thing, too, considering that 2 civilians are within range of the Santa Bot’s machine gun (Power Blasts) and would have certainly been easy targets if the Man of Steel wasn’t around to draw the Bot’s fire.

Since Toyman isn’t around to direct his toys yet, Superman automatically has initiative. Superman now has to decide whether to fight the robot or scan the stack of presents for the bomb; he can’t take both a Special Action and a Combat Action in the same turn! Being Superman, he decides the most immediate threat to the civilians is the Santa Bot, so he charges the Bot and attacks! He does a measly one net goal’s worth of damage, not enough to drop the Santa Bot. The Bot fights back, but fails to hurt Superman at all. The round ends!

Score: 0-0

ROUND 3

“Great Caesar’s Ghost!”

Once again, the civilians wander without purpose. My deck draws indicate that at stack #2, Teddy appears! Teddy is a big robotic teddy bear that isn’t very friendly. Unfortunately there is a civilian who looks an awful lot like Daily Planet editor Perry White standing right next to present stack #2. Perry White threatens the bear with a rolled-up copy of the Planet, but Teddy doesn’t seem too impressed.

Now Superman has a real dilemma: protect the civilians nearest him, protect Perry White on the other side of the board, or scan for the bomb??

Superman attacks the Santa Bot with a haymaker, flooring the robot with a net 7 goals of damage! That takes care of the civilians nearest to him, but should he scan stack #1 for the bomb next turn, or leave to protect Perry White from Teddy?

It’s no choice at all. Superman uses his Move action to fly across the board into base contact with Teddy, thus ensuring the big robotic bear has his full attention.  Teddy attacks Superman (leaving Perry White alone for now), but fails to do any damage.

At the end of round 3, the Toyman arrives in spectacular fashion by parachuting onto the middle of the square inside a huge Christmas present!

Score: 0-0

ROUND 4

The civilians move randomly, as usual. One of them takes the opportunity to get the hell out of the square and moves off the board, thus ensuring he lives to celebrate Christmas at all! Perry White’s random movement actually moves him closer to Teddy, but I decide that Mr. White is probably a lot smarter than that and move him in the opposite direction. The deck draws indicate that the house is the location for this round’s event, which is that the clockwork soldiers regenerate or that nothing happens. Since the soldiers aren’t in need of regeneration, nothing happens!

This is the first turn Toyman is on the board, and so initiative has to be determined. Toyman beats Superman’s roll. The huge present opens, and Toyman and his clockwork henchmen emerge!

Superman attacks Teddy, inflicting 2 net goals of damage and knocking Teddy back 8″.  Teddy is knocked down and can’t reach Superman to fight back on his turn.

Score: 0-1, Superman

ROUND 5

The civilians move randomly. The deck draws indicate that the 2 rock’em, sock’em robots burst out the front door of the church! Unfortunately, there are 2 civilians directly in the path of these clanking, metallic pugilists, and the Man of Steel is all the way across the board! What can he do?

Well, nothing yet, because Toyman keeps initiative this turn. He moves himself and his clockwork henchmen within firing range and open fire on Superman! They manage to inflict 2 net goals of damage. Ouch!

Superman is once again faced with a dilemma. Two civilians are in danger from the robots at the church, and Perry White is stuck between Teddy and the Toyman. Plus, there’s that pesky bomb to find…

Superman does the best he can. He flies over to Perry White and grabs him up, continuing to the nearest board edge and moving his boss to safety. Since this doesn’t count as an action, Superman returns to stack # 2 and uses his Special Action to scan it for the bomb, ignoring both Toyman and Teddy for now. Unfortunately, his gamble fails. Stack #2 doesn’t contain the bomb, either!

Teddy charges Superman, but Superman shrugs him off, and can only watch helplessly…

…as the robots move to attack the closest civilian and quickly pummel him into unconsciousness. Poor guy! Where’s Superman when you need him?

Score 1-2, Superman

ROUND 6

It’s halfway into the game, and Superman has only been able to scan 2 of the possible 7 bomb locations. That bomb could go off at any moment! He better get moving!

Of course, the civilians move randomly first. Another moves off the board to safety. The deck draws indicate that stack #4 is the location, and the event is once again that the clockwork soldiers regenerate or nothing happens. The soldiers have not been damaged, so nothing happens.

Superman gains initiative. A quick look at the board shows that there are only 2 civilians left to protect. One is all the way over by stack #1 and is in no immediate danger from anything, and the other is right next to the rock’em, sock’em robots. Superman leaves combat with Teddy to race across the board to the civilian near the robots. (Teddy gets a free attack on Superman as he flies away, but does no damage.) He flies the civilian off the board to safety and then lands next to the church, where he uses his Special Action to scan the church for the bomb.  Once again, there is no bomb.

Toyman marshals his henchmen and moves towards Superman. The robots move towards him, too; and Teddy moves as fast as he can in Superman’s general direction. That’s about all they can do.

Score: 1-4, Superman

ROUND 7

Civilians move. The Toyman’s deadly squadron of toy planes activates near stack #3.

Toyman gains initiative. He sends his planes over to attack Superman. They open fire, but fail to harm the Last Son of Krypton! Superman returns fire with his heat vision, destroying all but one of the planes. The robots charge into combat with Superman and mange to inflict one net goal of damage. (I probably should have moved Superman somewhere else and scanned another location, but instead I attacked the planes and forgot to move him at all! Dumb!) Toyman, his henchmen and Teddy all move towards Superman, but none of them can do anything else.

Score: 1-4, Superman

ROUND 8

The one remaining civilian on the board moves around, but she’s so far away she’s in no danger unless something activates at stack #1 this turn. Instead, nothing happens at the fountain and Christmas tree this round. That bomb is still out there, and there are not many turns left. There are still 4 possible locations that bomb could be: stack #1, stack #3, stack #4 and the house!

Superman keeps initiative and leaves combat with the robots,taking 1 goal of damage in the process. He moves to stack #4, directly in front of him, and scans the stack for the bomb. No luck! he still has plenty of movement left, so he speeds over to stack #3. He can’t do anything else on his turn, but at least he’s in position for next round…if it’s not too late!

Toyman’s group and the one remaining plane move into firing range and open fire, but Superman takes no damage. The robots and Teddy both chase after Superman, but they pose little threat to Superman at this point. There’s only one civilian left and she’s safely out of harm’s way. The main concern is the bomb!!!

Score 1-4, Superman

ROUND 9

The civilian wanders around stack #1. Holding my breath, I draw from both decks. Stack #2 is the location…and nothing happens!!!! Whew!

Superman keeps initiative. Superman immediately scans stack #3, hoping to find the bomb, but there is no bomb! There are only 3 rounds left in the game, and the bomb could go off on any one of them! Since one civilian has already fallen, if the bomb goes off, there is no way Superman can win this scenario.There are only 2 places it could be: stack #1, or the house. The house is closest…

Superman makes another calculated risk and flies across the board to stack #1., where he will scan for the bomb next turn. Even though the house is closer, he could get bogged down in combat with the Toyman’s toys, as they will all be in the same table quarter as the house by the end of this turn. It’s a gamble to be sure…

Toyman and all his toys consolidate near the house.

Score: 1-4, Superman

ROUND 10

The remaining civilian moves. Convinced I’m about to draw the Joker, I pull from both decks. The location is the church…the event is…the presents shuffle positions! Lucky for Superman, the stacks that switch positions are stack #3 and stack #4, so he doesn’t have to worry about chasing stack #1 around the board…

Superman keeps initiative. He scans stack #1, and discovers the bomb. And not a moment too soon! Victory for Superman!

Score: 1-9, Superman.

Analysis

Well, this game was the most fun I’ve had playing with myself since…well, never mind.

Despite going for 10 rounds, this game played very fast (about 30 minutes). The ending score was not as much of a runaway victory for Superman as it appears. If the bomb had gone off, there was no way Superman could have won the game, as he had already lost a point for the wounded civilian in round 5.  Even if Superman saved all the other civilians, had the bomb exploded, the final score would have been 5-6, Toyman.

The game went down to the final 3 turns. The last 3 cards were the 10, Jack and Joker; the two “present shuffle” events and the bomb going off. I really did shuffle the cards pretty well, or so I thought. In any event, despite all hazards being activated, Superman got really lucky by drawing all the “nothing happens” events during the game. This gave him the breathing room he needed to try to be everywhere at once.

Well, almost everywhere. This guy will be spending Christmas in the hospital.

I think the scenario works well. The random position of the bomb, and the randomness of the locations and hazards really makes the game difficult to predict, which is what I was going for. After all, what else can Toyman really do to Superman but keep him occupied and distracted? Superman has to do his best to balance getting the civilians to safety with finding the bomb before time runs out. The hazards work to delay him, as Superman really only has to engage them if they threaten civilians. If no civilians are threatened, he’s free to fly around the board and search for the bomb.

Ironically, the bomb was in the second location Superman visited, but he had to leave it to go protect Perry White from Teddy back in round 3! He didn’t have time to scan the location after destroying the Santa Bot, because if he did, that would have allowed Teddy to attack Perry White if the bomb wasn’t there. He never made it back to stack #1 until the very end of the game.

Here are my Super Mission Force builds for the characters:

Superman (Powerhouse) Major: Speed, Super Strength, Minor: Armor, Enhanced Senses, Flight, Power Blasts, Resistance, Tough

Toyman (Mastermind) Major: Enhance, Minor: Gadgets, Savant

Note: Toyman DID make use of his Gadgets power to gain re-rolls each round, but either he failed to do so or they were used without any real effect on the overall game.

Merry Christmas everyone!

Terror of the Toyman! Part 2

The Scenario: Just in time for Christmas, The Toyman has planted a bomb somewhere in the town square! He scattered piles of Christmas presents around, which naturally attracted the attention of the locals. The bomb will go off soon, making this a Christmas to remember…unless Superman can stop it!

Superman’s goal is to find and defuse the bomb before it goes off, and to protect as many civilians as possible. The Toyman’s goal is to make sure the bomb goes off by delaying Superman long enough for it to detonate.

Game length: The game lasts a maximum of 12 rounds, or as long as it takes for the bomb to detonate or be discovered.

Setup: The play area is a 4′ x 4′ section of  a park or town square. There are several piles of Christmas presents scattered around the area, as well as a few structures, monuments and buildings. Each of these is a possible location for the bomb. Randomly place a face-down counter under each possible location. All of these counters should be blank except for one, which should represent the bomb. (Obviously, if you’re playing this game solo, as I did, make sure you don’t know the location of the bomb.)

Scatter 6 civilian models or counters around the board. Each one represents a hapless civilian who has wandered into harm’s way and who must be protected!

Superman deploys in the middle of the board. The Toyman and the clockwork soldiers don’t deploy at the start of the game. Keep them off the board for now.

Special Rules:

The Super Mission Force turn sequence is slightly altered for this scenario. It is as follows:

  1. Move civilians.
  2. Draw one card each from the location and event decks.
  3. Place hazards or resolve effects of cards.
  4. Determine initiative.
  5. Activate normally.

Civilians: Per the SMF rules, civilians move 4″ in a random direction at the start of the turn. If a civilian wanders off the table edge, he or she has made it to safety. Civilians can also be escorted off the table edge if Superman moves into base contact with them and then moves to any table edge. Civilians have a Body of 2 and are quite vulnerable to attack.

Card decks: This game uses a special card activation mechanic to randomly determine when and where hazards (usually malicious toys) appear. Using a standard deck of cards, make two separate decks (red and black). The red deck should contain as many cards as you have locations (in my case, 7). Assign each location a corresponding card (i.e. Ace = fountain, 2 = Church, etc.) The black deck needs to contain 12 cards, including a Joker. (Ace-Jack, plus the Joker). These cards represent events or hazards that will take place. Feel free to make up whatever events you want based on the Toyman’s hazards (see below). You can use hazards similar to mine or make your own.  The Joker card represents the bomb’s detonation, and you should be sure that at least 4 cards are “no event” to give Superman some breathing room.

My black deck event list looked like this:

A-3: nothing happens.

4: Teddy appears.

5: Santa bot appears.

6: Robots appear.

7: Planes appear.

8-9: Clockwork soldiers (Toyman’s henchmen) regenerate (if they are on the board and damaged), or nothing happens

10-J: Presents shuffle!  The Toyman has made use of tricky teleportation technology! Randomly swap the places of two stacks of presents, being sure to move the counters underneath with them. This may mean that Superman may have to revisit a section of the board he has already scanned. Depending on the location of the bomb, this may also mean the bomb has moved!

Joker: The bomb explodes! If this card is drawn before Turn 4, ignore the result and shuffle it back into the deck. Also, when this card is drawn, ignore the corresponding red location card. The bomb explodes wherever it is on the board.

Hazards: Hazards deploy at whatever location is drawn that round. Hazards are there to delay Superman and to cause mayhem. Hazards do not get an initiative roll of their own, which means that until Toyman arrives, Superman automatically will act before any deployed Hazards. A hazard will always attack Superman if he is within range of its attacks or within its charging distance, as appropriate. If not, it will attack any civilian it can reach instead. If neither Superman or any civilian is a viable target, the hazard will move towards Superman at the fastest speed possible. Generally speaking, hazards pose little threat to Superman other than forcing him to spend valuable time dealing with them when he should be looking for the bomb. But hazards are very dangerous to civilians!

Toyman: Toyman deploys at the end of Turn 3. He can appear wherever you want, but I deployed him via a huge present that parachuted into the center of the board. He rolls for initiative as normal starting on Turn 4. Prior to this, Superman automatically has initiative over any Hazards that may have activated.

Toyman also has some special characteristics for this scenario. First, he functions as both a character and a henchman group. When he activates, his clockwork soldier bodyguards activate with him. They move as a unit and can make use of concentrated fire. In addition, the clockwork soldiers function as a type of armor. All damaging attacks on Toyman must target the clockwork henchmen first, removing them as casualties before the Toyman loses any Body. Once all henchmen are destroyed, Toyman takes damage as normal.

Lastly, Toyman can fix any damaged toy (other than his clockwork soldiers) on a successful Chance roll if he moves into base contact with it. Return the toy to full capacity. It can activate as normal on the following round.

Superman: Until the Toyman deploys at the end of Turn 3, Superman automatically has initiative. It should be noted that with Superman’s Speed and Flight powers, he has a Move of 60″, which means he can reach any point on the board from any other point on the board in 1 round. This is good, because he’s going to need it. He has a lot of ground to cover and not much time.

Usually, Perception checks are opposed Free Actions, but not in this scenario. The Toyman has encased his bomb in lead, which means Superman can’t simply use his x-ray vision to spot it. In order to scan for the bomb, Superman must get in base contact with a possible location. Then he must use a Special Action to scan for the bomb. This is automatically successful; if Superman scans for the bomb, reveal the counter at the location. If it’s blank, the bomb is somewhere else. If it’s the bomb, Superman automatically destroys it by whatever method you feel is appropriate (heat vision, freezing it with his super-breath, hurling it into space, etc.)

Scoring: Superman gains 1 point for every civilian he rescues or who exits off the board, and get 5 points if he finds and destroys the bomb. Toyman gets 1 point for every civilian injured, and 5 points if the bomb explodes. Thus it is possible for Superman to still win the scenario if he saves all the civilians before the bomb goes off.

Next post: the After Action Report!!!

The Breeder Bombs Finale: Savage Land Showdown!!!

We come now to the final chapter in our Super Mission Force campaign, True Believers! And hold onto your hats, because it’s a doozy!

The Scenario: Having thwarted Magneto’s plan thus far, the X-Men track the last Breeder Bomb to the Savage Land, where Magneto and the Brotherhood of Evil Mutants await!

Friendly-looking fellow, isn’t he? A primitive saurian attacks!

But they’re not alone. Everyone’s favorite Greek pterodactyl, Sauron (not to be confused with the Lord of the Rings guy) isn’t thrilled with this violation of his territory. Although he wants everyone out, he agrees to temporarily aid Magneto against the hated X-Men. To this end, has enslaved an army of primitive saurians to do his bidding!

But the X-Men are not without allies in the Savage Land. Answering the call is Ka-Zar and his wife, Shanna the She Devil, accompanied as always by Ka-Zar’s adoptive Dad (really, look it up), the saber-tooth tiger Zabu!

The SR-71 Blackbird’s VTOL engines whine as the pilot, Cyclops, sets the plane down in a clearing. Magneto watches from atop a sacrificial temple, nearby. Powerful energies surround him as he clenches and unclenches his hands. “X-Men!” he bellows, “Welcome…to DIE!!!”

Setup: I used a 4′ x 4′ area, filled with jungle and swamp scenery. There are two large temple-like structures on the villain’s side of the board. One is a sacrificial altar, the other a temple. In the center is the Breeder Bomb (it’s inactive, see below). The X-Men and the Brotherhood deploy in opposite corners of the table. Ka-Zar and family deploy on opposite corner from Sauron and his army of saurian henchmen.  The 20 henchmen are all veterans, so they deploy in four groups of five and must be within 4″ of the temple in their deployment zone.

Special Rules:

Objectives: Magneto’s goal is to destroy the meddling X-Men once and for all. The X-Men must defeat Magneto in order to ensure his plan fails. In other words, it’s a straight-up fight to the end!

The Breeder Bomb: Since he’s been trying to convince Sauron to help him, Magneto hasn’t had time to arm his Breeder Bomb yet. There’s no need to disarm it. For this scenario it simply functions as a big, menacing obstacle. (This is because with this many models on the board, there would be virtually no chance to disarm the bomb if we used the same rules as in past scenarios.)

Sauron’s Henchmen: Sauron’s henchmen are veterans, thus they deploy in smaller groups and are a little better than normal scrubs. As long as Sauron is alive and well (i.e. not KO’ed), they are endless. Whenever a henchmen group is wiped out, it may reform at the end of the turn. This newly-reformed group must deploy within 2″ of one of the temples. This represents the saurian horde pouring out from underground tunnels, heeding the psychic summons of their reptilian overlord!

Difficult Ground: All the swamps and jungle terrain is considered difficult ground, and restricts movement by half as per the SMF rules. Ka-Zar and Shanna have no penalty when moving over difficult ground, as they are quite used to the terrain of the Savage Land.

Injured Heroes: As a result of their fight with the Soviet Super Soldiers last scenario, three of the X-Men were wounded. Nightcrawler was wounded most severely and is not available for this scenario. Storm is -1D to attacks and -3″ to her movement, while Rogue is -2″ to her Movement for this fight.

ROUND 1

With so many miniatures, going back and forth will be tedious, so I won’t necessarily cover the actions in the order in which they happened, rather I’ll lump them together where I can.

The villains gain initiative.

The henchmen groups all move forward towards the middle of the board. The Blob and Colossus both lumber forward their slow 5″ move (Bricks are SLOW).

Zabu, Ka-Zar and Shanna all move up into the swamp area and end their movement in hiding. Toad, the sneaky git, moves into hiding as well. Kitty Pryde phases and moves unhindered through the difficult swampland in front of her. Cyclops uses his Enhance power to shout some strategic tips to his teammates. He scores enough goals to give his teammate, Storm, 2 re-rolls she can use later in the game to help attack or defend as needed. (Hopefully, that will help to offset the injuries she sustained in Arganistan.)

The Scarlet Witch uses her Fortune power to giver herself some extra defense capability (it’s looking like she might have a face full of tiger pretty soon). Storm flies shakily towards the center of the board and focuses on Magneto, realizing that the faster they drop him the quicker they can all go home. She Power Blasts him from pretty far away and uses her re-rolls, but fails to inflict any damage.

Sauron takes off from atop the temple and charges Storm. The two circle each other in a dazzling aerial display, but no damage is inflicted.

He’s the best he is at what he does…

SNIKT!!! Wolverine uses a Brawler maneuver called Speed Burst to really move and charges henchmen group 1. When all is said and done, Wolverine scores enough goals to completely wipe out the group of five saurians (because that’s what Wolverine does).

Quicksilver tries to take out the X-Men’s leader, Cyclops. As a Speedster, he has more than enough movement (40″!) to run across the table, but it’s a risky maneuver that leaves him far in enemy territory. Quicksilver has never been much of a reasoned and cautious fellow, and he’s counting on his speed to get him out of a tough spot. Unfortunately, even after using a Machine Gun Punch (a Speedster maneuver), he only inflicts 1 damage on Cyclops, and is now locked in combat with him.

Nearby, Rogue decides that that Speed power is pretty cool and she wantses it, my precious…so she successfully uses Mimic and copies it. Unfortunately for Quicksilver, he’s the only guy near enough to attack. So Rogue attacks Quicksilver with his own Machine Gun Punch, but he manages to duck and weave at supersonic speeds and avoids damage! Of course, now he has one more person to fight next turn…

Finally, Magneto acts (he’s been pontificating the whole time). From atop the Sacrificial Altar, he Power Blasts Storm. Although he risks hitting Sauron instead, he misses them both.

End of Round 1

ROUND 2

The X-Men seize initiative. Rogue attacks Quicksilver and clobbers him for 4 damage, knocking him off his feet and back into the trees, generally ruining his day. Quicksilver gets up and charges Rogue, using a Move-by Attack, a Speedster maneuver that lets him attack a model and if successful, continue his move and another model, etc….until he either fails an attack or runs out of movement. With 38″ of movement (he lost 2″ for having to stand up), he successfully attacks Rogue for 1 damage, then moves onto Cyclops, attacking him for 1 damage, and finally runs around the swamp, attacking Kitty Pryde for 1 damage! Not too shabby! Quicksilver could conceivably reach Colossus too, but he would probably not do any damage to the big Russian and would then be locked in combat with him. Quicksilver’s a hothead but he’s not stupid, so he opts to use the last of his movement to run back the way he came, putting some distance between him and the X-Men.

G’night sugah!

Cyclops resents being punched in the face, so he moves after Quicksilver and fires an optic blast at his dust cloud. As is usual for Cyclops in this campaign, he misses. Rogue puts her new Speed powers to good use and does a Move-by attack on the fleeing Quicksilver, whom she smacks for 3 net damage. Since he only had 2 Body left, he makes a KO check and fails. Quicksilver goes down for the count and Rogue moves on into henchmen group 4, dropping 3 of its members. She has no movement left so she’s stuck in combat with the remaining 2 saurians. They attack Rogue, but fail to wound her.

Sauron rips into Storm, causing 6 damage, which drops her to zero health in one shot. She fails her KO check and is out of the fight! (Cue triumphant pterodactyl scream.) Scarlet Witch spots Shanna with a successful Perception check and attempts to Power Blast the She-Devil, but Shanna is too agile.

Ka-Zar charges out of the swamp and attacks Scarlet Witch, whose Fortune power serves her well. She only takes 1 damage after all the dice are tallied. Toad sees his opportunity and rushes to Scarlet Witch’s aid, but Ka-Zar easily avoids Toad’s attack. Zabu bounds into the fray, attacking Toad with no effect.

Shanna charges Blob. She inflicts 1 damage which is soaked up by Blob’s armor. Thus, she learns the hard way that “Nothing moves the Blob!” Blob activates his Density Increase power and pounds her for 4 damage, knocking her back 16″. She manages to keep her footing, but she’s a lot less cheerful than she was a minute ago.

Deja vu?

Wolverine moves rapidly into combat with henchmen group 3, and does a repeat performance of last round, wiping them all out in one fell swoop. This gets Magneto’s attention. He quickly finishes his soliloquy about the futility of resistance, flies off the Sacrificial Altar he’s been perched atop and Power Blasts Wolverine, but only inflicts 1 damage. Henchmen group 2 moves up to support Magneto (as if he needs it).

Kitty and Colossus both move towards the action, but can’t really do anything.

At the end of the round, henchmen group 1 respawns near the sacrificial altar (near Magneto) and group 2 reforms near the temple.

End of Round 2

ROUND 3

The X-Men keep initiative. Rogue leaves combat with the two remaining henchmen in group 4 to charge Magneto, who is hovering nearby. The saurians get a free shot on her as she leaves, but they fail to injure her. She serves Magneto a knuckle sandwich that dishes out 3 net goals of damage, enough to knock him back 12″ and drop him to half his health! Magneto has the sudden thought that it might be a good idea to activate his Force Field, so he does. He’s also a guy who holds a grudge, so he Power Blasts Rogue for enough damage to drop her to 1 remaining health.

Wolverine regenerates his lost damage and charges henchmen group 3. He drops 3 of them, leaving 2 alive (for now). They attack Wolverine, but do no damage. Henchmen group 2 charges Wolverine from where they respawned (near the Temple). They also fail to wound Wolverine.

Sauron has a close target in the nearby Kitty Pryde, but notices that the Blob just knocked Shanna the She-Devil into next week and that she’s vulnerable. He dive-bombs her from across the board and hands her a heapin’ helpin’ of pterodactyl justice. Shanna is KO’ed and isn’t getting up anytime soon.  (Cue triumphant pterodactyl scream.)

Blob charges into combat to assist Toad, making it 2 against 1 for Zabu. Blob knocks the Smilodon back 8″ and inflicts 2 body worth of damage. The giant cat springs right back into action and charges Blob, tearing into him for 5 damage, dropping him from 8 body to 3. Ouch! Scarlet Witch leaves combat with Ka-Zar (thinking perhaps she may get her ass handed to her soon). Ka-Zar gets a free whack at her but misses. She promptly Jinxes Ka-Zar, which will make it difficult for him to do anything henceforth.

Toad moves to intercept Ka-Zar. The two fight but neither does any damage (Ka-Zar would have hurt Toad if not for the Jinx). Henchmen group 1, Colossus and Kitty Pryde all move towards the central combat. Cyclops moves and fires at what remains of henchmen group 4, taking them out of action (hey! he hit something!).

Henchmen group 4 reforms at the temple.

End of Round 3 (Side View)

ROUND 4

The X-Men keep initiative. Cyclops takes a long-rage shot at Magneto, who is hovering above the battlefield. He (naturally) misses.

How do you say “Good Night” in Transian?

Scarlet Witch turns her attention from Ka-Zar to Power Blast Rogue, scoring a ridiculous nine goals! Rogue fails to make even one resistance goal and fails her KO check, so she is out of the fight for good!

Blob activates his Density Increase power and trades blows with Zabu, but neither do any damage. It’s a good thing Blob activated his power first, because Colossus charges him and knocks him down to zero health! Blob makes his KO check and remains conscious. He’s also immune to knockback (Nothing moves the Blob!) thanks to the Density Increase, so he doesn’t go anywhere. Henchman group 1 charges into combat with Zabu, inflicting a net 3 goals of damage on the big cat.

He’s just one human! Get him!

Henchmen group 4 charges into combat with Wolverine, but does no damage; Wolverine counters and wipes out 4 of them. That leaves Wolverine in combat with a two Henchman groups: one with 1 member and 1 with 2 members left. Wolverine’s active Rage power is giving him more dice to roll, but he is bogged down in endless waves of saurians as he keeps getting charged every round! To illustrate this point, Henchman group 3 charges into combat with Wolverine too, but Wolverine shrugs off their spears in a fury of bloodlust!

Toad and  Ka-Zar attack each other but both miss. Sauron takes to the air and charges Cyclops, but he also misses. Kitty Pryde charges Sauron, hitting him for 2 damage.

End of Round 4

ROUND 5

The X-Men keep initiative. Kitty Pryde activates her Density Decrease power which makes her immune to body-damaging attacks, so she won’t have to worry about getting eviscerated by Sauron on his turn. She then performs a Ghostly Attack, doing 1 damage to Sauron. Cyclops attacks Sauron with his bare hands (he’s giving up on his own optic blasts), but his punch is as effective as his shooting (he misses). Sauron attacks Cyclops, dropping him to 1 body.

Magneto uses his Mentalist ability, Mind Meld, to give everyone on his team +2 re-rolls until next turn on all attacks. He takes a point of Psyche damage in doing so, but that’s of no concern to him.

Colossus throws a Haymaker into Blob’s fat face, doing no knockback (Nothing moves the Blob!) but dropping him on the spot in a spectacular KO. Scarlet Witch runs away from Colossus, then tries and fails to Jinx him. Meanwhile, Toad and Ka-Zar continue to fight each other this round without anyone actually landing a punch. Zabu and Henchmen group 1 do the same.

Wolverine makes a strategic decision…rather than wipe out one of the weaker henchmen groups he’s fighting and having it respawn at the end of the round, he attacks the largest one (henchmen group 3) hoping to do some damage, but not allow a full group to respawn. But Wolverine is berserk, and he overdoes it a bit. He wipes out henchmen group 3 anyway, ensuring the endless tide of saurians continues. The other two groups do no damage to him.

Henchmen group 3 respawns at the temple…

End of Round 5

ROUND 6

The X-Men keep initiative. Colossus grabs something large (a rock, tree, whatever…) and hurls it at Magneto, but Magneto’s Force Field easily deflects it.

Meddlesome Dullards!! I AM MAGNETO!!!!

Magneto is fed up. He Power Blasts Colossus, but makes it a Radial Attack in the hopes of catching Ka-Zar and Zabu in the blast and ending this combat with finality. Of course, henchmen group 1 and Toad are in the blast radius too, but Magneto has proven often that he cares nothing for lesser beings, and little indeed for Toad. Colossus takes 4 damage, dropping him to half his Body. Zabu takes a whopping 6 damage, enough to drop him to zero. He fails his KO check and goes to sleep. Ka-Zar, despite the Jinx, manages to come out of it unscathed. The villains fared poorly; Toad takes 3 damage, while henchmen group 1 is totally wiped out. Oops.

Toad attacks Ka-Zar and misses. Ka-Zar finally scores a hit resulting in 1 damage to Toad.

Wolverine knows that as long as he’s stuck here in combat with the endless saurians, he’s effectively being kept out of where he’s needed most. So he leaves combat with the henchmen groups (no damage from the free henchmen hits) and charges Scarlet Witch, who just got a little too close…when he reaches her he guts her like a mackerel for 7 goals of damage, enough to take her from 6 down to zero. She fails her KO roll and drops. Both henchmen groups formerly in combat with Wolverine charge him again; they fail to damage him and he automatically wipes them out because of his Scrapper counterattack ability (something I’ve neglected for the ENTIRE campaign).

Sauron attacks Cyclops but misses completely. Kitty Pryde and Cyclops both attack Sauron and manage to put him down for good. With Sauron gone, the saurian henchmen groups will not respawn any more. Henchmen group 3 is now all alone, and moves towards the two X-Men that just put down their master, but they are far away indeed.

End of Round 6

ROUND 7

The X-Men keep initiative again. Cyclops fires at Magneto, and actually manages to inflict 1 damage on Magneto despite his Force Field! Magneto responds in kind, Power Blasting Cyclops for an obscene amount of damage. Cyclops fails his KO check (it’s a bad game for KO checks) and it’s lights out!

At this point in the game, I’m wondering how the X-Men are really going to win. Magneto is flying above the battlefield and has no reason to land. He can just stay up there and blast away. Kitty and Wolverine can’t attack him from the ground. Both the flyers (Rogue and Storm) are out of the fight, as is Cyclops, limiting ranged attacks to whatever Colossus can throw.

A quick look at the table and an idea began to take shape. Wolverine and Colossus are pretty close to one another, certainly close enough for Colossus to walk over and grab Wolverine.

“Petey, Fastball Special!”

Super Mission Force doesn’t currently have official rules for the Fastball Special, but it’s certainly thematically appropriate and a classic maneuver perfected by these very two heroes! I decided that if Colossus can hit with a normal ranged attack, then he tosses Wolverine into Magneto. Wolverine then makes an attack. Should he count as charging? I decided HELL YES!

The odds were against them, as Colossus only has 4D to make the throw and Magneto has a Force Field up. They’d only get one shot at this…

Colossus managed to hit with one net goal. Wolverine inflicted 4 net damage. Magneto, like almost everyone else this game, failed his KO roll.

An awesome end to the campaign! Victory for the X-Men!!!

AFTERWORD

Well, the X-Men did it! They beat Magneto and the Brotherhood! They stopped the Breeder Bombs! They hit ’em with the Hein!

I’d like to extend special thanks to Joerg Bender from Things from the Basement, LLC. for all his help with the temple MDF kits. I was staring at a stack of pink insulation board, thinking I was going to have to construct the temple for this scenario, when I logged onto The Miniatures Page and saw these kits advertised. They’re from Joerg’s Frostgrave: Ghost Archipelago terrain. It couldn’t have been better timing. I immediately purchased the set. I was worried that painting them would obscure the detail, but Joerg assured me it wouldn’t and shared his painting technique. He even offered to replace the pieces if the paint job obscured the detail. As you can see, it didn’t. So thanks, Joerg!

Also, thanks to Scott Pyle and company for creating Super Mission Force and making the playdoc version available to gamers early!

This scenario was by far the most fun scenario to play in the campaign. The classic match-up between the X-Men and Magneto didn’t disappoint. I made a lot of changes from the original as it was written for the RPG. In the original, Magneto and the Brotherhood were robots, the Breeder Bomb was active, and Magneto had some generic mutants helping him out. I decided to add Sauron and the saurian henchmen instead of the generic mutants. Once I decided to use Sauron, I couldn’t resist using Ka-Zar, Shanna and Zabu. (More on them in the next post!)

I think that throughout the five scenarios of the campaign I managed to learn the rules pretty well, although I was using an early version of the playdoc Scott Pyle graciously provided (version 1.30 to be exact). I know the test rules have been updated and modified since then, and I eagerly wait the final product. In the meantime I think I used a lot of the powers and maneuvers and got a pretty good handle on combat.

Of course I’m sure I made mistakes and overlooked some stuff, just as I consciously changed and ignored some things. There’s a lot more to the game than what you read here: I pretty much ignored backgrounds and character development, because I was using established comic characters that I adapted to the system. Perhaps when the finished rules come out I’ll create my own supers team to experience more of what Super Mission Force has to offer.

Here are my SMF builds for the villains and team-ups in this scenario:

Magneto (Powerhouse) Major: Power Blasts, Mentalism, Minor: Flight, Force Field, Iron Will, Telekinesis

Quicksilver (Speedster) Major: Speed,  Minor: Armor, Clever

Scarlet Witch (Blaster) Major: Power Blasts, Minor: Fortune, Jinx

Blob (Brick) Major: Super Strength, Minor: Armor, Density Increase

Toad (Brawler) Major: Scrapper, Minor: Leaping, Super Agility

Sauron (Wild Card) Minor: Flight, Melee Specialist, Stun, Parasite

Saurian Henchmen (Veterans) Minor: Power Blasts, Melee Specialist

(Note that these archetypes represent the early versions of these characters, before Scarlet Witch became one of the most powerful mutants on earth, before Toad was a badass and before Sauron could breathe fire.)

Ka-Zar the Savage (Wild Card) Minor: Fast, Melee Specialist, Rapport (Shanna), Super Agility

Shanna the She-Devil (Wild Card) Minor: Fast, Melee Specialist, Rapport (Ka-Zar), Super Agility

Zabu (Big Cat) Minor: Enhanced Senses, Melee Specialist, Leaping, Super Agility.

Yes, Ka-Zar and Shanna are essentially the same character. (Shouldn’t they be?) For Zabu, I didn’t follow any rules. I just gave him what I thought an intelligent Smilodon should have. I also gave him a base movement of 12 and a body of 8, in case anyone cares.

And that’s about it for now! I think I’ll take a break from SMF (and supers gaming in general) until I get my hands on the finished rules. I may adapt more TSR Marvel Super Heroes adventures when that happens, so stay tuned! In the meantime I have something big (pun soon to be understood) planned for May.

See you soon!

MH-1 The Breeder Bombs Part 4: Red Scare!

The Scenario: The X-Men follow Magneto’s trail to Arganistan (not Afghanistan; much like Roxxon Oil, Ryder’s Island and the Maggia crime families, Marvel changed the real world name ever-so-slightly here), where the next Breeder Bomb awaits! Magneto placed it smack in the middle of a farm close to the Soviet border, much like the Ust-Ordynski Collective that was the childhood home of Colossus!

Unfortunately, Colossus has little time for nostalgia. Magneto has alerted the Russian government that the X-Men are on their way. The Soviet Super Soldiers, along with a contingent of Soviet Super-Troopers, are dispatched to neighboring Arganistan (borders? what borders?) to confront and arrest the X-Men on charges of espionage, and, in Colossus’s case, high treason against the Motherland!

Setup: I used a 4′ x 4′ area of farmland with some outbuildings, pastures and the odd tree or two. A large water tower and some farm machinery are part of the terrain as well. The Breeder Bomb is in the middle of the play area.

The X-Men deploy on one side of the table opposite the Soviet Super Soldiers.

Special Rules:

The Breeder Bomb: The X-Men’s objective is to defuse the Breeder Bomb. Attacking the bomb is not an option as it could result in detonation.  In order to defuse the bomb, one of the X-Men must get into base contact with the control panel and use a Special Action to make an attempt. This attempt is a Science check, so Kitty Pryde gets a +2D bonus to an attempt. Defusing the bomb requires 4 goals and may not be attempted if there are any enemy models within 6″ of the bomb. Failure to defuse the bomb results in a radiation leak!

If the bomb begins leaking radiation, the X-Men and the Soviet Super Soldiers each take an automatic 2D attack at the start of each round. This may be resisted normally, but Armor has no effect on any damage received. This damage is cumulative (to a maximum of 6D) with each failed attempt to defuse the bomb (i.e. 2 failed attempts = 4D per round, 3 or more = 6D per round).

Capture the Traitor: The Soviet Super Soldiers have standing orders to stop the X-Men from doing whatever they’re doing. In addition, they have been ordered to capture Colossus, as the Soviet government views him as a traitor for joining an American super-group rather than putting his powers to use in service of Russia. Crimson Dynamo and Ursa Major must attack Colossus if it is possible to do so, and will prioritize him over other targets.

ROUND 1

The X-Men win initiative for the first round. Storm flies over to the left, taking some cover behind the trees before blasting the Soviet Super-Troopers (henchmen group) with a lightning bolt. She takes out two of them, bringing their number down to eight. Darkstar activates, flying over to her left on an almost mirror image course from Storm. She fires her darkforce power blasts at the hapless Kitty Pryde, inflicting 1 damage to her. Cyclops fires back at Darkstar, but fails to achieve even a single goal. Looks like Cyclops is off to another great start.

Red Guardian rushes forward, trying to get close to the Breeder Bomb. Colossus and Ursa Major both move towards the center of the table.

Rogue activates next, flying 20″ towards the center of the table, prepared to meet Red Guardian and Ursa Major should they charge, but unable to do anything this turn. Titanium Man activates, flying around the side of the Breeder Bomb and power blasting Rogue for 1 damage. Kitty Pryde moves towards the bomb’s control panel. Crimson Dynamo flies towards the center and has a clear shot at Colossus. He takes it, but Colossus shrugs off all damage.

Wolverine activates, moving quickly to close with Titanium Man. Unfortunately he doesn’t get there this turn. The Super Troopers activate as a group, moving forward 6″ around the woods.

Finally, Nightcrawler teleports into melee with Darkstar. Although he doesn’t count as charging, he still manages to inflict 2 damage on the Russian mutant, dropping her from 6 to 4!

ROUND 2

The Soviets gain initiative handily! Titanium Man charges Rogue. Since she’s on the ground, he has to land to do so, but when all is said and done, he smacks her for an additional 2 damage and knocks her back 8″! She manages to keep her footing, but that smarted! (No picture of this; I got caught up in the game and forgot to snap one!)

Wolverine activates and charges Titanium Man (who probably shouldn’t have landed after all…), shredding him for 4 damage! That drops Titanium Man’s body by half! Ursa Major moves forward a plodding 5″ (Bricks don’t move fast).

Storm flies around her woods and blasts Crimson Dynamo for 3 net goals worth of damage, dropping the ex-KGB agent to half his body! The Super Troopers activate, concentrating their fire on Storm. It pays off, and Storm takes 3 goals worth of damage, dropping her to half her body as well! Rogue activates, charging Crimson Dynamo who is still feeling the effects of Storm’s power blasts! Rogue decks him, dropping his body to zero and knocking him back 15″! Luckily, he makes his KO check and his knockdown check, so he’s still up (barely), but certainly not feeling all that well!

Crimson Dynamo activates next (probably because he won’t have too many more chances to activate!). He fires at Rogue, inflicting 1 damage. Hardly fitting retribution, but better than nothing. Cyclops activates, firing a wide-beam optic blast at the Super Troopers. You would figure that with 6 dice to roll against the Troopers measly 2 dice to resist, he would have scored enough goals to at least take out a few of the henchmen, but you would be wrong. Cyclops proves yet again that he sucks (at least in this campaign), failing to achieve even one goal. He does no damage to the group.

Darkstar attempts to entangle Nightcrawler and is successful, hoping to pummel him at her leisure next round. Nightcrawler tries to escape but fails. Next, Red Guardian moves, getting within the 5″ range needed to hurl his shield at Rogue for 1 damage, chipping away once again at her overall health. Colossus moves forward, but is too far out of range to charge anyone. Finally, Kitty moves right up to the control panel but can’t attempt a disarm as there are too many enemies within 6″ of the bomb.

The end of a bloody round, which saw the Crimson Dynamo nearly KO’ed, Titanium Man and Storm each reduced to half their overall health, and Rogue suffering 3 damage!

ROUND 3

The X-Men gain initiative. Rogue activates and charges Ursa Major, smacking him for 4 total damage, dropping the big bear by half his body in one shot and knocking him back 20″! He manages to keep his footing, but he’s a lot farther back than he was a minute ago. Red Guardian charges Rogue; after all the dice are rolled he inflicts 1 damage to Rogue, slowly but surely whittling away at her health.


Storm activates, power-blasting the Soviet Super-Troopers for 3 more damage, dropping 3 of their number. The troopers fire back at Storm, but they miss! Cyclops takes out another 2 of them on his turn. Titanium Man is locked in combat with Wolverine, and any attempt to leave would mean that Wolverine would get a free shot at him. Instead he decides to attack Wolverine, inflicting 1 damage on Wolverine and knocking him back 4″. Titanium Man then takes off and flies away, putting some space between him and those adamantium claws.

Nightcrawler breaks out of his entanglement and attacks Darkstar, but does no damage. Darkstar successfuly breaks from  melee without Nightcrawler landing a blow, backs off a few inches and recharges her power blasts, opening fire on Nightcrawler. But Nightcrawler proves too agile, and is unharmed. Kitty Pryde activates but still has no opportunity to disarm the bomb, and no one within range to attack. She does nothing.

Crimson Dynamo charges Rogue, who is in combat with Red Guardian. He rolls his normal 5D attack, plus 1D for charging, +1D for assisting Red Guardian, and scores a net 7 goals! That’s more than enough to drop Rogue permanently! She is knocked back 21″ and fails her KO check! Rogue is out of the battle!

Colossus moves steadily towards Titanium Man, Red Guardian and Crimson Dynamo. Ursa Major activates, moving slow as molasses back to the fray. Finally, Wolverine moves quickly around the Breeder Bomb in support of Colossus and the two are ready to rumble next Round!

ROUND 4

The X-Men keep initiative. Wolverine easily regenerates his lost health and is back to his maximum. He activates and charges Crimson Dynamo, who had to land last turn in order to pummel Rogue. Wolverine rolls poorly and inflicts no damage against the Russian.

Titanium Man sees an opening, and rather than attack Colossus or Wolverine, he opts to charge Storm instead! He inflicts 4 goals of damage, enough to force a KO check. Storm fails and is out of the fight!


Colossus charges into melee with Red Guardian and Crimson Dynamo. He attacks Crimson Dynamo, inflicting the necessary damage to put the Dynamo down for good!

Any celebration is short-lived! Darkstar activates and, after a successful recharge, power-blasts Nightcrawler for 6 total damage, enough to drop him from completely healthy to a KO check! Nightcrawler fails and is overcome by the darkforce blasts!

Cyclops fires at the Troopers again and finally wipes them out. Ursa Major moves ever closer to the fight, but is still out of it. Kitty can’t do anything for the same reasons as last round. Red Guardian attacks Wolverine, but does no damage.

Another bloody round, which saw the end of Storm and Nightcrawler, as well as the Crimson Dynamo!

ROUND 5

The Soviets wrest initiative away from the X- Men! Ursa Major, bellowing like the bear he is, charges into combat (finally) with Colossus and Wolverine. He uses a Haymaker and cracks Colossus for 2 damage, but knocks him back 24″ with the “Way Outta Here” Brick maneuver! Colossus manages to keep his footing. Wolverine attacks Ursa Major with an Acrobatic Attack (a Brawler maneuver), scoring 3 net goals and dropping Ursa Major’s body to 1! Red Guardian attacks Wolverine with an Acrobatic Attack of his own, inflicting 3 damage on Wolverine, dropping him from 8 to 5.

Cyclops steps up and blasts Titanium Man for 7 net goals, 3 more than needed to force a KO check. He passes (barely), and manages to remain conscious although much the worse for wear. Darkstar teleports closer to Colossus and attempts to entangle him, but fails to roll a single goal. She’s left herself quite vulnerable!

Colossus takes advantage and charges Darkstar, winding up with a Haymaker that whiffs for no damage! Talk about lucky!

Titanium Man decides to charge Cyclops as he does better in melee than with power blasts. He could shoot it out with Cyclops, but his chances are much better if he takes the fight directly to the mutant. He also tries a Haymaker, doing only 1 damage, but with the triple knockback from Way Outta Here, Cyclops is knocked back 12″ and is knocked down!

Kitty Pryde charges into combat with Darkstar, since she’s having no luck disarming the bomb. She manages to inflict 1 damage on Darkstar. Darkstar has seen better days…she’s locked in hand-to-hand with Kitty Pryde and Colossus, and any attempt to flee will allow them both to take a shot at her. What to do?

ROUND 6

The X-Men regain initiative. Wolverine regenerates all his lost health and is back to full. Cyclops stands up and moves 4″, blasting Titanium Man for 4 damage, enough to KO the Super-Soldier for the rest of the game! Ursa Major attacks Wolverine, scoring 3 goals and undoing his Regeneration for the round, dropping him back down to 5 body!

Colossus recharges his Haymaker and clobbers Darkstar for 3 net goals, enough to knock her back 12″ into the fence. She fails both her knockdown and KO roll, and is out of the fight!

Red Guardian recharges his Acrobatic Attack and attacks Wolverine, inflicting 2 more goals of damage on Wolverine. Kitty Pryde moves back to the Breeder Bomb’s control panel, but Red Guardian is still within 6″ and she can’t attempt to disarm it until he’s gone!

ROUND 7

The X-Men keep initiative. Wolverine rolls a ton of goals on his Regeneration roll and heals back up to full health. Wolverine recharges his Acrobatic Attack and attacks Ursa Major, but inflicts no damage. Ursa Major responds with a net 5 goals, knocking Wolverine 20″ back and dealing 5 damage! (Good thing he’s got that healing factor!)

Cyclops uses a Blaster special maneuver, Radius Attack, which allows him to blast Ursa Major and hit anyone within 5″ (in this case Red Guardian) with a residual blast. He hits Ursa Major for 3 goals, enough to KO the big bear (after a failed KO check). The residual blast encompasses Red Guardian, who ends up taking 2 damage from the explosion.

Run Away!

So at this point, the only Soviet left on the table is a wounded Red Guardian, who is facing down Wolverine, Cyclops, Colossus and Kitty Pryde. There’s no real point to playing out the scenario for a few more rounds until the inevitable happens. Once Red Guardian flees the field, Kitty has no trouble disarming the bomb. Victory for the X-Men…but at what cost?

Afterword:

I changed this scenario quite a bit from the original Marvel adventure, particularly with regard to the opposition. In the original Breeder Bombs adventure, the X-Men faced off against the Crimson Dynamo and a bunch of Soviet Super-Troopers (2 per X-Man). In a roleplaying game, that might have worked; in Super Mission Force, this is some weak opposition indeed as the X-Men would have little trouble taking out a henchmen group and one lone villain. So in addition to the troopers, I opted to include the entire Soviet Super Soldier team: Crimson Dynamo, Darkstar, Red Guardian and Ursa Major; along with sometime teammate Titanium Man. This worked out well and provided much more of a challenge to the heroes.

Storm, Rogue and Nightcrawler all got KO’ed this scenario, which means there may be some lingering effects for the last scenario of the campaign. Some quick rolls on the “Fate of the Fallen” tables yielded these results: Storm is seriously injured (-3 to Move, -1D to attack rolls for next battle); Rogue is lightly injured (-2 Move for next battle); and Nightcrawler is grievously injured (misses next battle), which means the team will just have to do without him next time as they face down Magneto and the Brotherhood of Evil Mutants!

My builds for the Soviet Super Soldiers are as follows:

Titanium Man (Super) Major: Super Strength, Minor: Power Blasts, Flight, Armor, Entangle

Red Guardian (Brawler) Major: Scrapper, Minor: Shield, Super-Agility

Ursa Major (Brick) Major: Super Strength, Minor: Enhanced Senses, Melee Specialist

Darkstar (Sorcerer) Major: Sorcery, Power Blasts, Minor: Barrier, Entangle, Teleport, Flight

Crimson Dynamo (Blaster) Major: Power Blasts, Minor: Armor, Super Strength, Flight

Soviet Super-Troopers (Henchmen) Minor: Power Blasts, Armor


If anyone cares, I used U-Men for the Super Troopers and I used an old Grenadier werebear miniature for Ursa Major. That’s because the Heroclix Ursa Major looks incredibly silly.

Up next, the finale to the Breeder Bombs as the X-Men face off against Magneto and the Brotherhood in…The Savage Land!!!!!

MH-1 The Breeder Bombs Part 3: Sentinel Attack!

The BREEDER BOMB!!!

The Scenario: Thanks to information provided by the captured duo of the Fixer and Mentallo, the X-Men have tracked Magneto’s first Breeder Bomb to the remote wilds of Alaska. One short Blackbird flight later the team arrives, ready to thwart the Mutant Master of Magnetism in his nefarious plot to accelerate the evolution of humanity, ushering in the age of Homo Superior!

Unbeknownst to the heroes, Magneto has secretly tipped off Project: Wideawake as to the X-Men’s plans. A group of Sentinels consisting of 3 Mark V Sentinels and a group of 10 Sentinel Troopers (henchmen) has been dispatched to the location in an attempt to capture or destroy the X-Men, ensuring that Magneto’s plan proceeds unhindered.

Complicating matters further is the presence of a group of Alaskan trappers, who awoke this morning to find that a huge piece of blinking machinery had mysteriously appeared outside their cabin overnight! The trappers—Filthy Pierre, Stinky Jacques, Dirty Henri and Unwashed Claude—don’t know what the Breeder Bomb is, but they know they want it! After several long months in a remote cabin with no running water, these four manly men have little to show for their trapping efforts. They think they can make money off of selling this thing to the highest bidder, and no muties or robots are gonna stand in their way!

Setup: I used a 4′ x 4′ board for the battle, set up to resemble the Alaskan wilderness. In one corner of the board is the trappers’ cabin. In the center of the board is the Breeder Bomb. The rest of the terrain includes hills, forests and trees, and the odd clump of ice or rock.

The trappers deploy outside their cabin. The Sentinel force deploys on the same side of the table, in the opposite corner of the trappers. The X-Men deploy on the other side of the table along the edge.

Special Rules:

The Breeder Bomb: The X-Men’s objective is to defuse the Breeder Bomb and ensure that no harm comes to the trappers. Attacking the bomb is not an option as it could result in detonation.  In order to defuse the bomb, one of the X-Men must get into base contact with the control panel and use a Special Action to make an attempt. This attempt is a Science check, so Kitty Pryde gets a +2D bonus to an attempt. Defusing the bomb requires 4 goals and may not be attempted if there are any Sentinel models within 6″ of the bomb. Failure to defuse the bomb results in a radiation leak!

If the bomb begins leaking radiation, the X-Men and the trappers each take an automatic 2D attack at the start of each round. This may be resisted normally, but Armor has no effect on any damage received. This damage is cumulative (to a maximum of 6D) with each failed attempt to defuse the bomb (i.e. 2 failed attempts = 4D per round, 3 or more = 6D per round).

The Trappers: The four trappers count as a henchmen group, so they only activate once per round. The trappers don’t discriminate between the Sentinels and the X-Men; as far as they’re concerned, everyone is trying to steal their treasure. To represent this, roll a die at the start of each round. On a 1-3, the trappers will attack the closest X-Man; on a 4-6 they attack the closest Sentinel. They always use Coordinated Fire.

The X-Men should do everything in their power to protect the trappers from harm. If the trappers are hurt by either the Sentinels or leaking radiation, the X-Men should lose story points. The X-Men cannot attack the trappers in any way that causes damage no matter how much they want to, but  non-damaging attacks (like entangles) are ok.

ROUND 1

The X-Men gain initiative. My first plan was to have Storm scoop up Kitty Pryde and fly her over to the control panel so that she could start disarming the bomb on the X-Men’s next activation, but I decided against it as the Sentinels would easily get a model within 6″ of the bomb before Kitty could act. Instead I decided to have Rogue fly Colossus over there instead. The two of them should be able to hold off the Sentinels for a while…

The Sentinels activate next, and Sentinel #1 flies directly over to the bomb (see? told you it would happen) and lands about 6″ away from Colossus.  He opens fire on Colossus, but the power blast glances harmlessly off the mutant’s osmium-steel skin. Finally the trappers act, but they are well out of range of any Sentinels or X-Men, so all they can do is move away from their malodorous cabin towards the bomb, cursing in French and shooting off their guns threateningly.

Colossus activates and wastes no time charging Sentinel #1, clobbering it for 7 net goals of damage. The Sentinel is knocked back but manages to keep its footing. Sentinel #3 activates and flies towards the fray. It attempts to entangle Colossus, but is unable to.

Cyclops fires at Sentinel #1, trying to put the damaged robot out of the fight for good. Unfortunately, he rolls extremely poorly and fails to score even one goal. Oops.

The Sentinel Troopers activate and fly towards the trappers, seeking to cut off their access to the bomb. They open fire on the trappers, and despite rolling 10 dice total, they pull a Cyclops and fail to score even a single goal! I’d say the dice were cursed, but they were two separate dice pools! The trappers sneer in defiance!

Storm doesn’t think the trappers will be as lucky the next time, so she flies over to offer them some protection from further Trooper fire. She power blasts the Troopers with a bolt of lightning…but bad luck strikes yet again, and she fails to inflict any damage on the group!

Sentinel #2 flies over to the Breeder Bomb and, like Sentinel #3, it tries to entangle Colossus, but fails. The big guy just won’t lay down!

Finally, the remaining X-Men act. Nightcrawler teleports Wolverine into the midst of the three Mark V Sentinels. Kitty Pryde moves 6″ closer to the bomb, but can’t do much else. Finally Wolverine acts, charging into combat with Sentinel #2. Unfortunately for him, the Sentinel resists all damage.

Round 1 ends with the X-Men and the trappers unharmed. Sentinel #1 only has 2 boxes of health left, but the other Sentinels and the Troopers are unhurt.

ROUND 2

The X-men keep initiative. Storm knows those trappers are dead meat if they’re left to their own devices, so she flies over to them and calls up her windy force field, extending it to protect the trappers. In Super Mission Force, a force field user can protect a maximum of 3 additional models (besides herself); but I decided Storm would forgo the protection of her own force field so that Unwashed Claude could benefit from it instead. You figure the trappers would be grateful, but instead they open fire on Storm! Luckily they fail to cause any damage.

Sentinel #1 regenerates 2 boxes of health, bringing him back up to 4 Health. He pummels Colossus, but fails to damage him (again, thanks to Armor).

Rogue charges Sentinel #2, which is busy fighting Wolverine. She clobbers it for a net 6 goals of damage! She trying to clear some space around the bomb, so she uses Way Outta Here, a Brick special maneuver that triples knockback distance. Sentinel #2 is knocked back 24″ and is knocked down! It will have to spend some movement getting up on its activation later…

The Sentinel Troopers activate, firing en masse upon the ignorant trappers. Thanks to Storm’s force field, none of them are hit.

Nightcrawler wants to get Kitty over to the bomb now that some space has cleared, so he teleports over to Kitty and teleports her back to the bomb. (Although SMF doesn’t really allow this, it’s certainly thematically appropriate as Nightcrawler does this kind of thing all the time.) I made sure he had enough goals to allow for the required 20″ distance, and Bamf! Kitty is delivered to the bomb!

Sentinel #3 charges Colossus, inflicting 2 damage and knocking Colossus back 6″. He manages to keep his balance and isn’t knocked down. Cyclops moves to get within sight of Sentinel #1, trying again to put it out of the fight. Once again, he fails to score any goals. (Is his visor working?)

Sentinel #2 fires at Rogue, blasting her for five goals of damage! She only has 3 boxes left. Bet she wishes she took a minute to absorb Colossus’s Armor when she was giving him a lift last round…

Wolverine uses a Brawler special maneuver,  Acrobatic Attack, to charge Sentinel #3. The two re-rolls he gains from the maneuver help inflict a net 7 boxes of damage on the big robot, dropping it to 2 health!

The remaining X-Men act. Storm fails to power blast the Sentinel Troopers, perhaps because she’s busy protecting the ungrateful trappers who are firing upon her. Finally, Kitty Pryde acts. She can’t attempt to defuse the bomb, because Sentinel #3 is right in her face. So she charges Sentinel #3.

She rolls her normal 4D attack, +1D for charging, +1D for assisting Wolverine, +1D for attacking something electronic (my rule for Kitty) for a total of 7 dice. She scores an impressive 9 goals and utterly destroys Sentinel #3!

ROUND 3

In a stunning turn of events, the trappers gain initiative this round, followed by the Sentinels, then the X-Men.

The trappers open fire on the Sentinel Troopers, but fail to damage the group. The Sentinel Troopers act next, spreading out a bit to get some Troopers near the Breeder Bomb so as to foil any defusing attempts. They open fire on Storm (one of their primary objectives), but even without the force field they fail to hit her.

Nightcrawler successfully recharges his Teleport after carrying Kitty, and teleports into melee with the Sentinel Troopers. Although it doesn’t count as a charge, he still manages to take out 3 of the Troopers with his normal attack and the extra attack he gets from his prehensile tail (Multiple Limbs).

Sentinel #1 regenerates 3 boxes, bringing it back up to 7 health. Sentinel #2 regenerates 2 boxes, bringing it back up to 5 health. Sentinel #1 activates, using its Metamorph ability to grow Multiple Limbs. It then charges Rogue, inflicting 6 total boxes of health on her with its two attacks on the charge. Rogue only had 3 boxes of health left, so she has to make a KO check or be knocked out. She manages to make it, but she’s barely standing!

Cyclops fires at the Sentinel Troopers, trying to whittle them down. He fails again to score even one goal, making him the official Worst Leader Ever. Sentinel #2 charges Colossus, but the big mutant squares up and resists all damage. Wolverine recharges his Acrobatic Attack and charges Sentinel #1, inflicting 6 boxes of damage, enough to drop it to 1 health.

Rogue takes advantage of Wolverine’s close proximity to absorb his Regeneration power, which she may need relatively soon. She then attacks Sentinel #1, scoring enough net goals to knock it back 12″ and put it out of commission!

Kitty Pryde activates, charging into combat with Sentinel #2. Once again, she annihilates the big robot with 6 net goals. It fails its KO check and is destroyed!

Finally, Colossus activates. Since he’s no longer in combat with Sentinel #2, he picks up a huge tree and throws it at the Sentinel Trooper group. He scores seven net goals, which means that seven henchmen are removed. Since there are only seven Troopers left, Colossus single-handedly wipes them out by throwing a huge tree at them. Ha!

ROUND 4

On the first activation, Kitty Pryde succeeds in defusing the bomb, so it’s game over. We can assume the X-Men deal with the trappers in some non-lethal way (from downwind, of course). Victory to the X-Men!

AFTERWORD

Another quick game…3 rounds played in under half an hour. Super Mission Force is fast!

I wasn’t expecting so many times when one side completely failed to do any damage to the other…not because the damage was resisted, but because the dice roll was so poor that the attacker didn’t even score any goals at all! I think the dice were feeling mischievous. Clearly, the breakout star of the team was Kitty Pryde this time around. She accounted for two of the Sentinels all by herself. Rogue got into some trouble and almost got KO’ed, but since she managed to remain standing, she doesn’t need to roll on the post-battle damage table for any possible injuries. She’ll be back next scenario fresh as a daisy. The only other X-Man injured was Colossus, and he only took 2 boxes. The less said about Cyclops’s performance, the better.

The other thing that didn’t really work was the “failed defuse = radiation leak” idea. I think it’s a solid premise (it’s adapted from the original RPG adventure), but on a table this size with forces that can easily reach the center of the board, there was never an opportunity to defuse the bomb. There was always a Sentinel model within 6″ of it!

I changed the scenario from its original RPG form in a few minor ways. First, in the original, the setting is “a mining town in Western America”, not Alaska. I changed the setting because I wanted to use my new snow terrain. Also, there was a lone crazed miner who wanted the bomb, not a group of mad trappers. A few Sentinels aren’t really strong opposition for a group of heroes like this, so I added the henchmen group and made the trappers somewhat unpredictable. Having to protect them was just another challenge for the X-Men.

Here are my builds for the Sentinels:

Sentinel MK V: (Metamorph) Major: Metamorph, Minor: Super Strength, Regeneration, Construct, Massive

(Yes, I know that’s a lot of powers, but Metamorph doesn’t allow for any of them in a package.)

Sentinel Troopers: (Henchmen Group) Minor: Flight, Power Blasts

Trappers: (Henchmen Group) Minor: Power Blasts, Resistance

Lastly, if you’re wondering what I used for the actual bomb, it’s a mystery piece of resin terrain I’ve had for about 15 years. The base says “Epicast” on it, but it was clearly molded from a piece of shipping Styrofoam (it has a R and an arrow pointing up on it that I had to fill in before painting). I think it looked sufficiently Jack Kirby-esque so that it could be a bomb or any other kind of infernal machine or doomsday device, so I painted it up just for this campaign! What do you think?

Next time it’s off to Mother Russia where the next Breeder Bomb awaits!


MH-1 The Breeder Bombs Part 2: Ambush!

The Scenario: While the rest of the X-Men are downstairs training (see last time), Cyclops is moping around the grounds of Xavier’s School for Gifted Youngsters. What he’s brooding about we can only guess. Perhaps it’s that his girlfriend turned into an evil super-powerful cosmic entity and then died; or that he then fell in love with a clone of her that was really a demon queen; or that he has a really shitty relationship with his brother; or that his father would rather jaunt around the galaxy with a bunch of misfits rather than spend one minute with his kids; or that his own son from an alternate future timeline is a cyborg who is also a colossal douchebag; or maybe that it would be nice to take his friggin’ visor off every once in a while without blowing big holes in anything he looks at…you get the picture.

Suddenly, an attack! The Fixer and his partner Mentallo ambush the melancholy mutant!

The Vile Villains

Setup: Once again, I used a 2′ x 2′ surface, representing the landscaped garden of the X-Mansion. (The planters, for those who care, are from Jo Ann Fabrics “Bloom Room” collection. I got them super cheap on clearance.) I’ve arranged the planters and shrubs in a pleasing pattern around a central feature (like the Chinese lantern here). The villains deploy on one side of the board, while Cyclops deploys on the opposite side.

Special Rules: The odds are not in Cyclops’s favor (in fact, you could say the odds are 2-1 against him). In order to give him a chance to even things up a bit, I’ve decided that it’s a good bet the grounds of Xavier’s School have some built-in defenses, considering how often the place gets trashed by marauding Sentinels and the like. The Chinese lantern contains controls to activate two stun cannons in the garden. These stunners attack anything (other than Cyclops) in a 180° forward firing arc with the Stun power. Cyclops can activate the stunners by using a Special Action while in base contact with the lantern.

Taking Aim

ROUND 1

In order for Cyclops to survive this, he’s going to need to play it smart, and that means seeking cover and hiding so he doesn’t get shot to death by turn 3.


The villains gain initiative for the first round, and Fixer wastes no time. He flies 20″ directly across the board and throws a glue bomb at Cyclops, hoping to entangle him, but fails. Cyclops activates and blasts Fixer for 2 boxes of damage, then quickly takes cover and ends his movement by hiding. This will make him tougher to target next round. Mentallo moves, but is out of range for anything he could really do, so his turn ends.

ROUND 2

Cyclops gains initiative. He darts from planter to planter and fires at Mentallo, who is standing out in the open. But Cyclops misses! He ends his turn in cover, however; so he elects to hide again. But Mentallo spots him anyway and blasts him with a wave of mental energy, doing 3 boxes of Psyche damage to Cyclops! Ouch! That’s half his health! Fixer tries to spot Cyclops, but fails (lucky for the X-Man).

ROUND 3

Cyclops keeps initiative, and edges around the planter, keeping himself in cover. He uses Rapid Fire (one of the Blaster special abilities) and takes a shot at both Fixer and Mentallo. (Cyclops is looking to end this fight quickly. He can’t take another mind blast like that!) Mentallo is behind cover, so Cyclops fails to hit him; but Fixer is just floating around up there. Cyclops tags him for one box of damage, then hides.

Mentallo fails to spot Cyclops’s hiding place (one would think he would only have to follow the big red energy beam back to its source, but whatever), so for lack of anything else to do he meanders closer to the center. Fixer makes enough goals on his Perception check to spot Cyclops’s hiding place and fires a power blast his way. Unfortunately, he fails to score a single goal and misses the mutant!

ROUND 4

The villains act first. Since Fixer spotted Cyclops hiding last turn, and Cyclops hasn’t had time to hide again, he starts the round knowing where Cyclops is already (no need to check Perception again). Fixer fires at Cyclops, but the planter blocks his blast. Cyclops makes his Recharge roll and is able to use his Rapid Fire again. He wastes little time and hits both his targets: Fixer for 1 box, and Mentallo for 3 boxes! Cyclops isn’t going down easy! He hides in cover again at the end of his turn, and Mentallo can’t spot him on the villain’s activation. Mentallo can do nothing else but wander around and hope to bump into Cyclops…

Cyclops dives for the stunner controls

ROUND 5

Cyclops activates first and makes a mad dash towards the center of the board. He forgoes taking a combat action, instead using a special action to deploy the stunner cannons. Since he’s not in cover, he can’t hide; but he does end his turn by dropping prone, making himself a smaller target. It works out for him…sort of. The Fixer activates next and shoots at Cyclops, but misses. Mentallo has better luck, and mind blasts Cyclops for 2 boxes of damage. Cyclops only has one box left, and the garden starts spinning…


ROUND 6

Cyclops keeps initiative. He tries to recharge his Rapid Fire, but fails the roll. He fires at Mentallo, using the Blast Back special ability. He is successful, inflicting one box of damage to Mentallo. This knocks him back 2 inches, squarely in between those stunners! Cyclops moves quickly to cover and hides again. Fixer can’t spot Cyclops on his activation, so he quickly flies out of range of the stunners. The stunners activate, blasting Mentallo…but Mentallo shrugs off the effects easily! After also failing to spot Cyclops, he gets the hell out of the crossfire pretty quick. He hides on the other side of the same planter Cyclops is ducking behind.

ROUND 7

At thjis point, everyone’s pretty beat up: Fixer and Mentallo each have 2 boxes of health left, while Cyclops is barely standing with 1 box left. The round is pretty uneventful with no hits scored on anyone. Both Mentallo and Cyclops end their turns hiding in cover.

ROUND 8

The villains gain initiative. Mentallo tries to spot Cyclops, but can’t; so again he just keeps out of the view of those stunners and maintains cover. Cyclops tries to recharge Rapid Fire for the third time and fails once more, so he elects to fire at Fixer (since he doesn’t have to try and spot him first). He blasts Fixer for 3 boxes of damage, enough to drop him like a wet bag of dirt. Fixer fails his KO check and is out! This ends the round.

KA-POW!

ROUND 9

Cyclops gains initiative and spots Mentallo. Being a master tactician, Cyclops opts to charge into melee rather than fire at Mentallo. The reasons for this are twofold: first; if he fired, Mentallo would gain a bonus to defense because of the cover he’s behind. Second, Mentallo’s best ability, Mind Blast, can’t be used in close combat, so charging him effectively negates a pretty big advantage should Mentallo survive into next round. If Mentallo then tries to break out of combat to use it, Cyclops gets a free shot at him before he can.

The charge bonus pays off and he ends up inflicting a net 2 goals on Mentallo, who fails his KO check!

Victory to Cyclops!

AFTERWORD

Here are my builds for the villains:

Fixer (Blaster) Major: Archery, Minor: Flight, Armor. Quiver: Entangle, Melee Weapon, Stun

Mentallo (Mentalist) Major: Mentalism, Minor: Clever, Armor

This cat-and-mouse battle wasn’t as much fun to play as the Danger Room, but it was interesting to see how much hiding and taking cover can affect play tactically. If Cyclops had tried a straight up fight, he would have probably got creamed early on. Also, the small number of miniatures on the board meant the Rounds flew by; this game didn’t take much longer than 20 minutes to play.

I’m willing to bet on replay the villains would probably win more often than not. All it takes is one or two good shots and your Body boxes can start dropping fast. I think Cyclops got lucky.

After the battle, the X-Men interrogate the villains and discover that Magneto was hoping to take a few X-Men out of action before launching his evil plan to detonate…The Breeder Bombs! He almost succeeded in eliminating the team leader with this ambush!

The X-Men hop in the Blackbird SR-71. Destination: Alaska! The first bomb awaits!