Tag Archives: Supersystem 3

The Brotherhood of Evil Mutants

My next big Supersystem 3 game is going to be based on The Breeder Bombs, the classic (if not-so-great) TSR Marvel Superheroes adventure from the mid-80’s. Last time, I rebased and repainted the Uncanny X-Men team of my youth.  Now, I bring you…The Brotherhood of Evil Mutants!!!

From left-right: Blob, Toad, Magneto, and his wayward offspring Quicksilver and the Scarlet Witch. All have been repainted and rebased from their original dials. I decided since Magneto is such a badass, he should have a unique base. I used this large junk base from Taban miniatures. He has a pretty solid bottom which was easy to drill and pin, making it look (IMO) better than a Heroclix flight dial. Quicksilver was extensively repainted in his original “evil” green costume and rebased on an Armorcast urban base. The Scarlet Witch is rebased on a Micro Arts Studio tech base.

The Breeder Bombs features robot doubles of the Brotherhood rather than the actual mutants themselves, which I find really dumb. It takes nothing away from the plot of the module to simply use the Brotherhood rather than robots (and it makes more sense). You might think that aside from Magneto, these guys are a bunch of second-stringers, and you could be right. But remember: “NOTHING-NUH-NUH-NOTHING-NUH-NOTHING MOO-MOVES THE BL-BLO-BLOB!!!!” (Kudos to anyone who gets that referential joke.)

A view from the back. And now, in the immortal words of Magneto: “X-MEN…WELCOME…TO DIE!!!!!”


The Uncanny X-Men

I’m gearing up to run the next Supersystem 3 game based on the old Marvel Super Heroes RPG by TSR. Up next is MSH-1, The Breeder Bombs, so I’ve been busy repainting and rebasing the X-Men. This time I remembered to take a picture of the heroclix before and after my efforts.

Above, L-R, Kitty Pryde (Shadowcat), Wolverine, Colossus, Professor X, Cyclops and Storm. These are the X-Men of my youth (early to mid-eighties), so in selecting my clix I went for authenticity and made sure I had a mohawk-sporting Storm. Kitty Pryde was known as Ariel back then, and she wore a completely different costume. So did Wolverine.

So here are the repaints, sandwiched between Nightcrawler and Rogue, who round out the post-Dark Phoenix Saga/ Secret Wars era team. I couldn’t find a Heroclix Nightcrawler that I liked (and many are expensive), and I couldn’t find a Rogue miniature that was time-specific, so I had to use these old TSR metal miniatures from the Marvel Super Heroes RPG line. They scale pretty well with the clix.

As you can see, Wolverine is resplendent in his Autumn ensemble (i.e. brown costume). I don’t remember Cyclops ever beings so light blue, so it was easy enough to darken his costume up. Rogue’s costume has changed about a dozen times over the years, and unfortunately the TSR model shows her in her “orange tunic/legwarmers” look. Although I can’t imagine using Professor X much in  Supersystem 3 (he’s way too powerful), I decided to include him for completeness. I changed his suit color and wheelchair and gave him a nice plaid blanket to keep his legs warm. I did the least with Storm, who only really needed some minor highlighting and rebasing to fit right in.

I had to change Wolverine and Ariel’s costumes completely from the original Heroclix models. I’m pretty happy with the results (although Ariel’s face could be better.) Kitty’s costume isn’t 100% accurate (she had a bigger collar and no shoulder pads), but I like it. No Lockheed the Dragon, sadly.

Here are the closeups of the TSR models. Nightcrawler isn’t too bad, but the Rogue miniature is really not all that great. Her pose is mystifying and like most of these TSR models, the facial sculpt is awful. I did what I could with her. I don’t know what kind of alloy TSR used in their miniatures line, but it really doesn’t hold paint well, even when primed. Paint rubs off easily, even just handling them during the painting process.

Now I just need to paint a certain Master of Magnetism and his cronies and we can play!

Mr. Freeze

Mr. Freeze has long been one of my favorite bat-villains, due in large part to Arnold Schwarzenegger’s brilliant, iconic performance in the 1997 film Batman & Robin.

Mr_Freeze_(Arnold_Schwarzenegger)_1

OK, maybe not.

But I really do love Mr. Freeze. Especially any episode of the Batman Animated Series in which he is featured (voiced by the late, great Michael Ansara).  He is also really cool (pardon the pun) in the Batman: Arkham City video game, as well as the Arkham Origins downloadable content “Cold, Cold Heart.”

I’ve been rebasing and repainting a lot of Heroclix lately, but they’ve mostly been Marvel clix. I’ve been sadly neglecting the DC line. I decided to have some fun with this one and make a really nice conversion I can base a scenario or two around.

122440

Anyway, here’s what a Heroclix Mr. Freeze looks like out of the box.  That’s a stock photo, not the actual model I used. I really need to remember to photograph these clix before I repaint them, but this kind of happened as a side project.

The Mr. Freeze model has a removable helmet and shoulder piece, which is good since the helmet is so opaque it obscures the face almost entirely.

From Wikipedia: Mr. Freeze (Victor Fries) is a scientist who must wear a cryogenic suit in order to survive, and bases his crimes around a “cold” or “ice” theme, complete with a “freeze gun” that freezes its targets solid. In the most common variation of his origin story, he is a former cryogenics expert who suffered an industrial accident while attempting to cure his terminally ill wife Nora Fries

I like him because he’s actually a bad guy you can feel sorry for. Freeze does some bad. bad things, but it’s all for love of his wife.

Here are a couple of better shots that show him without the helmet. I considered adding a bit of snow to his gun barrel and the tanks on his back to simulate frost, but decided against it. The smoke is from a this Marvel Ultron clix model:

384592

I also used the Ultron model for Mr. Freeze’s wife, Nora. I painted her a frosty blue and based her on a dime, which, coincidentally, is exactly the right diameter to use if you want to place her in this spiffy bio-tank, made by RAFM.

The other miscellaneous sci-fi machinery was made by TMP’s Russell95403, I think it goes well as lab decor. For the ice piles, I used Chris Palmer’s method described here, using sea glass. I think they look great and I’ll be making more ice soon.

So now I have Mr. and Mrs. Freeze ready to go for a nice Supersystem 3 scenario.

And that-dare I say it?- is pretty damn cool.


Day of the Octopus!!!!

Back in the day, I was a big fan of the old Marvel Super Heroes RPG from TSR (still am, in fact). I thought some of their adventures might make fun scenarios for Supersytem 3, and it turns out I was right! First up is the introductory adventure included with the basic set: MSH0: Day of the Octopus!

A brief synopsis: That tentacled creep Dr. Octopus is at it again! This time his scheme is to become “Supreme Ruler of New York City” (yes, really). To that end, he has created a 30-foot tall robot duplicate of himself that will destroy Manhattan unless the heroes can stop it! (Because, you know, that’s  the best plan an insane, genius nuclear physicist could come up with.)

FYI ALL of the published adventures, as well as the rulebooks for TSR’s Marvel Super Heroes are available at Classic Marvel Forever in PDF format, and they’re FREEEEEEEE! Many of them are delightfully terrible, with questionable storylines, lame villains, and encounters that make you scratch your head and ask WTF??? But all of them seem easily adaptable to SS3, and 99% of the heroes and villains used in all of them are available as Heroclix models!

Without further ado, the dramatis personae:

The heroes (L-R): Captain Marvel, Spider-Man, Captain America, and the ever-lovin, blue-eyed Thing!

The main villains (L-R): Beetle, Scorpion, Dr. Octopus, Radioactive Man and the Fixer! (Fixer looked different back in the day, but this newer version is the only Clix model of the Fixer, so I’m stuck with it.) And of course, looming menacingly in the back: The Octodroid!!!!!

As is usual with most starting adventures, the heroes far outclass the villains. I assumed the bad guys would need some help, so I added Constrictor and these killer robots as reinforcements. The robots are repainted and rebased Horrorclix Carnage Bots.

If you’re wondering about the Octodroid, he’s this old Toy Biz Marvel figure, spray-painted silver. I picked him up on eBay for 8 bucks including shipping. Not bad, eh? Onto the game!

DSCN2503DSCN2502

An otherwise quiet day in Manhattan. Ben Grimm, Peter Parker and Steve Rogers are all spending some personal time in the park. Thing is buying a hot dog and feeling sorry for himself. Peter is having a picnic with Aunt May. Steve is on a date with his girlfriend, Bernie Rosenthal. Captain Marvel is on duty at Avengers Mansion (remember, this adventure was from 1984!)

All the heroes notice two well-known goons, Turk and Grotto, entering a building across from the park. They are up to no good! All the heroes in the park start to make their excuses and head over to the building, just as a huge explosion blows out the front wall! Who emerges but Grotto, accompanied by Turk, in full Mandroid armor!

(If you’re asking WTF??? allow me to explain: A suit of Mandroid armor was on display in the lobby of the building. You might think there would be extra security, or that the suit of Mandroid armor would be somehow neutralized for display purposes, like a cannon at a park, but you’d be wrong. It’s just sitting there in a glass case in the lobby, along with the plans for a new power source made by Tony Stark. Or it was. Until Turk stole it.)

DSCN2504

Alerted by the explosion and able to fly at lightspeed,Captain Marvel arrives on the scene instantly. The Thing wastes no time rushing across the street and ruining Grotto’s day before closing with Turk! And at that moment, the super-villains arrive!!!

DSCN2505

What are they doing here? What could they want? The heroes have no time for speculation, because combat erupts!

Thing beats up on Turk, but fails to KO him. Meanwhile, Spider-Man webs Turk to the ground. Turk is entangled!

DSCN2507

Captain Marvel and Beetle exchange energy blasts! Captain Marvel is wounded!

DSCN2509

After firing off a blast of radiation at Thing, Radioactive Man gets slammed by Cap’s shield and gets KO’ed instantly! (Cap rolled a ton of goals to hit, and it carried over to damage. Radioactive Man rolled poorly, and that’s all, folks!)

Scorpion shoots at Spider-Man, but fails to hit. In the next round, he bounds atop the building closest to the web-slinger, but before he can close, Spidey webs him to the roof! Meanwhile, Thing takes out Turk once and for all.

DSCN2510

On the other side of the park, Captain Marvel gets the worst of it in her fight with Beetle and is KO’ed! Cap takes out the Beetle with a shield toss, and Thing rips up a lamp post and cancels Christmas on the Fixer! With three villains KO’ed, the bad guys bug out and flee the table! But not before a sinister-looking steel tentacle snakes up from a nearby grate and steals the plans for a new power source…the villains’ goal all along! This was but a diversion! Mu-hu-ha-ha-ha-ha!!!

DSCN2512

In the original TSR RPG adventure, the heroes had to search for clues to find Dock Ock’s hideout. But we jumped right into it! The heroes track Doc Ock to his lair in an abandoned warehouse, where he awaits them with Scorpion and Constrictor!

DSCN2513

“It’s Clobberin’ Time!” Doctor Octopus barely has time to activate his security robots before the Thing is in his grill. He decks Doc in two rounds, which made for a very quick end to this scenario. Meanwhile, Captain America shield-bashes Constrictor into submission! All in all, not a good round for the villains. But as he lapses into rocky-fisted-induced unconsciousness, Doc Ock manages to activate his most villainous automaton:The Octodroid!

DSCN2515

BEHOLD! THE OCTODROID MARCHES!!!

DSCN2514

The Octodroid begins its path of destruction, shattering buildings to the left and right. The heroes move quickly to intercept! Spidey tries to web its legs together, but the Octodroid will not be bound! Captain Marvel fires a blast of energy, inflicting damage. In response, the Octodroid pauses its attack on New York to fire at the heroes with the plasma cannons contained in its tentacles, but fails to hit any of them.

DSCN2516

Then after a few more exchanges, Captain America once again saves the day. He hurls his shield with uncanny precision, striking the Octodroid in its eyes! Something shorts out and the Octodroid comes to an abrupt halt, toppling over a few seconds later. New York is saved! (Once again, Captain America rolled a shit-ton of goals that failed to be resisted by the Ocotdroid. Even I was surprised by how quickly the robot fell!)

This was a lot of fun and I plan on adapting more of the published TSR adventures to SS3 soon. Up next: MSH-1: The Breeder Bombs, featuring the X-Men!


Rebasing and Repainting Heroclix

I own a lot of Heroclix miniatures, but I don’t play Heroclix. Instead I use them with my favorite Superhero rules system, Supersystem 3.  I use Heroclix miniatures because I game with established Marvel and DC comics characters rather than creating my own heroes. (Until recently, there was a terrific online  archive of SS3 stats for Marvel and DC Heroes, but that seems to have disappeared. Bummer.) I never liked the Heroclix system. The dials really annoy me, and it doesn’t seem right that heroes gain and lose powers as the dials get clicked.  For example: I think Superman should be able to use his heat vision whenever he wants to fry something, not be limited as to when he can use it based on how much damage he’s taken.

There are a lot of companies making superhero miniatures in 28mm. I would get into some of them, but my fellow supers enthusiast from across the Atlantic, Carrion Crow, has already done that comprehensively over at his blog, and there’s really nothing I can add. (Incidentally, Carrion Crow has done a bunch of articles on converting Heroclix that are well worth the read, as they’re quite inspirational and really show the versatility of these miniatures, even for games outside the Supers genre.)

So why use Heroclix? The answers should be obvious, but…

  • Heroclix have been around for almost 15 years. The range is vast, and chances are you can find a clix model for almost any hero in the Marvel or DC Universe at this point. Most characters, in fact, have multiple sculpts and/or versions.
  • As you will soon see, Heroclix are easy to repaint and rebase (and convert, should you wish to do so).
  • With the exception of some promos and unique figures, most Heroclix models are cheap and easily obtainable. Online retailers such as Miniature Market and Troll and Toad offer a large selection of secondary market singles. eBay is a good place to pick up singles and lots, and don’t underestimate your local Craigslist listings! I picked up a lot of clix on Craigslist.
  • Many Heroclix models can be used for games outside the Supers genre. Thugs, criminals, aliens, cops, and military clix can all be adapted to other games such as pulp, horror or sci-fi, to name but a few. And don’t forget there were several sets of “Horrorclix” as well. Some are tough to find nowadays, but they’re every bit as useful across genres.
  • You can use Heroclix for other games without doing a thing to them, if that’s your preference. They come pre-painted and if you can overlook the dials, they’re ready to go out of the box. Convenient.

The quality of the sculpting and the factory paint jobs seem to have an inverse relationship over the years, at least in my opinion. In the beginning, the sculpting seemed to be generally ok, while the factory paint jobs bordered on the atrocious. As the years and releases accumulated, it seems the reverse is now true. Scale, especially when compared to the earlier releases, is disproportionate. But the paint jobs are generally better.

Still, they’re not good enough for me, so what follows is a tutorial of sorts on working with Heroclix, specifically rebasing and repainting them. I will say in passing that converting Heroclix is a breeze, as they’re made of fairly soft plastic, so weapon/head swaps are easy. (Again, if conversions are your thing, I highly recommend Carrion Crow’s Buffet over in the sidebar, as well as Dick Garrison’s Rantings from Under the Wargames Table.)

Rebasing Heroclix

Base Designs

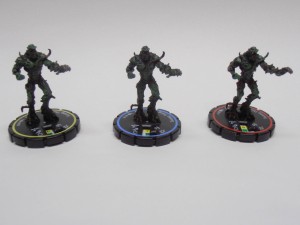
Heroclix bases have changed over the years. Above you can see the three types of bases. On the left is the original design, in the middle is the original “flying” base design, and on the right is the current design.  A few words about each:

Original clix came with a different-colored ring on the base, denoting the experience level of the model (Yellow=Rookie, Blue=Experienced, and Red=Veteran). This made a difference in the Heroclix points cost for including the model on your team. (A more experienced version of a hero cost more points.) Silver or other colored rings denote unique, promo, or special versions of heroes and villains. Some of these can get quite expensive to purchase on the secondary market, although many, especially from the older sets, have come down a lot in price.

Generally speaking, a more experienced version of a model costs more money on the secondary market, but this isn’t always the case. Regardless, many of these miniatures used the exact same sculpt regardless of experience level (see above) which is great news for those of us who don’t use them for Heroclix, as any version will do. So, just buy the least-expensive version available!

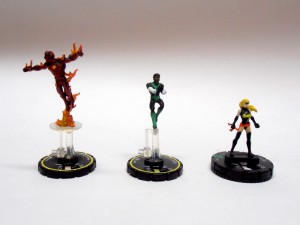
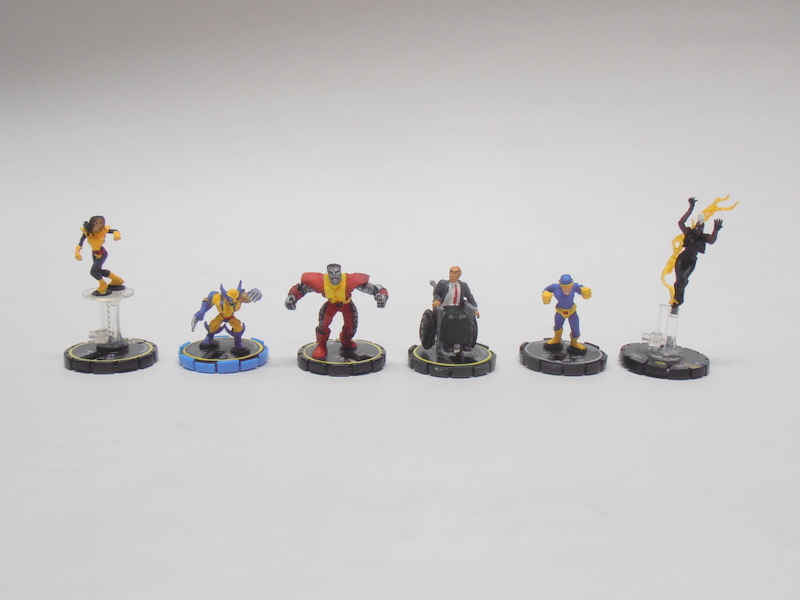
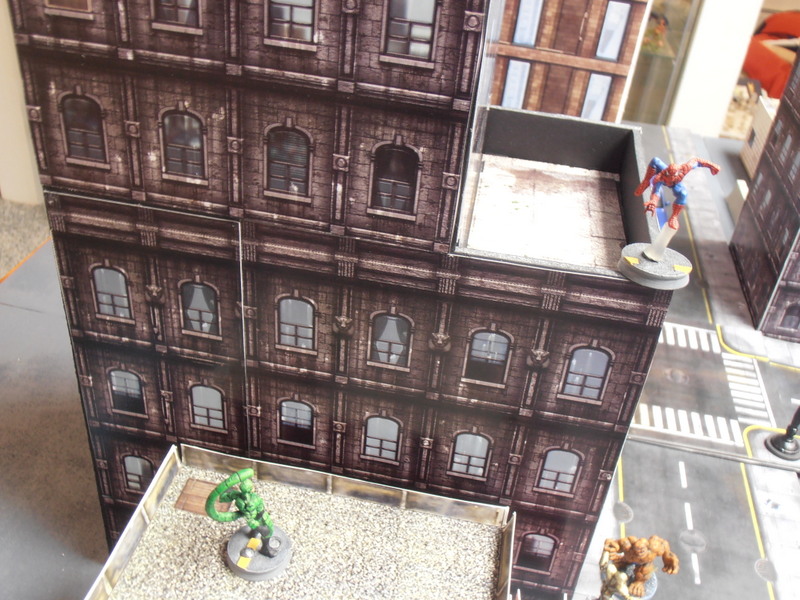
Flying bases come in two varieties, shown above. As you can see, the Human Torch model sits on a plastic disc that fits over the top of the flying base. In contrast, the Green Lantern model has a peg on his foot that fits into the flying base. For whatever reason, flying bases no longer exist in the latest Heroclix sets, and even models that fly are sculpted on the ground, like Ms. Marvel above. I only rebase the flight stands in the “peg-leg” cases like Green Lantern. When rebasing models such as the Human Torch, I pop them off the plastic discs and rebase them without flight stand. (That’s my preference, but YMMV).

The newer bases are bigger and blockier, and have no color rings denoting experience levels (something else they decided to do away with, it seems). Fair warning if you plan on rebasing miniatures on these bases: they are MUCH harder to work with than the earlier colored bases. models are now sculpted onto a plastic crescent, and it’s often easier to remove the crescent from the dial than to remove the model from the crescent.

Rebasing Technique

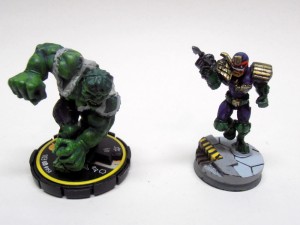
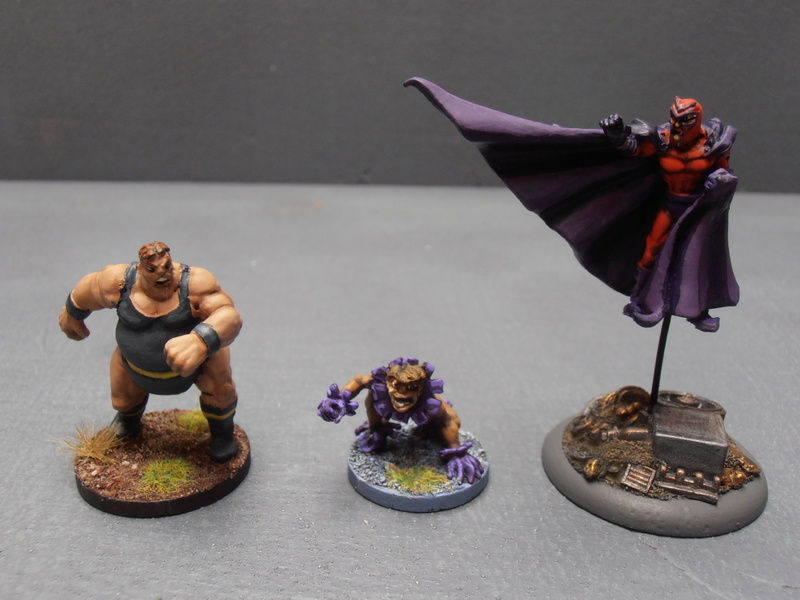
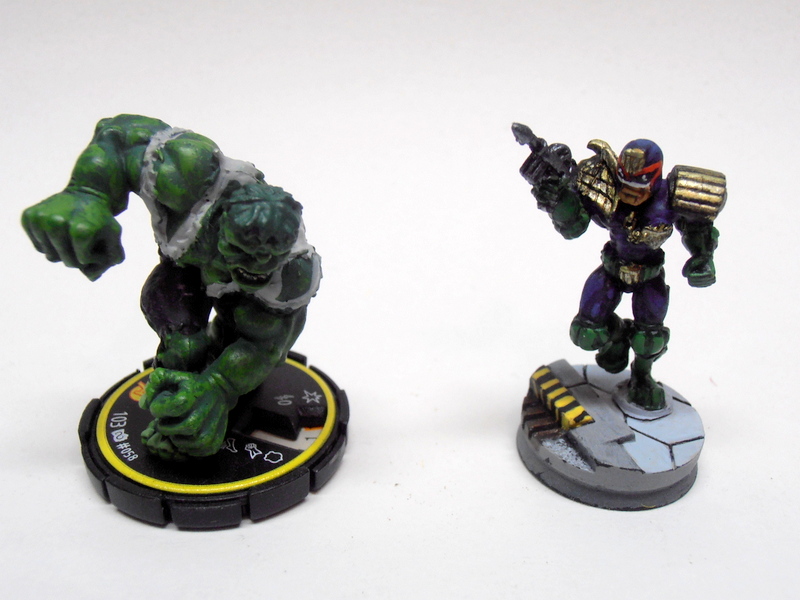
There are several ways you can remove a Clix model from its dial. First is brute force, which I don’t recommend. Bigger models, such as the Hulk above, can be wrested off the dial without much worry of damaging the model, but why risk it?

The second way is by using a hobby saw or Dremel to saw the figure off the dial. Again, I don’t recommend this as at high cutting speeds, the plastic will melt. This stinks, and can also alter the shape of the model’s feet.

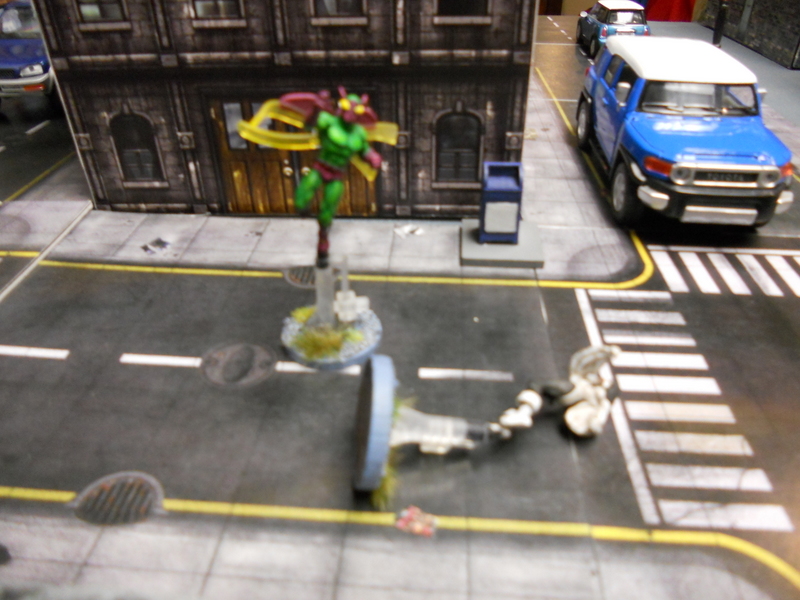
The best method I have found to remove a Heroclix model from its base is the following. First, throw the model (or the flight stand) in the freezer for at least an hour. This makes the plastic brittle. Then, remove it from the dial with a pair of nippy cutters. If you go slow enough, it should pop right off with no problem. Note that clix models with thin legs are vulnerable to snapping even if this method is used, particularly if you don’t take the time to cut slowly. One good thing about Clix, however, is even if they snap, the break is usually clean enough that you can heal it with some superglue. That was the case with the rebased and repainted Judge Dredd model above, and you can’t tell the difference now.

Rebasing Choices

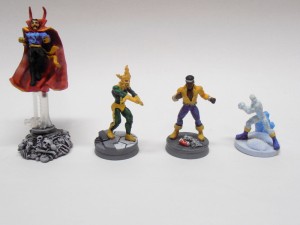
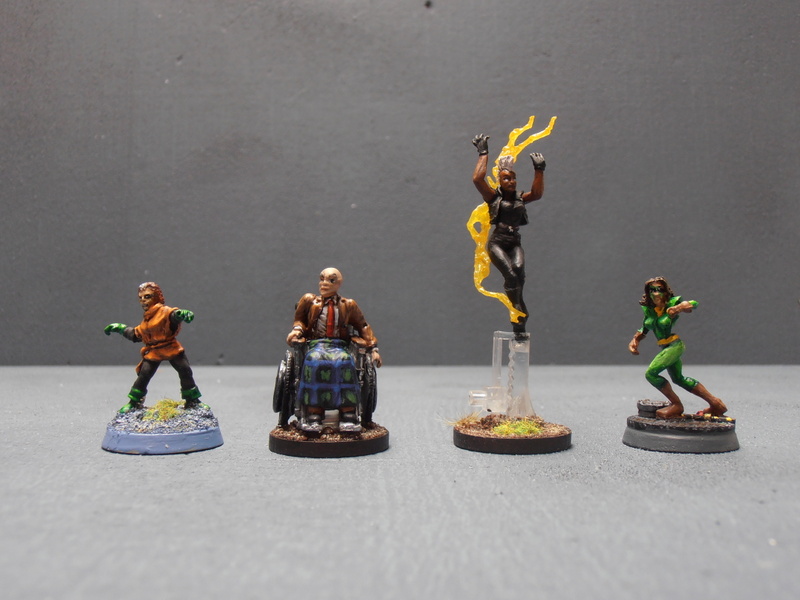
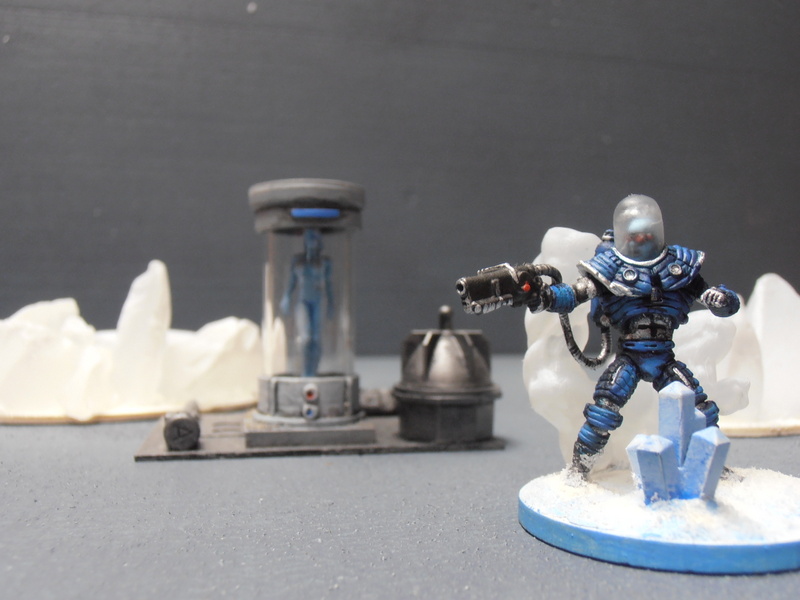
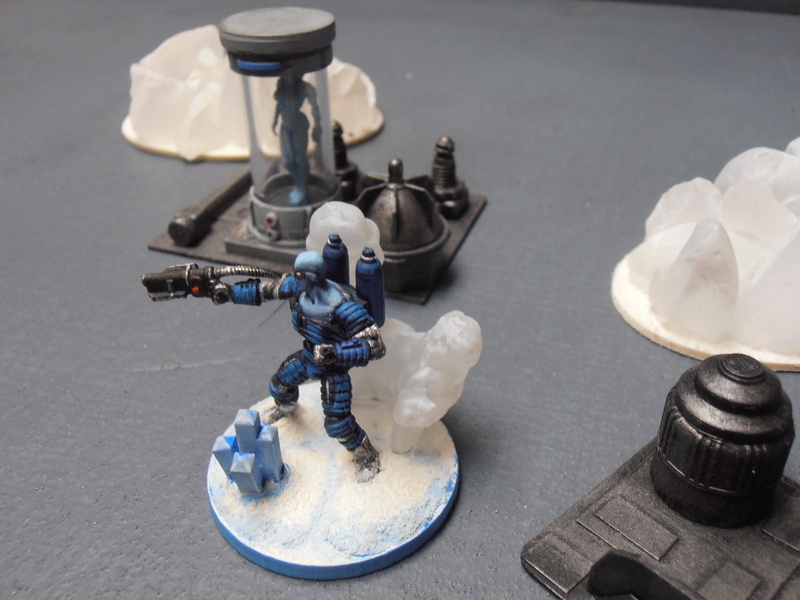
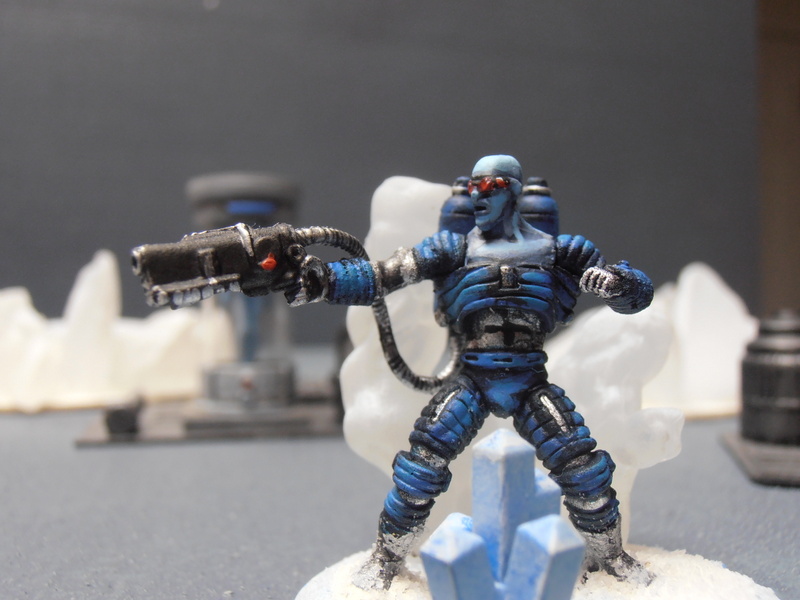
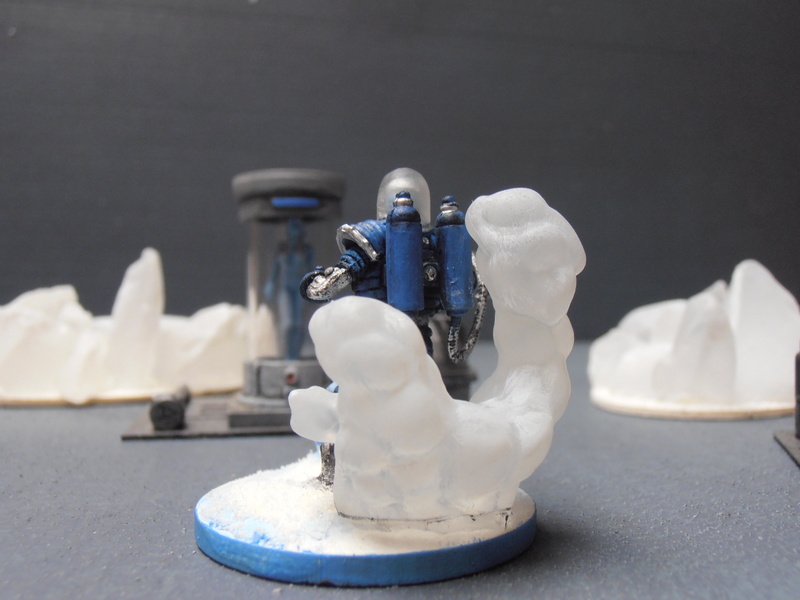
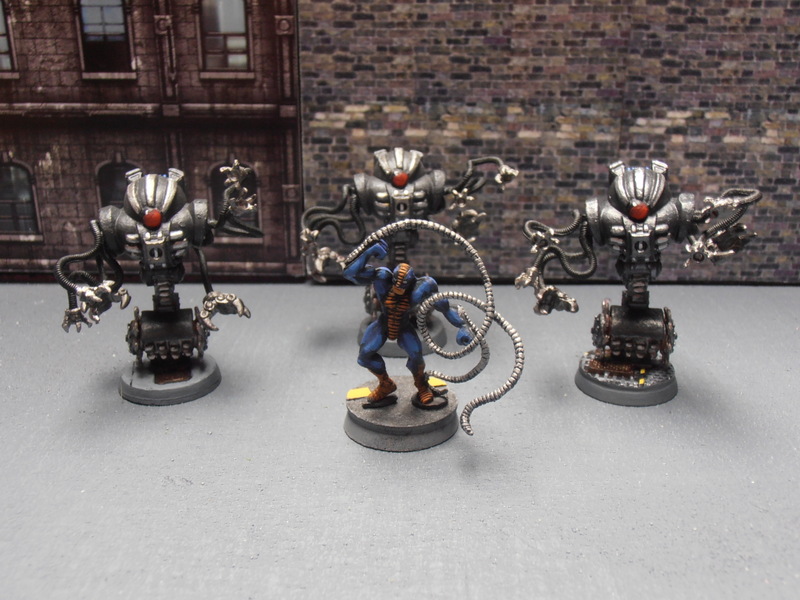
Once you have the model off the dial, it’s up to you what kind of base you want to put it on. I find that Heroclix adhere readily to resin bases with superglue, but you may want to take the added steps of drilling and pinning in order to secure a firm transplant. The Dr. Strange model is based on an old metal RAFM fantasy base. He’s a good example of a transplanted peg-mounted flying base.  Electro is glued to a Micro Arts Studio Tech Base. Power Man is based on an Armorcast Urban Base, while Iceman is based on a piece of MDF, snow-flocked and enhanced by me.

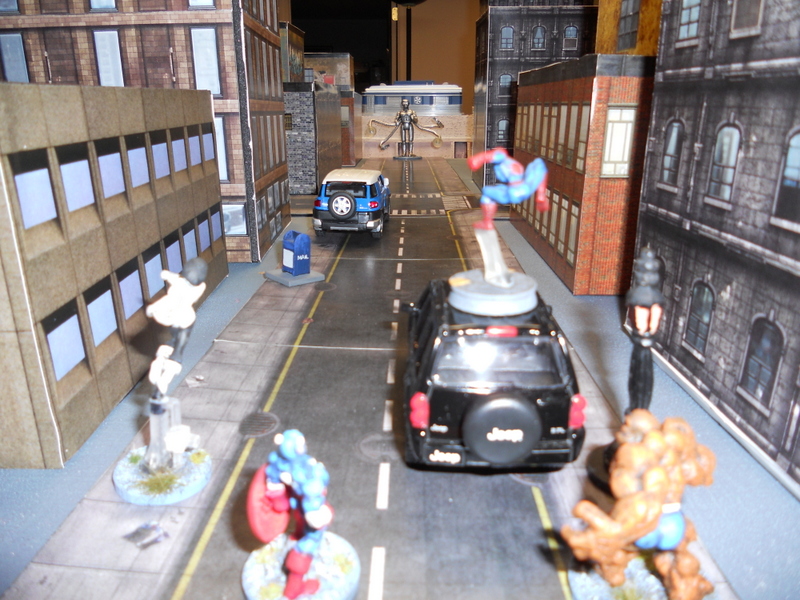
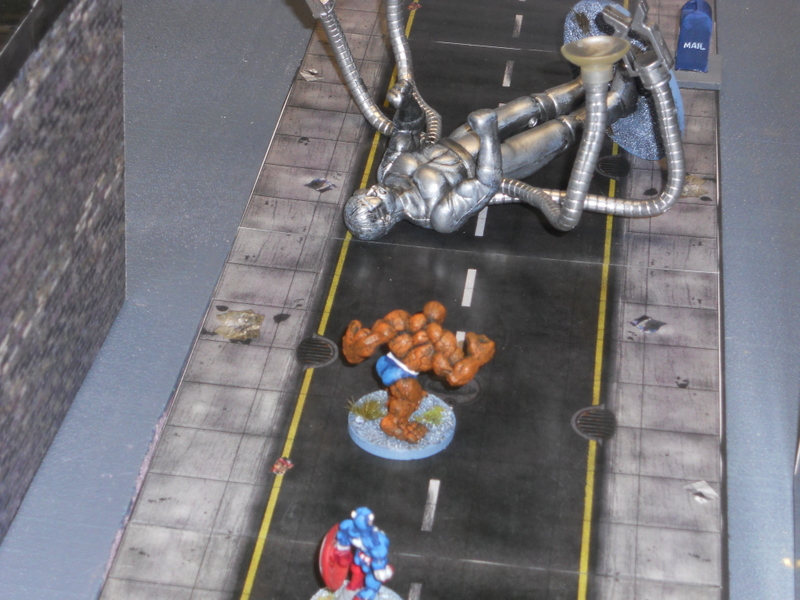
Again, the choice to rebase or not depends on how much you hate the dials. I loathe them, but I’ll still use Clix models on the dial in a pinch. If you want to see an example of an AAR using rebased an repainted Clix (as well as other models), check one out here. If you want to see a Supersystem 3 game using unaltered Clix, look here. I think the first game looks better, but both were a blast regardless.

Repainting

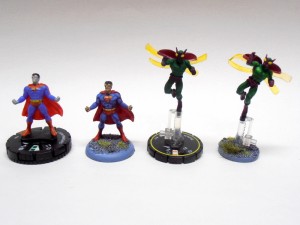
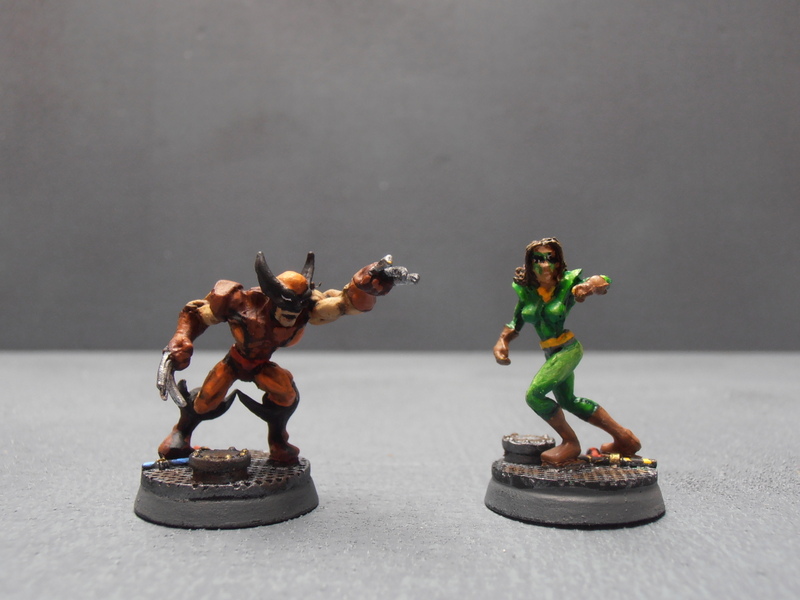
As I said before, it’s no secret to anyone with eyes that Clix models generally have poor paint jobs, especially the early releases. As you can see in the picture above, repainting a Clix model really achieves some dramatic results over the factory paint job, and repainting is a surprisingly easy and often fast option for those who can’t abide poorly painted figures (like me). Above is a before and after comparison. Although not a true before and after, as they are different figures, you can see what a factory painted miniature looks compared to one I’ve repainted. The one on the left is a new “Superman Robot”, which I repainted and rebased to be a perfectly adequate Superman. The one on the right is Marvel’s Beetle. I added highlights rather than a giving him a full repaint.

Step 1: To strip or not to strip?

While it’s easy enough to strip metal miniatures, plastic miniatures such as Heroclix pose a problem, as the chemicals used on metal miniatures will most likely melt plastic. There are many threads on the net regarding stripping plastic miniatures and the best way to do so. Some say Simple Green is the way to go, as it’s non-caustic and won’t melt your plastic miniatures into goo. I haven’t tried it, so I can’t speak to its effectiveness. In fact, I don’t strip Heroclix miniatures at all!

Step 2: Priming and painting

Since I don’t strip my Clix, I have no need to prime them. The factory paint job is perfectly fine as a first coat. Although some of the early Clix models are so heavily painted that you may find subsequent coats obscure detail, this is usually a problem with individual models and is easily remedied by simply using another figure.

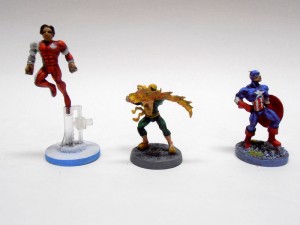
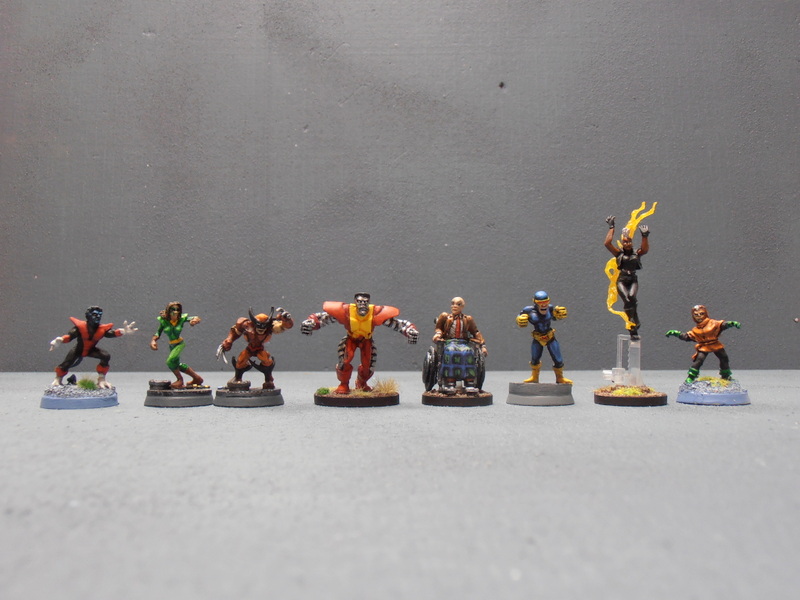
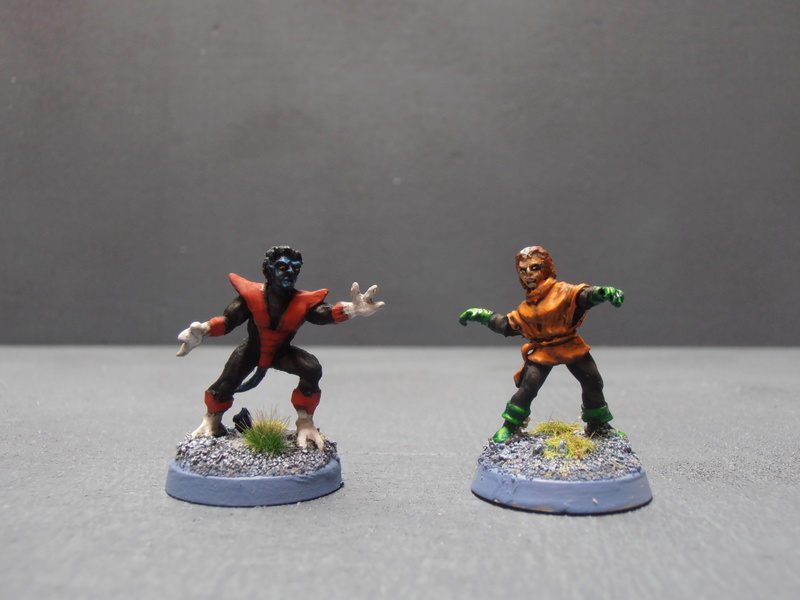
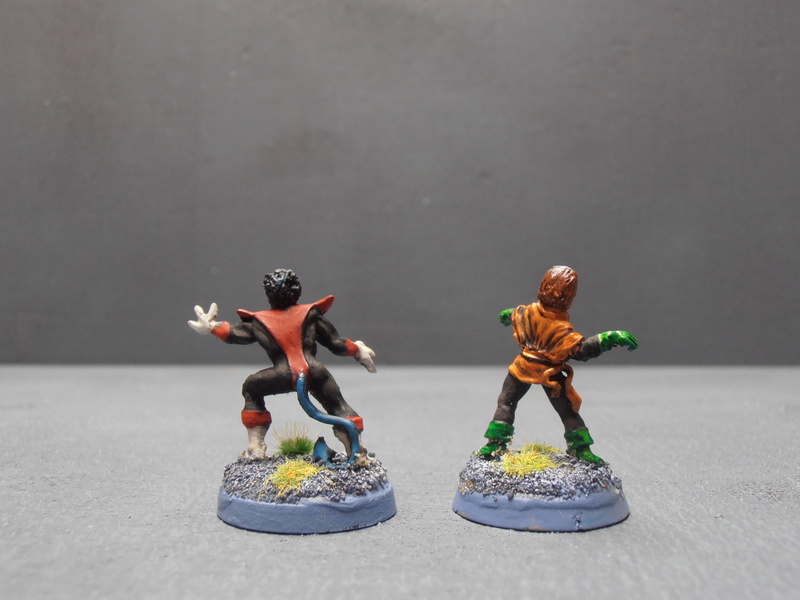
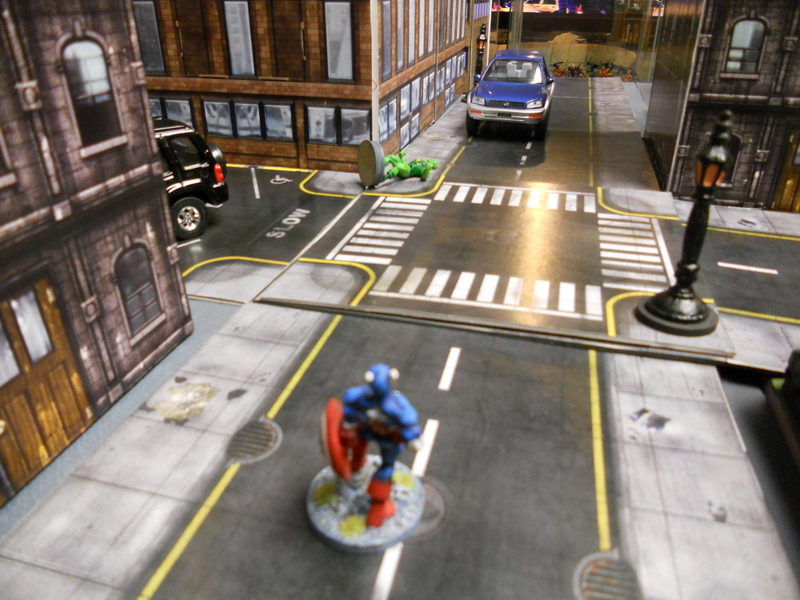
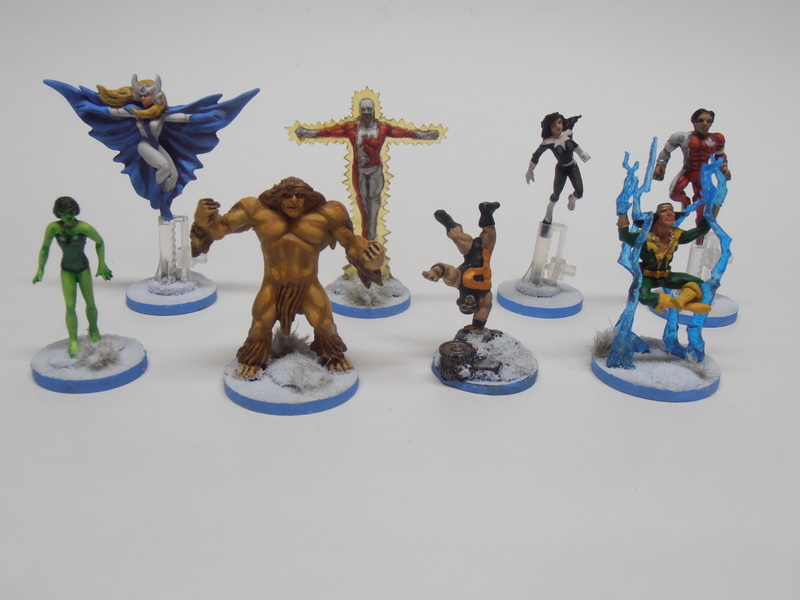
In many cases, repainting a Heroclix model is merely a matter of adding highlights rather than starting from scratch. This Northstar miniature was painted with highlights only. In contrast, the green on Iron fist was originally red (it was the only version of him I had), so I needed to paint a dark green basecoat on and highlight from there. Captain America was originally a much lighter blue. I repainted him a darker blue and highlighted upwards.

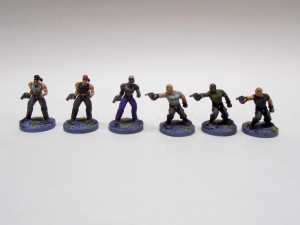
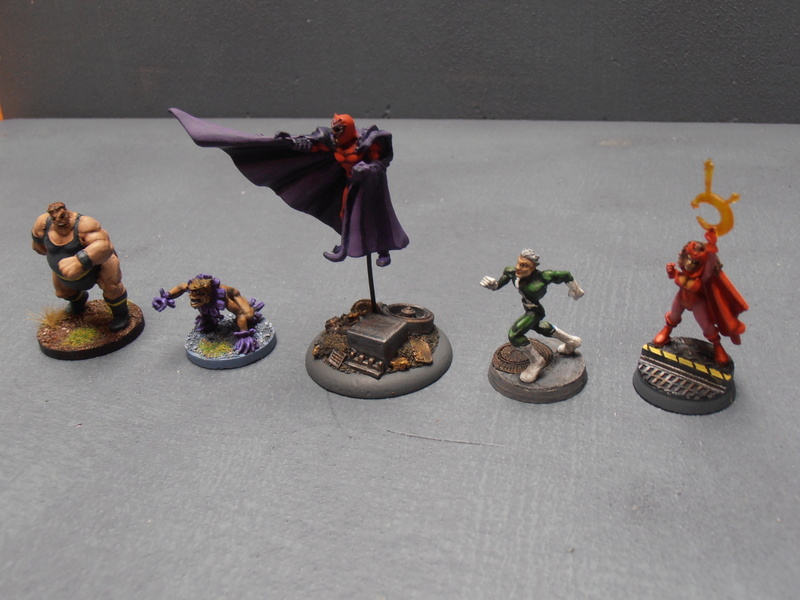
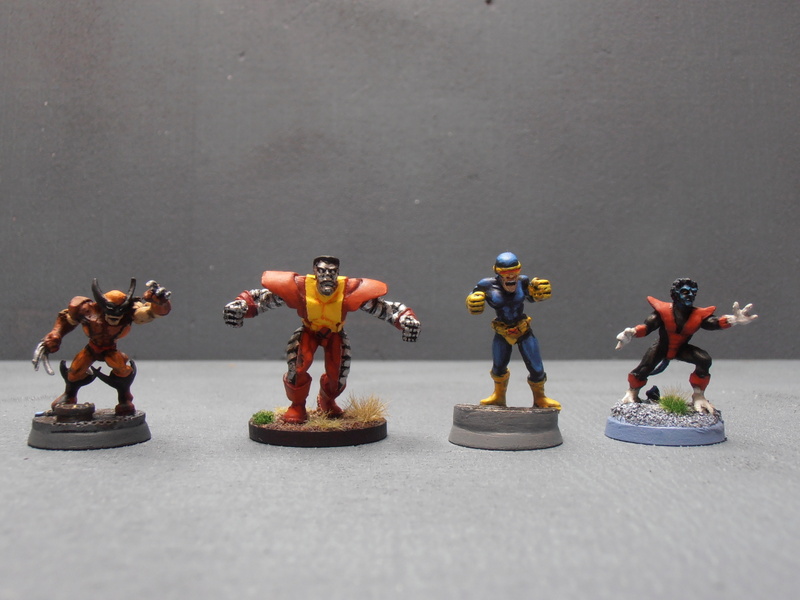
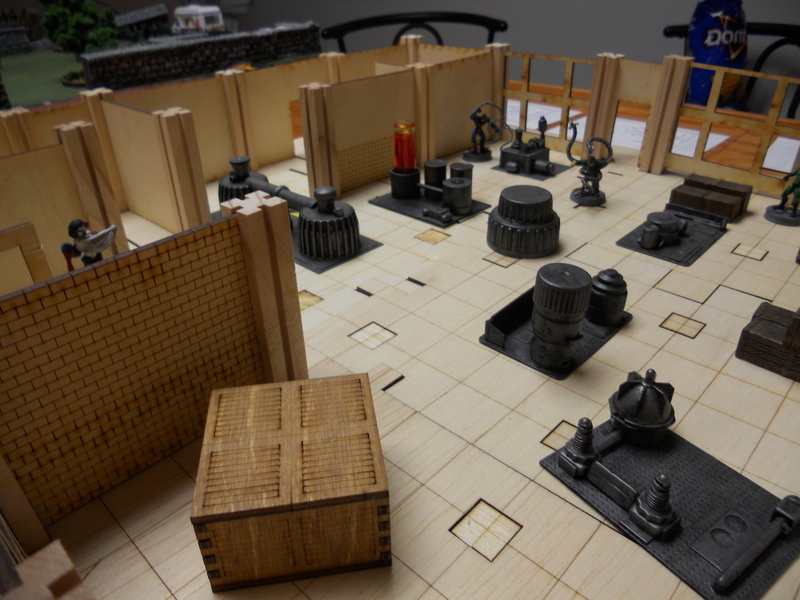
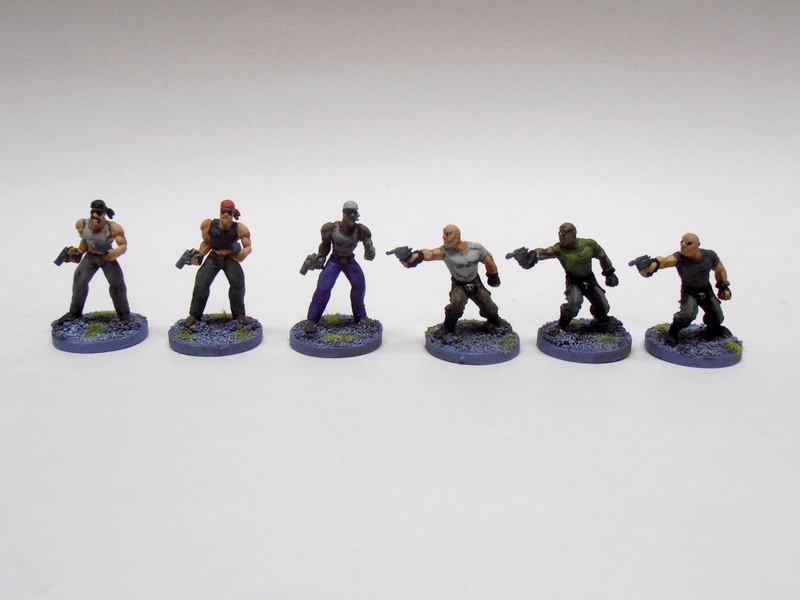
These criminals and henchmen were completely repainted to give them some variety.

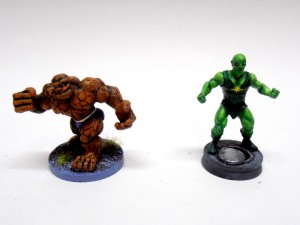
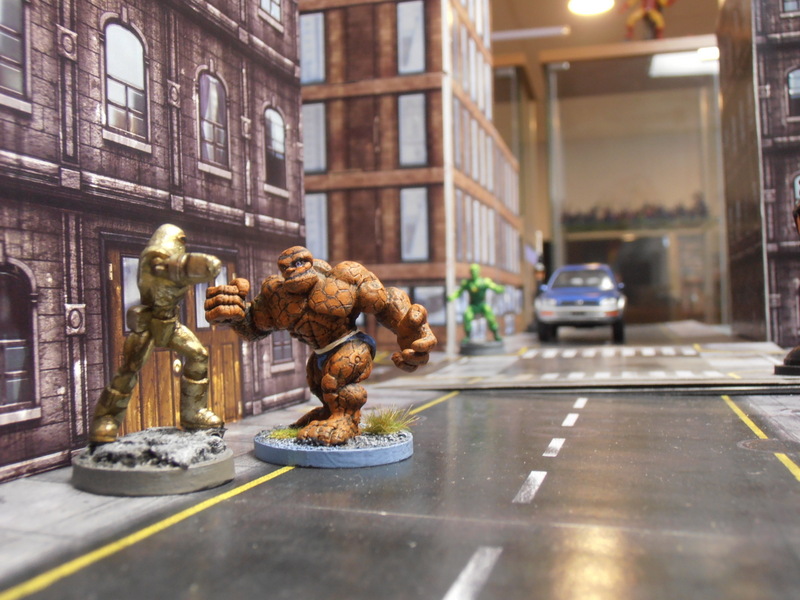
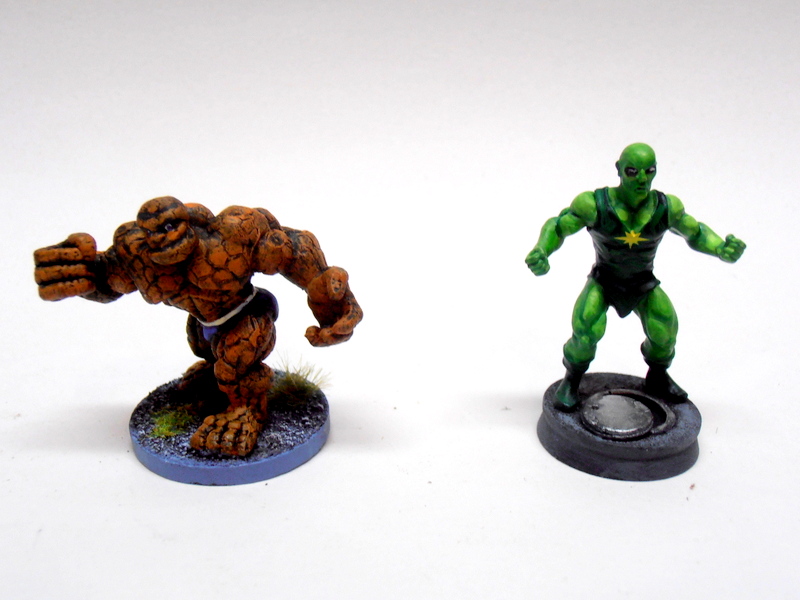
In the above picture, the Thing was given a black wash over his original paint, and then highlights of orange. In addition, I trimmed his eyes because they were way too big on the original paint job. Radioactive Man was repainted a darker basecoat and highlighted upwards, much like Captain America.

Step 3: Going fast

If all you’re doing is highlighting the existing paint job, you can blow through repaints in record time and still enjoy quality results. But here is another tip to speed-painting Clix:

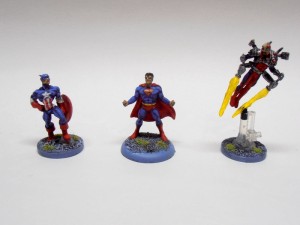
Heroclix generally use the same paint shades, as seen in the picture above. If you want to repaint a lot of Clix all at once, it makes sense to grab a handful of miniatures that use the same colors and do them in batches. Of course, if you need specific heroes and villains, this may not be an option in the short term. But, if you’re planning a game down the road, you may want to paint some miniatures you may not have a use for immediately simply because you’re painting similar colors on the miniatures you do need. For example, even though I have no immediate plans for Superman, I painted him at the same time as Captain America and the Fixer because they use the same colors. Neat, huh?

I plan on doing more Supersystem gaming in the near future, so watch this space for more Clix repaints and AARs!

Alpha Flight

AlphaFlight1


Don’t ask me why I did this. For those who don’t know, Alpha Flight is the first all-Canadian superhero team, created by John Byrne (a  Canadian) in 1979. Byrne is legendary for his artwork on X-Men and Superman, among too many other credits to name.

Alpha Flight made their debut in X-Men #120, and soon had their own book. The thing is, Alpha Flight kinda sucks. I mean, to call them second-raters is an understatement. To call them third-stringers is still a kindness.

Still, I thought I’d have some fun and repaint and rebase some Heroclix for Supersystem. So here they are.

OLYMPUS DIGITAL CAMERA


Starting in the back, R-L: Snowbird, Guardian, Aurora, Northstar. Front row, L-R: Marinna, Sasquatch, Puck and Shaman.

Despite being a  really lame team (and that’s being kind), most of the Clix sculpts are pretty good. To me, Shaman, Snowbird and Puck really stand out. Shaman required the least in the way of repainting; he actually had a pretty good paint job right out of the box. The others, however, required a bit more effort to make them look good.

Now I have to find something for them to fight.

(WEN-DI-GO!!!!!!)

Expect a new SS3 After Action Report featuring Alpha Flight soon!!!


Batman vs. Two-Face: A SuperSystem 3 Scenario and AAR

Well, ZeDecember didn’t really work out as planned, mainly because I got distracted halfway through it and failed utterly to rekindle my painting spark. Some of that was due to the holidays, some due to real life, and some due to the fact that I’ve been in a painting slump lately.

One thing I have been doing is re-reading lots of my old comics and playing copious amounts of Batman: Arkham City on PS3. Yeah, I know I’m late to the party, since this game came out in 2012, but I’ve never been one to rush out and buy a new game when I have dozens of games I haven’t even opened yet just laying around. Suffice it to say, however, that aside from playing PS3, I haven’t done all that much for the past couple of months.

In an effort to get my ass in gear, I came up with a scenario for SuperSystem 3 involving a “Year One” Batman and Captain Gordon vs. Two-Face. Even Year One Batman is pretty damn formidable (my build came in at 120 points) despite his inexperience, and Two-Face just isn’t all that powerful a villain (my build came in at 71 points), so I had to tweak the rules a bit to make it more of a challenge for Batman. Here is what I came up with:

The Scenario: Two-Face decided to rob the Gotham Savings and Trust building. Actually, the coin decided for him. He put together two squads of highly trained goons, came up with two plans, and went to work double-quick.

A specialized GCPD SWAT team, led by the arrogant and trigger-happy Lieutenant Branden, arrives on the scene shortly afterward.  Also rushing to the scene, hoping to avoid the certain collateral damage that is to occur when Branden and his team is unleashed, is Captain James Gordon. But neither the SWAT team nor Two-Face counted in the new player in Gotham City: The Batman.

Forces: One player controls Two-Face and his two squads of goons. The other player controls Batman and Captain Gordon. The SWAT team begins play under the control of the hero player, but that may change (see below).

Setup: The board represents a section of Gotham City. The buildings are mostly not important, but there needs to be a building big enough to represent a bank, complete with interior.  The bank has 2 exits and several windows. Two getaway cars are parked outside the bank on either side. There should be a separate escape route off the board for each getaway car.

Deployment: Two-Face and his goons begin play inside the bank, looting. Gordon begins in a squad car on one corner of the opposite table edge, while Branden and his SWAT team deploy on the other corner. Batman may be deployed anywhere on the board, but must begin at least 20” from the bank.

Objectives: Two-Face wins if he can loot the bank and make his escape off the board by one of the predetermined escape routes, or if he kills Batman. Batman wins by stopping Two-Face.

Special Rules:

TWO-FACE

The Coin: Any time the Two-Face player wishes to do something where there are two clear alternatives, he must flip a coin and let the coin decide.  Examples include choosing which way to exit the bank, choosing which getaway car to use, choosing which escape route, choosing who to shoot at, etc. The only exception to this is that Two-Face can always elect to shoot at Batman without tossing a coin.

Two Squads: In order to give Two-Face better odds than he would otherwise enjoy, he is allowed two squads of Veteran henchmen for this scenario.

Looting the Bank: At the start of the game, roll a d3. The result is how many rounds Two-Face and his goons must spend looting the bank before they can attempt their escape. Looting the Bank is a Difficult (2) Mind roll. Two-Face doesn’t have to make the roll (but he has a better chance of doing it than his henchmen).

THE COPS

SWAT Team: Lt. Branden is a bit of a psycho, and is just as likely to shoot at Batman than at Two-Face or his goons. If the SWAT team ever has line of sight to Batman, they activate immediately and open fire.  This happens outside the normal activation sequence and control of the SWAT team reverts to the Two-Face player for as long as they have line of sight to Batman.

Gordon Takes Command: If Captain Gordon can get within 10” and has LOS to the SWAT team, he can effectively take command and the SWAT team will not fire on Batman. This command is lost if Gordon ever leaves command distance, however.

BATMAN

Batman won’t attack cops no matter how much he may want to.

“What are you??!” Batman has a special power for this scenario: Fear Aura. Anyone in short range must make s Difficult (2) Resolve roll or be afraid. Batman gets +1D to Attack and Defense rolls against models he has frightened until they make their Resolve roll. Two-Face is immune to this power.

RESULTS:

I gamed this scenario a couple of weeks back. Sorry, no pictures this time. I played Two-Face, while my friend took the role of Batman and the cops. Although it was fun, it had its share of problems.

First, it’s not all that hard to keep Batman out of the SWAT team’s view, so he never had to worry too much about getting shot at by Branden and his men.  This could be further abused by the fact that the same player has control of the SWAT team and Batman at the start of the game, so if they wanted to be unscrupulous about it, they could basically ensure that Batman stayed far away from the SWAT team. (My friend didn’t do this, however. He’s a good sport.)

Second, the game quickly degenerated into the SWAT team and Gordon firing away at Two-Face’s goons (and vice-versa) for most of the game, without either side really doing any significant damage to the other. I think this is because they were too similar. They had the same Vitality, similar stats, and they were all Veterans.

Third, even with a big screen of goons to hide behind, Two-Face is just no match for Batman. Although he managed to flee the bank, Batman brought him down in short order without too much trouble. Two-Face spent three turns just trying to break out of Batman’s Entangle power while Batman waded through his goons without breaking a sweat.

It was fun, however, and we both enjoyed the randomness of the coin tosses and the moment when Batman got to use his Fear Aura on the goons in the bank.

More Heroclix Repaints

Took a break from my usual stuff to paint up some more Heroclix for use with Supersystem 3.

First up: The Wrecking Crew. Thunderball, Piledriver, The Wrecker, and Bulldozer. Although they’re a bunch of losers, I’ve always like the Wrecking Crew. I have to say that the Piledriver miniature is one of the worst miniatures in the Heroclix line. He doesn’t even scale well with the other Crew members. I really like the sculpts on the other three, however.

Next up: the original Uncanny X-Men! Iceman, Marvel Girl, Angel, Cyclops, and Beast. I’m pretty happy with the team overall. Iceman’s base is the only one I made from scratch, the rest are modern urban and tech bases from various companies. I was reminded how much I hate painting yellow when I did this team, as yellow is notoriously difficult to shade without it looking like crap. I think Cyclops looks the worst, but I can live with it.

Night of the Sentinels: A Super System 3 Scenario and AAR

I recently picked up four Heroclix Sentinels from some Craigslist sellers, and decided I needed to use them for Super System 3. I came up with the following scenario, and played through it with some friends the other night.

The Scenario

A young mutant’s powers have just manifested for the first time. Cerebro ranks this unknown as potentially one of the most powerful beings on the planet.  The X-Men are sent to recover him and bring him back to the Xavier Institute for his own safety and security.

Unfortunately, S.H.I.E.L.D. has learned of this mutant and is taking no chances. Acting Director Maria Hill quickly dispatches two of her best recovery teams to the area, hoping to bring the mutant in as quickly as possible. When she learns of the X-Men’s involvement, she authorizes the use of Mark VII Sentinels. It is imperative that the mutant in question be brought under S.H.I.E.L.D.’s control, to be used and/or terminated if necessary, and Maria Hill isn’t one for leaving things to chance.

Meanwhile, the mutant in question, Reggie Bowers, is cold, hungry and scared out of his mind of his new powers.

Forces: One player controls the X-Men: A team of 6-10 would be best (about 750-800 points), depending on the power levels of the heroes chosen. The other player controls two recovery teams of 6 S.H.I.E.L.D. agents each (henchmen), led by one agent in Mandroid armor. One recovery team is made up of veterans, giving them double Vitality. The S.H.I.E.L.D. player will also control the Sentinels, but there are special rules for them.

Setup: The game is played on a 4’x6’ table, divided into sextants of 2’x2’.  Each side deploys their forces on either of the short sides. The X-Men player may deploy all his models at the start of the game. The S.H.I.E.L.D. player may only deploy his Recovery Teams and the Mandroids at the start of the game.

Place at least 4 counters in cover in the two middle sextants of the board. The counters should be numbered in some way to distinguish each from the others. These represent possible hiding places where Reggie has gone to ground.

Special Rules

Reggie: Reggie has the following stats: Strength : 3 Agility: 4 Mind: 2 Resolve: 2 Vitality 5 AP: 6. His powers play no part in the scenario, as he can’t control them yet and is too scared to try.  He begins the game in hiding. The four counters represent possible hiding places. At the start of the game, assign Reggie one of the numbers on the back of the counters. At any point during a model’s turn, if that model is within 6” of a counter, it can try to spot Reggie. Make an opposed Mind vs. Reggie’s Agility contest. If the model wins, flip the counter over and look at the number. If it doesn’t match Reggie’s number, it’s not him. If it does, the model has spotted Reggie. Remove all the counters and place the miniature representing Reggie on that spot.

At the start of every subsequent turn, if Reggie is not in base contact with another model, he will move away from any model towards cover at his full AP (6).  If he is in base contact with a model, he will move with that model up to that model’s AP total or Reggie’s, whichever is less. This represents Reggie being herded along by either side. If the model herding Reggie is KO’ed, Reggie will move randomly again at the start of the next turn until he is in base contact with another model.

Reggie cannot be attacked by either side (they want him alive), and he will not fight. He will move with any model that gets into base contact with him, but can only move as described above. He may be grabbed and moved along faster;, however, he will actively resist any attempts to grab him, and may be hurt unintentionally during a rescue attempt (see below).

Sentinels: At the start of the turn, beginning on Turn 2, the S.H.I.E.L.D. player may deploy a Sentinel in any sextant he wishes. It can activate as normal on the turn it comes into play. Every second turn thereafter (i.e. turn 4, 6, 8, etc), and/or any turn immediately following the destruction of a Sentinel, the S.H.I.E.L.D. player may deploy another Sentinel in the same manner.

The following exceptions apply:  if Reggie has been revealed, the S.H.I.E.L.D. player must deploy his Sentinel in the same sextant that Reggie currently occupies.

Sentinel Grab: If a Sentinel successfully grabs Reggie, he is rendered unconscious immediately and will not resist on subsequent turns. Reggie will regain consciousness if freed (see below).

Rescuing Reggie:
If any model (other than a Sentinel) successfully grabs Reggie, Reggie will resist to the best of his ability each turn until he either gets away or is carried off the board. Note that if Reggie breaks free from a flying model he will suffer falling damage. If a model carrying Reggie is attacked and missed, there is a chance Reggie will be hit (same as firing into close combat). If a model carrying Reggie is hit for at least 2 Vitality, the model drops Reggie and Reggie is free to move on the next turn.

If a Sentinel drops Reggie, he will suffer falling damage (3D) unless a model catches him. A model attempting to catch Reggie must be in base contact with the Sentinel or possess the Bodyguard power, and must pass a Difficult-2 Agility Roll or Reggie hits the ground. If he’s not killed by the fall, Reggie will regain consciousness immediately and can act normally on his next turn, but he will be prone (2AP to stand up).

Winning the Game: A player wins the game either by wiping out the enemy team or by getting Reggie off of their side of the board. If this happens, the game ends immediately, regardless of any remaining models on the board. If Reggie dies during a rescue attempt, the player attempting the rescue loses immediately.

How it all played out:

In my game, the X-Men were controlled by four of my friends in teams of two heroes each, while I controlled S.H.I.E.L.D. and the Sentinels. The X-Men consisted of Storm, Cyclops, Rogue, Wolverine, Colossus, Iceman, Gambit and Longshot.

While the game was too long to detail turn by turn, I’ll share some highlights. I assumed that the hunt for Reggie would take a while, as there are four places he could be. In the meantime, S.H.I.E.L.D. might get a couple of shots off at an X-Man or two, and vice-versa. Turns out Reggie was discovered by Turn 2, thanks to Iceman’s ability to move pretty fast and take Longshot along with him. This duo approached a random marker and was able to make the opposed Mind vs. Agility check to spot Reggie, thanks in part to Longshot’s Fortune power. By Turn 2, Reggie was being herded along towards the X-Men’s side of the board, far, far away from S.H.I.E.L.D.

Thankfully, with Reggie now revealed, I was able to deploy a Sentinel right where he needed to be on Turn 2. This was able to delay the X-Men, hopefully long enough for S.H.I.E.L.D. to catch up. That didn’t happen, but the Sentinel made quick work of Longshot (which was a good strategy for me, as Fortune is a power that can really hose your opponent) and caused Reggie to run away randomly for a turn.

Unfortunately for me, on Turn 3, Wolverine and Rogue took out the sentinel in spectacular fashion. Wolverine is the best he is at what he does, which is shred robots like wet tissue. His Soul Fire ability makes it so that instead of resisting damage with their Physical Resistance (which is formidable), the Sentinels had to resist with their Mind (which is far less impressive). Wolvie took the Sentinel from 11 Vitality down to 1 in one shot, whereupon Rogue finished it off with a Power Dive.

Turn 4 allowed me to deploy another Sentinel, so I wasted no time in doing so. Over the course of the next few turns, I would get all 4 Sentinels on the board, the X-Men would get Reggie to within 1″ of their table edge, only to have a Sentinel rip him from their grasp and high-tail it across the board with the hapless Reggie in his fist. My S.H.I.E.L.D. guys would do absolutely nothing of consequence. They failed at every opportunity to inflict damage, and they were so slow, they barely got anywhere near the action for most of the game.

Except for these guys.

First, I must confess to a certain bias. I hate Gambit. I always have. I find him to be a stupid character with a stupid premise. I hate his costume. I hate his powers. I hate his stupid Cajun accent and his stupid telescoping quarterstaff. In short, I hate Gambit. A lot.

Which is why I found it so vexing that despite shooting at his stupid Cajun ass EVERY TURN with EVERY AVAILABLE MODEL, I was unable to wound him enough to kill him. I even resorted to swarming him en masse, thinking that sheer weight of numbers would overwhelm him. Well, not even 6 highly trained S.H.I.E.L.D agents, one Mandroid, and a fire team of S.H.I.E.L.D. veterans taking intermittent potshots at the melee could drop Gambit. The fact that my friend provided smack-talk in Gambit’s Cajun-accented voice after every failed attempt (Honh Honh Honh, mon ami!) only added to my misery.

The most dramatic moment came at the end of the game, when a Sentinel carrying Reggie made a beeline to the other side of the board, with Iceman and Wolverine in hot pursuit. Iceman tried in vain to entangle the Sentinel in ice so that Wolverine could get close enough to do what he does best, but he was unable to entangle the Sentinel successfully. Also, on the last turn, out of sheer spite, I had my remaining Sentinel charge Gambit hoping to smear him across the pavement.

It didn’t work. Gambit survived.

So although I won the game, I still feel like I lost.

The Menace of Ultron Part 2: A Super System 3 AAR

A few nights later we picked up where we left off. My friend Chris couldn’t make it, so we decided this was that moment in so many comic books where the two hero teams combine to fight a common enemy! Matt quickly chose Captain America as his new, combined hero team leader. He figured if there was one guy besides Professor X that Cyclops would defer to, it would be Cap.

Turn 3

The heroes got initiative.

SNIKT! Wolverine charged down the alley and ripped into Dreadnought #1. His adamantium claws are pretty impressive against mindless robots. He netted 6 Vitality of damage to the Dreadnought, dropping it to 1 and kniocking it back 5 inches!. Despite this, Dreadnought #1 was barely able to remain upright. But the Dreadnought’s electrified armor shocked him back for 7 Vitality! (Turns out we were doing this wrong; Wolverine shouldn’t have been shocked for anywhere near that much damage. But what the hell. It’s cinematic.)

In response, Dreadnought #1 ran forward and attacked Wolverine, but missed.


Iron Man fired of a repulsor blast at Ultron and hit. What’s impressive is he actually managed to do 3 Vitality worth of damage, as Ultron rolled miserably to resist.

In response, Ultron attempted  to telekinetically grab Iron Man and bring him into hand to hand. Problem is, that’s not how the power works. TK grab just roots someone to the spot. Even if it succeeded (which it didn’t), it wouldn’t have left me with a  lot of tactical options; but since I had already spent the points to use the power this round, I was stuck with it. The first of several of my blunders.

Storm used her wind control to transport both herself and Colossus 9″. Then they landed.

Dreadnought #2 attacked Wolverine and hit; combined with his Damaging Aura, the attack did a total of 4 more Vitality damage and knocked him back 2″ into the wall of a nearby building.  Wolverine was starting to look pretty battered.

Cyclops fired at Dreadnought #2, but missed.

Madame Hydra used her short-range teleport ring to get to the top of a nearby building. Once there, she took a shot at Storm and hit, but Storm managed to avoid any damage.

Colossus moved towards Ultron, intent upon closing with him in hand-to-hand combat next turn.

Dreadnought #3 fired at the approaching Colossus and hit, but the big mutant just shrugged it off.

From behind a pile of junk, Hawkeye took a shot at Ultron and hit, but did no damage.

The Vision floated towards Ultron, still intangible and out of sight for any ranged attack.

Captain America threw his shield at Dreadnought #3, and scored a whopping 17 goals on his attack! The end result, however, was not as impressive: the Dreadnought suffered 4 Vitality worth of damage, leaving it with 3. Cap used his remaining AP to move through the alley to assist Wolverine next turn, retrieving his shield along the way.

Turn 4

The initiative was a tie, broken by Captain America’s higher AP total. The heroes went first.

Storm took off and blasted Madame Hydra with a lightning bolt, but missed.

Ultron used his Dominate power on the weak-willed Colossus and succeeded, meaning he would be able to control Colossus when Matt activated him next. Then he moved back into the park.

Captain America flung his shield in a spray attack, attempting to hit both Dreadnoughts, but only hit  one. It resisted all damage. In return, Dreadnought #1 charged Cap and attacked, scoring enough net goals to drop his Vitality to zero and knock him back into the building. (Matt really rolled terribly on his defense rolls.) Captain America was KO’ed!

Wolverine spent 4 AP to Regenerate, scoring 8 goals, restoring 8 Vitality! Back in the fight, he used 6 AP to Flurry, scoring a net of 7 goals of damage on each Dreadnought, enough to destroy them both! Take that, Bub! Then he moved past their smoking and sparking bodies towards Ultron, his intentions obvious.

Dreadnought #3 used all his power pool for his Damaging Aura and left nothing for Ranged attack, so if he wanted to do anything, he’s have to attack in melee. I knew that Colossus wouldn’t fight back, so I figured I might take the opportunity to do some damage to Colossus. This was blunder #2. The Dreadnought charged and did 2 Vitality of damage, knocking Colossus back 4″ and knocking him prone.

Iron Man shot at Dreadnought #3 and hit, but did no damage. Then he flew atop the same building as Madame Hydra, getting into position to ruin her day next turn.

But Madame Hydra teleported away, this time to the street. She shot Cyclops for 5 Vitality of damage, almost knocking him out. Then she used her remaining AP to close the gap, moving into hand-to-hand.

Cyclops fired at Madame Hydra at point-blank range and missed. Maybe he was still seeing stars from her shot.

Hawkeye took a shot at Madame Hydra, attempting to Entangle her. He missed, and also missed Cyclops, who he could have hit by accident.

The Vision continued to drift closer to Ultron, still intangible.

Of course, Matt waited until the last possible second to activate Colossus, who was mine to control. Unfortunately for me, I had to spend 2 of Colossus’s measly 5 AP just to stand up after being knocked prone by the Dreadnought. Even with his extra movement, Colossus couldn’t reach Hawkeye this turn to punch him into next week like I wanted. And at the end of the turn, control of Colossus reverted back to Matt.

Turn 5

With Cap KO’ed, Matt nominated Cyclops as his new team leader. This allowed Ultron to seize initiative for the first time this game.


With Wolverine bearing down on him, Ultron did the sensible thing. He fired at Wolverine with full power. Unfortunately, he missed. So he did the next best thing. He used his remaining AP to move farther away.

That didn’t help him for long. Wolverine charged and easily closed the gap, but despite scoring 8 goals to damage Ultron, the robot was able to resist all damage.

Madame Hydra shot at Cyclops at point-blank range, but she missed.

Vision finally got into the fight and tried a phase attack against Dreadnought #3, but missed.

Colossus charged into combat with Madame Hydra, attacking her from behind and knocking her senseless. Madame Hydra was KO’ed!

Hawkeye successfully Entangled Dreadnought #3, rooting it to the spot. Despite this, Iron Man still missed when he shot at the Dreadnought moments later.

Finally, Storm blew Dreadnought #3 to pieces with a lightning bolt that did 6 goals of unresisted damage. Dreadnought #3 was destroyed!

Turn 6

Ultron, now alone, faced the combined forces of Iron Man, Vision, Hawkeye, Cyclops, Storm, Colossus and Wolverine. It was pretty clear he’d be defeated eventually, and it was getting late, so we called it a night. Victory to the heroes!