Category Archives: Conversions

Gaslands 6: Grond: Going Big with the WAR RIG!

Well, the end of April brings me to the end of my Gaslands posts, at least for now. I’ve saved the best for last: ladies and gentlemen of the wasteland, I present Grond, the war rig! (The Tolkien-philes among you may recognize the name Grond: it’s the name of the huge battering ram the forces of Sauron used to sunder the gates at the siege of Minas Tirith. I feel it is an appropriate name for my rolling death machine.)

From the moment I first read the Gaslands rulebook, I knew I needed to make a war rig: a big, diesel-burning armored machine of death to crush my enemies, see them driven before me and hear the lamentation of the women. Originally, I wanted my armored bus Marstorius to be a war rig, but there’s one small problem with that: although Marstorius is certainly big enough for a war rig, it is not articulated; meaning it has no separate cab and trailer. It’s all one piece. Whether or not a war rig is articulated is a pretty big deal in the game, as it affects such things as hazard tokens and vehicle orientation.


I started with this Hot Wheels truck. It was the most money I spent on a Gaslands car thus far: almost $7.00 brand new. In my haste to get started, I neglected to take a picture of it before I started work. So here’s a YouTube video review of it by a somewhat enthusiastic Hot Wheels aficionado. You may notice it comes with a another car (Maybe it could be a performance car, see below), so I guess for seven bucks it wasn’t a bad deal.

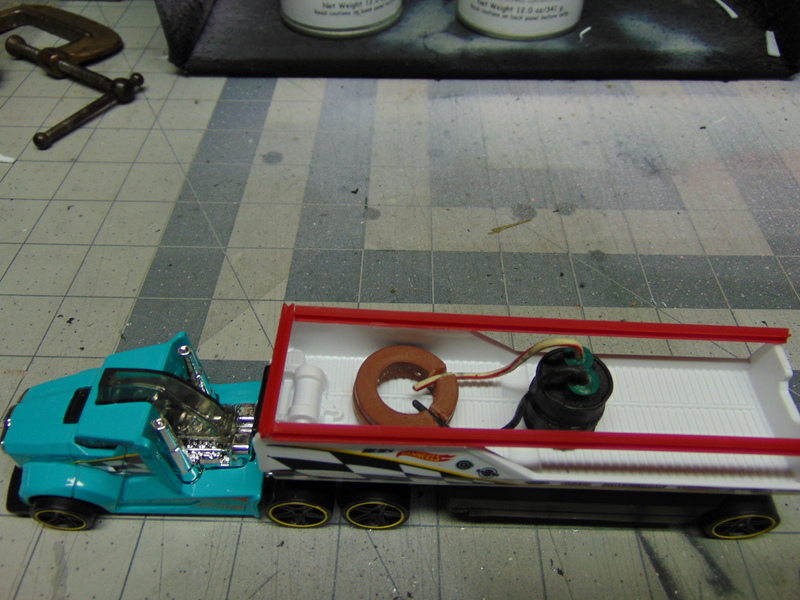
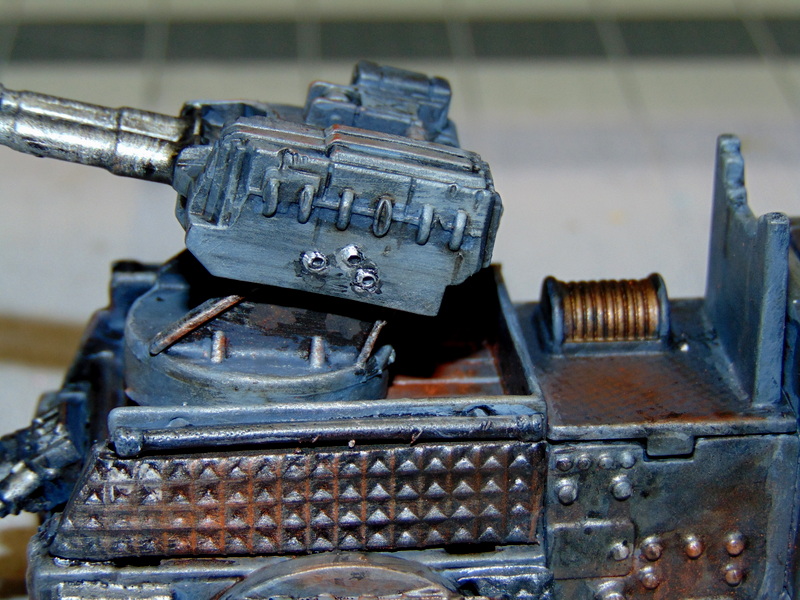
I wanted to use a flatbed-style truck because I wanted to have a turret-mounted flamethrower, and I didn’t like the look of it on top of a full-sized trailer. It just looked too high up.  The flatbed seems pretty unprotected, however, so I started armoring up the sides. Before I got started, I built my flamethrower turret and made sure it fit inside the bed.
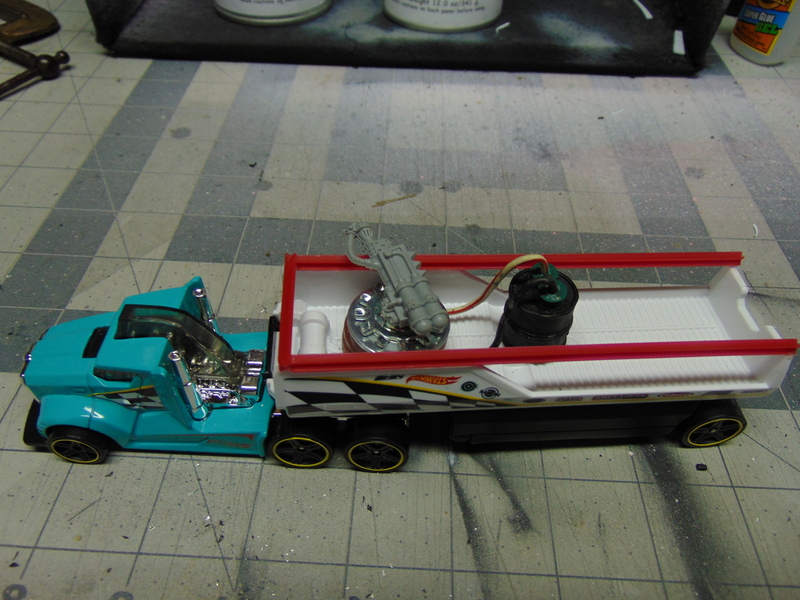
The side rails are coffee stirrers. The flamethrower turret was made from a couple of rubber faucet gaskets, a fender washer, a lock washer and an axle nut, much the same as the turret on my monster truck, Rock-n-rolla. The flamethrower itself came from a Imperial Guard Sentinel sprue (I think). I decided to use a GW oil can as a fuel source and clipped some old speaker wire to use as hoses. I cut slots in the rubber gasket to accommodate the wires; that way it would look like the barrel was supplying oil to the turret through the hoses.
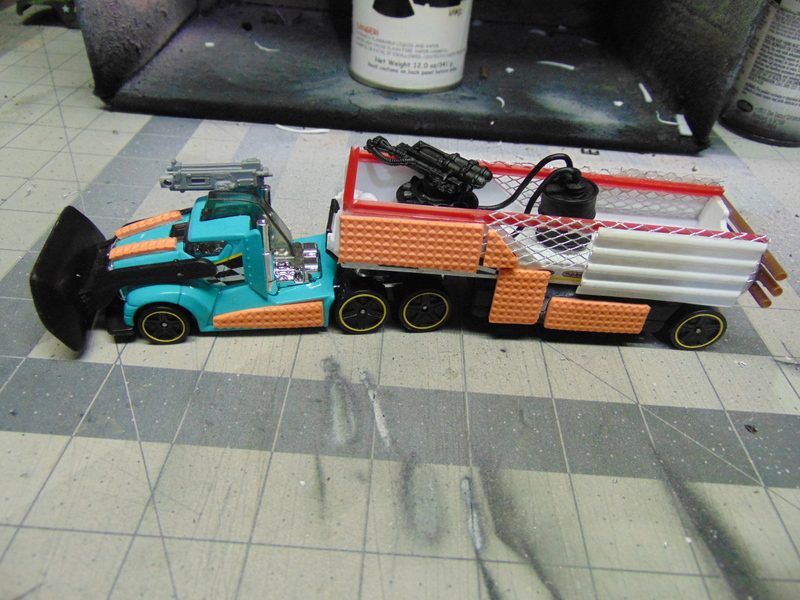
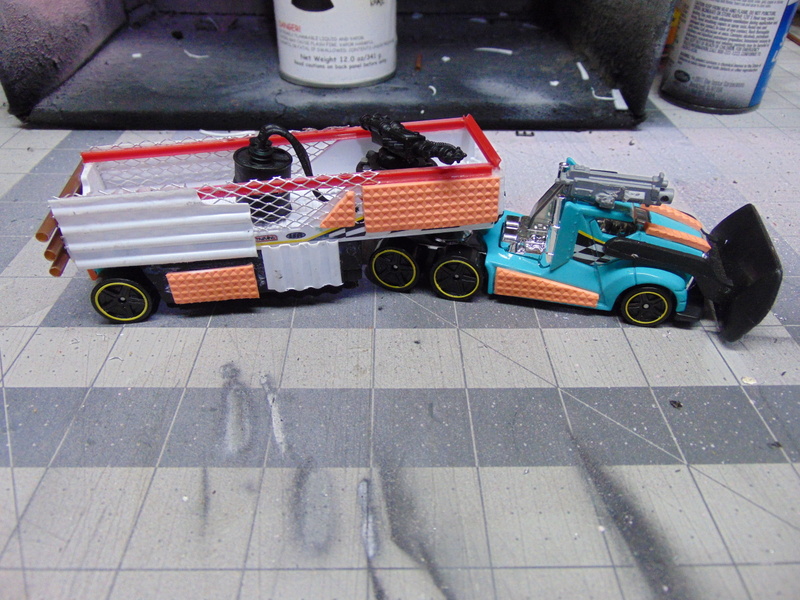
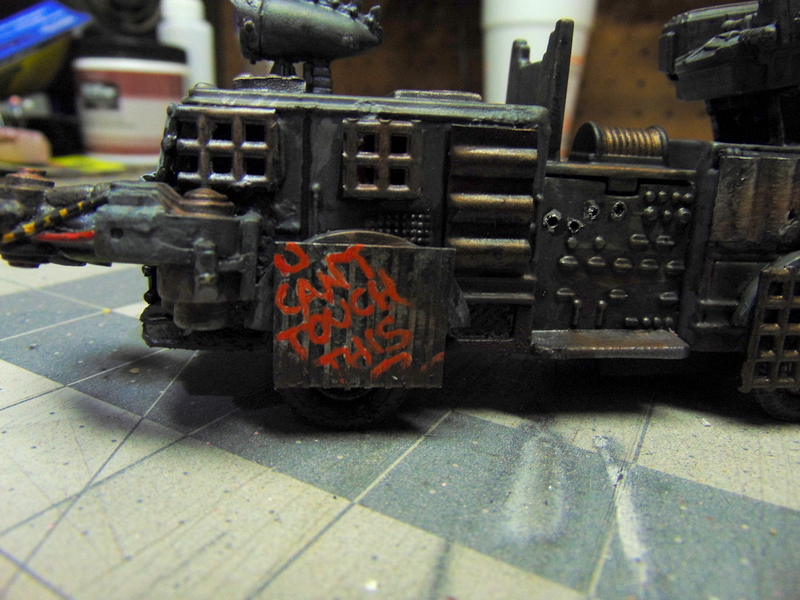
I applied some wire mesh, craft foam and plasticard as armor plating, mounted a GW heavy bolter to the cab roof, and a plow blade from a Tonka bulldozer I got at a flea market. A war rig has the most build slots of any vehicle in Gaslands, a whopping 5. The flamethrower took up 2, the machine gun and the plow took up one each. That left me with one more build slot. I could just use the extra armor, but a war rig doesn’t really need any more armor. As you can see, I have a lot of room left in the bed of the truck, so I started thinking about a mine dropper.
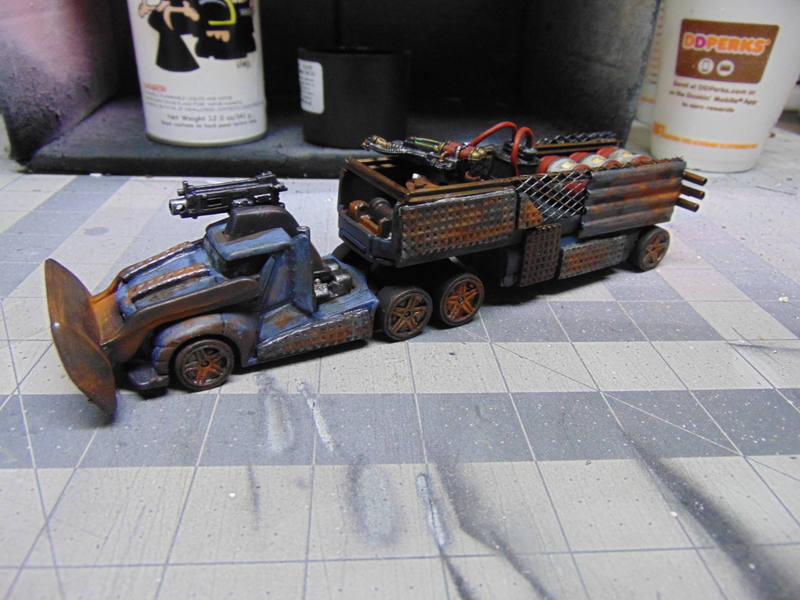
Instead of traditional mines, I thought it would be cool if Grond dropped explosive barrels off of his tailgate whenever any pursuers got too close for comfort. I had some of these old barrels around and they fit the bed of the truck perfectly, so I painted them in the ubiquitous “explosive barrel” color scheme familiar to anyone who plays first-person shooter video games.
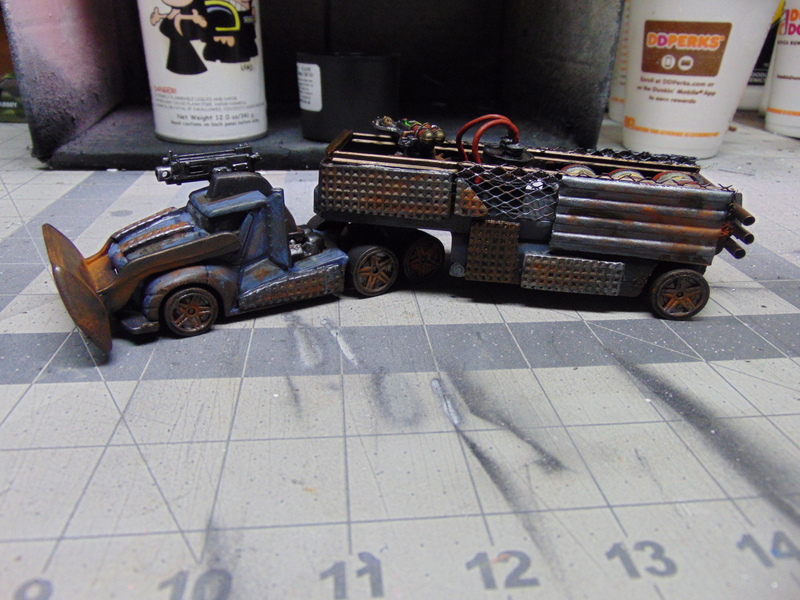
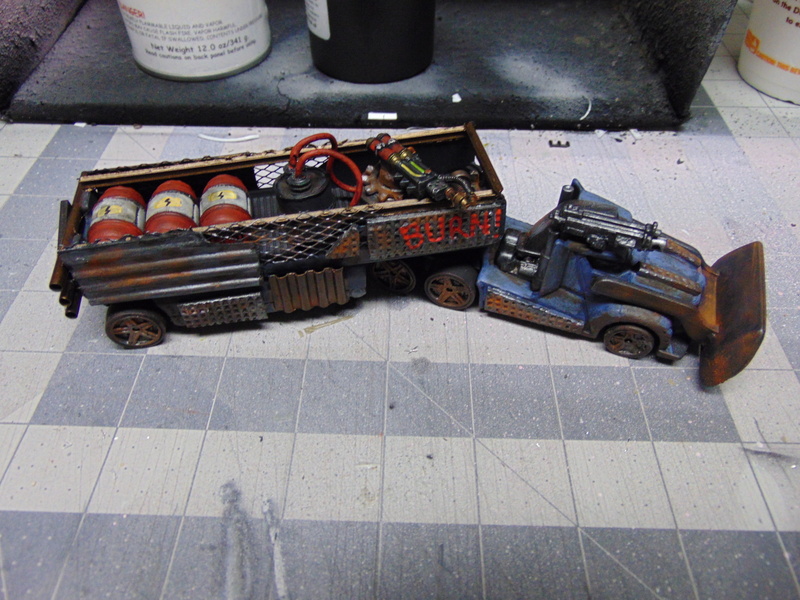
One may question the wisdom of having a 360° flamethrower operating in close proximity to volatile, explosives-filled barrels; but I can assure you not one crewmember aboard Grond ever thought twice about it. Not for a second. What could go wrong?
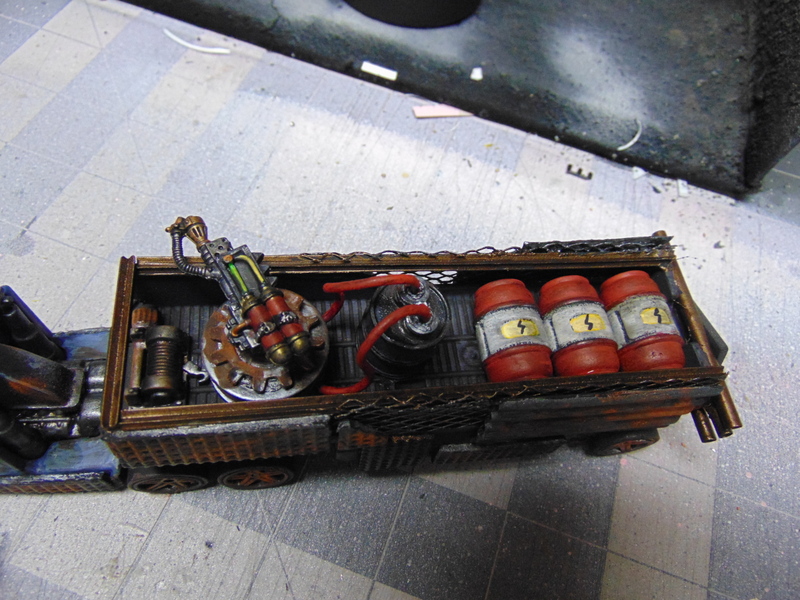
Here’s a close-up of the bed of the truck. I’m quite happy with the way the flamethrower turret and the barrels came out.
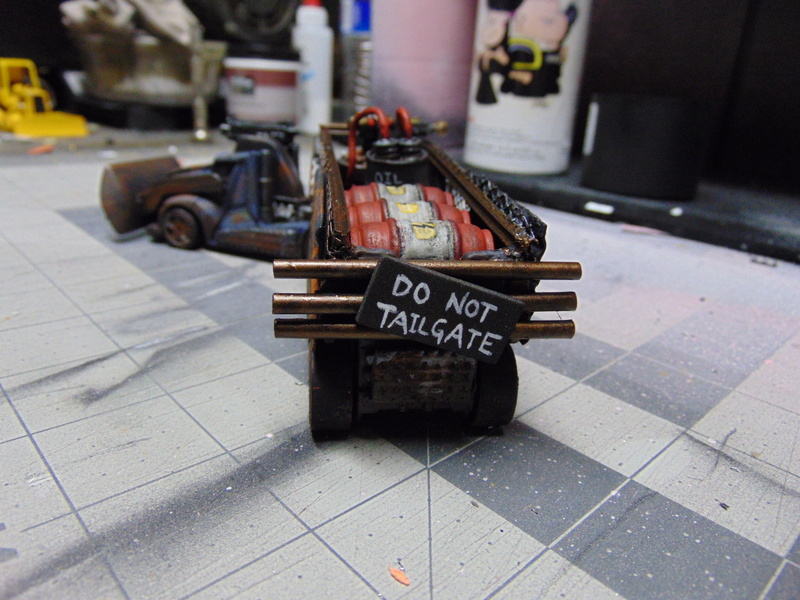
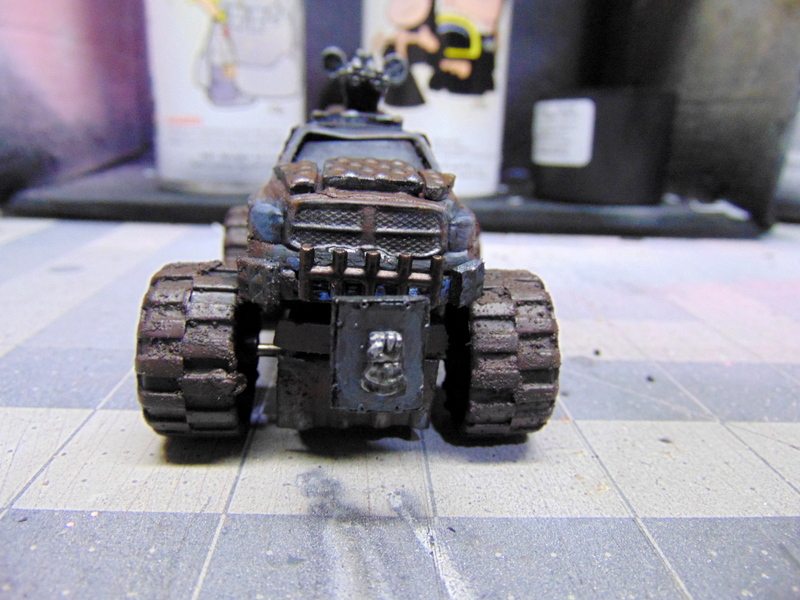
Here’s the back. The bars were made with coffee stirrers (a different kind), the sign from a piece of craft foam. If you take an explosive barrel to the face, you can’t say you weren’t warned.
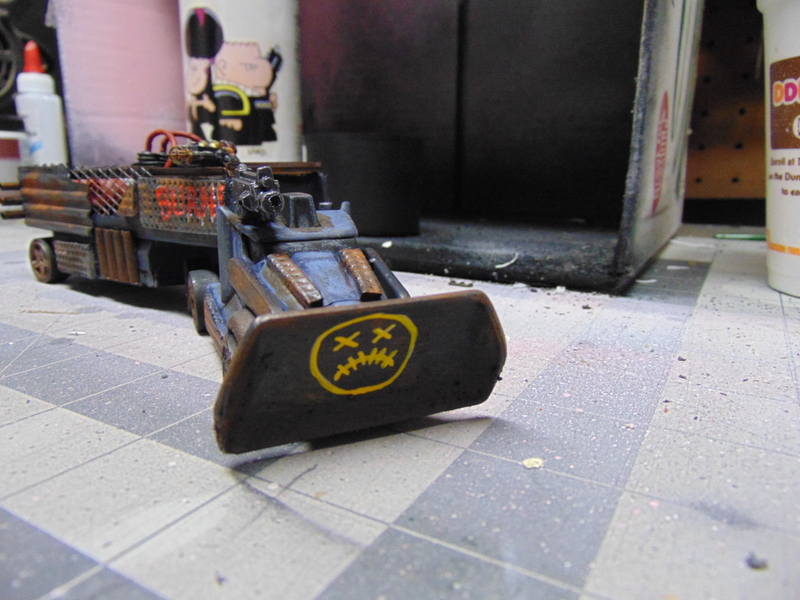
And a close-up of the front. I considered writing some pithy statement on the blade, like “Here I Come!”, but decided against it, as it would have to be written backwards in order to be read in a rear-view mirror. If you were actually facing Grond, you wouldn’t need to be told as you would see it coming, thus rendering any warning somewhat superfluous. So I drew this dead smiley face instead.
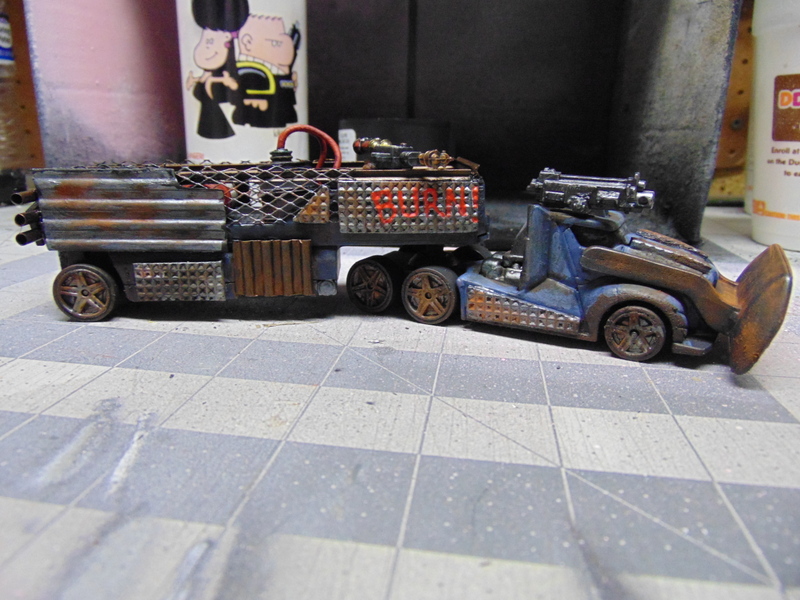
The finished product: Grond, the war rig!!

Painting for all my Gaslands vehicles is pretty much the same. I used a mix of Cote D’Arms, Games Workshop, Reaper and Vallejo paints. Grond’s body is based with The Fang (GW), with a highlight of Shadow Grey (CD), then given a wash of Nuln Oil (GW). The armor plating was painted with either Gunmetal Grey (V), Gun Metal (CD) or Tin Bitz (GW) before being washed with Armor Wash (CD). The machine gun and the plow were painted Adamantite Black (R) and dry-brushed with Necron Compound (GW) and Tin Bitz (GW) before given a wash of  Nuln Oil (GW). I used some Typhus Corrosion (GW) and Stirland Mud (GW) on the tires, wheel wells and the plow. Lastly, I used some MIG rust pigment on the armor, wheels and body.
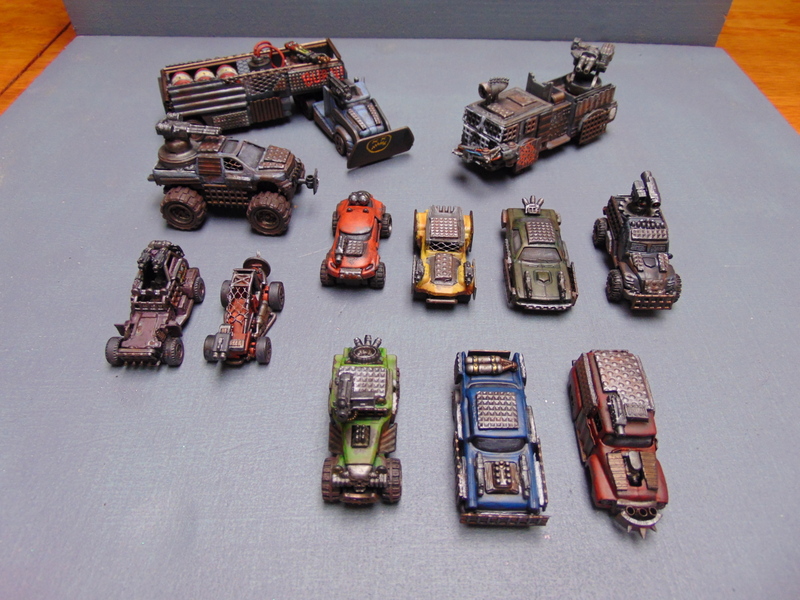
Well, that about does it for Gaslands for now. I want to focus on some other projects and perhaps get some actual games in before I start on any new cars and/or terrain. One thing I didn’t build were any performance cars, which are a separate type of vehicle that is really good at evading collisions. They can reach the highest gear, which allows them to activate more often than most other vehicle types. They tend to be more elegant and less rusty and Mad Max-y then the other cars; more finesse than brawn. Perhaps in the future I’ll convert some performance cars, but other than that, I think I’m pretty happy with what I’ve got so far: seven cars, two buggies, a monster truck, an armored bus and a war rig.

Next post: May is Monster Month!
Gaslands 5: Sunday!!! Sunday!!! SUNDAAAAAAY!!!!!!!

I’m unsure about the rest of the world, but those of us who live in the USA periodically have these things come to town called “Monster Truck Rallies.” Basically, they fill an arena with loose mud and junk cars and unleash monster trucks to crush, spindle and mutilate everything they possibly can in the span of a few hours or so.

It’s not my thing. At all. Then again, not everyone likes bagpipes, so YMMV. Different strokes, as they say. Live and let live. Judge not lest ye be judged, and all that.

Often, these monster truck rallies are accompanied by loud music and scantily-clad women and are usually hosted by local radio personalities or former WWE or NASCAR “superstars”. As the title of this post implies, these events tend to take place on a certain day of the week. Watch this video, which is a parody (but isn’t far off the mark), and you’ll get the idea.

Sponsors include Bass Pro Shops, Wal-Mart and Bud Light. Priceless. (I know I said I wouldn’t judge. I lied.)

You can find actual monster truck commercials elsewhere on YouTube, lest you think I’m being unduly critical. (Here’s one.) In short, it’s shitkicker heaven; a pageant of redneckery that I believe is somewhat unique to America. It is less popular in the region where I live than in other parts of the country, and it’s not something that has ever interested me in the slightest.

Until now.

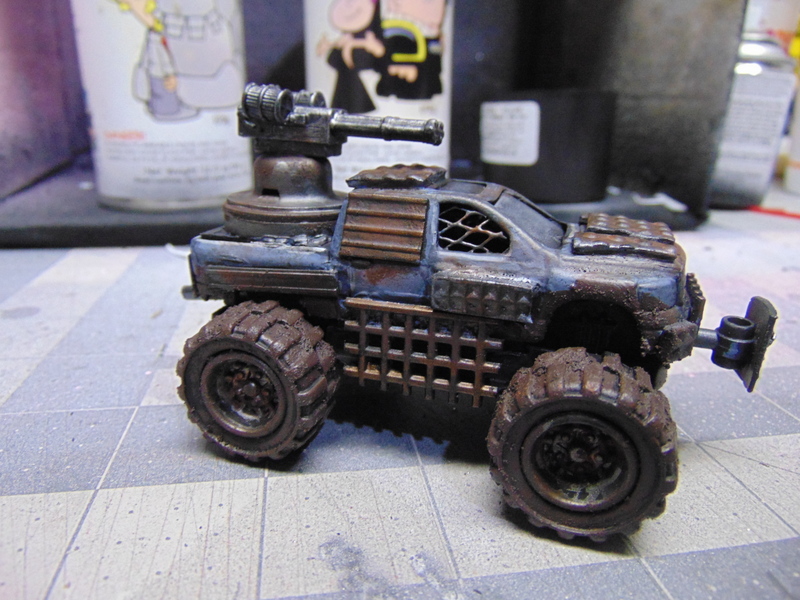
Ladies and gentlemen of the wasteland: I present my Gaslands Monster Truck: Rock-n-rolla!!!!

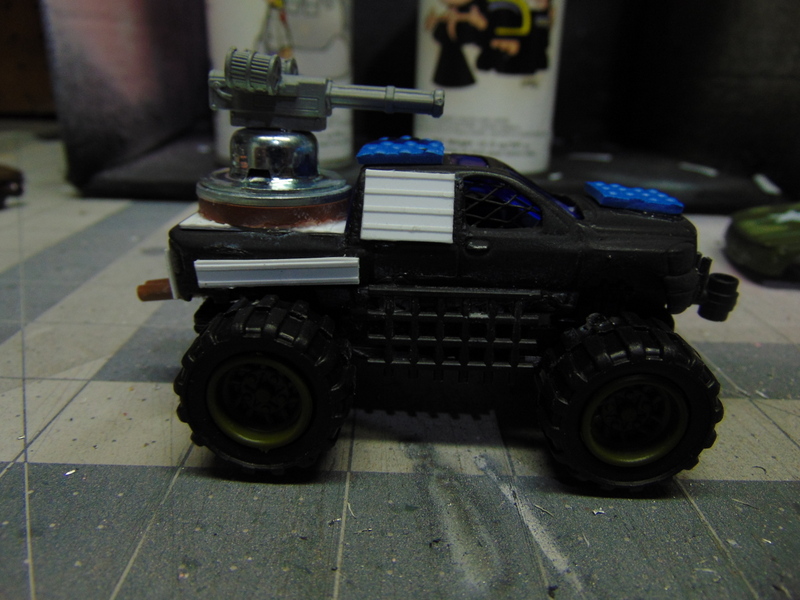
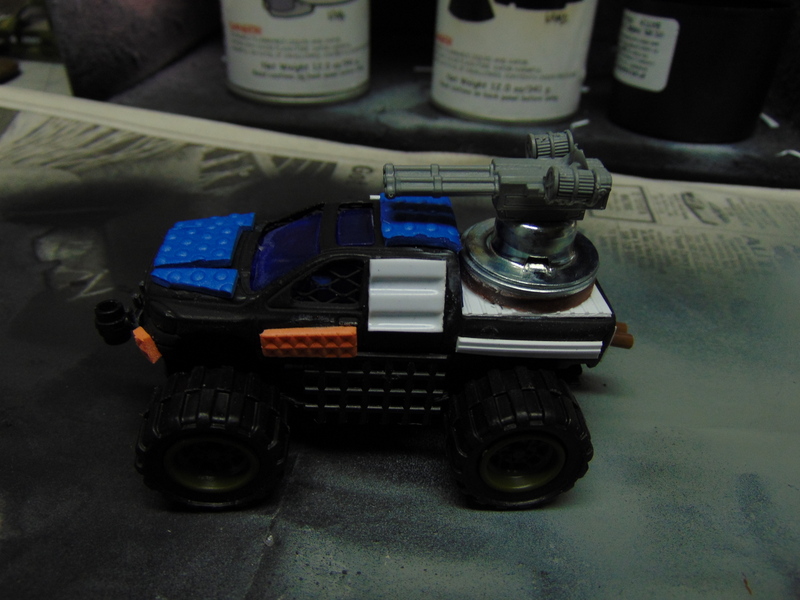
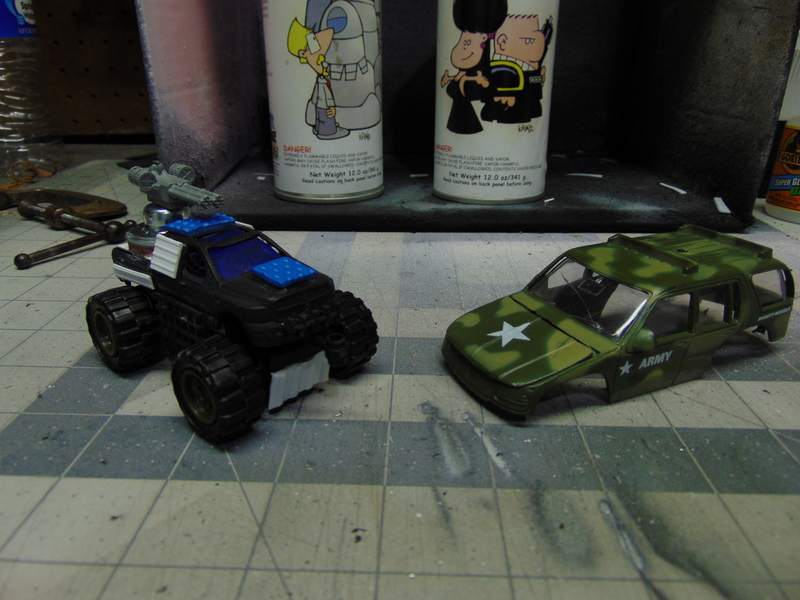
You may recall from my last post that Rock-n-rolla began as a Ford F-150 Hot Wheels car. I de-riveted it and applied some wire mesh to the windows before re-assembling the chassis.  My initial purchase of cars was a grab-bag at a thrift store, which included a junky military SUV of a larger scale. I promptly cannibalized it for its roof-mounted gun, but as I looked at my disassembled pickup, I suddenly realized that the SUV didn’t really need it’s wheels anymore, either. A quick fit-check and some minor alterations to the pickup chassis, and….Rock-n-rolla was born!

Time for MONSTER TRUCK MADNESS!!!!!

For some reason, a monster truck only has 2 build slots in Gaslands, which is the same as a car or buggy. (If I had left it a pickup, it would have 3 build slots.) I guess this is done for game balance, because a monster truck simply runs over anything it collides with (see above video). The point is I didn’t have much to work with as far as weaponry was concerned, so I gave it what I could.

I built the minigun turret out of a gasket, fender washer and axle nut glued to some corrugated plasticard. It fit snugly in the bed of the truck. For the actual gun, I could have used the gun I pulled off the SUV, but instead I raided an unopened box of Wargames Factory Shock Trooper Heavy Weapons Teams  for the double minigun. This is the first time I went outside the bitz box for something, but I think it was worth it.

Here is the finished result:

I put a ram on the front end, but I used an extra shield I had from a unit of Black Tree Ironclad Dwarfs. I like the fist emblem; it seems to fit a monster truck ram nicely. I added some armor purely for aesthetics, as Rock-n-rolla has no more build slots to spend on armor. Thus, no game effect; it just looks cool.

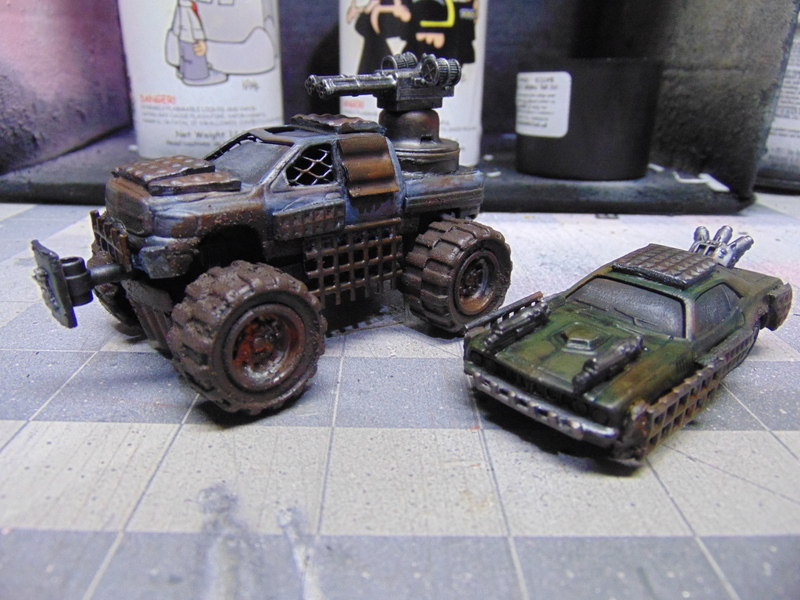
Here’s a shot of Rock-n-rolla next to my first car build, Coughin’ Joe. As you can see, he’s much taller, as a monster truck should be, thanks to the wheels I purloined from the larger-scale SUV.


For those interested in the painting/weathering process, it’s pretty standard by now if you’ve read any of my other Gaslands posts. I used a mix of Cote D’Arms, Games Workshop, Reaper and Vallejo paints. Rock-n-Rolla’s body is based with Twilight Blue (R), with a highlight of Lupin Grey (CD), then given a wash of Nuln Oil (GW). The armor plating was painted with either Gunmetal Grey (V), Gun Metal (CD) or Tin Bitz (GW) before being washed with Armor Wash (CD). The gun turret was painted Adamantite Black (R) and dry-brushed with Necron Compound (GW) before given a wash of  Nuln Oil (GW). I used some Typhus Corrosion (GW) near the armor plating to further the grimy look, and I used copious amounts of Stirland Mud (GW) on the tires and undercarriage. Lastly, I used some MIG rust pigment on the armor, hubcaps and body.

I never thought I would ever say this in my life, but I think this monster truck is pretty cool!

I’m hoping to have my final (for now) Gaslands post up by the end of the month, as I have some big plans for May. I’ve saved the best for last, or at least the biggest for last….

Bigger than Rock-n-rolla? Yep.

Bigger than Marstorius?

Oh, yes…


Gaslands 4: Cars Galore!

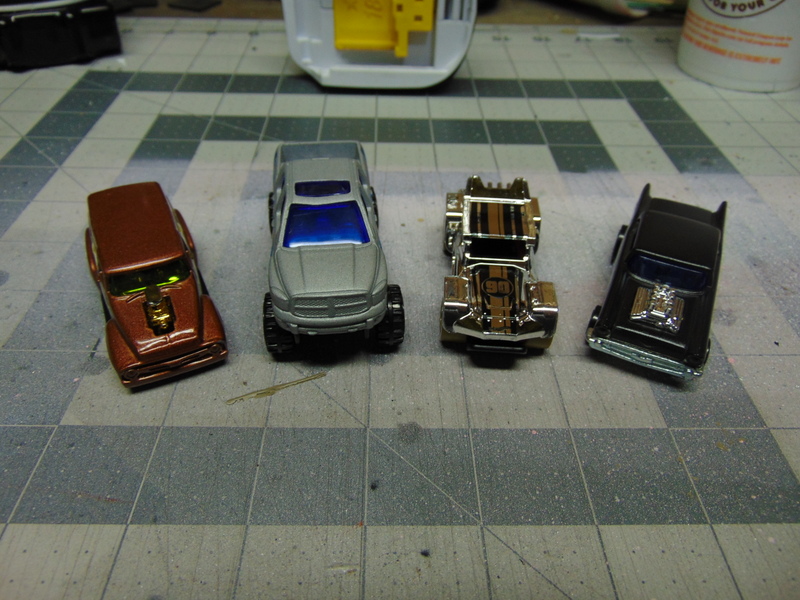
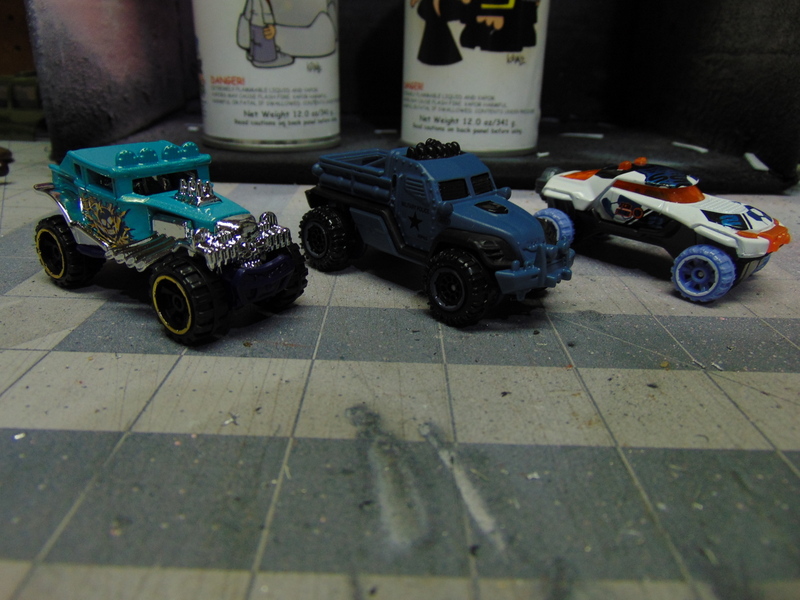
After building one car, a couple of buggies and my armored bus, I realized I needed more cars, as one car does not a wasteland racing team make. Here’s what I started with:

Three cars, including a classic ’57 Chevy, and a Ford F150 pickup (the preferred vehicle of the Angry Piper’s brother).

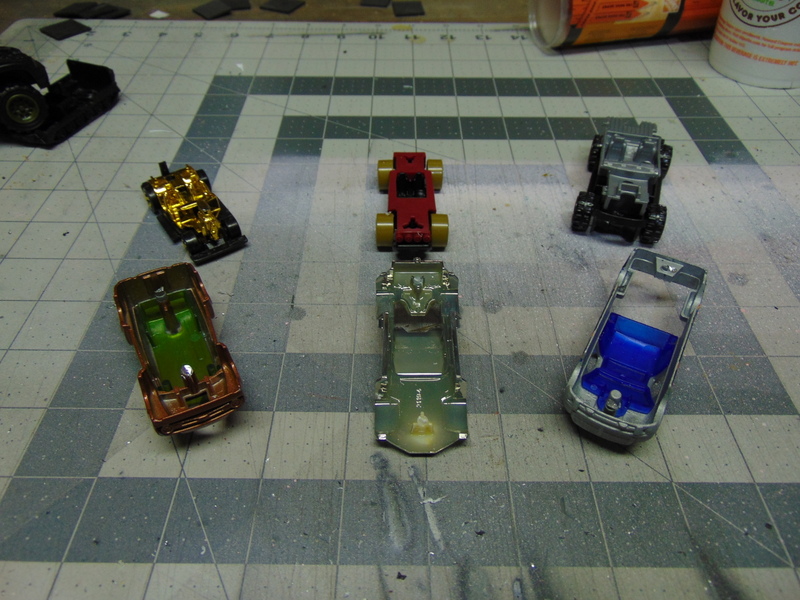
This was the first time I needed to de-rivet the cars, as most of them had open windows and I wanted to add some wire mesh to the inside before I repainted them. I found this how-to video on Youtube from, of all people, Mike Hutchinson, the creator of Gaslands, wherein he shows you exactly how quick and easy it is to take apart a toy car:

Except, of course, it isn’t. At least not for me. What I discovered was that you need a cobalt drill bit if you’re planning on going though anything metal, otherwise all you’ll do is lock your drill bit and say nasty words. Once you get a cobalt drill bit a little bit bigger than your rivet, start drilling on a low setting and you’ll eventually get there.

Anyway, once de-riveted, I set about adding wire mesh, weapons and armor to the cars. Never mind the pickup truck for now, I had other plans for him.

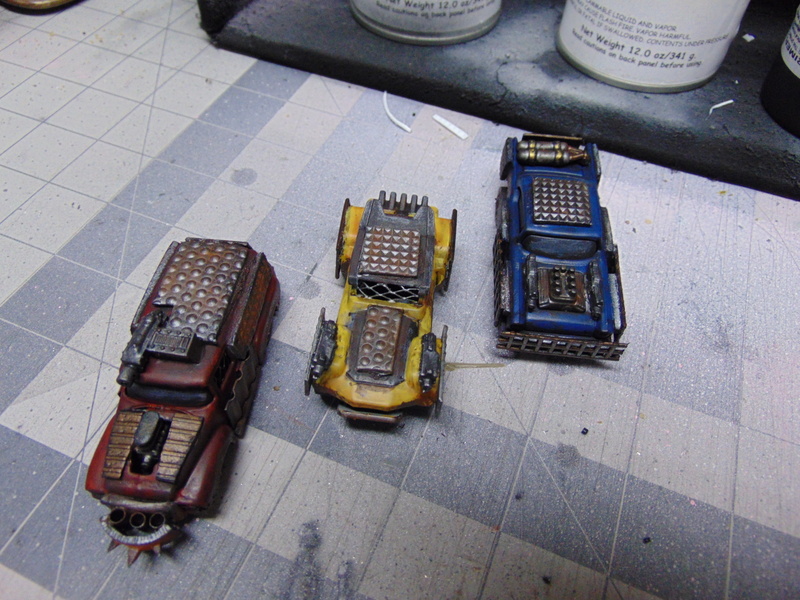
Here they are completed: Bully-boy, Bullwhip and Stagger Lee! Bully-boy has a front-mounted machine gun and a forward ram. Bullwhip is actually the official name for the Hot Wheels car I used, and it sounds cool enough that I don’t need to rename it. He has front-mounted machine guns and a caltrop or oil slick dropper. Stagger Lee, the converted ’57 Chevy, has front-mounted machine guns and a nitro booster.

Of course, I then, quite innocently, found myself at a place where they sell yet more Hot Wheels cars. So I bought three more.

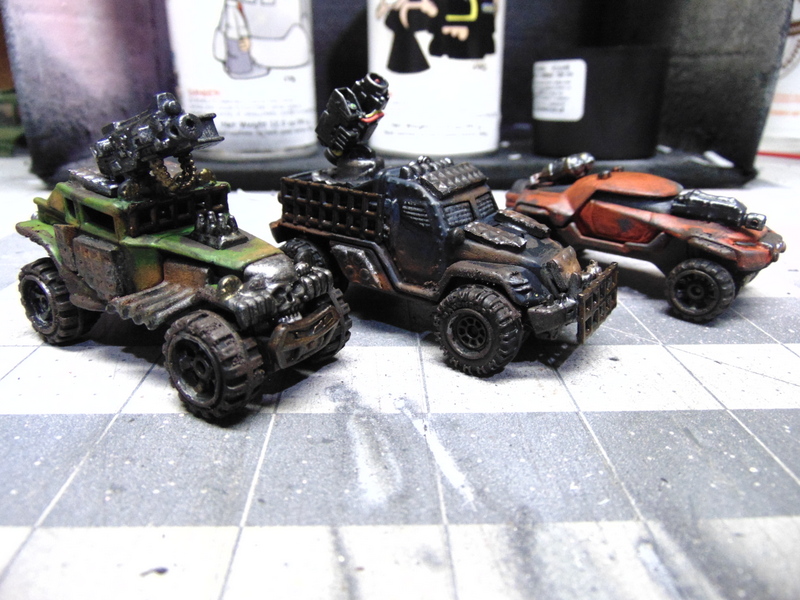
After the usual conversion process, I present the results:

I present: Surrender, Dorothy!, Black Betty (Bam-a-Lam) and Red Asphalt! Surrender, Dorothy! is equipped with a heavy machine gun and smoke launchers (much like Coughin’ Joe), Black Betty has a front-mounted rocket launcher, and Red Asphalt has a front-mounted machine gun and an oil-slick dropper (or a nitro boost, depending on how I feel).

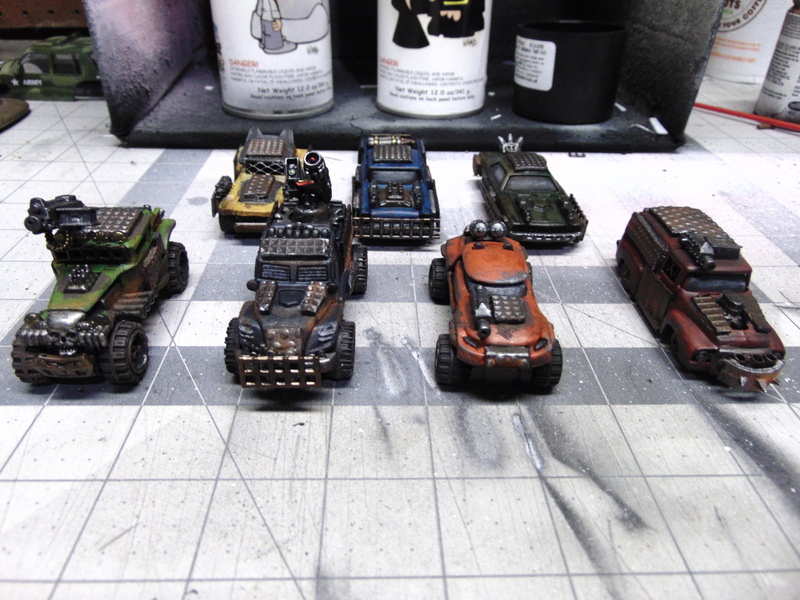
Together with my first Gaslands build, Coughin’ Joe, that makes seven cars in total. More than enough to play the game with a friend! (Note to self: make some friends.)

If you’ve been following my Gaslands build posts thus far, my painting technique should be pretty familiar. Basically, the cars all get weathered and highlighted the same way: after applying my chosen colors, they are all washed with Nuln Oil. All the armor and metal bits are painted either with Gunmetal Grey, Gun Metal or Tin Bitz, then washed with Nuln Oil, Armor Wash or Agrax Earthshade. Then I apply some Stirland Mud, Typhus Corrosion and usually some MIG rust pigment to weather they cars further. And that’s pretty much it.

Wondering about that Ford F-150 Pickup? Well, next post you’ll see what I did with it. For those of us in the United States, here’s a hint…

“Sunday! Sunday! SUNNDDAAAAAY!!!!!!”

Gaslands 3: Marstorius!

Well, I said I would post something that wasn’t Gaslands, but I lied. I’m too hooked. My Gaslands kitbashing continues on, with my first “big boy”. Ladies and gentlemen of the wasteland, I present: MARSTORIUS!!!!

I got the name from an old fighting game. Marstorius was a big wrestler from Fighter’s History. Here he is giving a bull a suplex, because as everyone knows, bulls are assholes. Marstorius was a poor imitation of Zangief; but that’s hardly surprising as Fighter’s History was a poor imitation of Street Fighter II. I like the name, and it fits my latest project nicely.

I need a bully: someone whose sole purpose is to ruin the day of anyone he meets. Someone who can dish out a curb-stomp like no one else, but can also take whatever punishment comes his way with a bloody, gap-toothed smile. In other words, I need an armored bus.

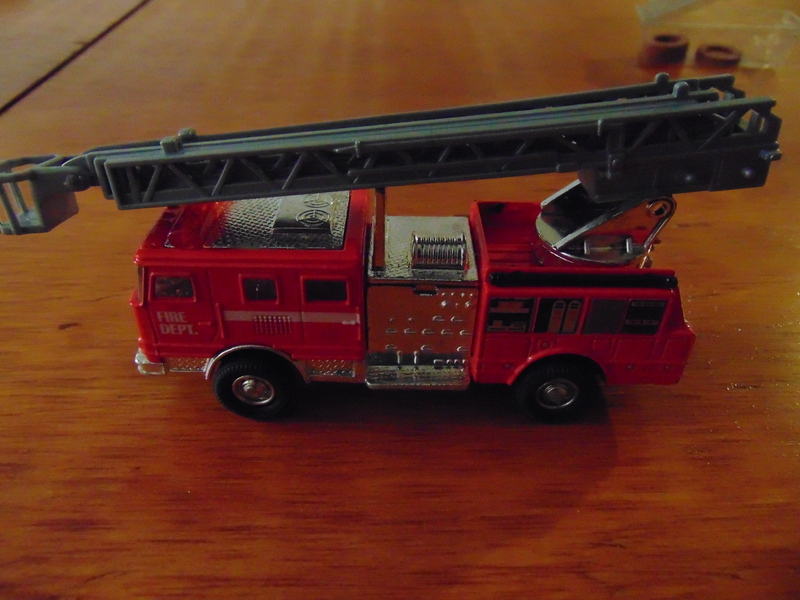
I started with this fire truck. It’s not a Hot Wheels or Matchbox; it’s sold at CVS and made by a Chinese company that makes cars that are (mostly) compatible with 28mm miniatures. In fact, I own a lot of those cars and you can see them on After Action Reports all over this blog, if so inclined. This fire truck is the same size as most of their cars, which of course means it’s totally out of scale (i.e. too small) with the rest of their line, but it is perfect for “Hot Wheels” scale, as it’s much bigger than a standard Hot Wheels car (about the size a fire truck would be next to a HW car). Hopefully that makes some kind of sense.

Anyway, the first thing I did was remove the side ladder, the siren lights and the extending ladder. The extending ladder could come in handy for use as scenery in other games. Removing it left me with an empty bracket on a 360° rotating platform, which is perfect for a turret emplacement.


Many of the scenarios in Gaslands are races, or variations thereof. Being an armored bus, Marstorius won’t win any races, but that’s not his job. His job is to make sure YOU don’t win any races.

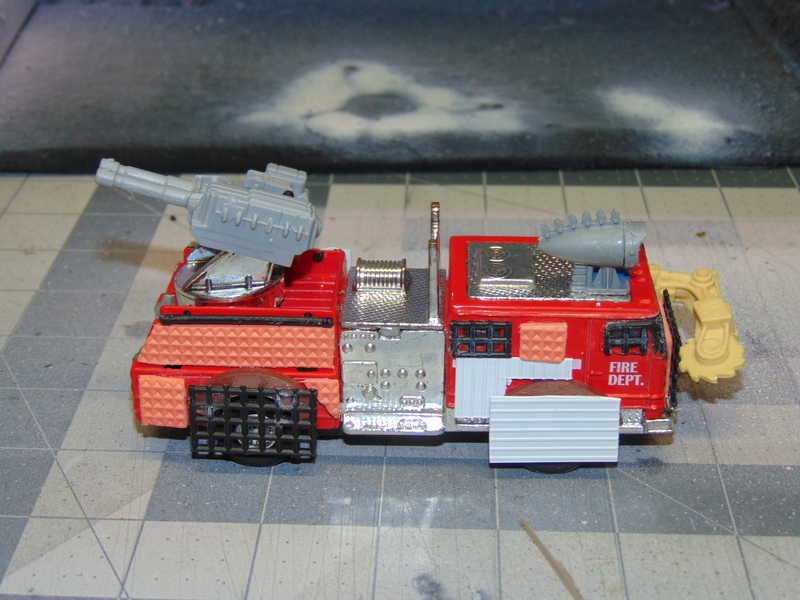
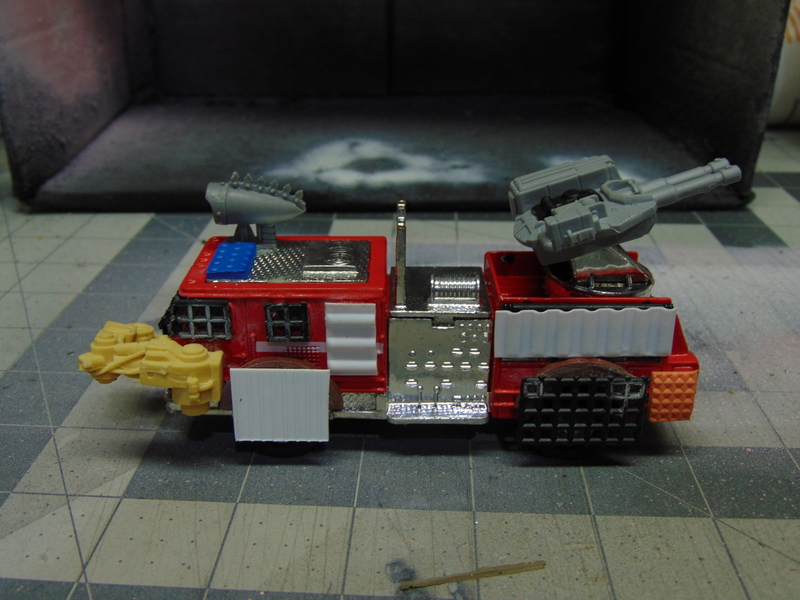
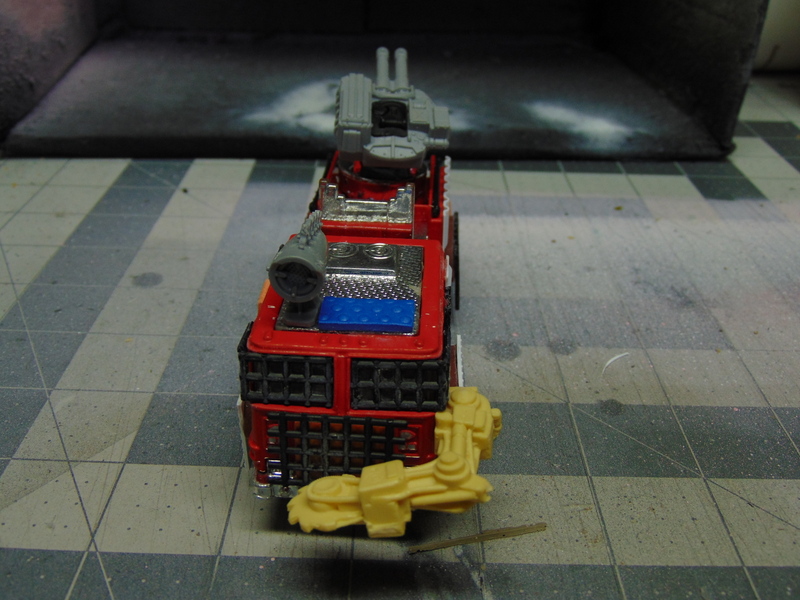
With that in mind, I attached a turret from a Matchbox tank to the extending ladder mount, giving it a heavy machine gun with a 360° field of fire. This will allow targeting pretty much anywhere in range. Then I added the armor. Lots of styrene sheeting, craft foam and plastic mesh slapped all over this baby. It’s armored EVERYWHERE. I had some leftover rubber gaskets I had bought to replace on my outdoor faucets, so I cut them and fitted them around the wheel-wells of the truck so the armor panels wouldn’t be attached to the truck directly, and wouldn’t affect wheel rotation.

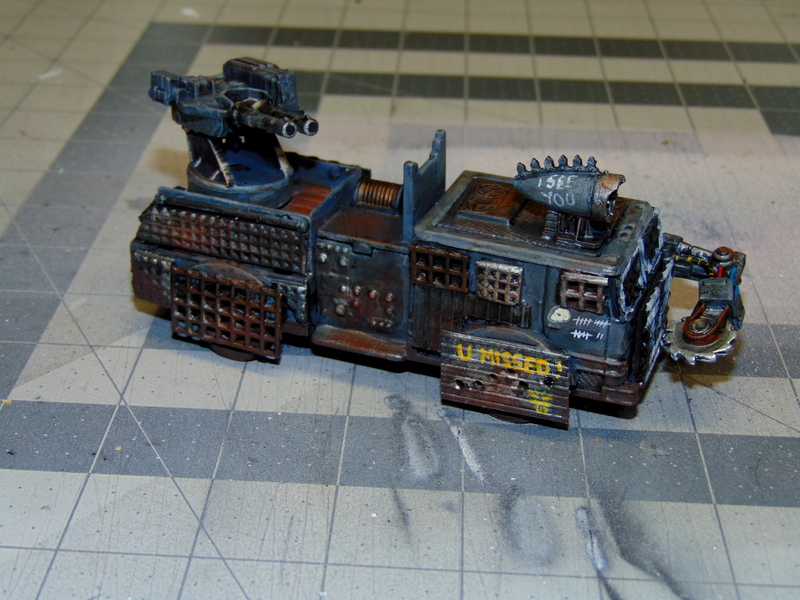
I knew I wanted a ram on the front, so I went with this buzzsaw arm. It’s an extra bit I had from an Armorcast Frank-N-Steam model I bought years ago. They don’t seem to make that model anymore, but it’s a variation of the other “Frank” models, only with two legs. I can just see Marstorius turning any vehicle foolish enough to get in his way into an instant convertible! I stuck a searchlight on the top and some auto-launchers on the back, both from old Leman Russ tank sprues. (Gotta love the bitz box!) The auto-launchers represent caltrop droppers, lest any pursuers get too close. It is unwise to tailgate Marstorius.

In Gaslands, a bus has 3 Build slots. The heavy machine gun, caltrop droppers and the front buzzsaw (ram) take up a slot each, which means the armor I festooned Martsorius with is pretty much just for show. If I wanted to make him tougher, I could forego the caltrop droppers for some extra armor instead, making him more like a war rig than a bus. He’s certainly big enough!
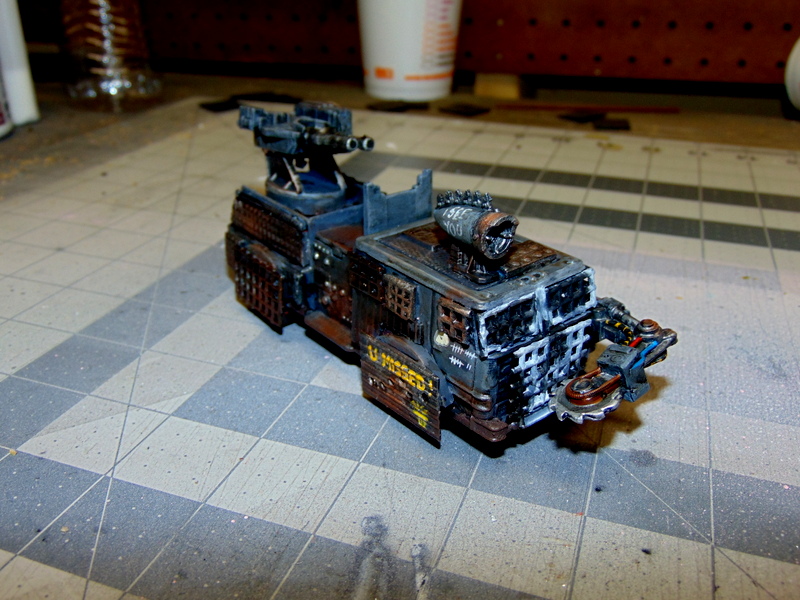
Here’s how he looks painted up. I used a mix of Army Painter, Cote D’Arms, Games Workshop, Reaper and Vallejo paints. Marstorius’s body and the turret is based with Necromancer Cloak (AP), with a highlight of Ash Gray (R) and Concrete Gray (R), then given a wash of Agrax Earthshade (GW). The armor plating was painted with either Gunmetal Grey (V), Gun Metal (CD) or Tin Bitz (GW) before being washed with Armor Wash (CD). The buzzsaw wires were painted various colors and given a wash of Nuln Oil (GW). I used some Stirland Mud and Typhus Corrosion (both GW) to further the grimy look. Lastly, I used some MIG rust pigment on the armor and body.

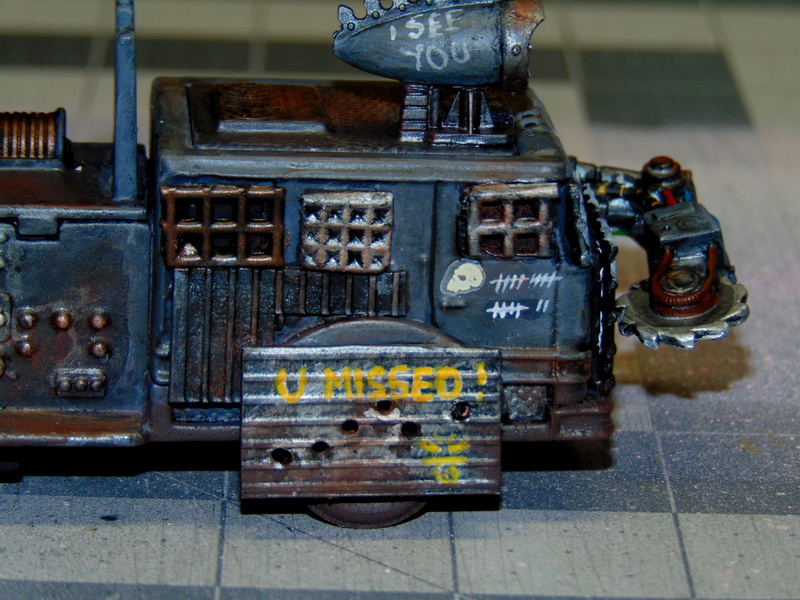
It’s not as obvious as I would like, but I painted this skull visage on the front of Marstorius’s cab. It’s tough to see behind the buzzsaw arm, but it’s there. I painted it with some watered-down white paint to simulate a spray paint effect.

I decided to add some other small touches, like this hash-mark tally of the vehicles Marstorius has sent to the junk heap. I free-handed the grafitti on the armor panels and searchlight and added the bullet holes with a Dremel.

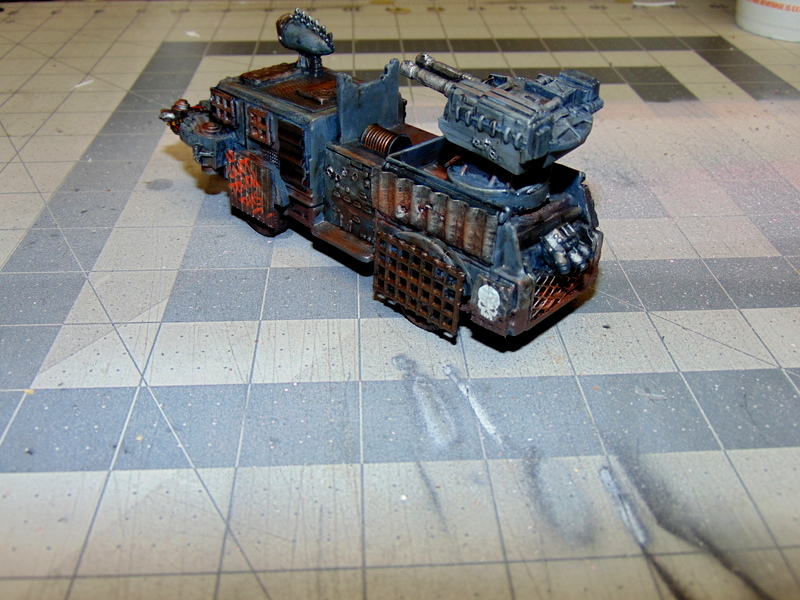
Here are some shots showing some more battle damage. Marstorius tends to attract gunfire.

Another shot showing the rotation of the turret. That’s an old GW tank decal on his rear side panel.

Overall, I’m happy with my armored bus. I have some other cars in the works, so watch this space for more Gaslands conversions, coming soon!
Gaslands 2: Nitro Burn and Oil Can Harry!

I was warned this would happen. I have officially been bitten by the Gaslands bug. I guess that’s why I decided to convert some buggies next.

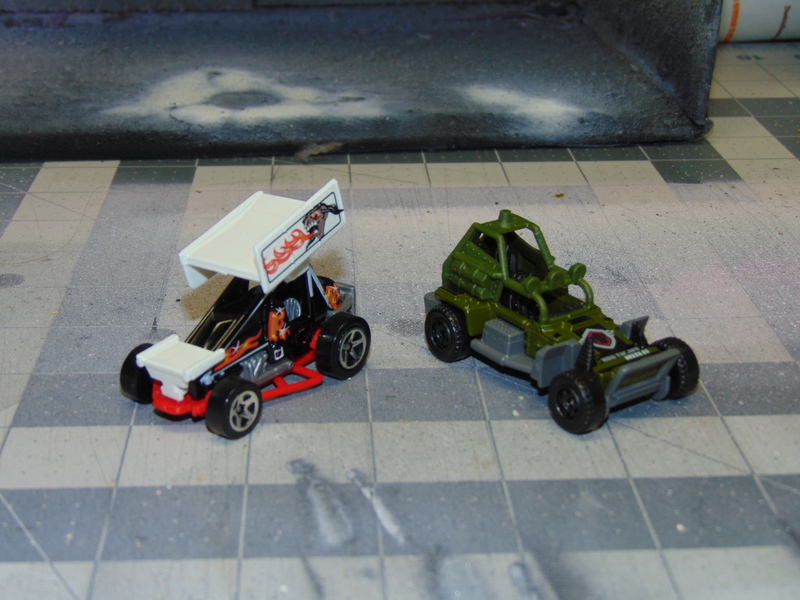
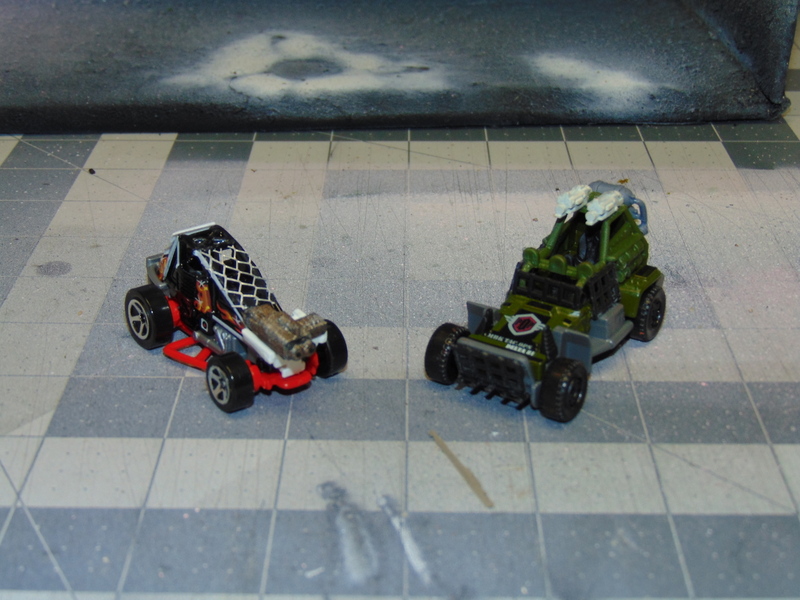
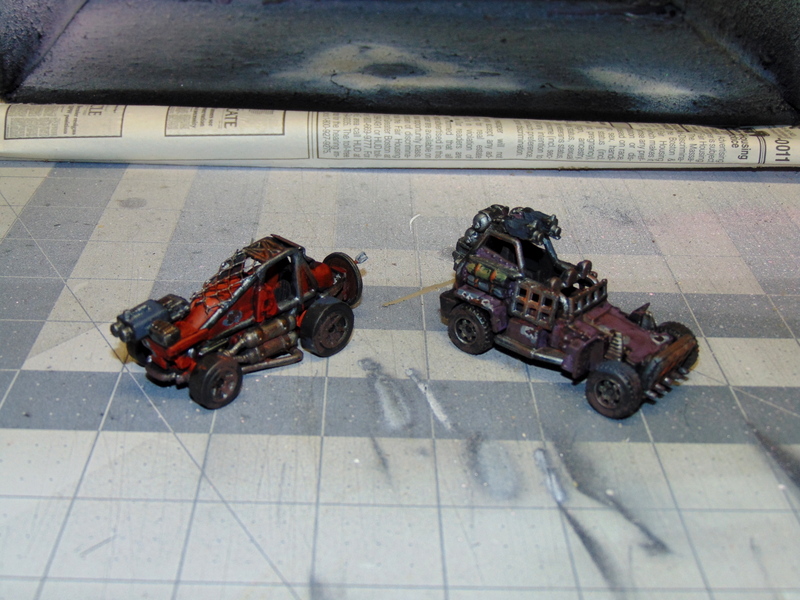
These are what I started with. I bought both of these cars brand new (a dollar apiece at soon-to-be-gone Toys R Us). The one on the left is a Hot Wheels car, the one on the right is Matchbox. Both are open-topped buggies. I really like the look of the one on the right. It has two front seats and a raised back seat, perfect for a gunner!

Buggies are light vehicles in Gaslands, meaning they’re pretty much just there to cause as much trouble as possible before they blow up.  I put minimal armor on the frames, since armoring up a buggy is a waste of a build slot, IMO. Still, I wanted the overall “Road Warrior” aesthetic…

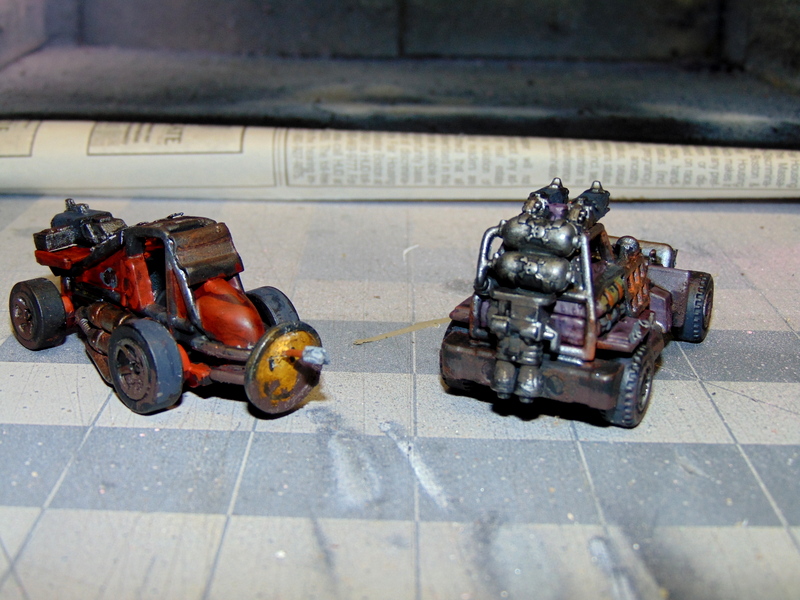
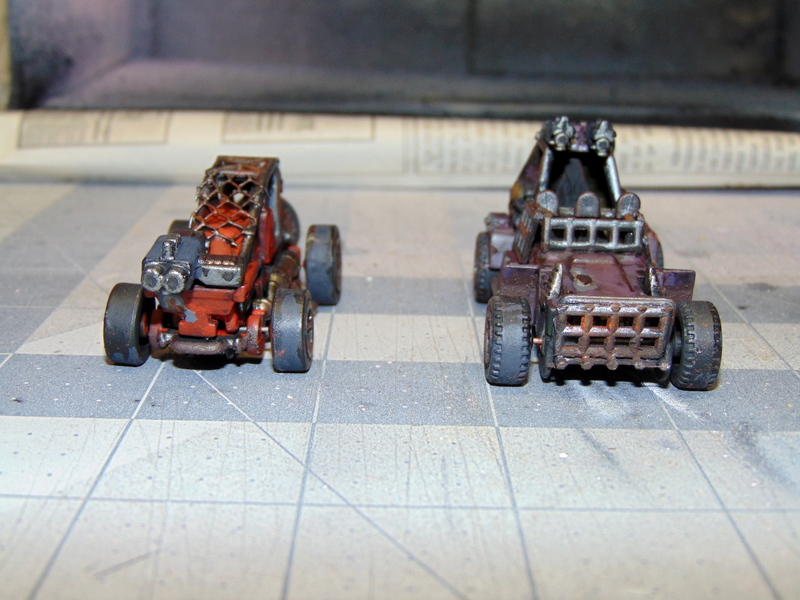
Nitro Burn, on the left, had that ridiculous I-don’t-know-what on his roof, so I got rid of that immediately. For “armor”, I glued some some wire mesh to his canopy and some styrene to his back window. I gave him a GW storm bolter as a front-mounted machine gun and stuck a flamer tank to the side as a nitro booster.

Oil Can Harry, on the right, got two space marine bolters mounted on his roll cage as machine guns. I made an oil slick dropper from an old heavy flamer nozzle (pointed downward) and some flamer tanks. For “armor”, I covered his front and side windows with plastic mesh, and gave him a spiky front bumper.

Here’s what they look like after some painting and weathering. After priming both black, I used a mixture of Reaper, Cote D’Arms, Vallejo, Army Painter and GW paints. Nitro Burn got a basecoat of Black Red (V), highlighted with Rusty Red (R), while Oil Can Harry was based with Dusky Grape (R) and highlighted with Faded Purple (R). The metal on both buggies was Gunmetal Grey (V) and the wheel rims and guns were Gun Metal (CD). The gun casings were painted Necromancer Cloak (AP). The colors on both got a wash of Nuln Oil (GW), while the metallics were washed in Armor Wash (CD). I also used some Dawnstone, Administratum Grey and Tin Bitz (all GW) to pick out some dinged up and rusted spots. I used some Stirland Mud and Typhus Corrosion (both GW) where it made the most sense. Lastly, I applied some MIG Rust pigment to all the “armor” and to the rims.

As a final touch, I decided to have a little fun with Nitro Burn. I attached an old GW Fantasy round shield to his rear, painted up like a smiley face. I figure Nitro Burn likes to live dangerously. He likes to taunt his opponents by speeding ahead of them, forcing them to look at that infuriating yellow smile. Naturally, that face is a prime target for weapon fire, so I drilled a small hole and stuck an arrow in it, no doubt fired by some enraged wasteland scavver!

My next Gaslands project is a doozy, but I think I’m going to try to paint something non-Gaslands related first.

But I make no promises.


First Gaslands Build: Coughin’ Joe!

I discovered Gaslands by reading Miniature Wargames magazine a couple of months back. It’s a game of post-apocalyptic vehicular combat put out by Osprey.  It’s designed to be played with standard Matchbox/Hot Wheels cars that you convert into Mad Max-esque death machines, and it looks like a lot of fun.

While my experience with Osprey Games has been hit-or-miss so far, I figured why not give it a shot? After all, the entry cost to a game like this is minimal; you only need the rules and a bunch of toy cars to play. The rules are reasonably priced at under $20, and toy cars are easy enough to come by. They’re pretty cheap even brand new, and better still; there are tons of thrift shops, flea markets and secondhand stores where you can pick up used and banged up toy cars for even less! (If you have kids, you can probably find a bunch laying around your house on inconvenient places, like stairs.) You’re going to convert them anyway, and cosmetic damage is the look you’re going for!

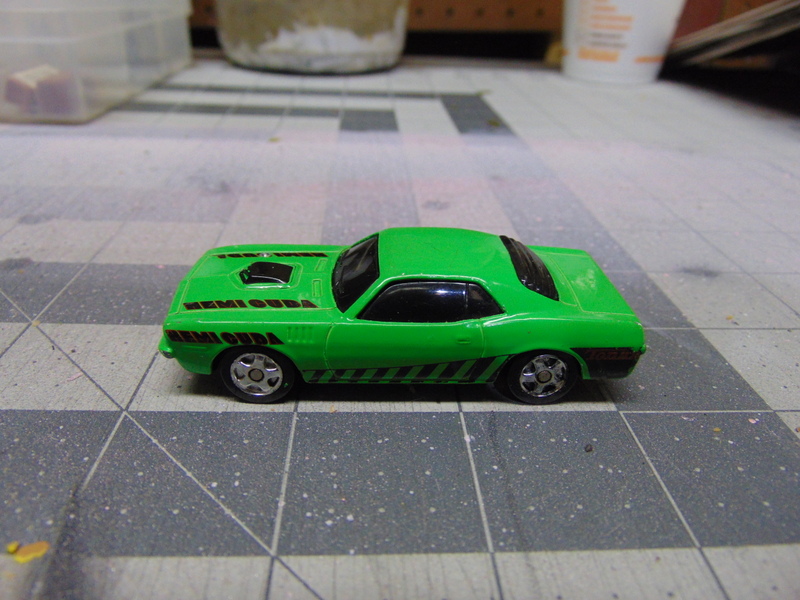
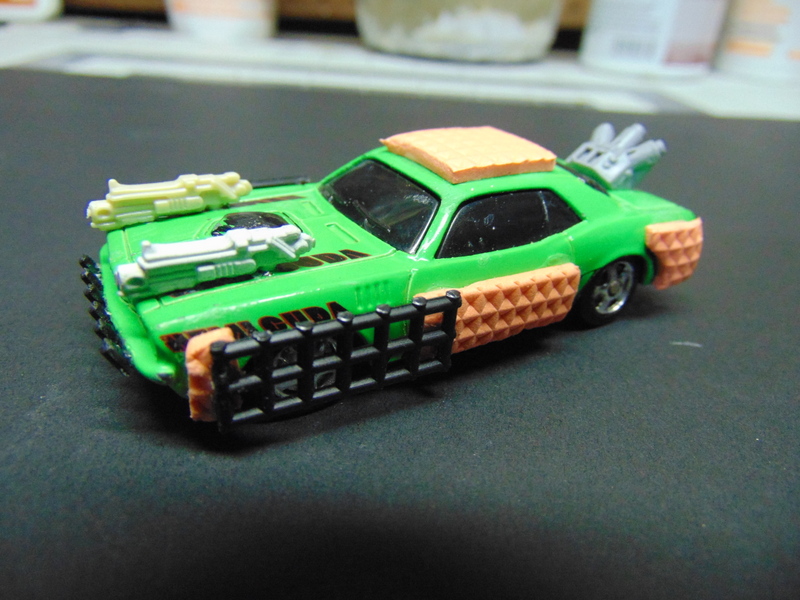
I went by a thrift shop and bought a bag of 6 cars for $3.00. It contained this car, a “Plymouth Hemi Cuda” by Maisto.  I actually know a guy who owns a 1969 Plymouth Barracuda. He drove it all through high school and still has it to this day, some 30 years later. It gets about 3 miles to the gallon, but it’s absolutely the coolest car I’ve ever been in, and it hauls balls, to put it mildly.

I decided this is going to be my first Gaslands conversion.

Images abound on the Interweb of Gaslands vehicles; simply Google “Gaslands” and you’ll see for yourself. There are also many Youtube videos to view on the subject. One particular creator, JH Miniatures, does a terrific series entitled Wastelands Workshop. It’s a bit technical, but you don’t need to get as fancy as he does. I highly recommend his videos.

If you’re like me, i.e. an obsessive hoarder of bits from previous kits, then rejoice, for Gaslands is the game for you. I played a lot of Warhammer 40K back in the day, using Space Marines (of course) and Imperial Guard. In other words, I have a lot of old vehicle bits that have been sitting in boxes for a very long time. But you don’t need to have a ton of fancy bits like me, or be as technically savvy as JH Miniatures to get to work on Gaslands conversions. DM Jim over at Game Terrain Engineering does a bunch of Gaslands videos, and this one in particular shows how to use common junk items as weapons and armor. Good stuff!

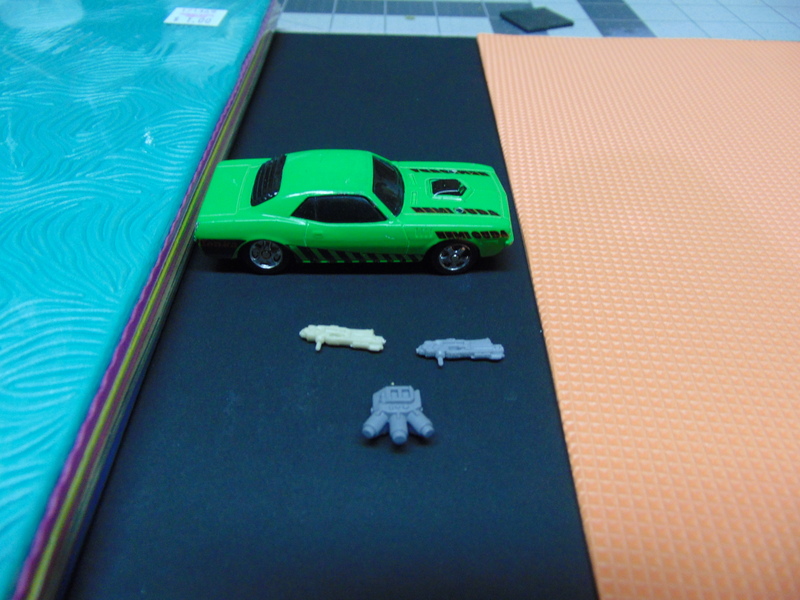
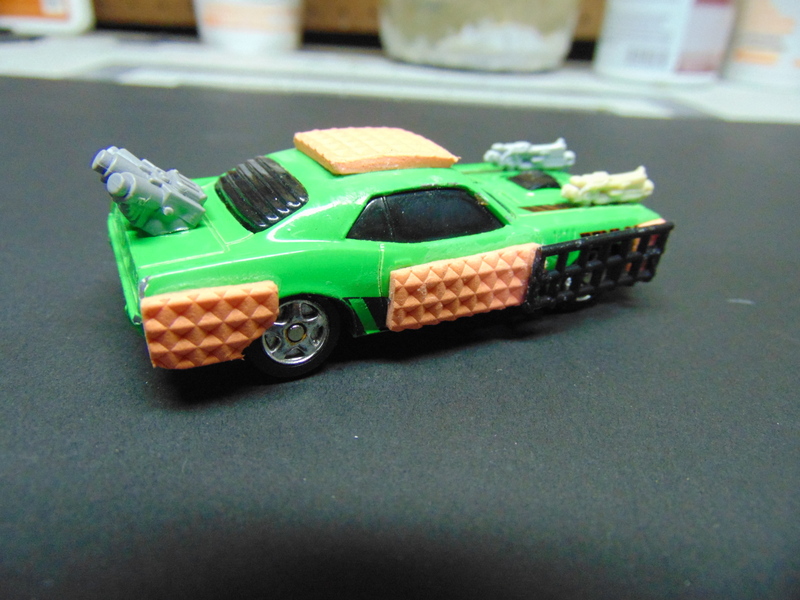
But back to me…I decided not to go too crazy with my first car. I’ve opted to use some bolters from some old Rhino kits and smoke launchers from a Leman Russ tank as conversion bits. The bolters are machine guns, and the smoke launchers could represent turbo boosters, caltrop or glue droppers, oil dispensers, or…well, smoke launchers, which is what I’m going to use them for. Coughin’ Joe, get it?

For armor, I used some old material I had laying around: these textured craft foam sheets. Each package cost me a dollar, and you get six different texture patterns. Four of these have patterns that are useless (like the one pictured), but there are two that could work.

The orange stuff is the craft foam. It’s easy as pie to cut and glue, and the grid pattern makes it look industrial enough to serve as armor. I also clipped some plastic mesh from a needlepoint sheet (I think that cost a dollar, too), and glued it around the front wheel wells to offer the tires some protection.

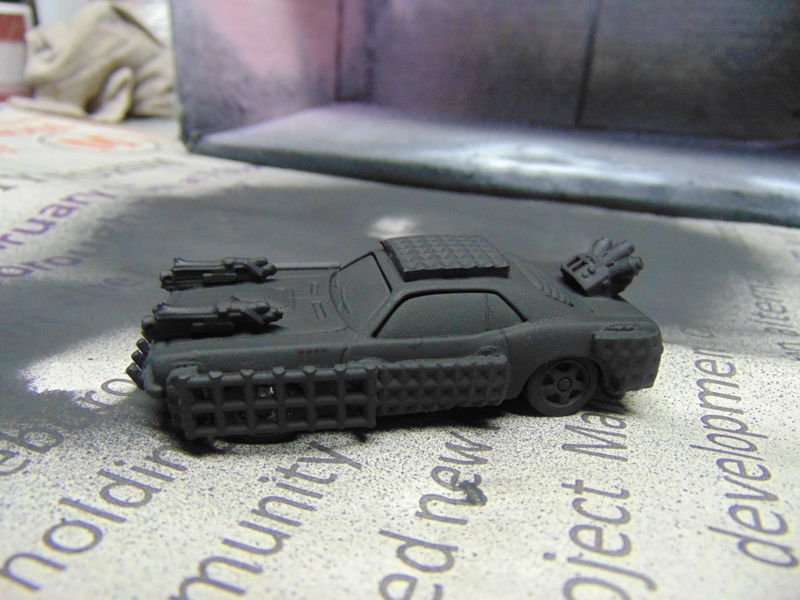
The smoke launchers glued easily to the back of the car. The bolters have little mounting pegs on them, so I decided to drill tiny holes to accommodate the pegs. This was surprisingly difficult, even with my Dremel on max rpm. Turns out I needed a cobalt drill bit to get through the car. One quick trip to Home Depot sorted that out, and voila! Front mounted machine guns!

Once assembled (it took less than 20 minutes, not counting my trip to Home Depot), I primed it black.

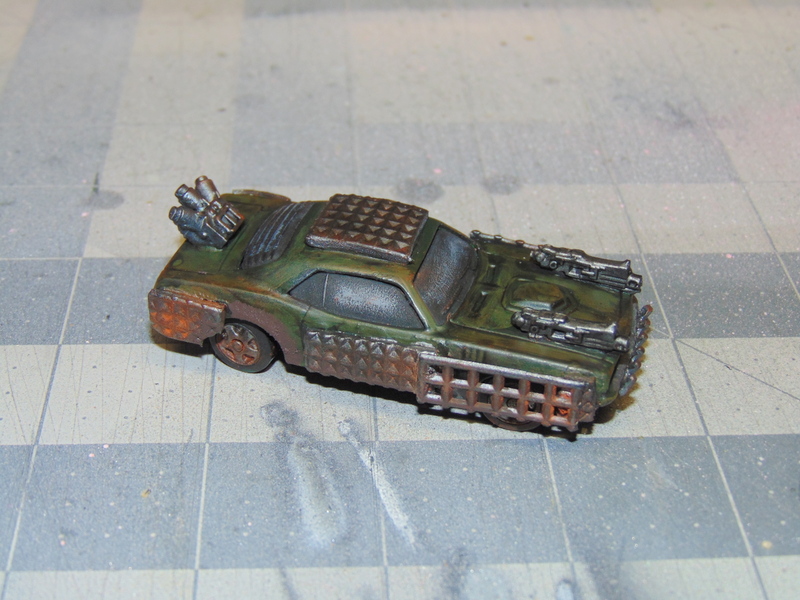
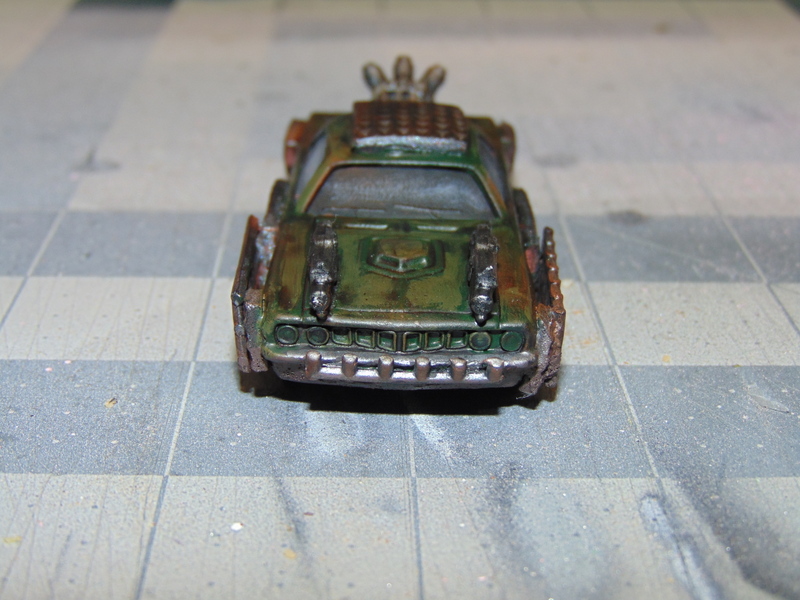
I used a mixture of Vallejo, Cote D’Arms and GW paints. I based the car in Military Green (V) and highlighted it with Cayman Green (V) before giving it a thorough wash in Nuln Oil (GW). I painted the armor plating Gunmetal Grey (V) and the guns and wheel rims with Gun Metal (CD) and washed all the metallics with Armour Wash (CD). Then I liberally applied some MIG rust pigments to the armor sections and the rims. I used some Stirland Mud (GW) on the wheel wells and the front and rear bumpers. A light drybrush of Dawnstone (GW) on the windows, and that was that.And here he is, in all his grimy glory…Coughin’ Joe!

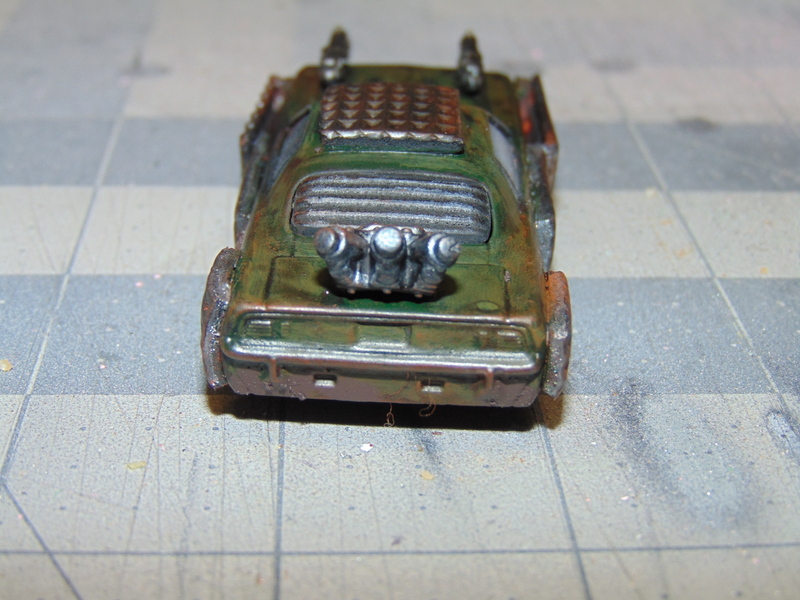
Rear view. Most people never see this on account of the thick black smoke pouring out of those launchers…

If you see this in your rear-view mirror, you’re about to get shot. A lot.

I read somewhere that it’s easy to get addicted to converting cars for Gaslands, and I am already hooked. I have a bunch of toy cars and bits scattered around my hobby space as we speak. More Gaslands conversions soon!


Terror of the Toyman! Part 1

When it comes to superheroes, Superman isn’t one of my personal favorites. Of course, if I could be any superhero, I’d definitely pick Superman for x-ray vision alone (but having super-strength, invulnerability and flight wouldn’t suck either).  Despite this I never really found him all that interesting on his own.

That’s because it seems there are only three main ways to challenge Superman’s obvious superiority. Take away his powers (à la kryptonite), hit him with magic or mental manipulation (à la Mr. Mxyzptlk), or just be tougher and stronger than him (à la Doomsday).

The Toyman doesn’t really fit any of these criteria, and yet, he’s primarily considered a “Superman” villain.

For those not all that familiar with the Toyman, I could write a brief description of the character here. Or, I could just block quote and attribute a perfectly good description that needs no editing or embellishment. So, from DAMN Good Coffee, the blog of  Mr. Charles Skaggs, I present his description of the Toyman:

Created in 1943 by Don Cameron and Ed Dobrotka, The Toyman first appeared in Action Comics (vol.1) #64 as Winslow Percival Schott, a criminal who used various toy-themed devices and gimmicks when committing crimes. After Superman’s continuity was relaunched following the Crisis on Infinite Earths event miniseries and John Byrne’s The Man of Steel miniseries, The Toyman was reimagined in Superman (vol.2) #13 as an unemployed British toymaker who blames Lex Luthor for being fired from a toy company.

Years later, The Toyman became a darker, more sinister character who abducted and murdered Adam Morgan, the son of Cat Grant.  The character was reimagined once again in Action Comics (vol.1) #865 as a toymaker who lived with his wife Mary and agrees to sell his shop after Mary is killed in a car accident.  After learning that the buyer lied to him, Schott proceeds to bomb the business with an explosive teddy bear and Mary is revealed as one of his first robotic creations.

I can add nothing of substance to Mr. Skaggs’s words. That’s pretty much the history of the Toyman.

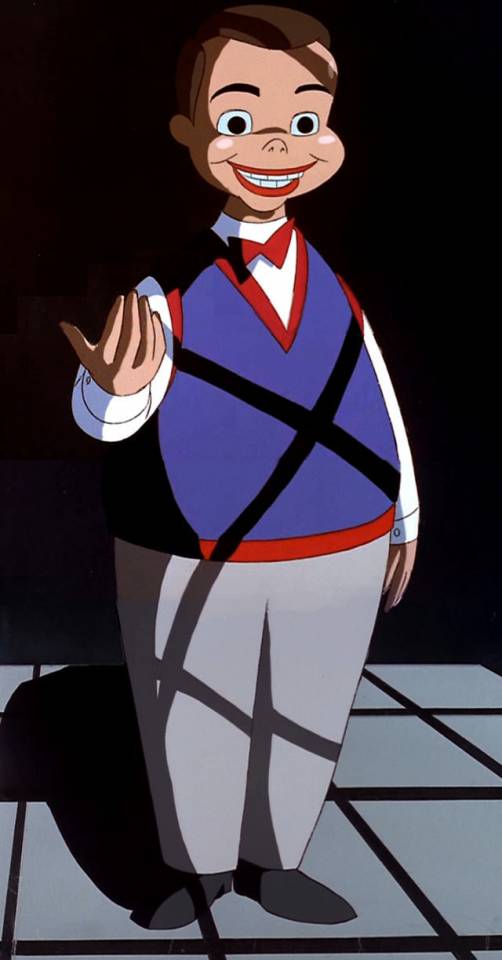
However, my favorite version of the Toyman is this one from the DC animated universe. This version is the unnamed son of Winslow Schott, and is obsessed with revenge against mob boss Bruno Mannheim, who he blames for his father’s imprisonment and eventual death, and his own miserable foster home upbringing as a result. He wears this creepy doll head and you never see his real face.

Anyway, about a year ago, I got an idea for a Supersystem 3 scenario featuring the Toyman. But, now I play Super Mission Force pretty much exclusively, and SMF being predominantly a game of Supers combat, I was in a quandary as to how to effectively use Toyman against Superman. After all, he has no super powers, and Superman could pretty easily wipe the floor with him in a straight-up fight. Toyman could, of course, have some super-tough toys for Superman to brawl with, but that just seemed kind of boring and not very imaginative.

I decided that Toyman isn’t really a threat to Superman, but he could easily be a threat to normal people. Protecting normal folks is what Superman is all about, so what if, for the purposes of the scenario, Superman had to protect as many civilians as possible? An idea took shape…

But first, if I was going to use the Toyman, I would need some toys. Behold what I found at the local dollar store:

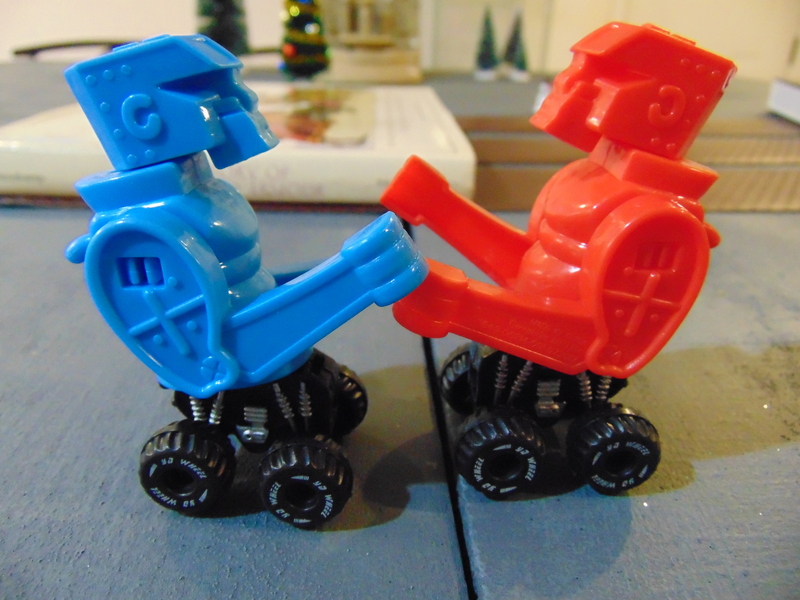
For a grand total of $3.oo, I purchased these cool rock’em, sock’em robot finger puppets and some cars I could cannibalize. Some nippy cutters and superglue later, here is the result:

Instant toy-themed robot menace!

I did a quick search for a Heroclix version of Toyman. Sadly, it seems Wizkids don’t have the rights to the DC animated universe (Knight Models does, I think…) so I couldn’t get a version of the doll-head wearing Toyman that I like. I had to settle for this guy:

Not a bad start, and it naturally got me thinking about Christmas, which would be an ideal time of year for Toyman to start some trouble. With that in mind, I did a quick repaint and scoured my miniatures for other things that could be used as deadly toys.

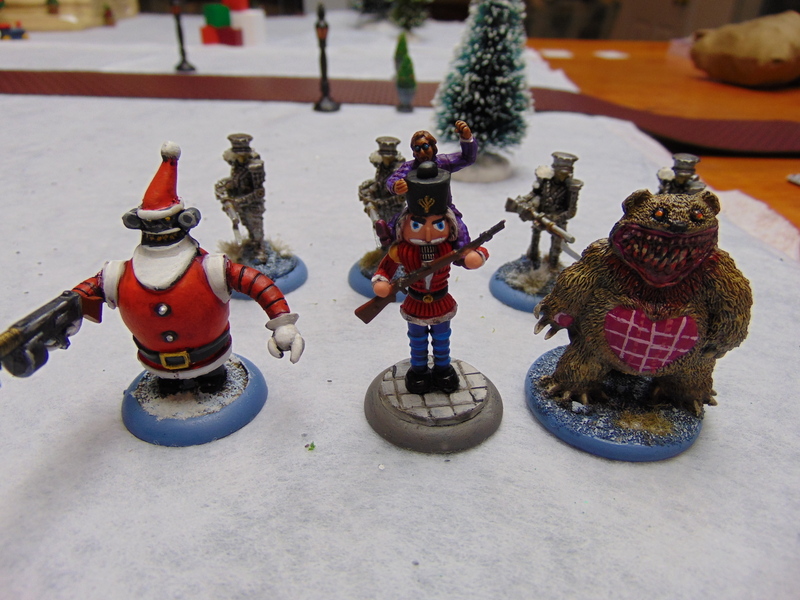
My repaint is in the center. I purchased some (sadly OOP) Parroom Station clockwork soldiers (in the back) from Matt Beauchamp of Hydra Miniatures, and I took advantage of Armorcast’s 20% off Christmas sale to pick up the Santa bot. I already owned Wyrd’s Teddy from the Malifaux line.  I just needed to paint him, and I did.

Turns out these Hydra War Rocket Galacteer fighters are just the right scale to double as deadly toy planes. So I planned on using them, too.

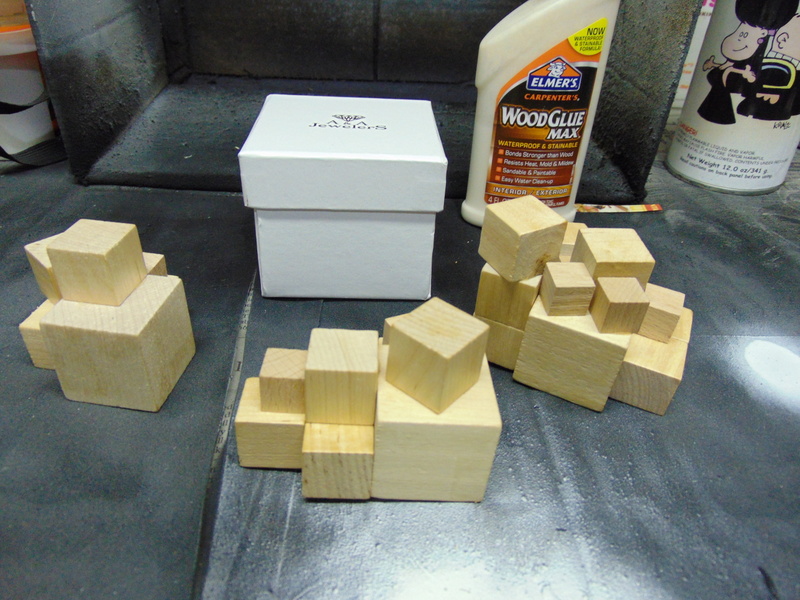
If Christmas was to be the backdrop for the scenario, I would need some thematic scenery, like piles of presents! I thought a ring box would make a good giant present (from which something deadly could emerge). I bought some wood cubes from an art store and glued them together in random formations. A little red, white and green craft paint and I’d be good to go.

I figure once I’m done with this scenario, I can repaint the blocks to use as crates and boxes for warehouse scatter terrain.

Stay tuned! Scenario to follow next post!

Forgotten Heroes: The Super Mission Force Builds

As I said a few posts back, I first encountered the Liberty Legion in an adventure for TSR’s Marvel Super Heroes RPG that was published in Dragon magazine #104. Although the adventure was pretty good, I was surprised by how low-powered the Legion was by “modern” standards. Even the other “big” WWII-era supers team, the Invaders (watch this space soon!) far outclassed the Liberty Legion in power level. Nonetheless, I sought out all the appearances (up until then, anyway) of the Liberty Legion in Marvel Premiere, Marvel Spotlight and The Invaders, and I became a fan.

Painting and converting the team for Forgotten Heroes has been a blast. As promised, true believers, I present some background and the SMF gaming statistics for the Liberty Legion!

With a couple of minor exceptions, these profiles and builds are based only on what I knew about the Legion as presented in the Dragon adventure. In other words, more “current” versions of these characters probably exist (see Carrion Crow’s explanation as to why Thin Man uses knives nowadays in the comments section of this post), but these are the versions I am familiar with (and would use if I was gaming with the Legion).

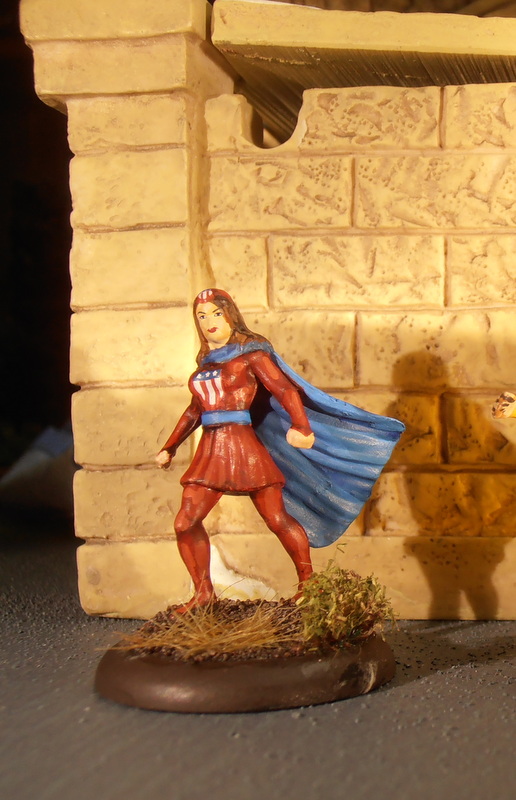
First up: Miss America. Madeline Joyce got struck by lightning while visiting a lighthouse. When she woke up, she found out her “powers” had awakened. After the War she and Whizzer got married and had a son, Nuklo. That didn’t turn out so well.

Red Raven’s parents were killed when their plane crashed into a floating city of Inhumans called the Bird People. (Don’t you hate when people just park their floating cities anywhere? You’d think Red’s parents would notice something as big as a city before they crashed into it, but perhaps they were the worst pilots in the world.) The Bird People raised him and gave him a bird costume. Then he joined the Liberty Legion. After the war, he placed himself and the Bird People in suspended animation. He woke up, fought the X-Men, went insane and committed suicide when he discovered the Bird People were all dead due to a malfunction in the life support. Ahhh, happy endings.

Patriot was a reporter for the Daily Bugle who quit his job to put on a costume and root out Nazi agents working in America. He had no super powers other than a good right hook. As his name suggests, he was quite patriotic and made stirring radio broadcasts to bolster the war effort. He was a founding member of the Liberty Legion. After the second Captain America fell in battle, Patriot took up the mantle.

Whizzer got bitten by a cobra when he was a boy. A mongoose killed the cobra (of course). Then, for no sound medical reason,  his scientist father injected Whizzer with some of the mongoose’s blood, which inexplicably gave Whizzer his super speed. Then his father died. He and Miss America joined the All-Winner’s squad and got married after the war.

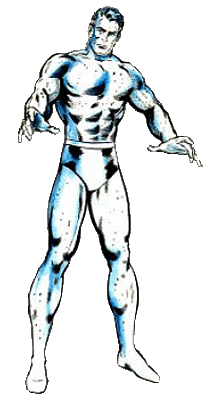
Under Jack Frost’s background in the TSR adventure, it simply says: “Jack Frost’s personal history at this time is unknown to anyone.” Works for me. Anyway, his powers basically make him a much less cool (pardon the pun) version of Iceman.

Thin Man discovered a lost city in the Himalayas where people can flatten themselves as thin as paper. Why they do this is not really explained, but they gave him a chemical that let him do the same and also made him age so slowly he’s effectively immortal. Somewhere along the line he picked up a special plane that only he can pilot safely (presumably because the controls require flattening and stretching of the appendages in order to operate).

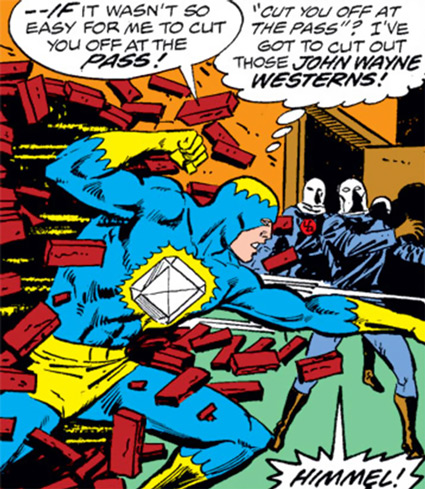
Blue Diamond, along with Pink Heart, Yellow Moon, Orange Star, Green Clover and (later) Purple Horseshoe, formed the ill-fated super team the Lucky Charms. Blue Diamond was the only survivor when a homicidal cannibalistic leprechaun slaughtered and ate the remaining members of his team. Actually, his true origin is almost as stupid as that. He was a normal guy standing next to a huge diamond when it suddenly exploded, embedding millions of diamond shards in his skin. This gave him super strength and durability, rather than shredding him to bits (which is the much more likely outcome when the human body is bombarded with diamond shards).

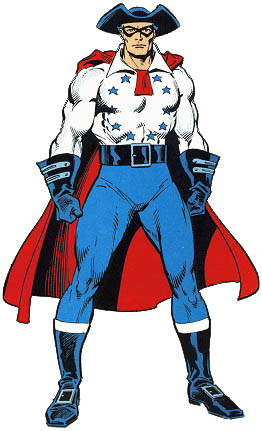
Like Patriot, Spirit of ’76 has no super powers and got his start fighting Nazi espionage at home. Unlike Patriot, Spirit of ’76 is a complete douchebag in a really stupid costume. Early in the war, he went to England and joined the Crusaders to fight the Nazis. He is an awkward and constant reminder of the American War of Independence (from the British), he has no super powers, and he wears a really stupid costume. How Union Jack didn’t constantly kick his ass is a mystery to me. He eventually becomes the second Captain America when the original Cap disappears (after being frozen in a block of ice).

Bucky needs no introduction. He’s Captain America’s sidekick! At least until he “died in an explosion” only to resurface as the Winter Soldier decades later.

Finally, Union Jack is Lord James Falsworth, a peer of the realm and brother to bloodsucking vampire Lord John Falsworth (Baron Blood). He was active during WWI, then resurfaced in WWII, offering his home to the Invaders to use as a base during the war. His brother threw a giant rock on him, effectively ending his career as Union Jack. Luckily, his son eventually took over. Union Jack is just a badass. He has no super powers, but packs a Webley. And his costume is cool.

Here are my Super Mission Force builds:

Miss America (Wild Card) Minor: Leaping, Super Strength, Enhanced Senses, Iron Will

(I really had to work to make a version of Miss America that (just barely) doesn’t suck. Her ONLY power in the TSR game was that she could levitate for up to 2 hours and she can make “controlled leaps”. She’s not even particularly good at fighting. In other words, Wonder Woman she ain’t. She should probably be a Street-Level archetype, but I pored over her pre-Marvel bio and found some minor, vague mentions of other powers possibly retconned out by the time she joined the Legion. It mentioned super strength, and the ability to “project X-Ray energy.” I guess this could be power blasts or enhanced senses. I chose the latter.)

Red Raven (Wild Card) Minor: Armor, Flight, Power Blasts, Reflection

Red Raven’s powers all come from his suit. He can shoot frikkin’ lasers out of his wings and use them as a shield.

Patriot (Brawler): Major: Scrapper, Minor: Clever, Melee Specialist

Patriot has no powers. He’s just good at hitting things.

Whizzer (Speedster): Major: Speed, Minor: Melee Specialist, Super Agility

Whizzer is really good at using his speed powers to their maximum potential in combat.

Jack Frost (Blaster) Major: Power Blasts, Minor: Armor, Entangle, Flight

Jack is a poor man’s Iceman. He can use his ice powers to travel on slides as a form of Flight.

Thin Man (Super) Major: Metamorph:Elasticity, Minor: Resistance, Savant, Immortal

A “super” archetype only because of game mechanics (i.e. power slots). Thin Man isn’t really that impressive.

Blue Diamond (Brick) Major: Super-Strength, Minor: Armor, Resistance

Blue Diamond is a tank, pure and simple.

Spirit of ’76 (Brawler) Major: Scrapper, Minor: Armor, Melee Specialist

About the only thing good about Spirit of ’76’s costume is that he has a bulletproof cape. This is unfortunate, as it protects him from getting shot.

Bucky (Brawler) Major: Scrapper, Minor: Power Blasts, Grenades

I thought about making Bucky a Wild Card or even a Street Level archetype, but then I remembered he was a soldier who was trained by Captain America.

Union Jack (Brawler) Major: Scrapper, Minor: Power Blasts, Melee Specialist.

Another non-powered ass-kicker, only British this time.

In the comics, the Liberty Legion often faced off against low-powered goons and tons of henchmen. This was ideal, as most members were also low-powered. This works for roleplaying games like the old TSR Marvel game, but in Super Mission Force the heroes can easily dispense with hordes of henchmen. They’re actually more powerful in SMF because the henchmen rules favor the heroes. Also, there are a lot of Brawlers in the Liberty Legion, and Scrapper is one of the best powers in the game (IMO). This means the Legion would probably do fairly well in Super Mission Force combat.

Black Tree Design is having a 50% off sale on WWII miniatures until July 4th and I’m tempted to splurge and buy a bunch or Wehrmacht. The only thing that’s stopping me is that I don’t game WWII, so I would only be buying them as henchmen for this team to face off against. I think some of the mechs and walkers from Dust Tactics and AT-43 might work as opposition, too…guess we’ll see if I take the plunge or not!


Forgotten Heroes: The Liberty Legion: The Conversions!

Yesterday I posted the repainted members of the Liberty Legion. But of course, they don’t really count as far as Forgotten Heroes is concerned…they’re just an added bonus! The remaining heroes, to my knowledge, have never been released in miniature form, and thus they required the conversions below.

Before we start, a big thanks to Russ Dunaway from Old Glory miniatures for very generously providing me with some 28mm heads wearing three-cornered hats. I thought I might use one in one of my conversions (see below), but it turns out they were a little too small to scale with Heroclix. Still, his kindness is most appreciated, so I say again: thank you, Russ!

Next, a couple of disclaimers. First, I am not a sculptor. I use green stuff to fill gaps, and I am in awe of anyone who can work with that substance without it sticking to their fingers and making a mess. Yes, I know enough to wet my hands and use color shapers, but I still suck at it. Second, I am (and have always been) terrible at painting anything freehand. Give me a design that’s sculpted onto a miniature and I’m good. Make me draw it with a paintbrush and nine times out of ten it’s going to look like complete ass. Please bear all this in mind and don’t judge my efforts too harshly!

First up, the Patriot!

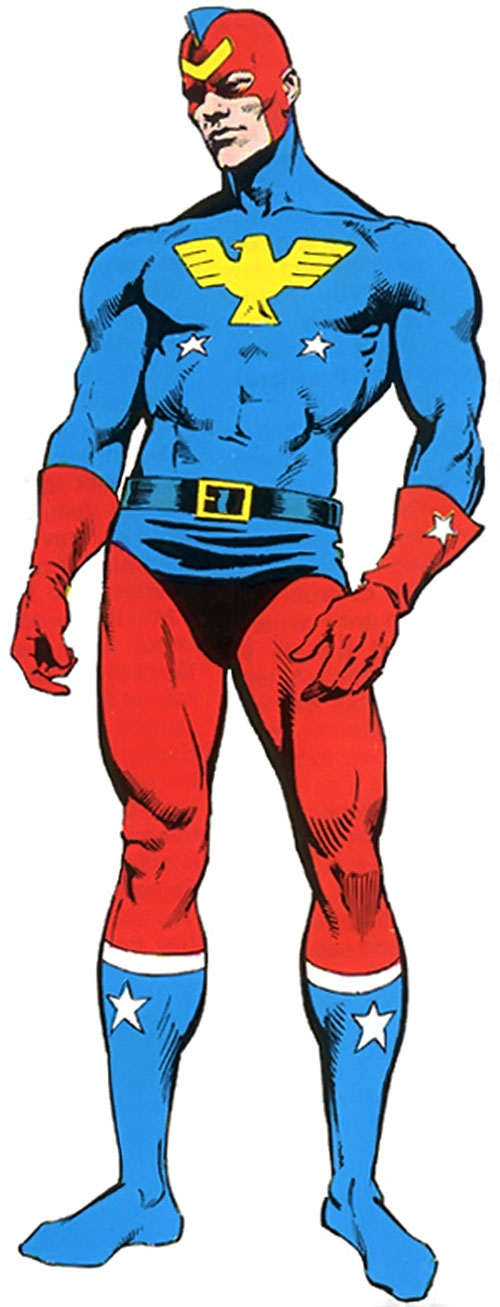
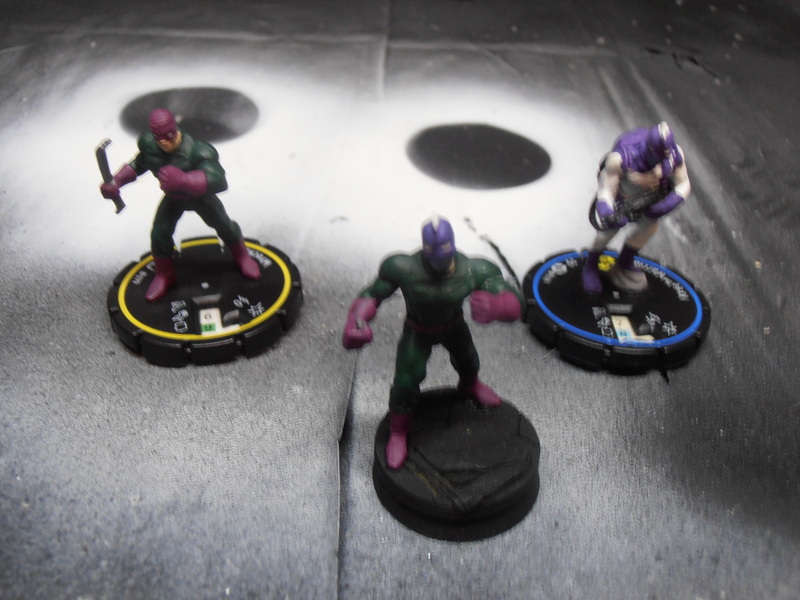
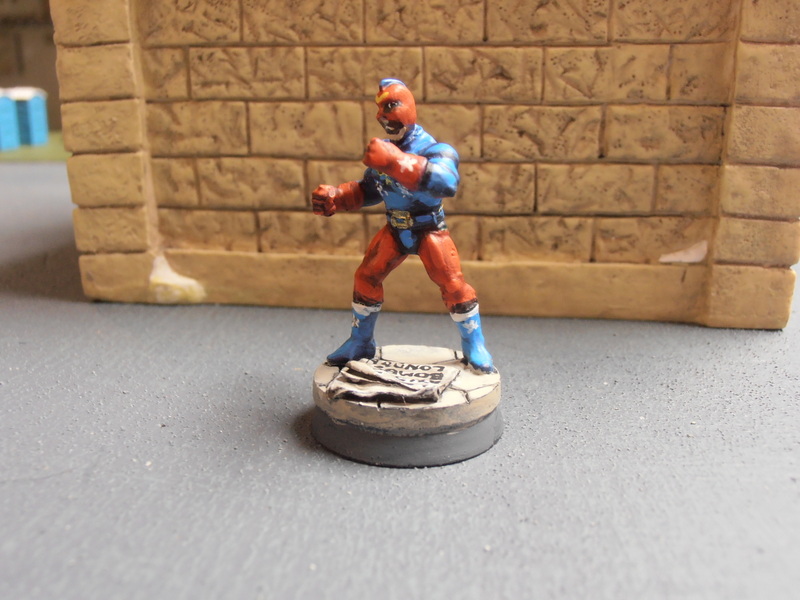
For the Patriot’s body, I chose the Wrecker. He had the gloves I needed and his costume was such that it could easily serve for the Patriot with a quick repaint. Trimming away his crowbar gave him a two-fisted tough guy stance (tough for a guy with no superpowers). For his head I used one off of a Kree Warrior. The Kree helmet has a central fin similar to Patriot’s cowl, so it was a perfect fit!

The end result, though, is a bit disappointing. As I said above, I suck at painting anything freehand, and the chest eagle and little stars proved very difficult. Using the Wrecker’s body may have been a close fit for the costume, but it resulted in Patriot being a lot beefier than he normally is depicted. Someone’s been sneaking shots of the Super Soldier serum!

Patriot’s head is where I had the most problems.  I never strip Heroclix prior to repainting (it’s rarely necessary), but this is one occasion when I wish I had. The Kree Warrior is a first generation Infinity Challenge clix model, and they are notorious for being covered in gloopy paint. By the time I repainted his helmet into Patriot’s cowl, I found it difficult to maintain any level of detail. To me, it just looks like the model has way too many layers of paint. This is by far the conversion I am least happy with.

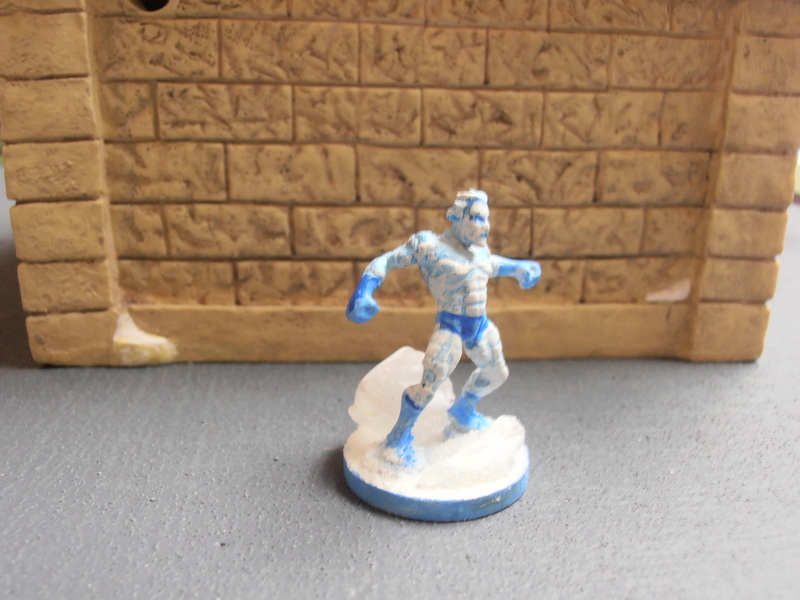
Next is Jack Frost!

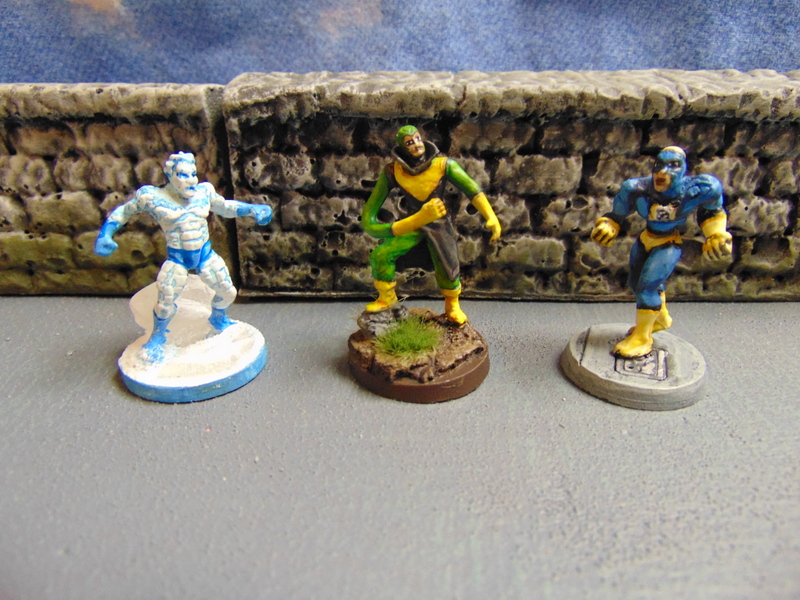
Jack is another basic head swap conversion. I had an old Scorpion miniature laying around that somehow lost his tail, so I decided to use that as the body. I packed some green stuff around the hump on his back and filled in the hole where the tail used to be. I removed Scorpion’s head and used the head off a Quicksilver model, since it seemed a good match for Jack Frost’s wavy hair.

A quick prime of white paint, a wash of some ice-blue ink, a touch-up of white, and Jack Frost was done in about ten minutes, by far the easiest conversion and quickest paint job of all the Legionnaires. I’m not sure why I painted his gloves and boots (Jack is usually barefoot and gloveless), but I guess I could fix that pretty easily. I added some sea glass “ice” to his base and flocked it with snow. Done!

Next, arguably the most powerful member of the Liberty Legion: Blue Diamond!

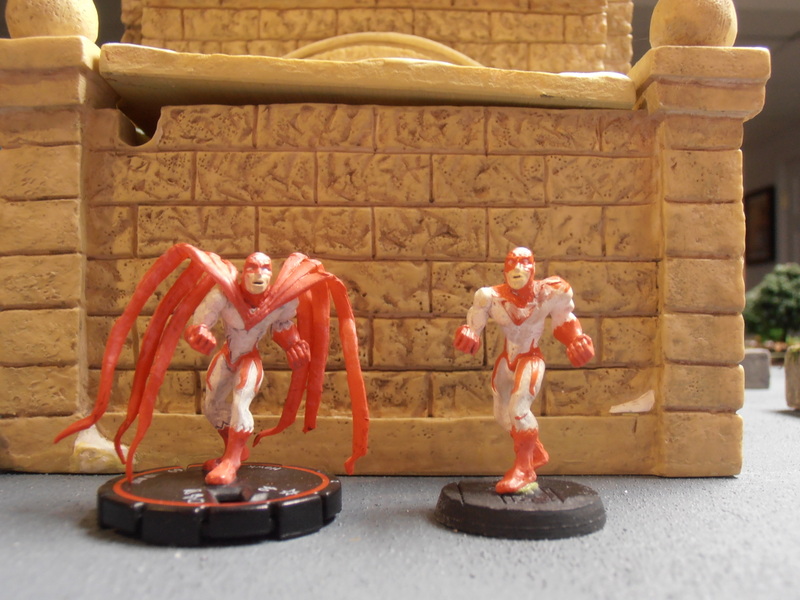
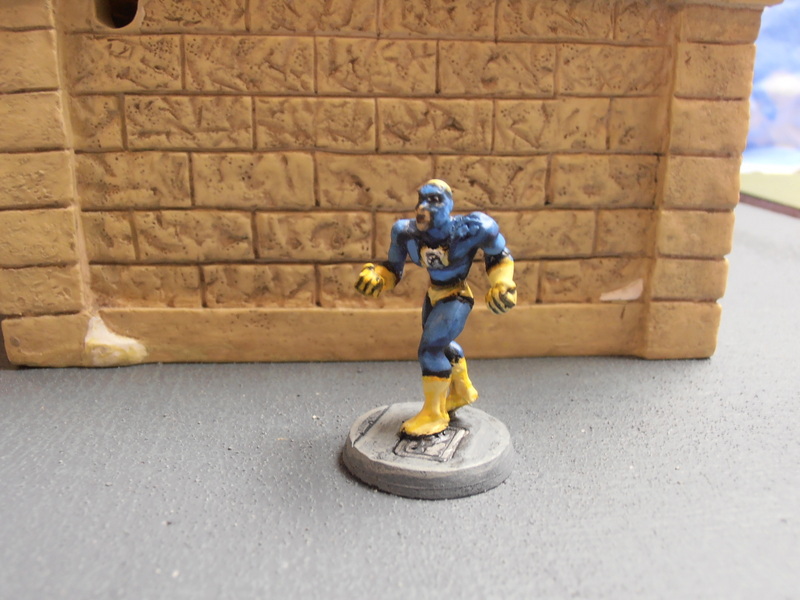
Blue Diamond began as a DC Heroclix Hawk figure, from the Hypertime set. I trimmed away his tattered cape-thing, sanded him down a bit and rebased him before priming him black.

Once primed, I repainted him as shown. I had a tough time “drawing” the diamond on his chest with a paintbrush (my eyes aren’t what they used to be), but I guess I’ll just live with it. I think Hawk’s modified costume is a good match for Blue Diamond. What do you think?

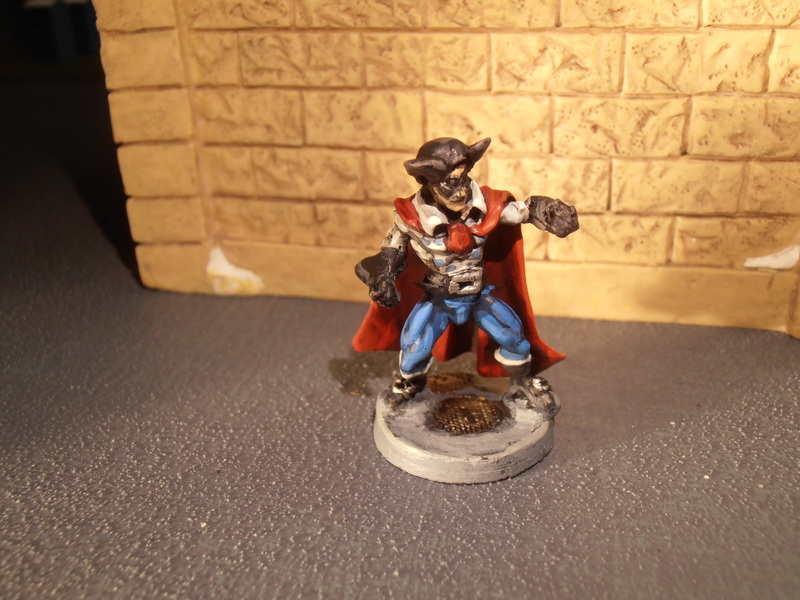
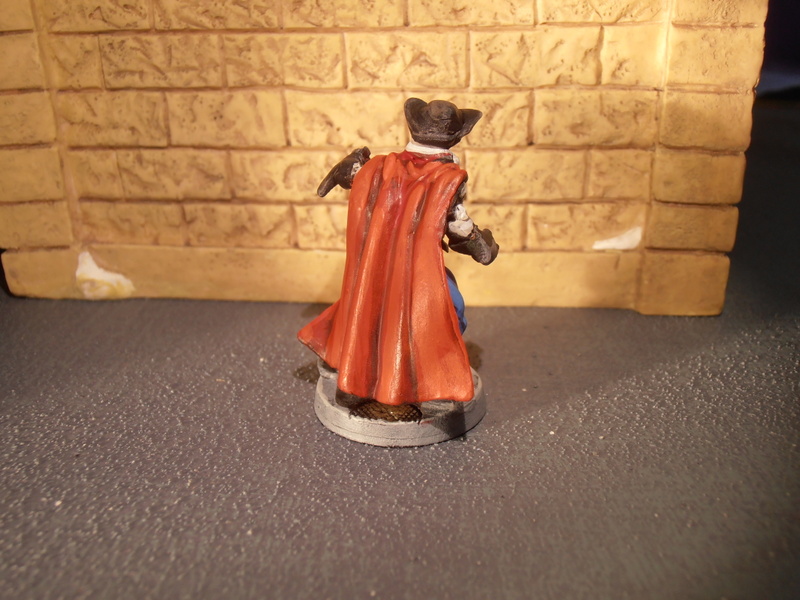
And last but not least, another special guest star: Spirit of ’76! (Dear Lord, is this guy a tool or what?)

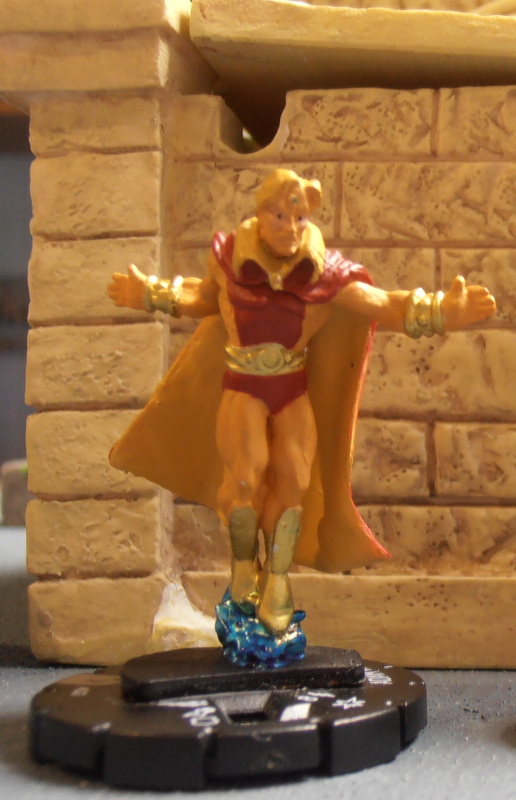
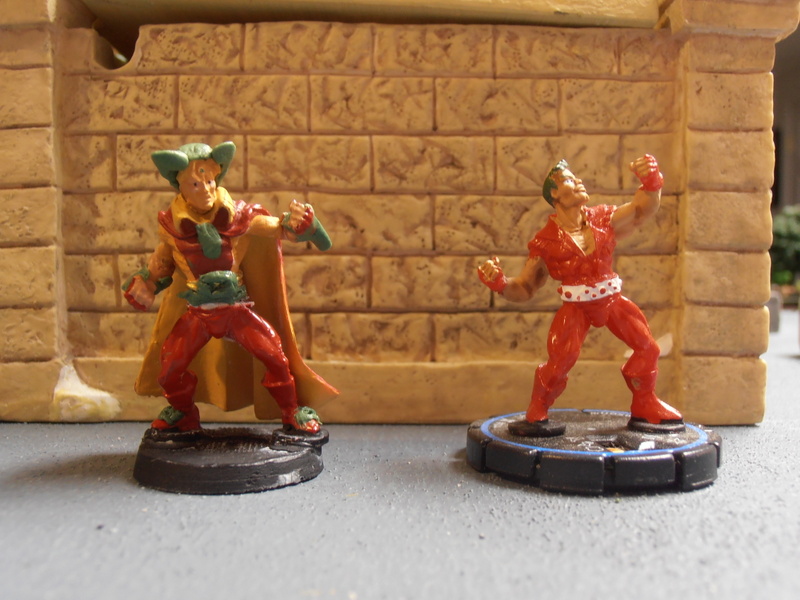
To make him, I used the body and cape of the Adam Warlock clix on top, combined with the legs and forearms of Doc Samson. I sculpted the gloves, buckles, cravat and hat (turns out it’s not really a three-corner hat after all) out of green stuff and rebased him before priming him black. I considered trying to sculpt his domino mask, but decided to quit while I was ahead. I’d just paint it on later.

Here is how he looks repainted. I’m pretty happy with the way he turned out, even though his face could be a lot better. Turns out painting that domino mask on wasn’t much easier, and I didn’t even attempt the little blue stars around his chest (I just painted little dots). He was the most challenging conversion by far. Like I said, I’m no sculptor.

Tomorrow: as promised, I will provide some background on the Liberty Legion members, as well as my Super Mission Force builds for each hero! Now that I’ve painted them, I need to use them in a game!


Forgotten Heroes: The Liberty Legion: The Repaints

Sincere apologies to my fellow participants, but I have been unable to post an update to my Forgotten Heroes contribution until now. First up: the repaints. These are members of the Liberty Legion who already had a released miniature, and who required only a fresh coat of paint and a few minor adjustments to be ready:

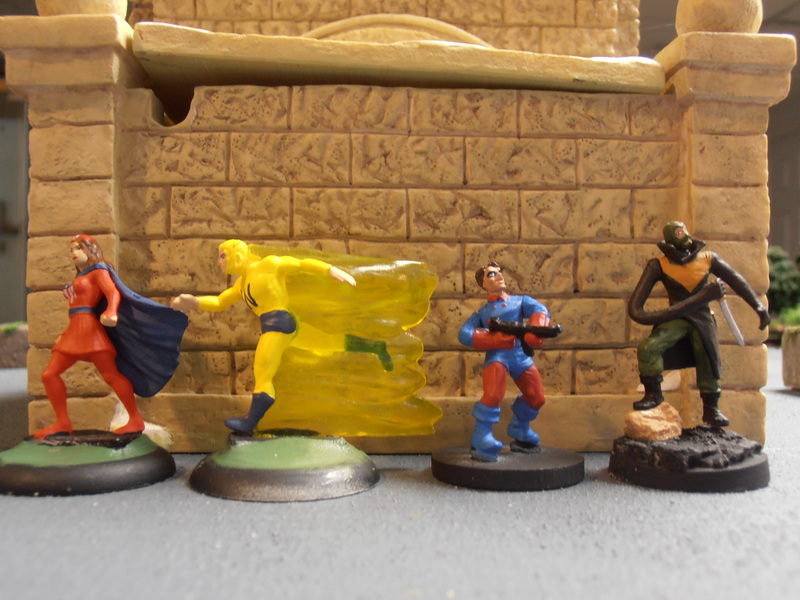
Here’s what they looked like before repainting. All I did here was rebase them.

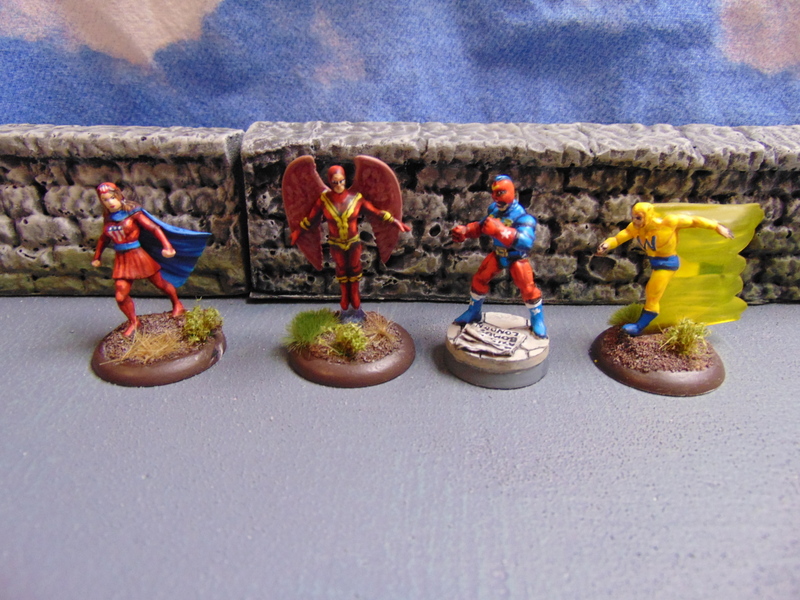
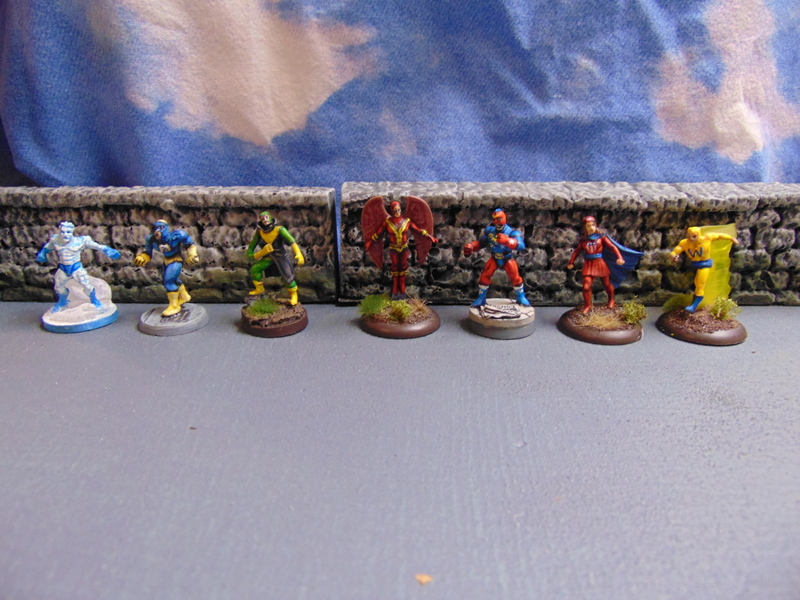
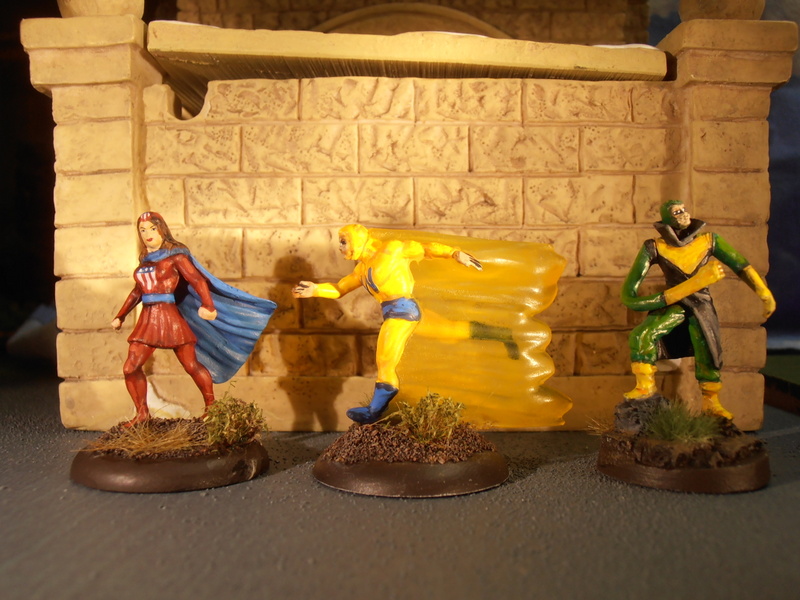
And here’s how they look after my brushwork. From l-r, Miss America, Whizzer, and Thin Man! Miss America has an annoying habit of leaning back, which isn’t something I can seem to correct. I really hate the plastic “effects”, like Whizzer’s speed blur, on some of the newer clix, but this one’s pretty much impossible to remove.

For some reason unknown to me, Thin Man came equipped with a couple of knives and was sporting a handlebar mustache. Not the way I remember him. the Thin Man I remember was clean-shaven, had a different costume (this one is better!) and he didn’t have any knives. (After all, he can become almost completely two-dimensional, so if he had need of a knife, he could just make his hand into one.) Needless to say, I decided to remove the knives. The mustache was trickier and I opted not to remove it; rather I just painted over it in the hopes we could all pretend not to see it, much like Cesar Romero’s Joker ‘stache. (If he looks too shiny, it’s because I took the picture before I had a chance to give him a spray of Dullcote!)


Here’s a closeup of Miss America. Note the annoying lean.

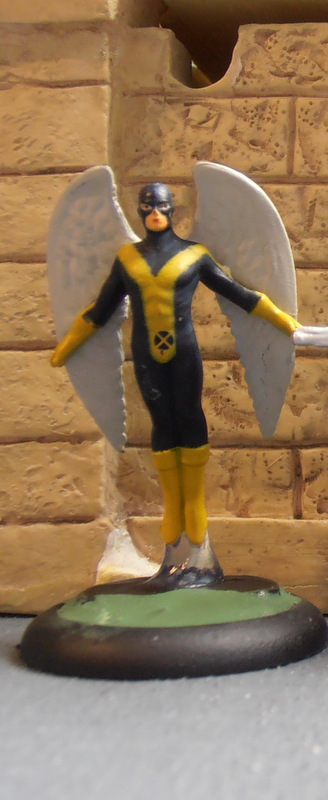
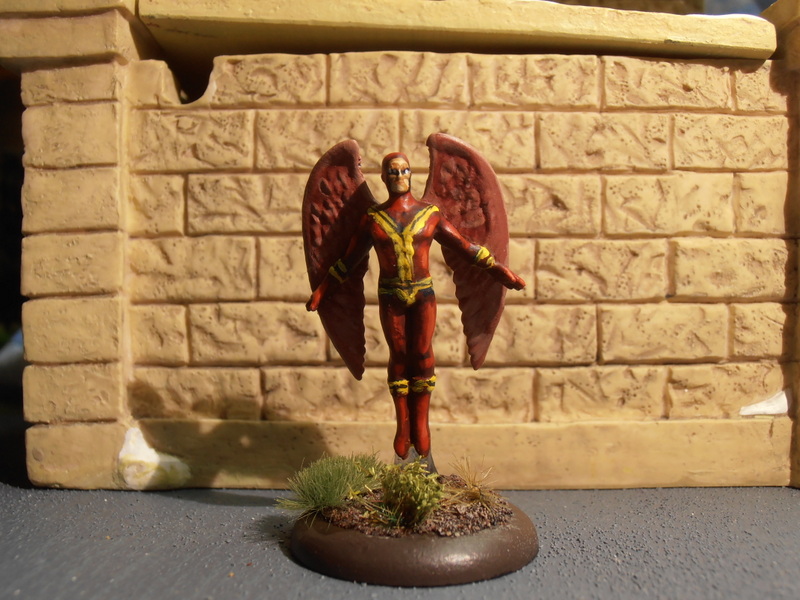
Red Raven began as an X-Men Angel miniature. His original yellow costume was ideally suited for Red Raven, and all I needed to do was paint him red! I really like the way he came out.

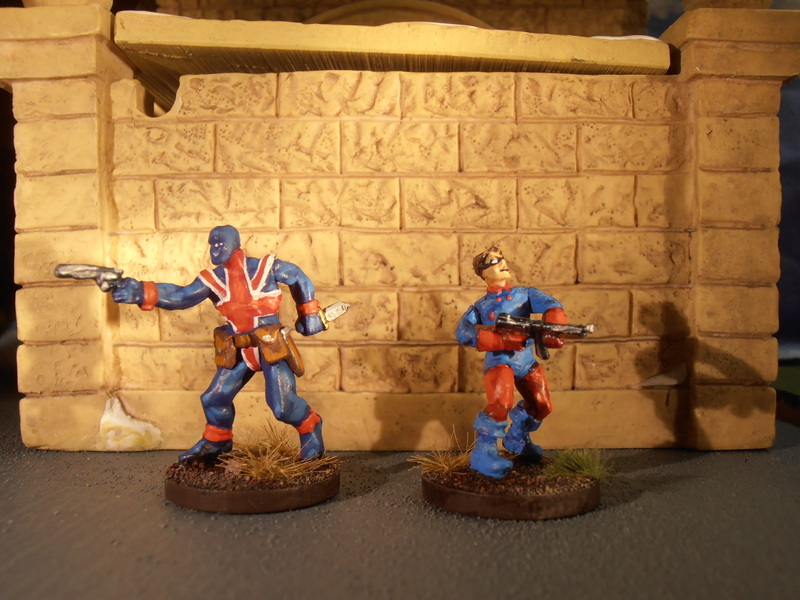
And finally, some special guest stars: Union Jack and Bucky! Bucky’s gun is bent and there’s no way to fix it short of giving him a new one. I don’t have a spare Thompson, but I may add some grenades or a knife to his belt (remember, Bucky was a soldier!). We’ll see.

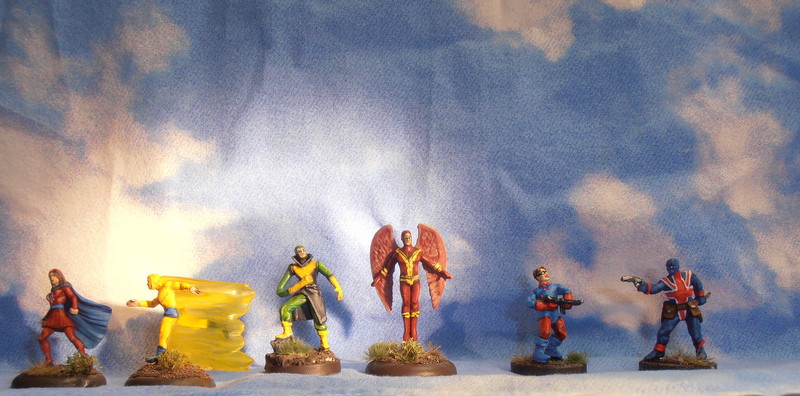
Here’s a shot of all the repainted miniatures.

Tomorrow, the real Forgotten Heroes submissions. I mean full-blown conversions of the remaining members of the Liberty Legion: Jack Frost, Blue Diamond, and the Patriot! Plus a very special guest!