Those of you who drop by Dead Dick’s Tavern may know that lately, I’ve been playing Mad Max on the Playstation 4, which, in turn, has made me want to play Gaslands very much. With the end of my Time Trap Super Mission Force campaign, I only have a couple of weeks before September, when I, Dick Garrison and Blax the Kleric are all committed to a painting project soon to be revealed here.
At least I hope we’re all still committed. We are still committed, right guys?
Anyway, I have a short amount of time for other projects, so I decided to do something Gaslands-themed in honor of Mad Max. However, it’s a different movie, and one of my favorite movies of all time, that gave me the inspiration for this quick project: Escape From New York.
I decided to make the Duke’s car.
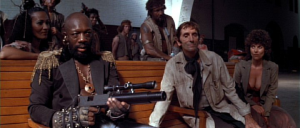
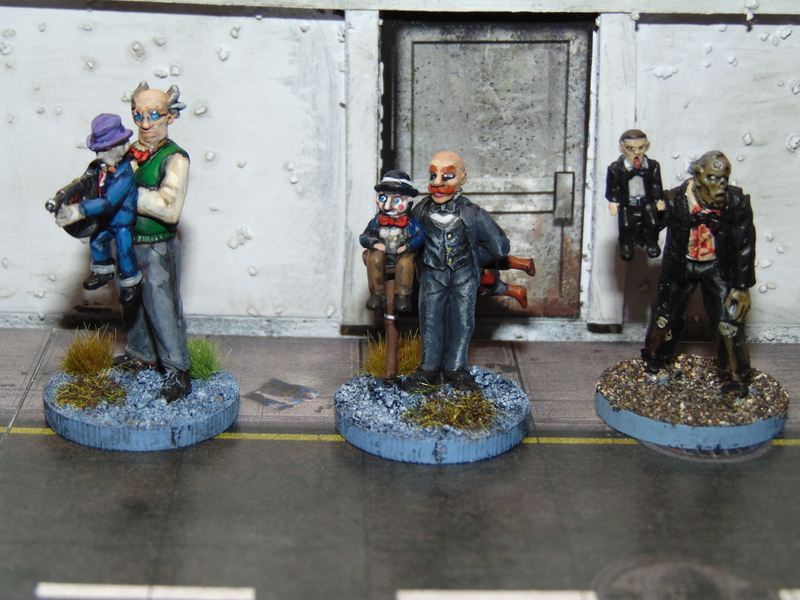
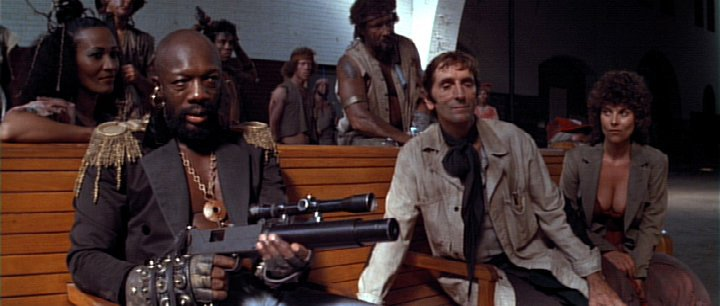
If you aren’t familiar with this movie, I’m not going to summarize it here. Just see it as soon as possible by whatever means necessary. That’s the Duke of New York above, played by the late, great Isaac Hayes. The late, great Harry Dean Stanton is next to him, as is Adrienne Barbeau. She’s not late, or great. She’s fucking amazing, and I was, and still am, madly in love with her.
One look at that picture above and you notice two interesting things. And no, I’m not talking about the two things you think. I count those as a pair and therefore one thing. The other thing is the Duke’s gun. I’m no gun expert, but I have to wonder why you would put a long-range optical scope on an Ingram Mac-10 submachine gun. I doubt you’d be doing much sniping with that…but I guess it looks cool.
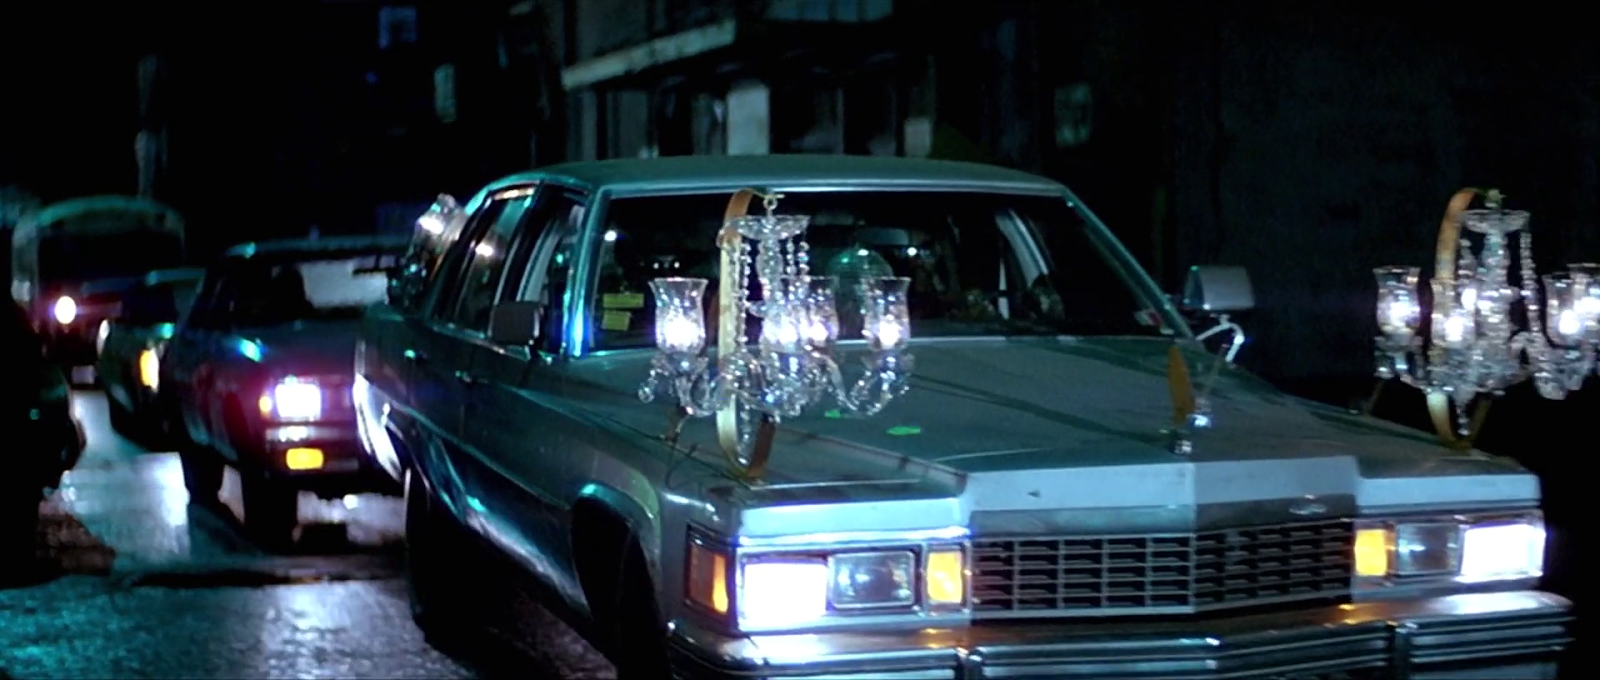
Anyway, this is the Duke’s car:

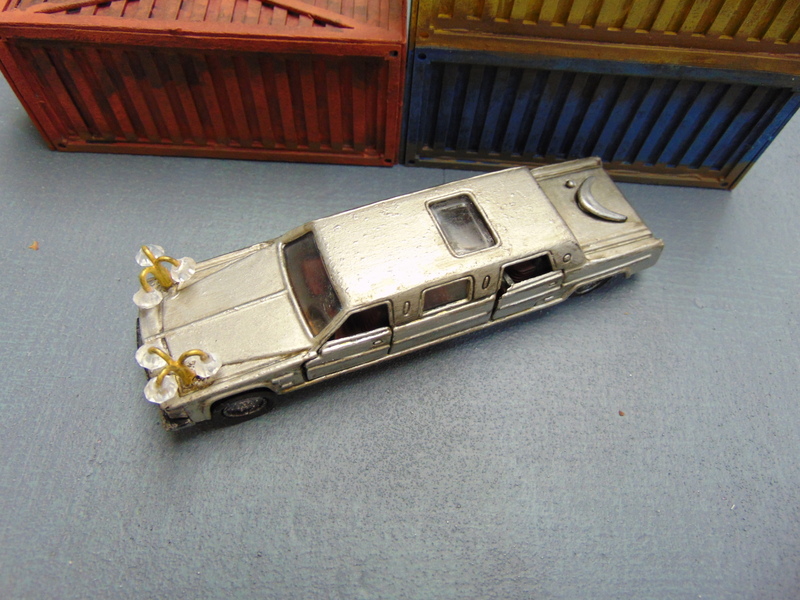
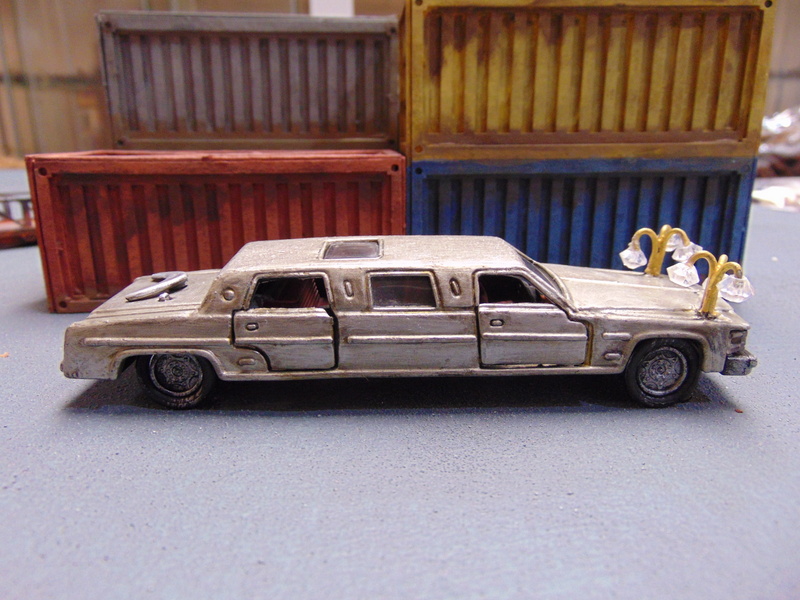
A 1977 Cadillac Fleetwood Brougham. The Duke pimped it out with some hip chandeliers on his hood, because hey, he’s the Duke of New York. He’s A #1.
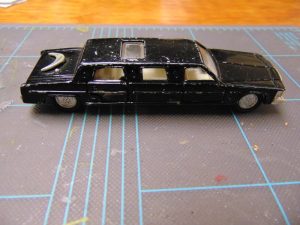
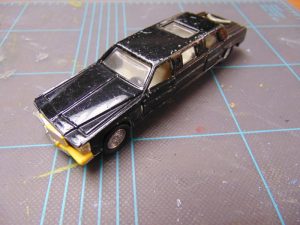
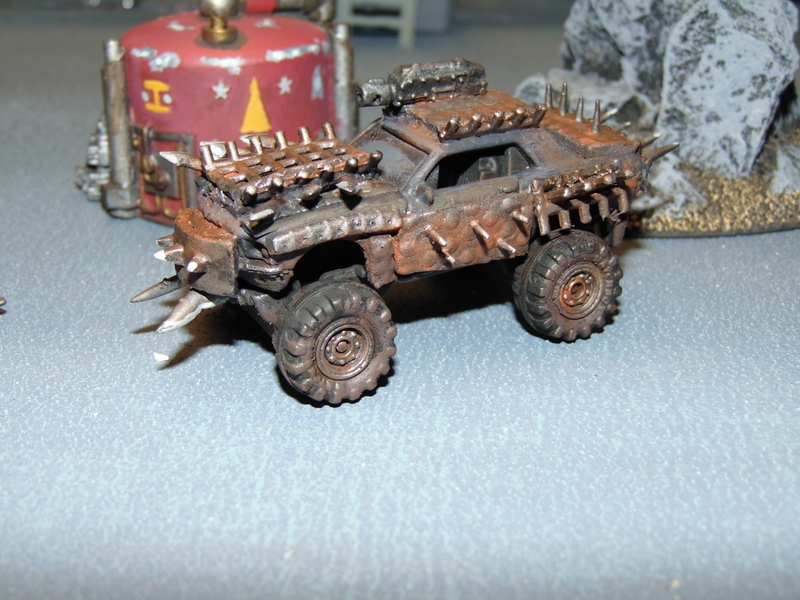
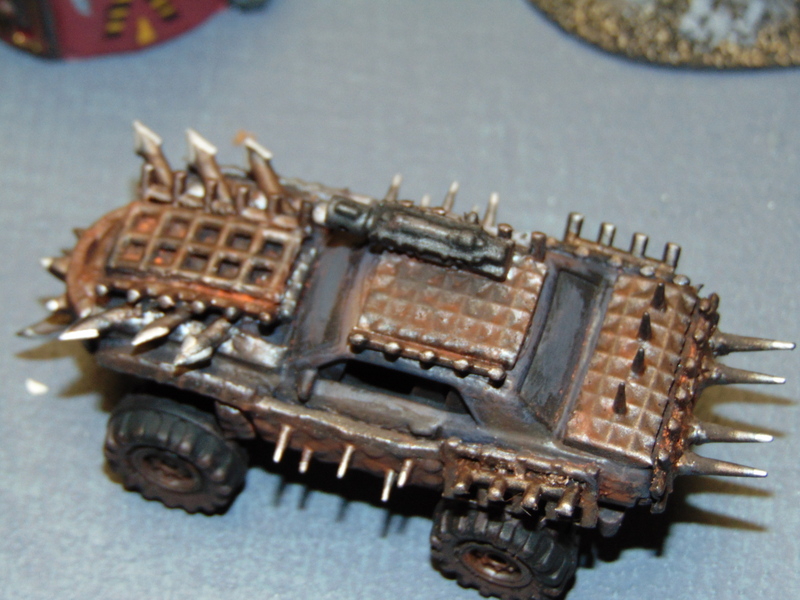
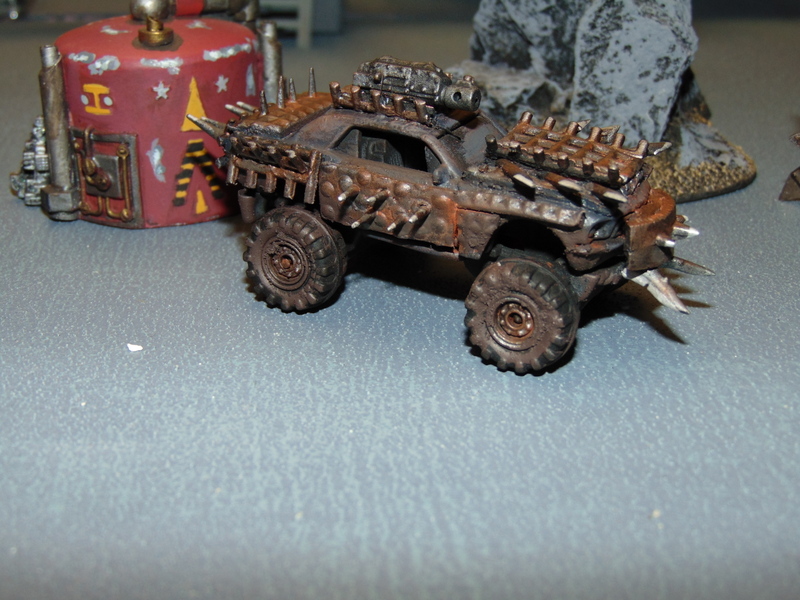
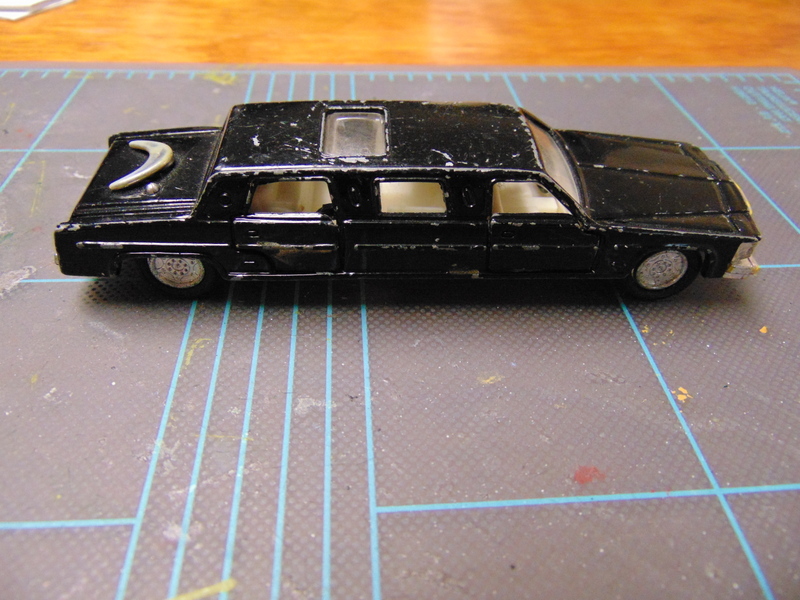
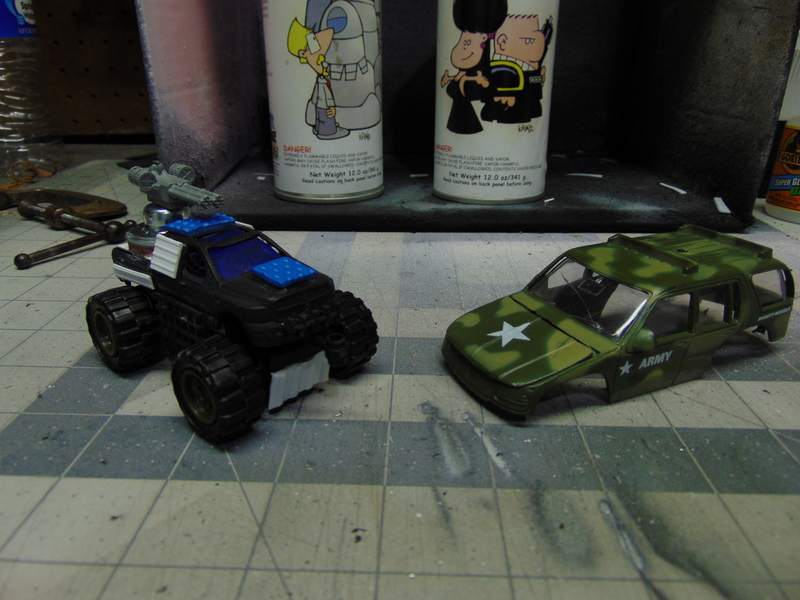
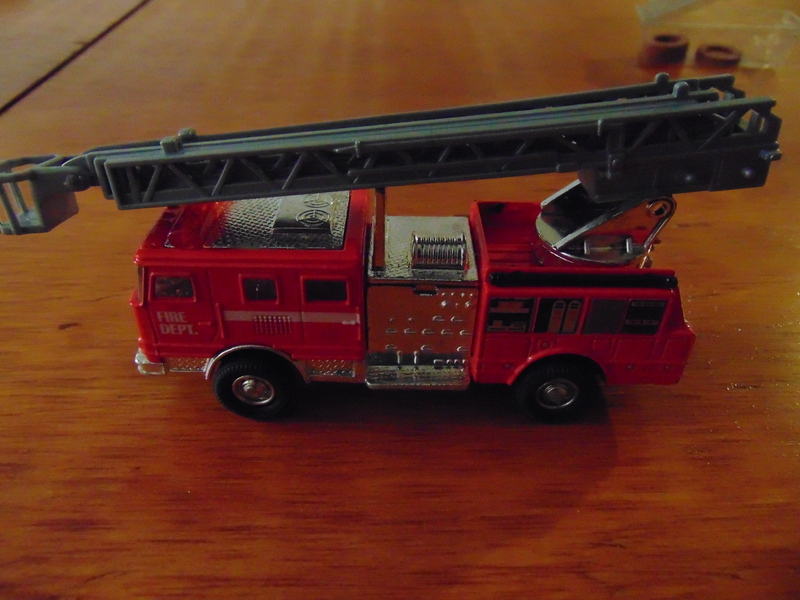
I had this. It’s a limousine, not a Cadillac Fleetwood, but I immediately thought of the Duke’s car when I got this in a bag of toy cars from a thrift store. Some of those have since become other Gaslands conversions, but this one…well, this one was put on hold. After all, the Duke’s car is far from the wasteland rustbuckets I’ve converted thus far.
The Duke has class. He’s A #1.
Of course, this all but requires the Xzibit “Yo, Dawg” treatment…

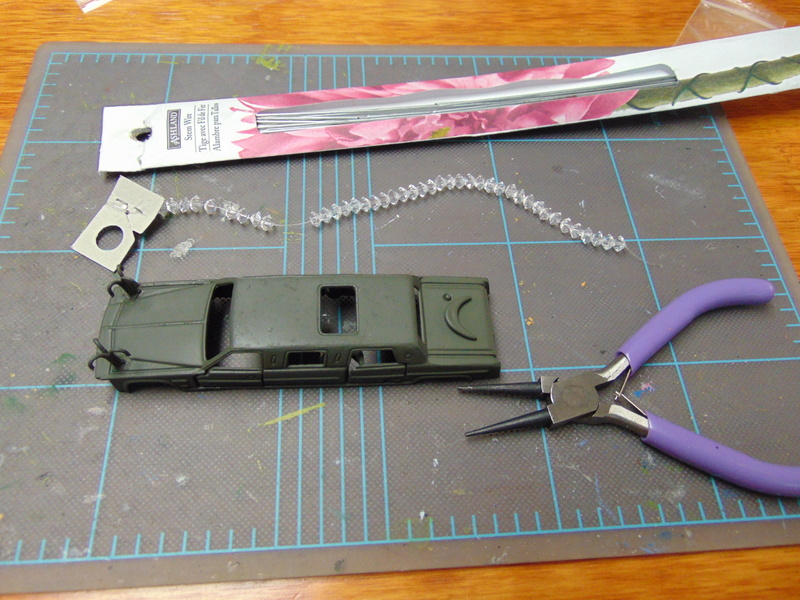
One look at the chandeliers on the hood and I knew that duplicating them would be beyond my meager modeling skills. So, I tried to find dollhouse furniture that would be in scale, but believe it or not, Matchbox cars are way smaller than standard dollhouse furniture. Also, dollhouse furniture is fucking expensive, so I resolved to make my own.
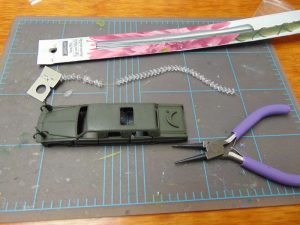
I took the car apart and primed it with some Rustoleum camo paint. I drilled some holes in the hood, then used these bead pliers, which I didn’t even know I had, to bend and crimp some floral wire for the frames. I used these cheap glass beads for the lights. (As a side note, I also make lovely bracelets in my spare time. Not really.)
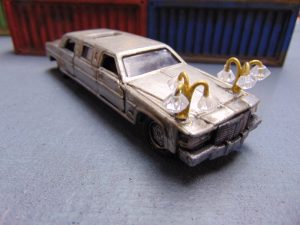

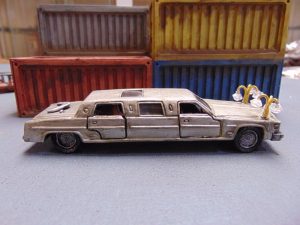
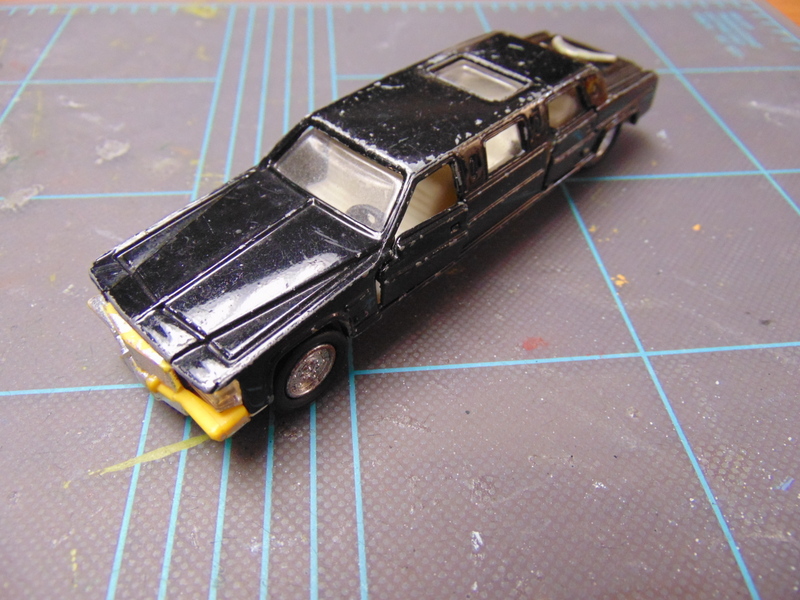
One look at these light fixtures and you can see they’re not 100% accurate replicas of the Duke’s hood ornaments, but as I said above, those are beyond my skill. Then again, this limousine is bigger than the Duke’s caddy, so I guess it doesn’t matter. Let’s just say this car was “inspired” by the Duke’s car.
You may ask me, “Hey, Piper, why did you go through all that bullshit when you could have just used a three-prong fishhook for the lamp frame?” To that I say: I thought of that. But I couldn’t find a small enough fishhook without buying a lure (I am not a fishing enthusiast and I don’t own any fishing tackle), and I didn’t want to do that, considering I already had the floral wire. So that’s why.
If anyone cares, I painted the car with a base of Vallejo Bronze before giving it a wash of GW’s Nuln Oil, then I highlighted the whole body with P3 Radiant Platinum. The chrome fixtures were painted with GW’s Mithril Silver, and the lamps were done with Auric Armor Gold.
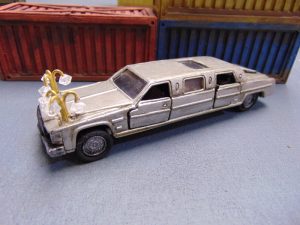
I don’t know how it would fit into Gaslands, because there are no limos in Gaslands, and this one looks particularly vulnerable, having neither weapons nor armor. I’d probably just call it a bus. Maybe it’s the ride of a wealthy race patron.
“I am the Duke of New York! I am A #1!!!!”